
How to Automatically Create a New WordPress User Account After Payments (Step-by-Step Guide)
Last updated on

 Spencer Finnell
If you’re manually creating WordPress user accounts after each purchase, you’re wasting precious time and risking costly errors. I’ve been there — spending hours each week setting up accounts, double-checking details, and responding to frustrated customers who can’t access their membership accounts immediately.
The good news? You can completely automate this process using WP Simple Pay and Uncanny Automator. This powerful combination lets you create WordPress user accounts instantly after successful payments, giving your customers immediate access while freeing you from repetitive admin tasks.
In this guide, I’ll show you exactly how to set up this automation, step by step. No coding required — just follow along, and you’ll transform your post-purchase workflow into a seamless, automated system.
In This Article
Why Automate WordPress User Account Creation?
Let’s talk about why automating user account creation is crucial for your business before diving into the technical setup.
This is especially valuable for membership sites and online course platforms, giving your members, students, and subscribers immediate access to manage their accounts after purchase.
In my experience implementing this automation across numerous WordPress websites, I’ve found it…
✔️ Saves 2-3 hours per week on manual account creation
✔️ Eliminates human error in data entry
✔️ Provides instant access to your customers (they expect this!)
✔️ Scales your business without increasing admin overhead
✔️ Reduces support tickets related to account access
Creating a WordPress User Account
The best way to create a WordPress user account immediately after customers have purchased a product, subscription, or membership on your website is to use a Stripe payments plugin for WordPress that supports this automation.
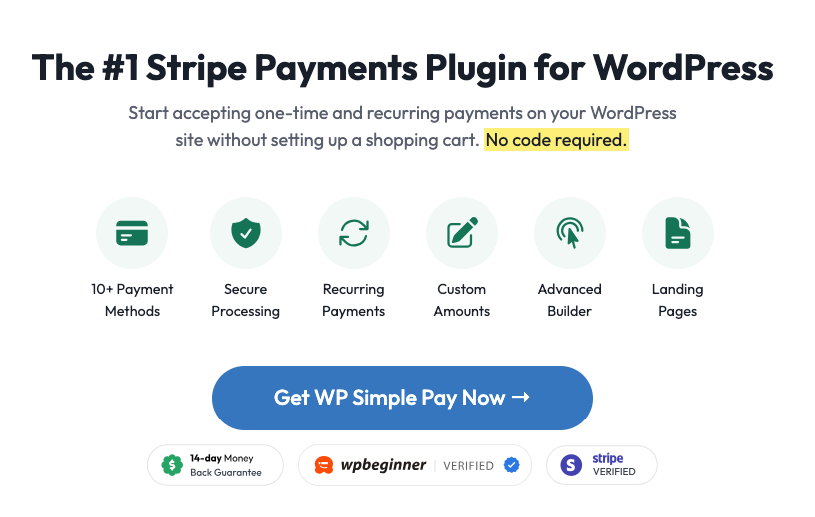
WP Simple Pay is the #1 Stripe payments plugin for WordPress that allows you to accept payments directly on your website without coding or a complicated shopping cart solution.
It also offers built-in automation capabilities that let you easily set up hundreds of automations from the payment form builder.
One of the many great parts about WP Simple Pay is that it integrates seamlessly with the most powerful automation plugin for WordPress, Uncanny Automator.
With Uncanny Automator, you can create several automations to improve the functionality of your website and also to streamline tasks, including creating a user account on WordPress after a payment.
How to Create a WordPress User Account After Payment
Before we get started, to follow this tutorial, you’ll need:
- WP Simple Pay Pro
- Uncanny Automator (Basic Plan or Higher)
- An active payment form in WP Simple Pay
💡 Pro Tip: While Uncanny Automator’s free version works for basic automation, the Pro version unlocks advanced features like creating a WordPress user account.
Without further ado, let’s get started!
Step 1: Install and Activate WP Simple Pay
The first thing you’ll need to do to create a new WordPress user account after payment has been made is install and activate WP Simple Pay on your WordPress site.
Simply visit the pricing page and choose the right plan for you.
Once your purchase is complete, you’ll get access to the plugin’s .zip file via your purchase confirmation email or from your WP Simple Pay account.
Click on Let’s Get Started.

If you didn’t see the setup wizard, simply head over to WP Simple Pay » Settings » Advanced tab and click the Launch Setup Wizard button.
2: Connect WordPress to Stripe
To connect your WordPress site to Stripe, click on Connect with Stripe.

Next up, enter the email address you use for your Stripe account and connect it to your site. If you don’t have a Stripe account, you can easily create one by entering your email address and completing the registration.
Upon completing this process, you’ll be shown a success page that says, “Setup Complete.” Next, click on Create a Payment Form.

Step 3: Create a Payment Form
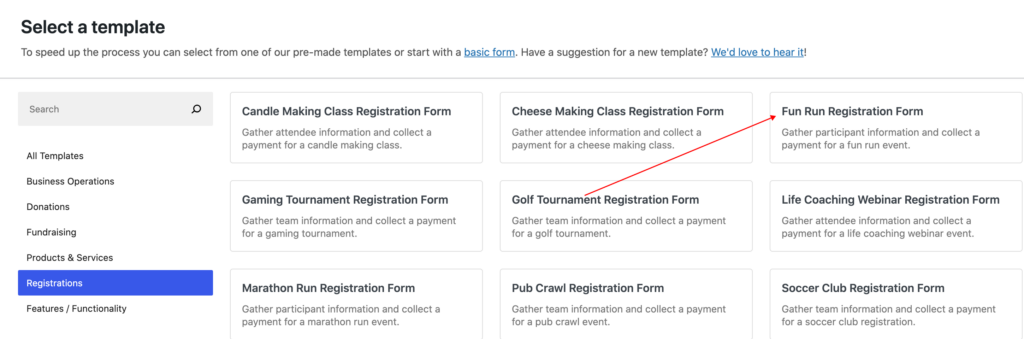
As you can see, WP Simple Pay provides tons of pre-built payment form templates for you to create a payment form in minutes.
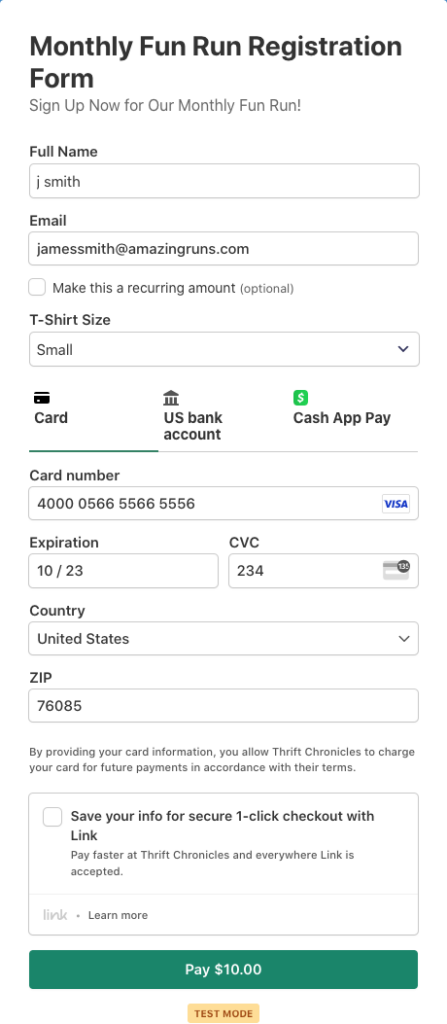
For the purpose of this tutorial, go ahead and choose the Fun Run Registration Form template.
Next, in the General tab, add your form’s title and description and select On-site payment form for the Type from the dropdown menu.
Then, click on the Payment tab and configure a one-time payment by adding the price amount and pricing options. You can check the box to offer registrants an optional subscription.
Finally, check the boxes next to the available payment method options you want to accept.
When you’re finished configuring the Payment tab settings, go ahead and click on the Form Fields tab and add or remove the custom fields you want to include on your form.
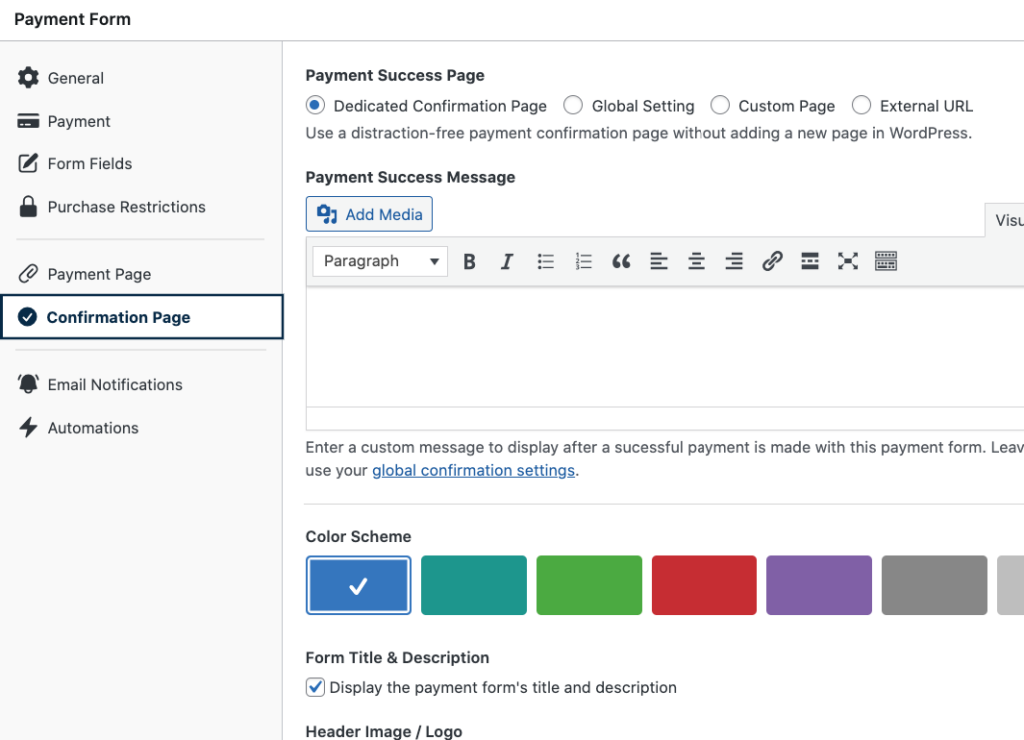
It’s a good idea to set up custom payment confirmation messages and email receipts for this form so that you can provide registrants with additional information about the event they’ve registered for.
Simply click on the Confirmations Page tab and enter your custom message. Keep in mind that this message will be displayed once your customer completes the checkout process.
After finishing up the confirmation page message, click on the Email Notifications tab and enter the email confirmation message you want to send to registrants.
WP Simple Pay offers Purchase Restrictions, which allow you to control when your payment form starts and stops accepting payments.
Also, if you need to limit the event or registration to a certain number of people, you can easily configure those settings in the Purchase Restrictions tab.
When you’re finished, click on Publish.
Step 4: Publish Your Payment Form on Your Site
Now that you’ve created your payment form, it’s time to add it to your site.
Simply go to the page or post you want your form on and click the + icon to bring up the WP Simple Pay block. Next, choose the form you just created from the dropdown menu.
Be sure to click on Update or Publish.

Step 5: Install and Activate Uncanny Automator
To automatically create a new WordPress user account after a customer completes a purchase, you’ll need to install and activate Uncanny Automator on WordPress.
Similar to WP Simple Pay, the installation process for Uncanny Automator is quick and easy.
Simply visit the pricing page and pick the best plan for your specific needs.
Then, download the plugin from your Uncanny Automator account and navigate to Plugins » Add New in the WordPress dashboard.
Next, click on the Upload Plugin button, find the .zip file, select Install Now, and then Activate.
Step 6: Create a WordPress User Account Automation
Now that you’ve published your payment form on your website and installed Uncanny Automator, it’s time to create an automation that will create a new WordPress user account once payment goes through on the form.
Because WP Simple Pay offers a built-in integration with Uncanny Automator, you can easily create automations straight from the payment form builder.
First, go back to your payment form and click on the Automations tab. Then, click on Automate this Payment Form.

You’ll be redirected to the recipe editor page in Uncanny Automator. Enter a title for your automation that will help you quickly identify this particular payment form and automation later.
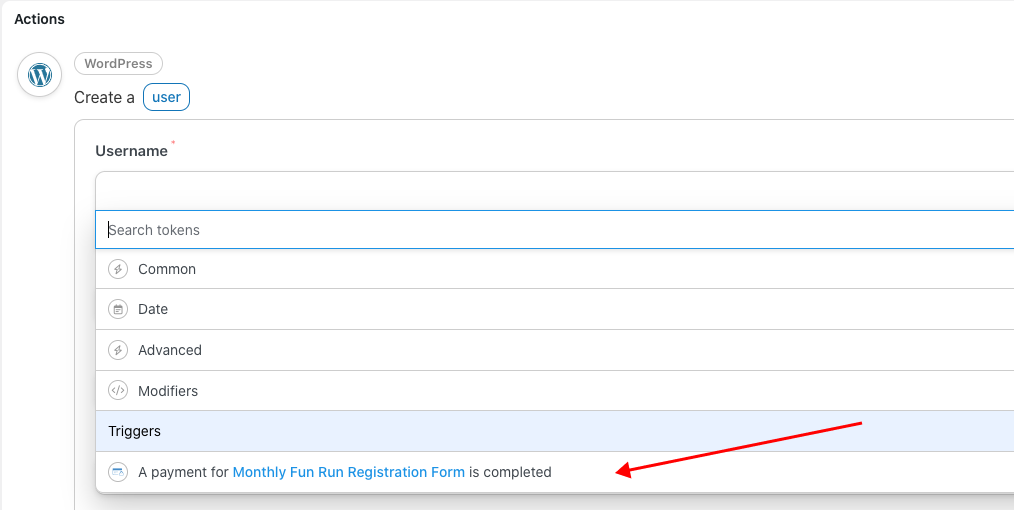
Next, click on the WP Simple Pay icon from the gallery of options to add your Trigger. Then, choose A payment for a form is completed and select the payment form you just created from the dropdown menu.

Now it’s time to create your Action. First, click on Add action and choose WordPress from the list of possible integrations.
Next, choose Add a user from the dropdown menu and then A payment for Fun Run Registration Form is completed.
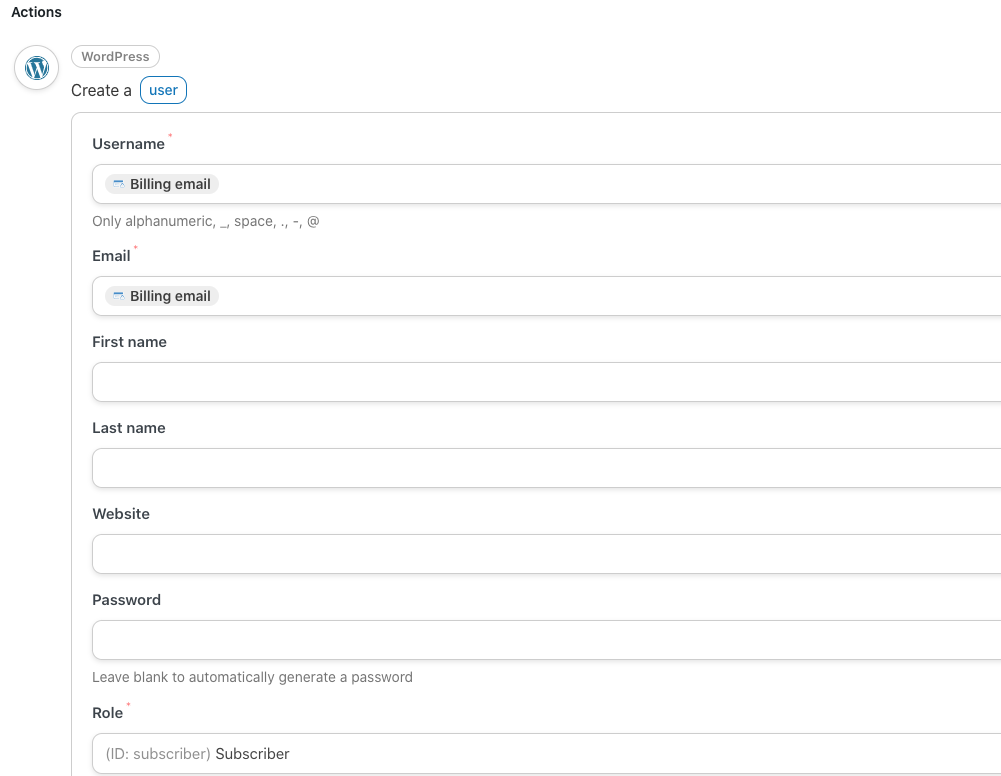
You’ll need to add the Billing email for the Username and Email fields to complete your automation recipe. You’ll also notice that the user Role is set to Subscriber by default.
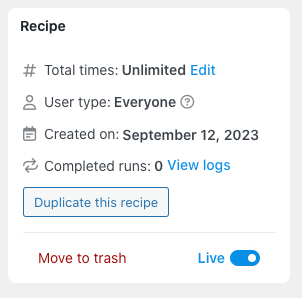
Be sure to click on Save and toggle the switch from Draft to Live.
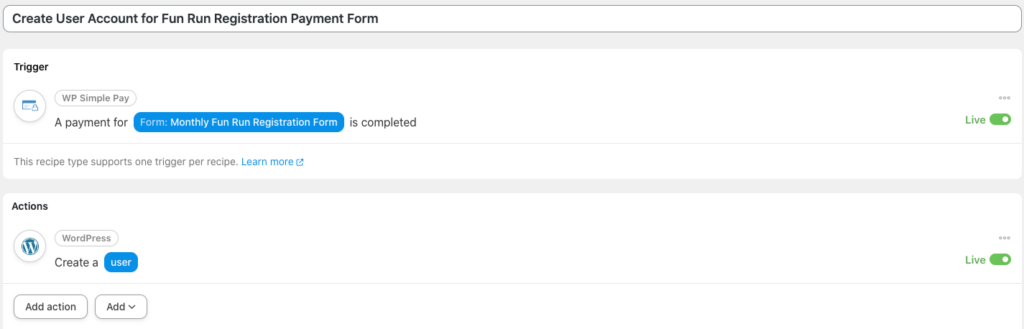
Your completed recipe should look like this:
Step 7: Test Your Payment Form
It’s a good idea to test your payment form to ensure that your automation is working properly.
If you’re not sure how to perform a test payment, see our simple step-by-step guide.
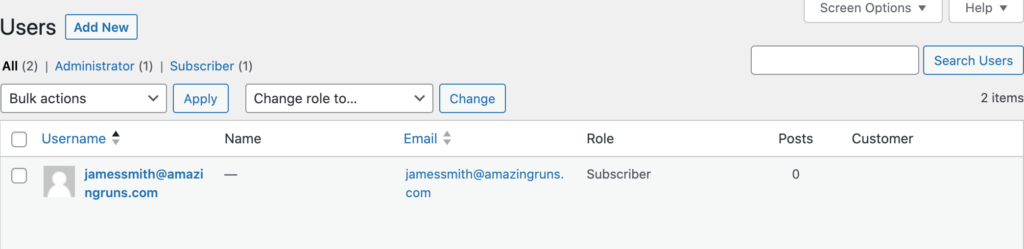
Once the test payment is completed, navigate to Users in your WordPress admin dashboard. You should see that the new user has been added as a Subscriber:
That’s it! We hope this article has helped you create an automation that creates a new WordPress user account after a payment has been made on your website.
If you liked this article, you might also want to check out How to Let Customers Manage Recurring Renewals in WordPress.
If you’re looking for more ways to automate tasks for your WP Simple Pay payment forms using Uncanny Automator, be sure to check out How to Automate Social Proof Posts on Facebook Pages.
What are you waiting for? Get started with WP Simple Pay today!
To read more articles like this, follow us on X.
Disclosure: Our content is reader-supported. This means if you click on some of our links, then we may earn a commission. We only recommend products that we believe will add value to our readers.


Leave a Reply