How to Collect Taxes for Stripe Payments in WordPress
Last updated on

Do you want to collect taxes in WordPress for Stripe payments? With the right WordPress Stripe plugin, it’s easy to collect taxes exclusively or inclusively with your payments. In this article, we’ll walk you through how to collect any tax (GST, sales tax, VAT, or more…) for Stripe payments.
Collecting Taxes in Stripe With WordPress
The easiest way to collect taxes for Stripe payments is to use WP Simple Pay.
WP Simple Pay is one of the best WordPress Stripe plugins that lets you accept payments via multiple Stripe-supported payment modes, such as Google Pay / Apple Pay, ACH Direct Debit, SEPA Direct Debit, and more.
It also supports Stripe Tax, which lets you collect tax based on the payers’ location. That way, you can stay tax compliant regardless of where you do business.
Stripe Tax is currently available to users in Australia, Canada, the EU-27, Hong Kong, Iceland, Japan, New Zealand, Norway, Singapore, South Africa, the United Arab Emirates, the United Kingdom, and the United States.
2 Different Ways to Collect Taxes
WP Simple Pay lets you collect taxes in 2 different ways.
#1. Fixed Rate Tax Collection (Manual):
You can define a fixed tax rate manually in WP Simple Pay settings, which will be globally applied to all Stripe forms on your site. This way, taxes can be collected either inclusively or exclusively with your payments. The difference is that an exclusive tax is not included in the invoice subtotal, whereas an inclusive tax is included in the subtotal.
#2. Automatic Tax Collection With Stripe Tax
Stripe Tax is a premium Stripe feature that lets you enable automatic tax collection via your payment forms.
Automatic tax collection takes a few things into account: your location, the product type you’re selling, and most importantly, your customer’s location, to determine the amount of tax to be charged.
Based on where you collect the payments from, you might be legally obliged to register with that country or jurisdiction to collect taxes. This is true even if your business has no physical presence in that country or jurisdiction. Stripe Tax monitors your transactions, so you know when and where you need to register to collect taxes.

In addition, the advanced tax data allows Stripe to offer more advanced filing and remittance reports.
For Stripe Tax, you’ll only be charged on transactions to customers in states or countries where you’re registered to collect taxes. Currently, it costs an additional 0.5% fee for only the applicable transactions.
Should You Enable Automatic Stripe Tax?
You might not need tax registrations if your business only sells non-taxable products or sales volume or transactions don’t exceed the tax threshold in a jurisdiction. If you think your business will likely exceed the tax threshold in the near future in any jurisdiction where Stripe Tax supports, you can enable Stripe Tax.
Otherwise, you can set a fixed tax rate in WP Simple Pay.
We’ll explain how to collect taxes through both of these methods in this tutorial. Just follow this tutorial to proceed. And in Step 4, we’ll show you how to enable one of these tax collection methods.
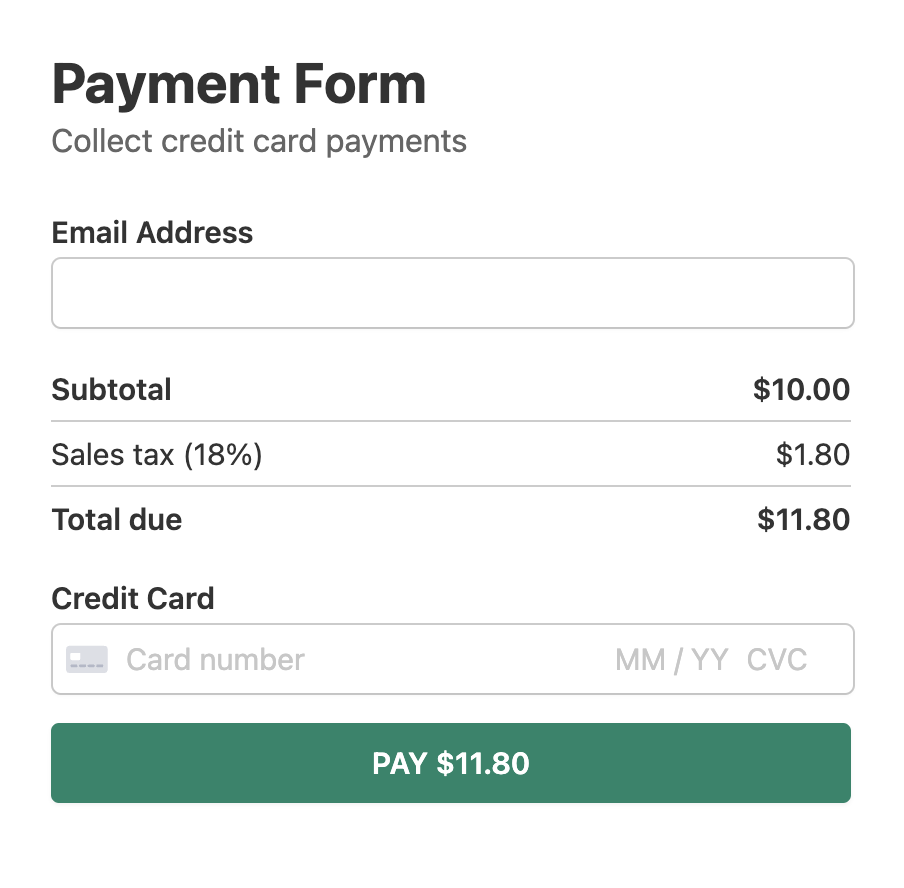
Here’s the fixed-tax rate form we’re going to create with this tutorial.
Alternatively, if you want to do automatic tax collection with Stripe Tax, here’s how the form would look. The only major difference between these 2 forms is that the form shown below has a mandatory address field, which is used to calculate automatic tax.

Now let’s get started!
Step 1: Install and Activate WP Simple Pay
First off, go ahead and install and activate the WP Simple Pay plugin on your site. To install the plugin, you’ll need to sign up for a premium plan and create an account. Then download the plugin on your computer and then upload it to your WordPress site.
For more details, see this step-by-step guide on how to install WP Simple Pay.
Remove the additional 3% fee!
Most Stripe plugins charge an additional 3% fee for EVERY transaction
…not WP Simple Pay Pro!

If you didn’t see the setup wizard, simply head over to WP Simple Pay » Settings » Advanced tab and click the Launch Setup Wizard button.
2: Connect WordPress to Stripe
To connect your WordPress site to Stripe, click on Connect with Stripe.

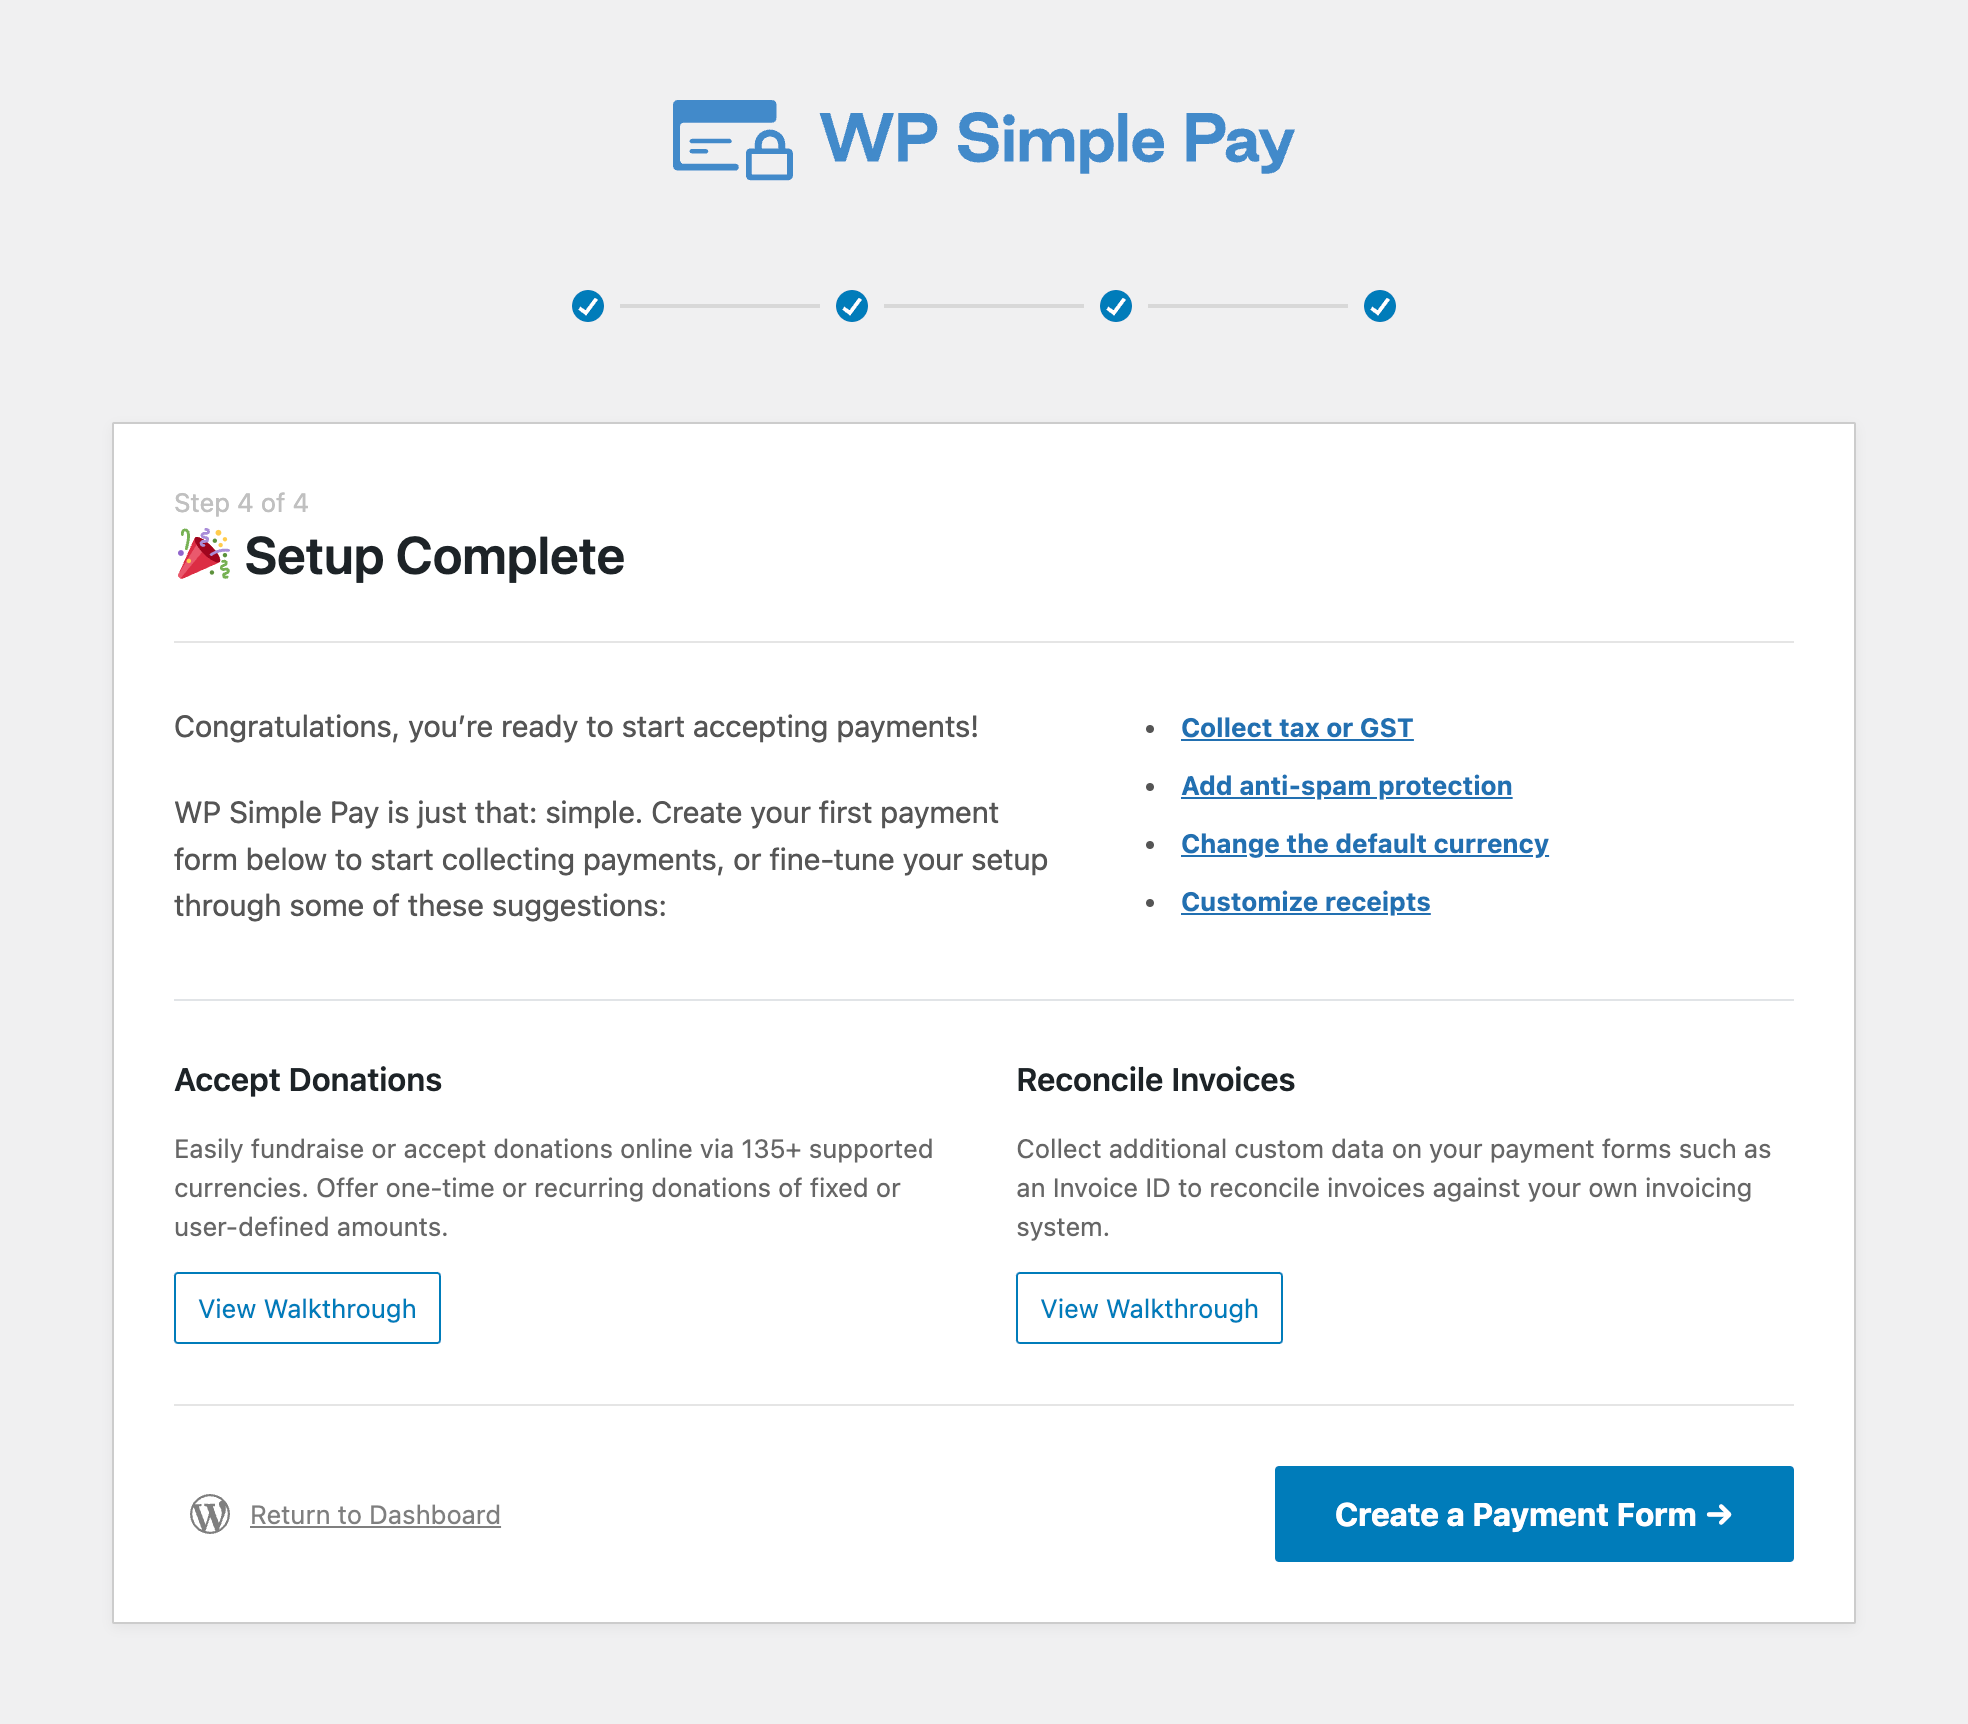
Next up, enter the email address you use for your Stripe account and connect it to your site. If you don’t have a Stripe account, you can easily create one by entering your email address and completing the registration.
Upon completing this process, you’ll be shown a success page that says, “Setup Complete.” Next, click on Create a Payment Form.
Step 3: Accepting Payments With Stripe
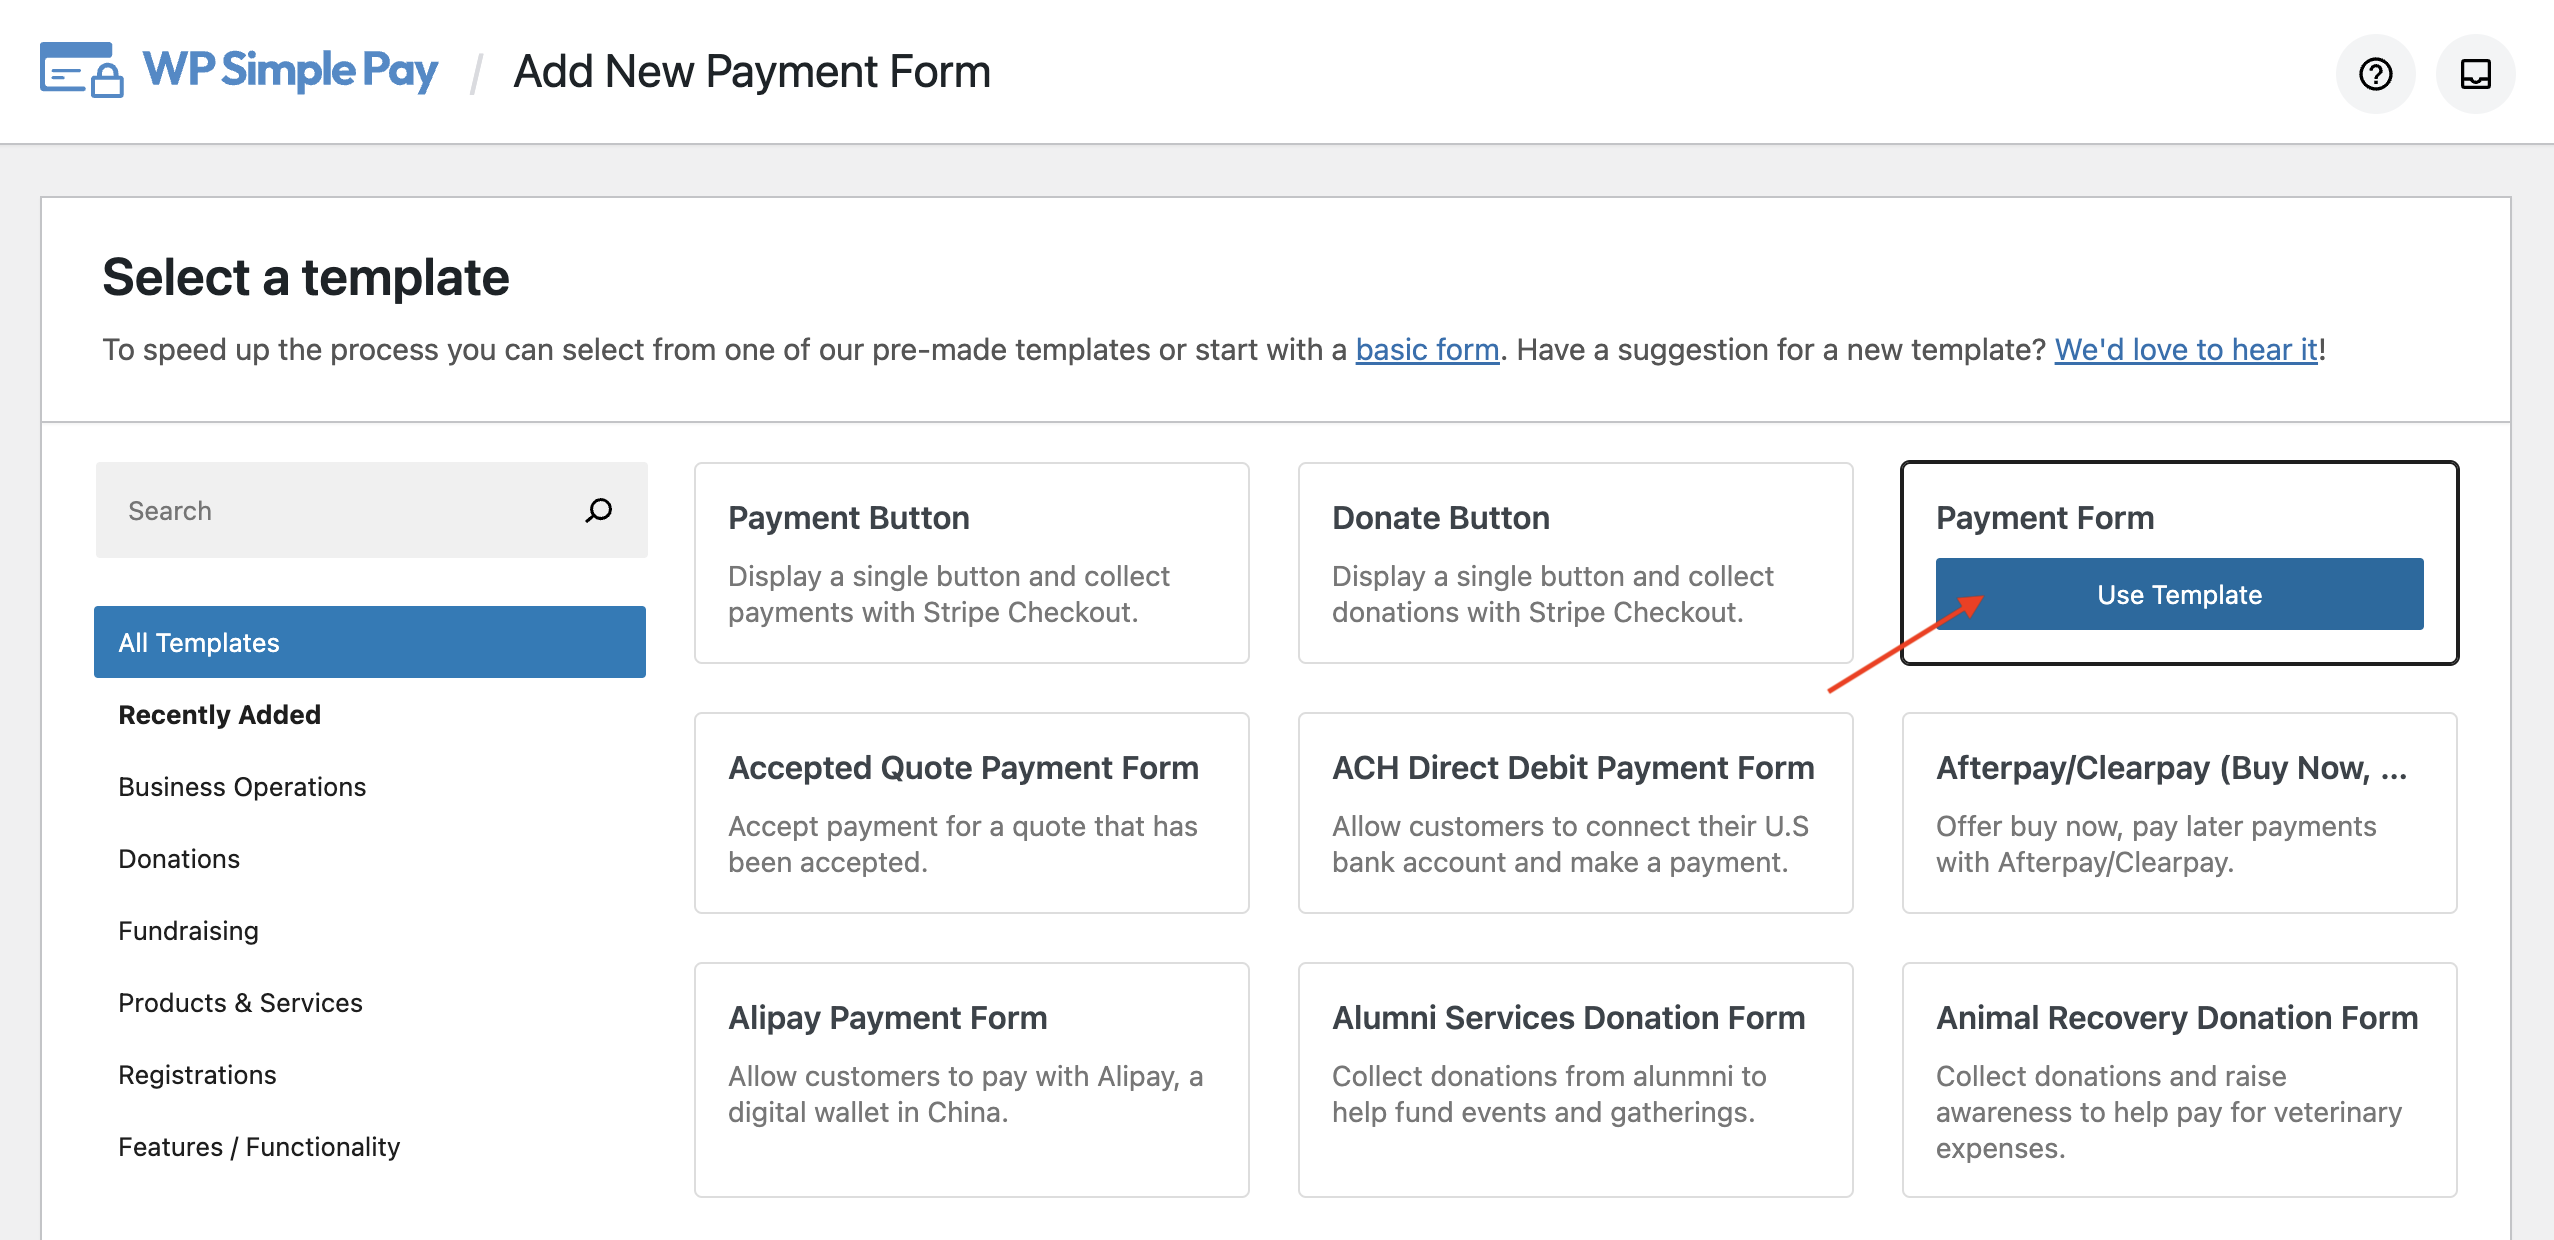
So far, you’ve installed WP Simple Pay and connected your Stripe account to your website. Now you’ll be prompted to create a payment form by choosing a payment form template.
For the sake of this tutorial, let’s select Payment Form. If you’re not on this page yet, you can navigate to WP Simple Pay » Add New to start creating a payment form.
You’ll now be landed on the General tab of your payment form. Here you can customize the title, description, and a few other elements of your form.
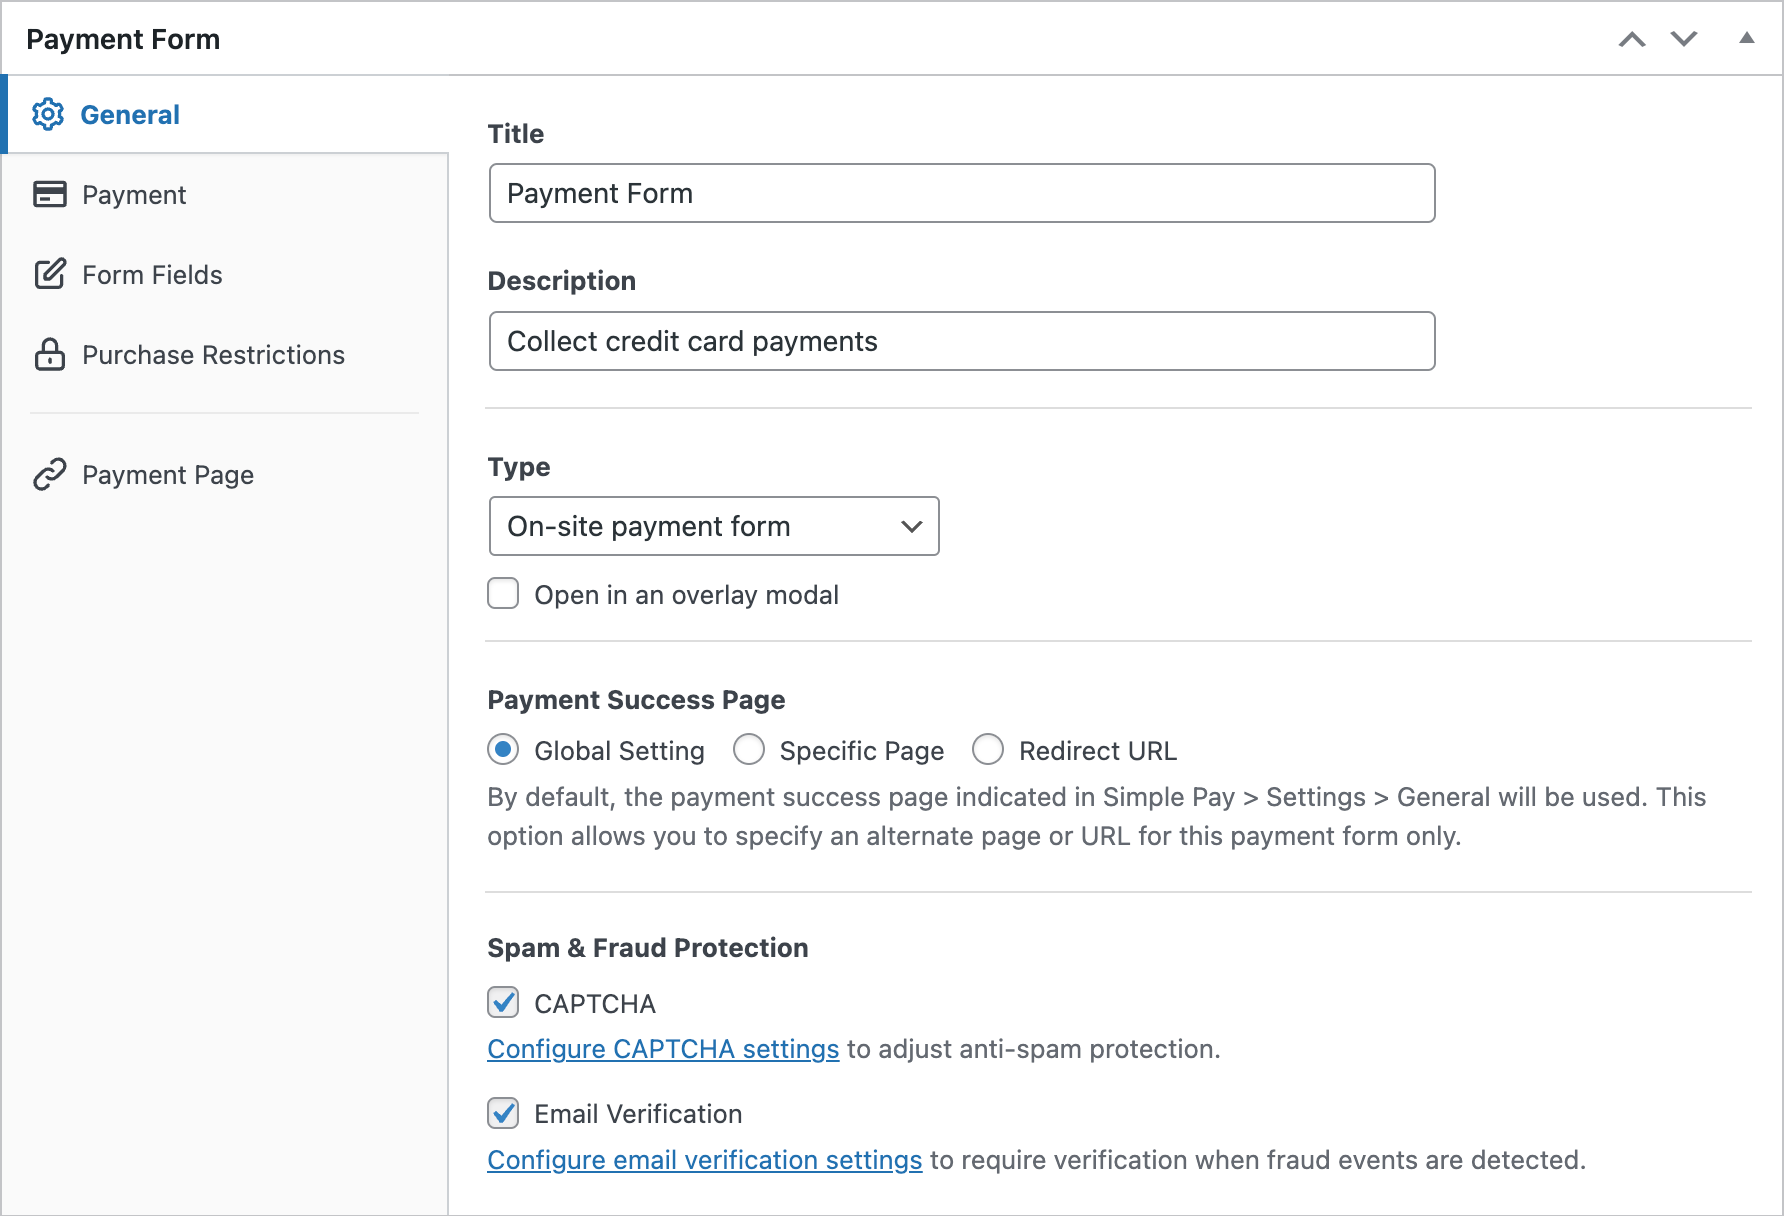
By default, your form type will be chosen as On-site payment form. Instead of hosting your payment form on your site, you can configure the form to host on stripe.com by selecting Off-site Stripe Checkout form.
For more details, refer to this guide: The complete guide to setting up a Stripe Checkout Page for WordPress
Now let’s choose the Payment option on the left. You can now change the price, currency, amount, and even choose between one time or subscription payment.
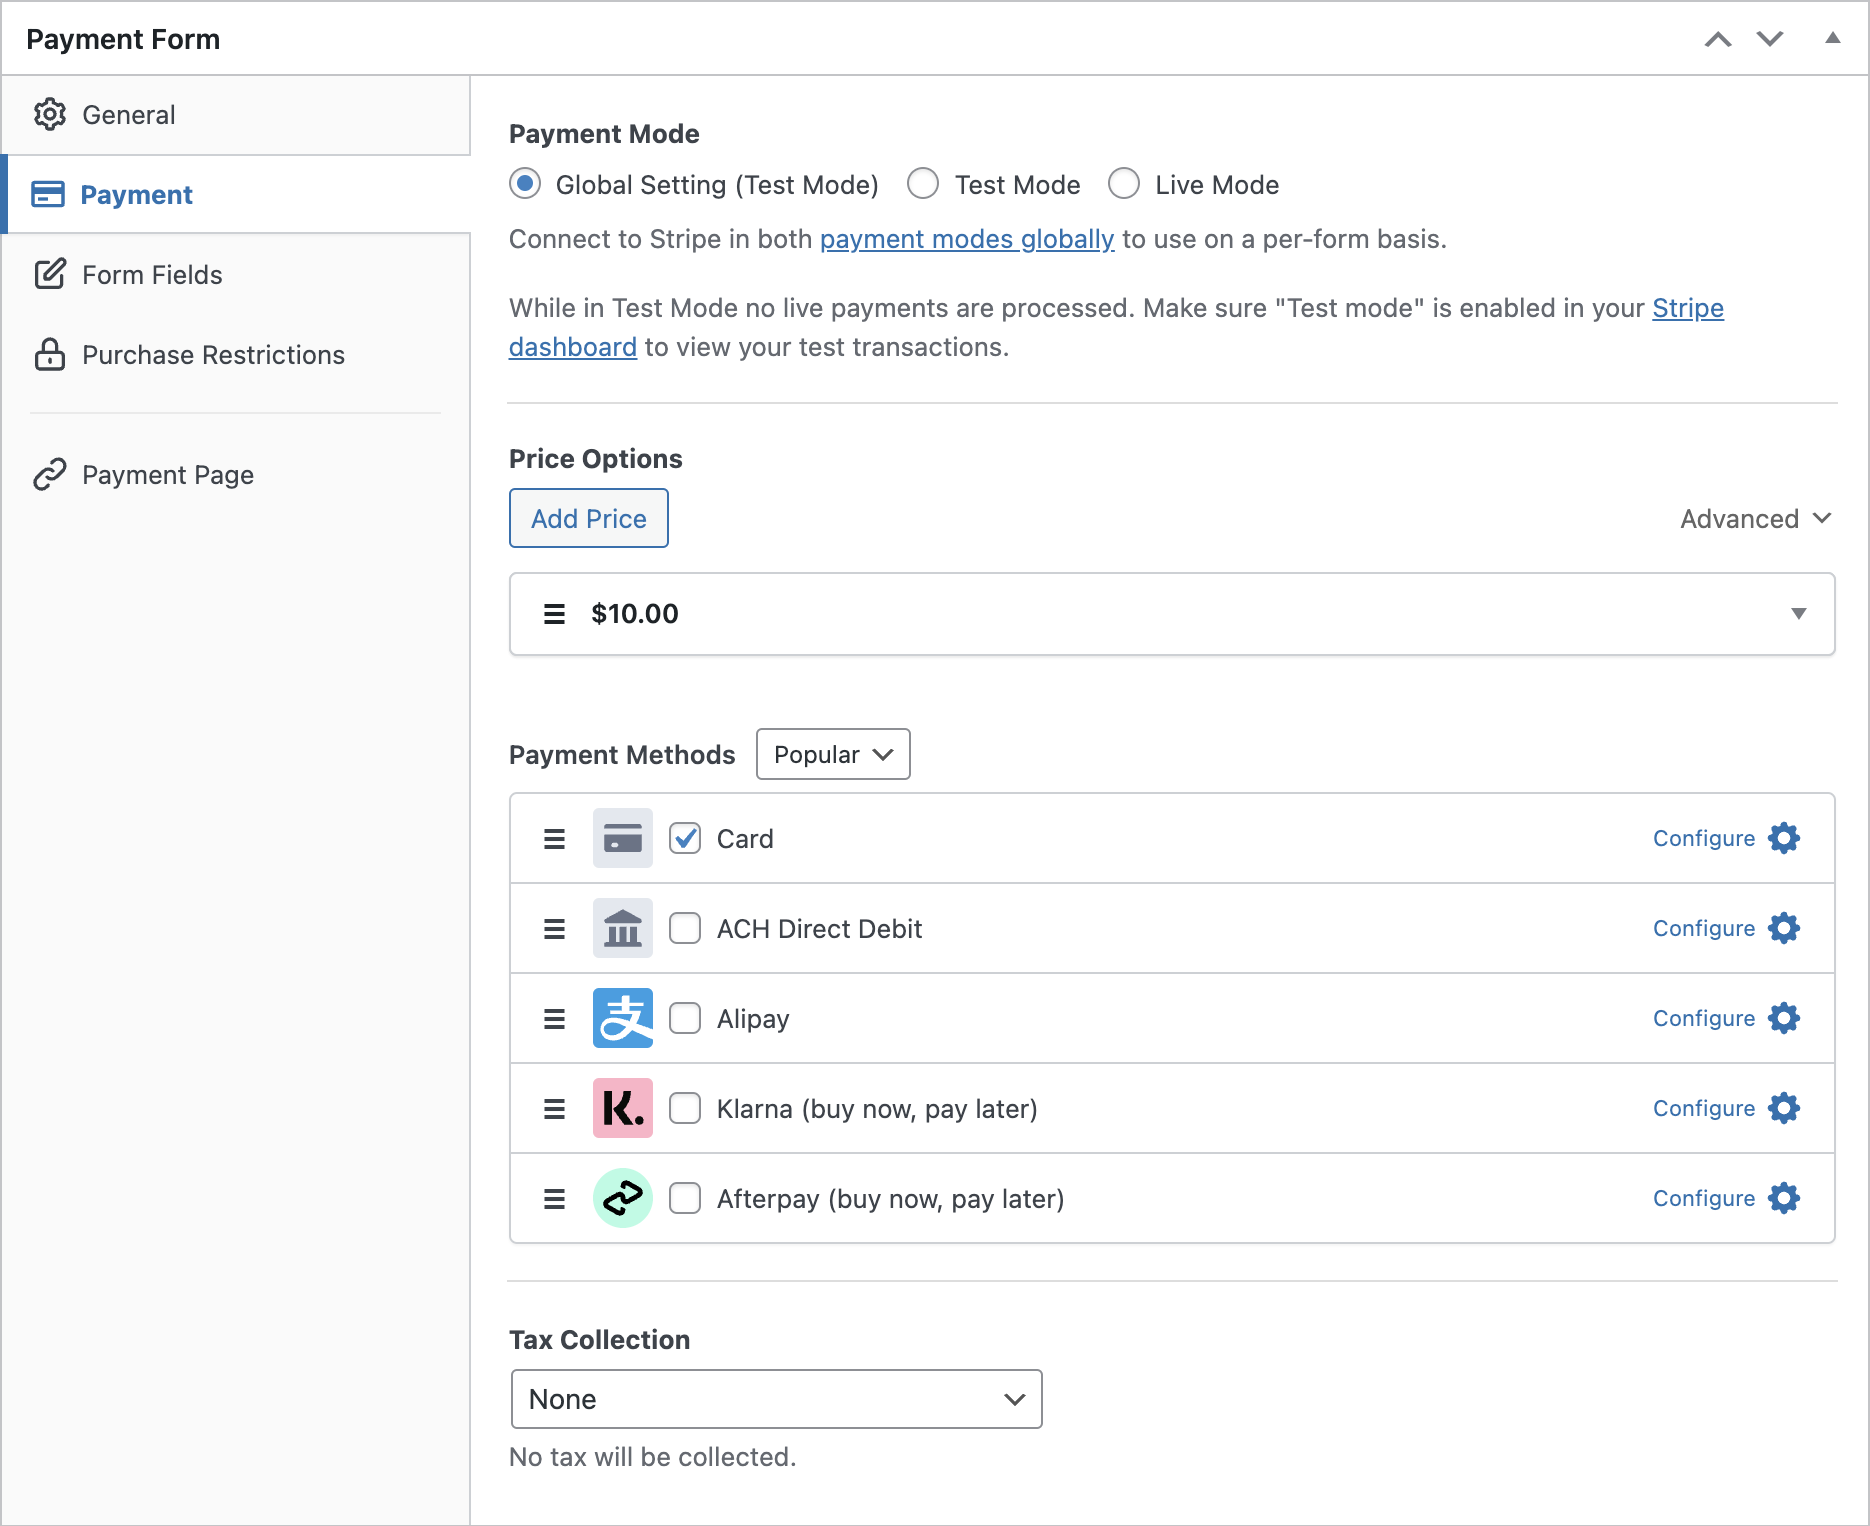
For now, let’s NOT change the payment mode to Live Mode. It’s recommended to switch to live mode only after making a test payment after publishing the form and ensuring everything works fine as you wish.
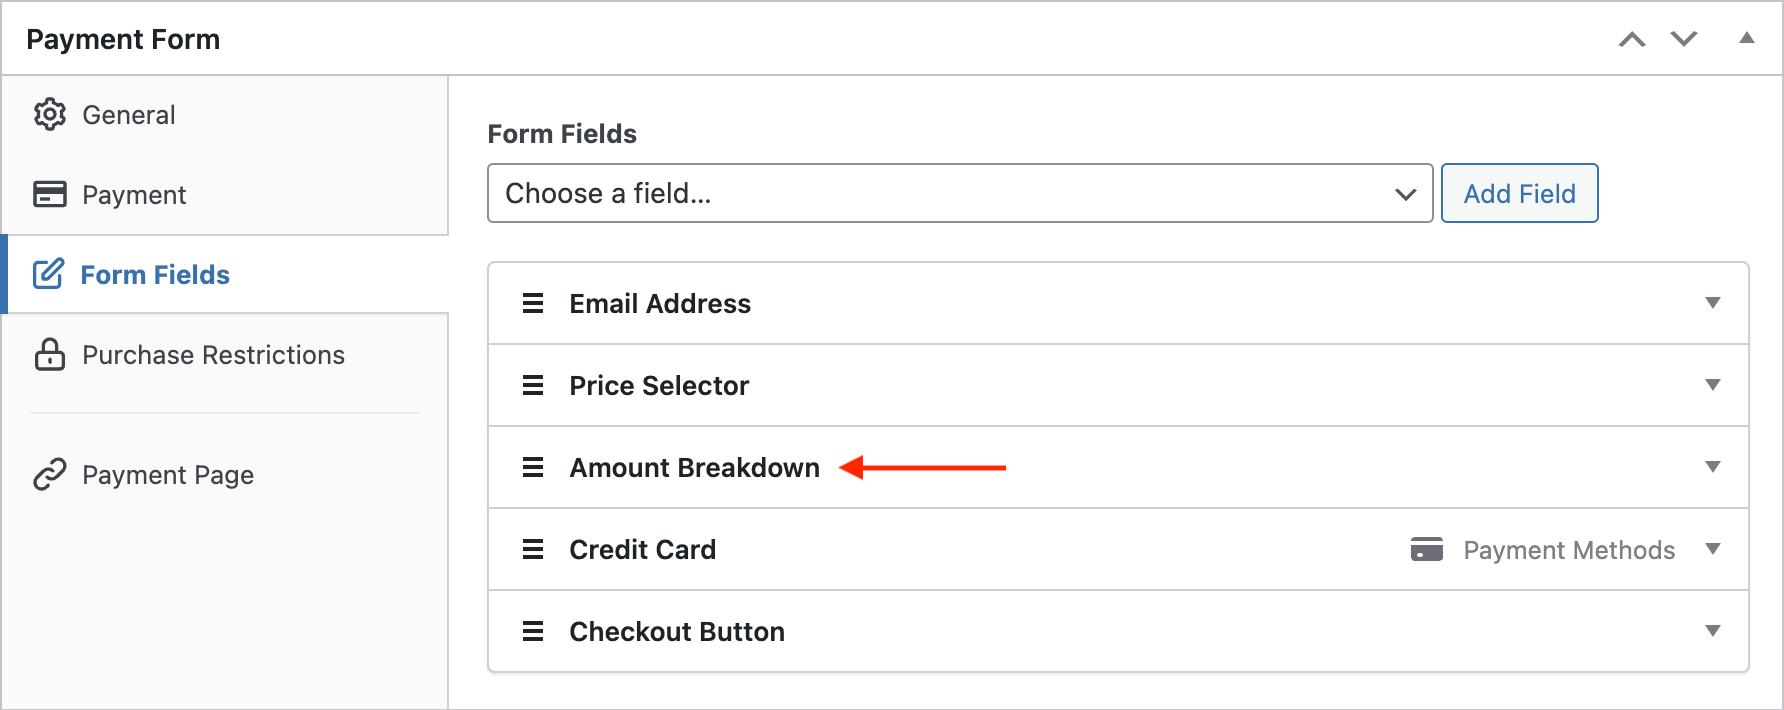
In the Form Fields option, you can add a new field or customize any existing form fields.
Since tax is collected additionally, it’s important to show the subtotal on your payment form. That way, you can show your customers how much you’re charging as tax in addition to your fee. To show subtotal, let’s add the Amount Breakdown field to your form.
Step 4. Collect the Applicable Tax
Before proceeding, you’ll need to determine how you want to collect taxes: by configuring a fixed tax rate (no additional cost) or automatic tax collection based on users’ location (paid since it’s a premium Stripe feature). Earlier in this tutorial, we’ve already explained these 2 methods.
Step 4. a: Configure a Fixed Tax Rate
In this section, we’ll explain how to configure a fixed tax rate in WP Simple Pay. If you’d rather use automatic Stripe tax, calculated based on payers’ location. skip this step and jump right in here.
Let’s configure the tax rate in WP Simple Pay after creating your form. Head over to WP Simple Pay » Settings. Then navigate to General and click on the Taxes tab.
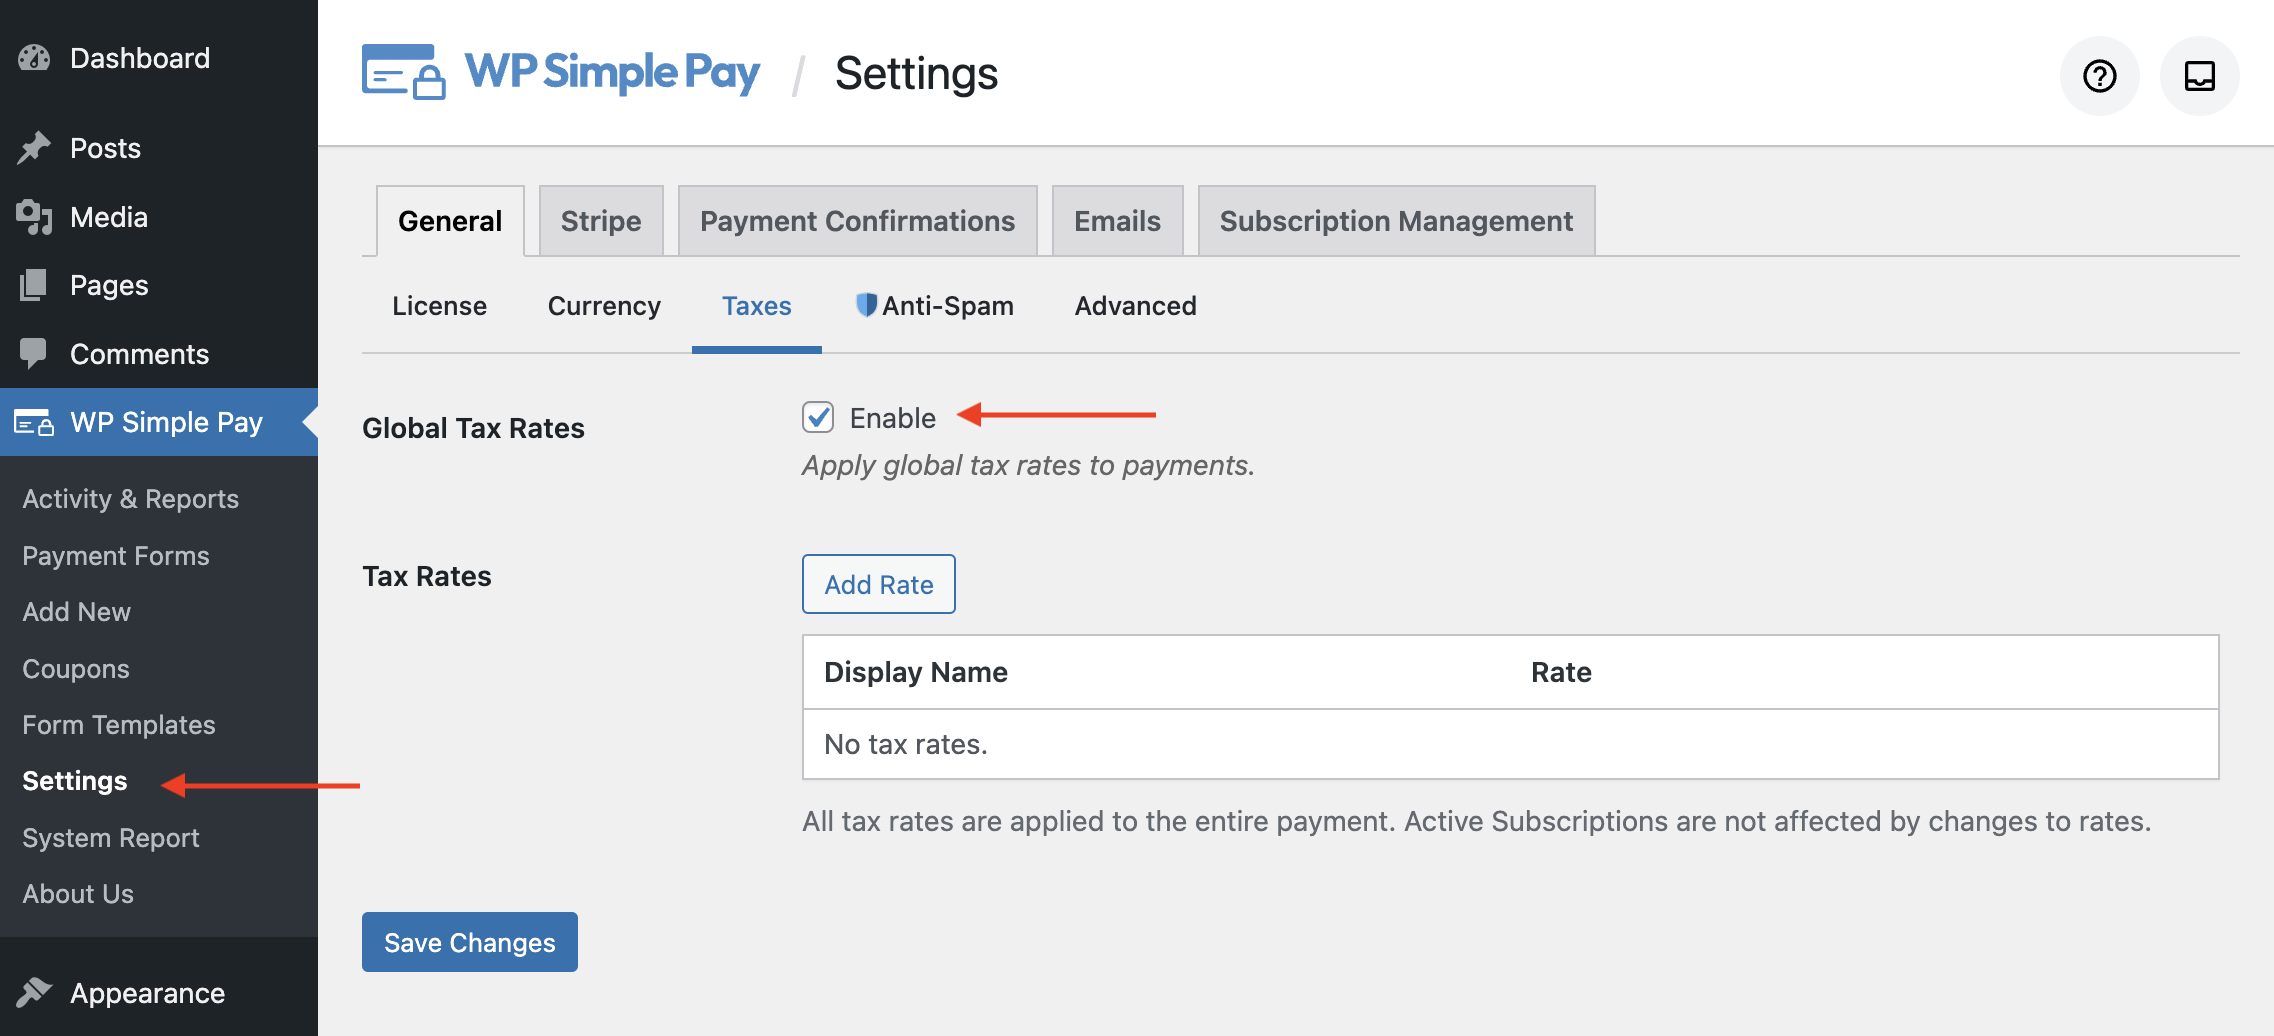
Select the checkbox to enable Taxes. After selecting the checkbox, you’ll find an option to add Tax Rates. Click Add Rate. You’ll now be prompted to add the tax rate via a modal popup.
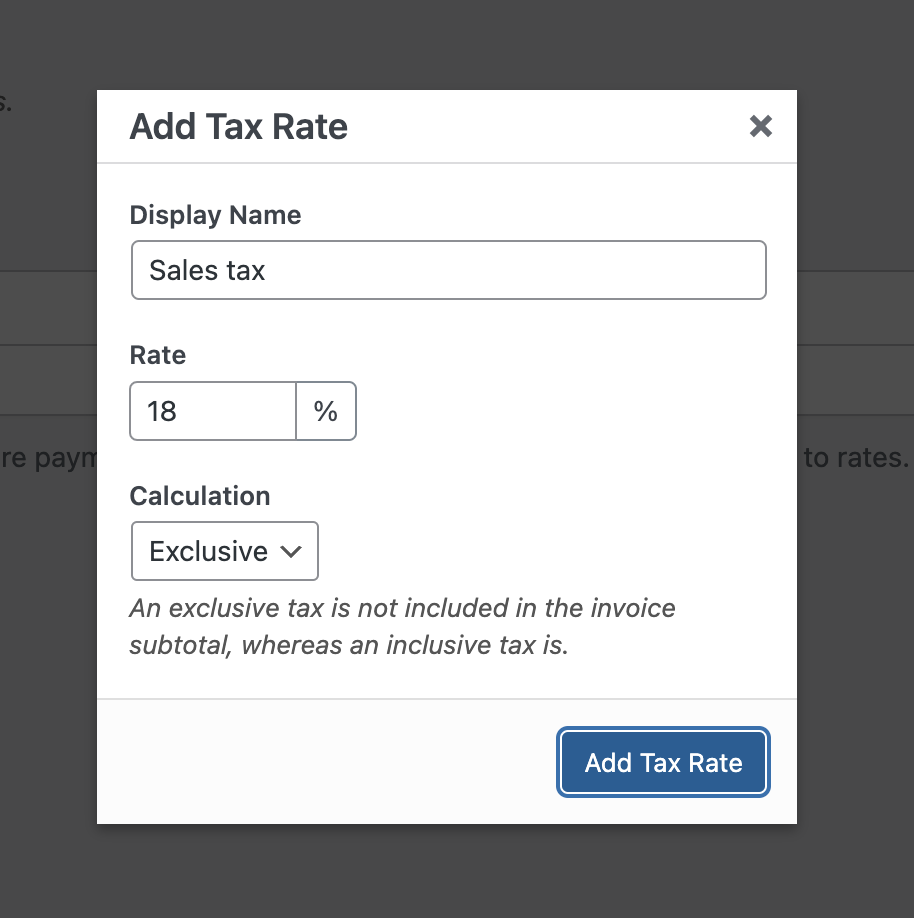
Specify the display name and rate, and then specify how tax has to be calculated, inclusively or exclusively. Choose the right option per your needs and click Add Tax Rate.
Step 4. b: Calculate Tax Based on Payer’s Location
If you’ve configured a tax rate in WP Simple Pay, you can skip this step and go ahead to Step 5.
To automatically calculate tax amounts with Stripe tax, you’ll need to activate Stripe Tax in the Stripe dashboard.
With Stripe Tax, you can monitor whether your business is crossing the tax threshold in the supported jurisdictions.

Once the threshold has been reached, you can add registration and start collecting taxes for those locations or schedule collection at a future date.
Before adding registrations, you’ll need to confirm your origin address and select a default tax category.
Keep in mind that when Stripe Tax is enabled, the Billing Address and Amount Breakdown fields will automatically be added if they did not previously exist.
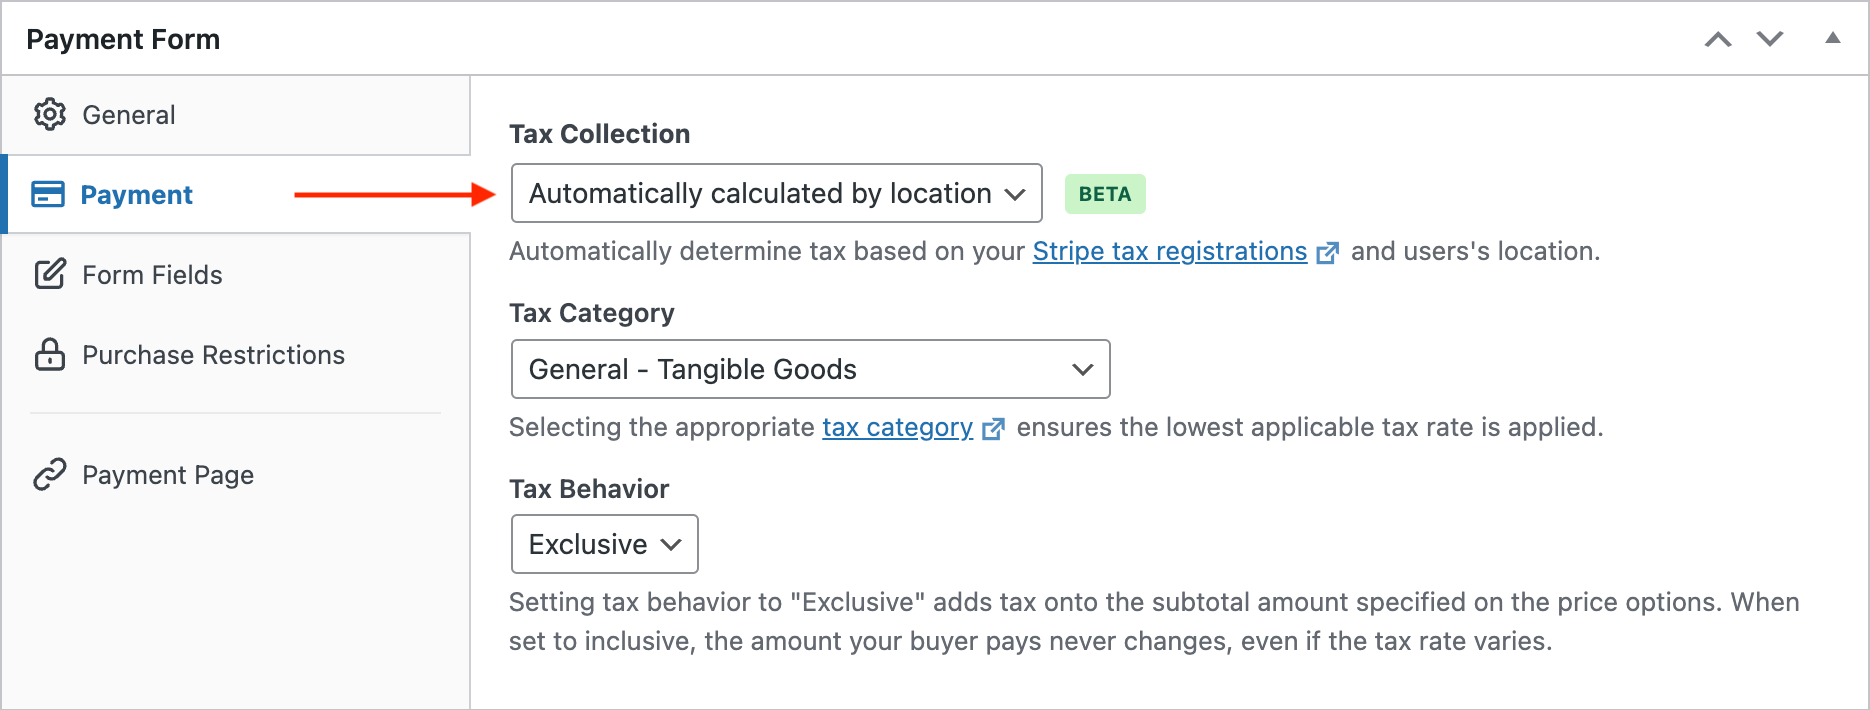
This allows tax calculation to occur at the most accurate level, as well as ensures that customers know what they are being charged for.
Once a complete address is entered on the payment form, the tax amount will be calculated and displayed.

Step 5: Publish Your Payment Form
Now you’re all set to publish and embed the payment form on your website.
Make sure you test the form first before it goes live. You can toggle your entire site or individual payment forms between test and live modes (read more about Test mode).
To embed the form, go to the post or page where you want to publish it. Then click on the + icon to add the WP Simple Pay block. Then choose a form you just created. And then, click Publish or Update.

That’s it!
We hope this article helped you learn how to collect taxes for Stripe payments in WordPress.
You might also want to check out our guide on how to accept recurring payments with WordPress.
Start using WP Simple Pay today and enable all the advanced Stripe features on your site.
To read more articles like this, follow us on Facebook and Twitter.
Disclosure: Our content is reader-supported. This means if you click on some of our links, then we may earn a commission. We only recommend products that we believe will add value to our readers.

Leave a Reply