
How to View and Manage All Your Stripe Payments in WordPress
Last updated on

Here’s something nobody warns you about when you start taking payments on your WordPress site. Your payment forms live in WordPress, but the payments themselves live in Stripe.
So every time you want to check who paid, spot a failed card, or refund a client, you’re logging into a second dashboard and hunting for the right charge. Do that a few times a week, and it adds up fast, and a failed payment can slip past you until the client brings it up.
That’s why I’m so glad you can now manage Stripe payments in WordPress with WP Simple Pay’s own Transactions and Subscriptions pages. You can search, filter, export, and refund payments without opening Stripe at all.
In this article, I’ll show you how to view and manage all your Stripe payments in WordPress, including where your subscription renewals actually show up.
Why Manage Your Stripe Payments Inside WordPress?
Managing Stripe payments in WordPress means you can check, refund, and export payments from the same dashboard where you built your forms. Stripe’s dashboard still has its place, but it lives in a separate tab.
Keeping your payment records in WordPress fixes a few everyday headaches:
- Less tab-hopping. Each payment sits right next to the form that collected it. You can go from “did they pay?” to an answer without logging into anything else.
- Failed payments you can catch. A declined card can get lost in a long list of successful charges. A dedicated status tab puts every failed payment in one place, so you can follow up while the customer still wants to buy.
- Faster refunds and fewer disputes. When a client asks for their money back, a quick refund keeps them from going to their bank instead. Here’s more on how to handle online refund requests without the back-and-forth.
- Cleaner records at tax time. Your accountant wants a spreadsheet, not screenshots. Exporting payments straight from WordPress saves you from copying numbers by hand.
Now let’s set it all up.
Manage Stripe Payments in WordPress With WP Simple Pay
The best way to manage Stripe payments in WordPress, without adding a shopping cart, is with WP Simple Pay.
WP Simple Pay is the #1 Stripe payments plugin for WordPress. It lets you accept one-time and recurring payments without setting up a shopping cart, and now it lets you track and manage those payments from the same dashboard.
Here are some key features offered by WP Simple Pay:
- Transactions Page. Every one-time payment shows up in one list with status tabs, filters, search, and a CSV export. It’s included in every WP Simple Pay Pro plan.
- Refunds From WordPress (Professional plan or higher). Issue a full or partial refund from a payment’s detail screen, without opening Stripe.
- Subscriptions Page. See every recurring payment along with its status and next renewal date, including subscriptions that already existed in Stripe.
- Activity & Reports. Check today’s gross volume, successful payments, and new customers, then chart gross volume and successful payments over any date range, right inside WordPress.
With that, let’s see how you can use WP Simple Pay to view and manage all your Stripe payments.
Step 1: Install and Activate WP Simple Pay
To start, head over to the WP Simple Pay pricing page and pick a plan. If you’d like to issue refunds from WordPress, choose the Professional plan or higher.
After your purchase, you can download the plugin’s .zip file from your purchase confirmation email or your WP Simple Pay account dashboard. While you’re there, copy your license key, since you’ll need it in a minute.
If you’ve never uploaded a plugin before, this guide on how to install a WordPress plugin walks through it with screenshots.
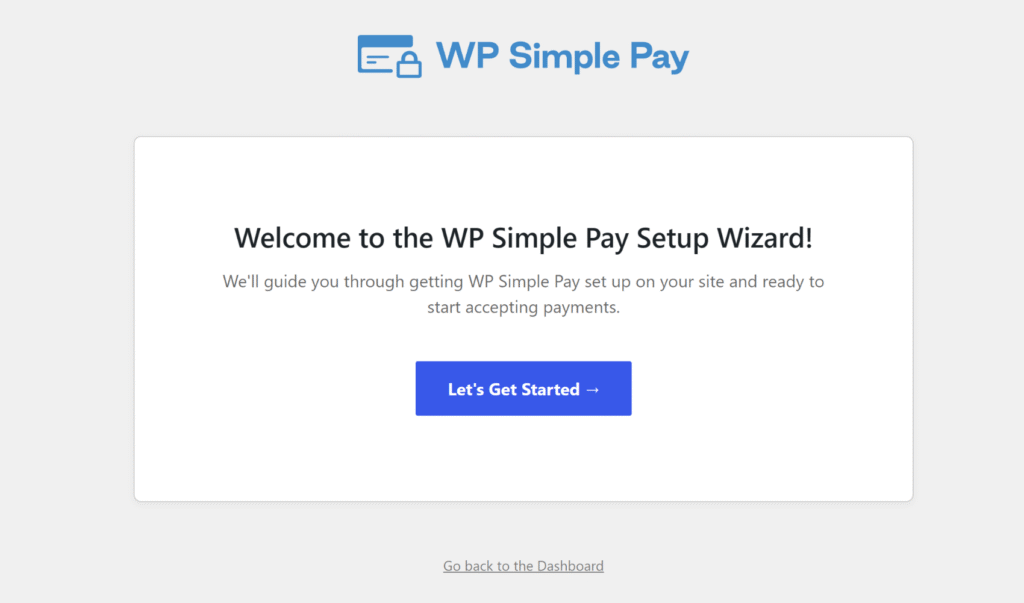
Once it’s activated, WP Simple Pay opens its setup wizard. Go ahead and click Let’s Get Started.
Step 2: Connect WordPress to Stripe
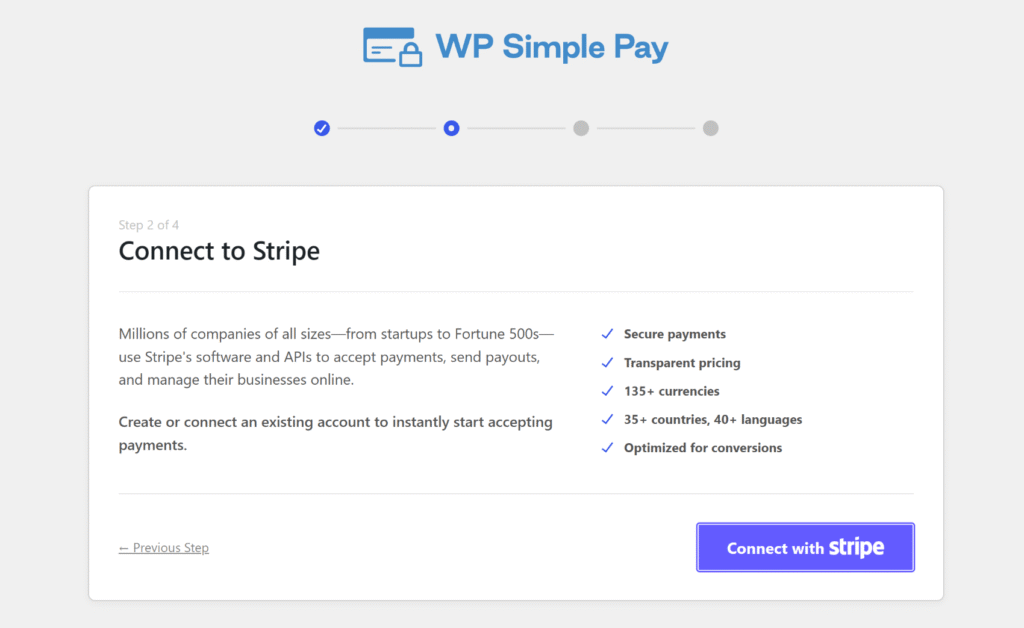
The next screen in the wizard is Connect to Stripe. This is the secure link between your WordPress site and your Stripe account, and it’s what lets WP Simple Pay show your payments in the first place.
Go ahead and click Connect with Stripe. You’ll be sent over to Stripe, where you can log in to your account or create a new one.
Once you approve the connection, Stripe sends you back to WordPress, and you’ll see a Connected to Stripe message. From there, you can finish the Configure Emails screen and land on 🎉 Setup Complete.
WP Simple Pay is all set! Now you’re ready to start tracking your payments.
Step 3: View, Filter, and Export Your Stripe Transactions
To start, head over to WP Simple Pay » Transactions in your WordPress dashboard.
You’ll see the Stripe payment history for every one-time payment your forms have taken. Each row shows the ID, Date, Customer, Form, Amount, and Status.
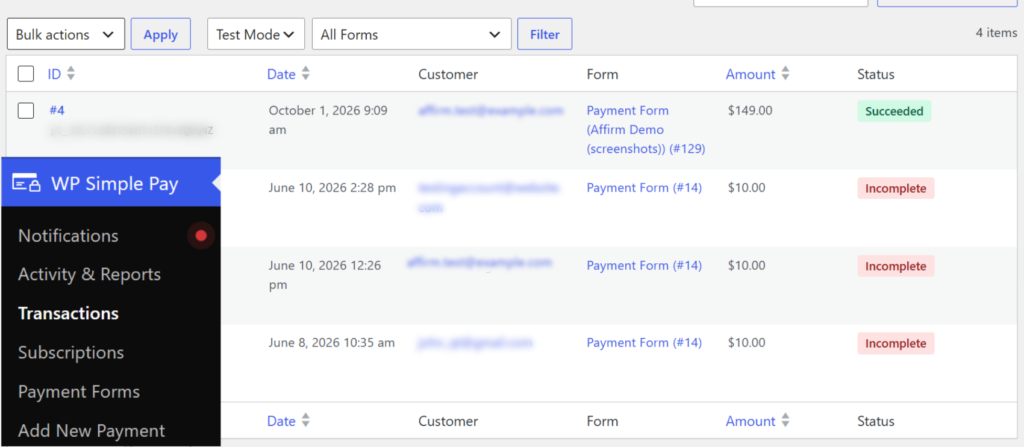
Across the top, there’s a row of status tabs: All, Succeeded, Processing, Incomplete, Failed, Refunded, Partially Refunded, Disputed, and Canceled. Each tab shows a count, so you can tell at a glance whether anything needs your attention.
The Failed tab is the one I’d check first. It collects every failed Stripe payment in one place, which makes it the quickest way to reach a customer before they give up.
Next, you can narrow the list with the two dropdowns above it. The first switches between Live Mode and Test Mode.
The second dropdown lets you pick a single form instead of All Forms. Once you’ve made your choices, click Filter.
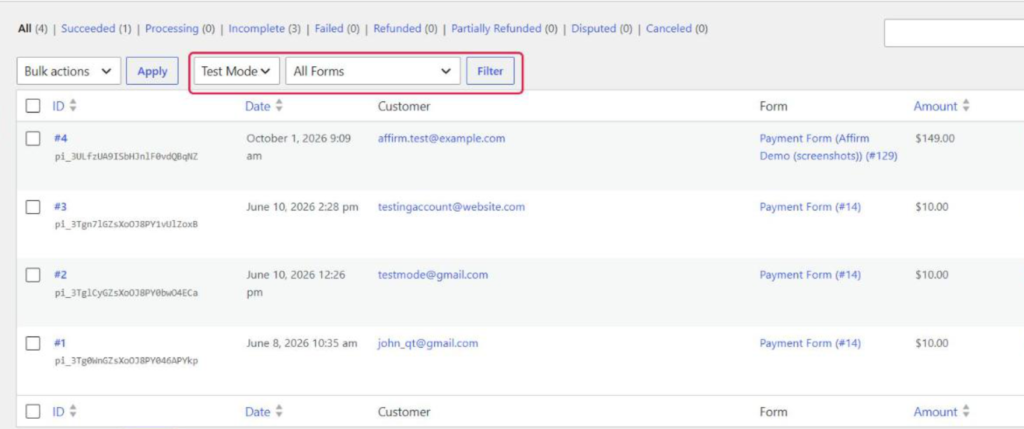
Keep an eye on that mode dropdown. It defaults to your site’s current payment mode, so if you’re live and can’t find a test purchase, switch it to Test Mode.
To find one customer, type their email address into the search box. Then, click Search Transactions.
You can also search by Stripe customer ID, or by the payment ID that starts with pi_.
After that, hover over any payment and click View to open its details. The Payment Info card shows the amount, and the Stripe Details card shows the payment method, plus a View receipt ↗ link when Stripe has a receipt for that payment.
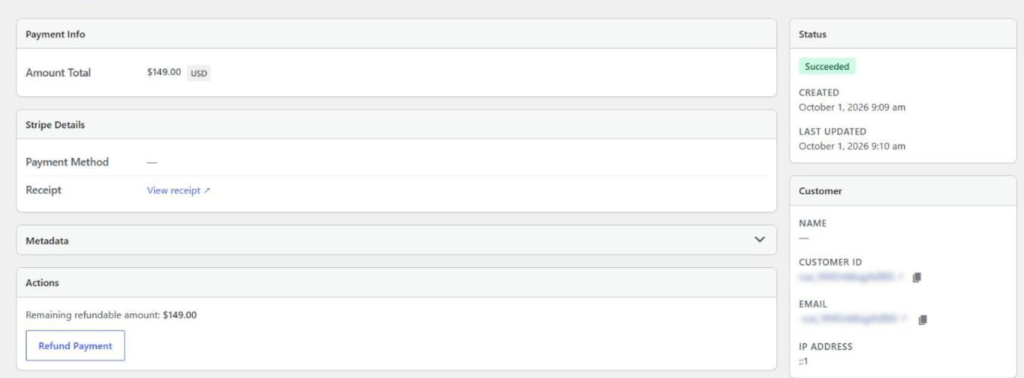
The same screen has a Customer card with the buyer’s name and email. There’s also a Form card that tells you exactly which payment form they used.
For a full rundown of every column and card, see the Transactions page documentation.
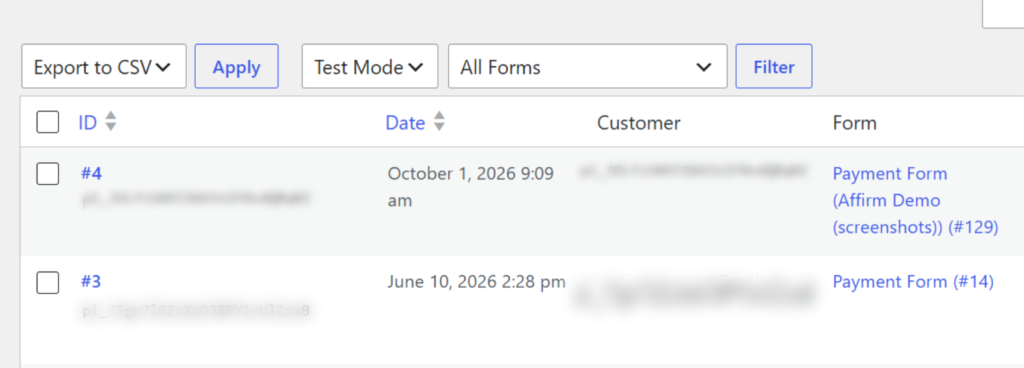
When you need a spreadsheet, tick the box next to each payment you want to include. Next, choose Export to CSV from the Bulk actions dropdown and click Apply.
Step 4: Refund a Stripe Payment From WordPress
To refund a payment, open it with View, the same way you did in the last step.
Then, scroll down to the Actions card, which appears on succeeded payments that haven’t been fully refunded yet. It shows the remaining refundable amount, so you always know how much you can still send back.
Next, click Refund Payment. A popup opens with Full refund selected by default.
If you only want to send back part of the payment, choose Partial refund. Then, type the amount into the Amount field.
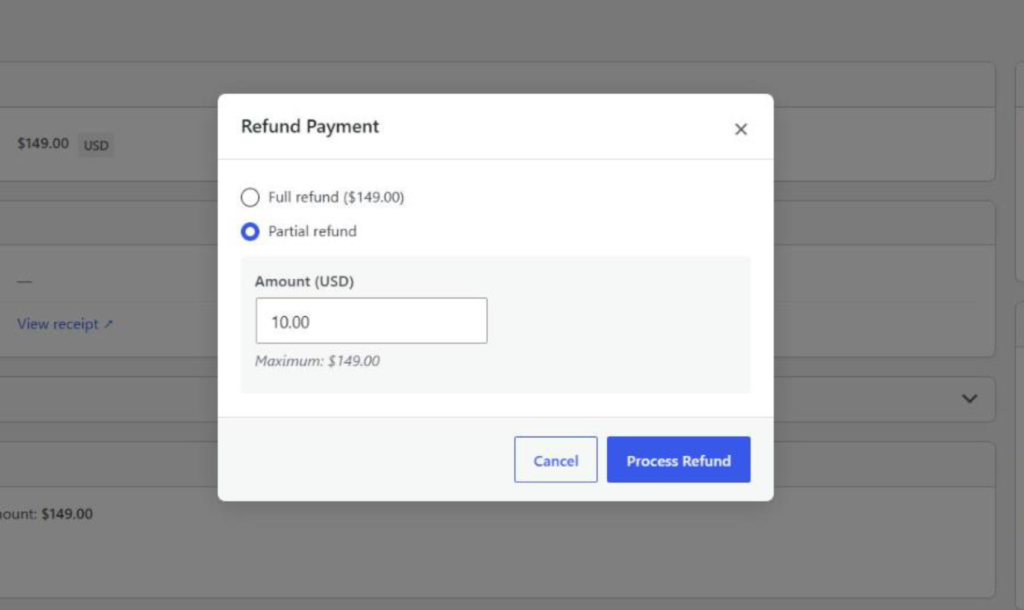
When you’re ready, click Process Refund and confirm. WP Simple Pay sends the refund to Stripe and reloads the page.
The payment then moves to the Refunded or Partially Refunded tab. Stripe returns the money to the customer’s original payment method. You can find more detail in the refund documentation.
Step 5: Track Stripe Subscriptions and Revenue in WordPress
This is where those subscription renewals from the intro show up. Since the Transactions page only lists one-time payments, recurring payments get a page of their own.
To see them, head over to WP Simple Pay » Subscriptions. Each row shows the Customer, Form, Amount, Status, and Next Renewal date.
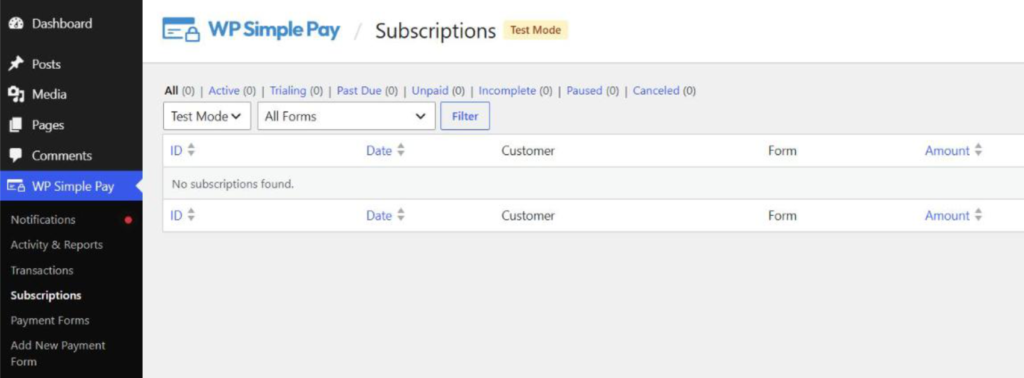
This list includes subscriptions that already existed in your Stripe account, so your older subscribers aren’t missing.
The status tabs here are All, Active, Trialing, Past Due, Unpaid, Incomplete, Paused, and Canceled. I’d check Past Due every week, since it shows the subscribers whose latest renewal didn’t go through.
From there, click View on any subscription to see its details. That includes when a trial ends, plus links to the customer and the subscription in Stripe.
The Subscriptions page documentation covers each status in more detail.
After that, you can visit WP Simple Pay » Activity & Reports for the bigger picture. The Today card shows your Gross Volume, Successful Payments, Customers, and All Payments, each compared with the previous period.
Further down, the Reports card has a Report range picker. You can switch between ranges like Last 7 days, Month to date, and Year to date, or set a Custom range.
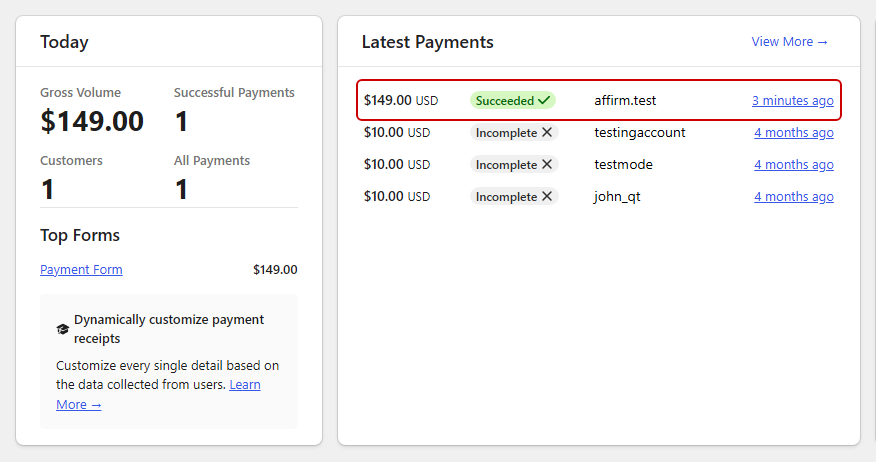
The Latest Payments card also lists your most recent charges, with a link to each payment’s record in Stripe.
Bonus: Spot Chargebacks Before They Pile Up
When a customer disputes a charge with their bank, Stripe opens a chargeback. WP Simple Pay marks that one-time payment as Disputed on the Transactions page.
There’s no email alert for this, so make a habit of clicking the Disputed tab once a week. Stripe gives you a limited window to respond, and its disputes guide explains what evidence to send.
Keeping disputes low also keeps your Stripe account healthy. This guide covers how to keep your Stripe account in good standing over the long run.
Frequently Asked Questions
1. Can I refund a Stripe payment from WordPress?
Yes. With WP Simple Pay, open the payment from WP Simple Pay » Transactions, click Refund Payment, and choose a Full refund or Partial refund. Refunds from WordPress require the Professional plan or higher.
2. Why don’t subscription payments show on the Transactions page?
The Transactions page only lists one-time payments. Subscription payments, including renewals, live on the WP Simple Pay » Subscriptions page, where you can see each subscription’s status and Next Renewal date.
3. How do I export Stripe payments from WordPress to a CSV file?
Go to WP Simple Pay » Transactions and tick the box next to each payment you want. Then, choose Export to CSV from the Bulk actions dropdown and click Apply. Only the rows you tick are included in the file.
4. Why can’t I see my test payments in WP Simple Pay?
The Transactions and Subscriptions pages show one payment mode at a time, and they default to your site’s current mode. Switch the mode dropdown to Test Mode and click Filter to see your test payments.
5. Does WP Simple Pay show Stripe chargebacks and disputes?
Yes. When a customer opens a chargeback on a one-time payment, it shows as Disputed on the Transactions page. WP Simple Pay doesn’t send an email alert for disputes, so check the Disputed tab regularly.
Conclusion
Now you know where every Stripe payment lives in WordPress. One-time payments are on the Transactions page, recurring ones are on the Subscriptions page, and the big picture is in Activity & Reports.
I hope this article helped you learn how to manage Stripe payments in WordPress. You may also want to see these guides on how to manage Stripe subscription payments in WordPress and how to customize and manage Stripe payment reports.
Ready to start accepting payments? Get started with WP Simple Pay today.
Disclosure: Our content is reader-supported. This means if you click on some of our links, then we may earn a commission. We only recommend products that we believe will add value to our readers.

Leave a Reply