
How to Customize & Manage Stripe Payment Reports
Last updated on

Are you wanting to customize and manage your Stripe payment reports?
Stripe is a powerful tool for businesses of all sizes in part because of its robust data capabilities. Not only does it simplify your transactions with customers from all parts of the world, it allows you to gain a better understanding of those transactions within the larger context of your business. This is critical for getting a better sense of the overall health of your business.
In this article, we’ll go over the various types of Stripe reports available, how you can customize them to provide more in-depth information, and some valuable ways to manage them.
Table of Contents
Understanding the Different Stripe Reports
While Stripe provides eCommerce businesses like yours with versatility and convenience, challenges can arise. To leverage the platform for maximum success, it’s important to know what the differences are between the available types of Stripe reports and how to tailor them to meet your specific needs.
The Stripe platform offers plenty of data on its dashboard, which can be great for at-a-glance information or quick updates. However, if you want a more substantial financial report from your account, you may want to export a custom report.
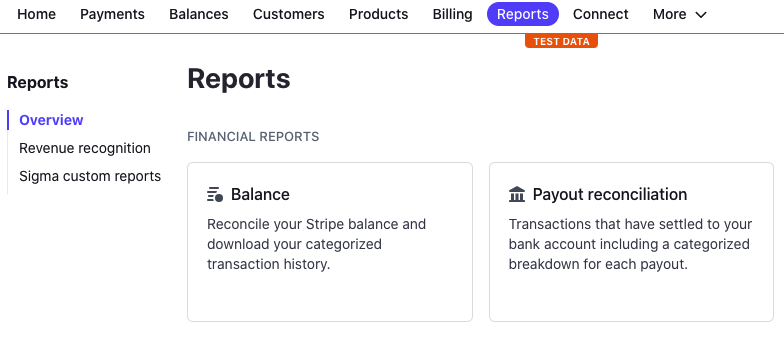
These reports can be customized to include different types of information. In terms of the format of your downloadable financial reports, Stripe generally offers three financial report categories:
- Balance Reports: A categorized transaction history.
- Payout Reconciliation Reports: Transactions that have settled to your bank account, including a categorized breakdown for each payout.
- Revenue Recognition Reports: Automates your accrual accounting process.
Stripe Balance Report
Stripe’s Balance report is similar to a bank statement. It displays a list of various transactions and activity that determines your balance. made from your account. You’ll also see a Balance summary, which indicates your account’s starting and ending balance for the date range selected.
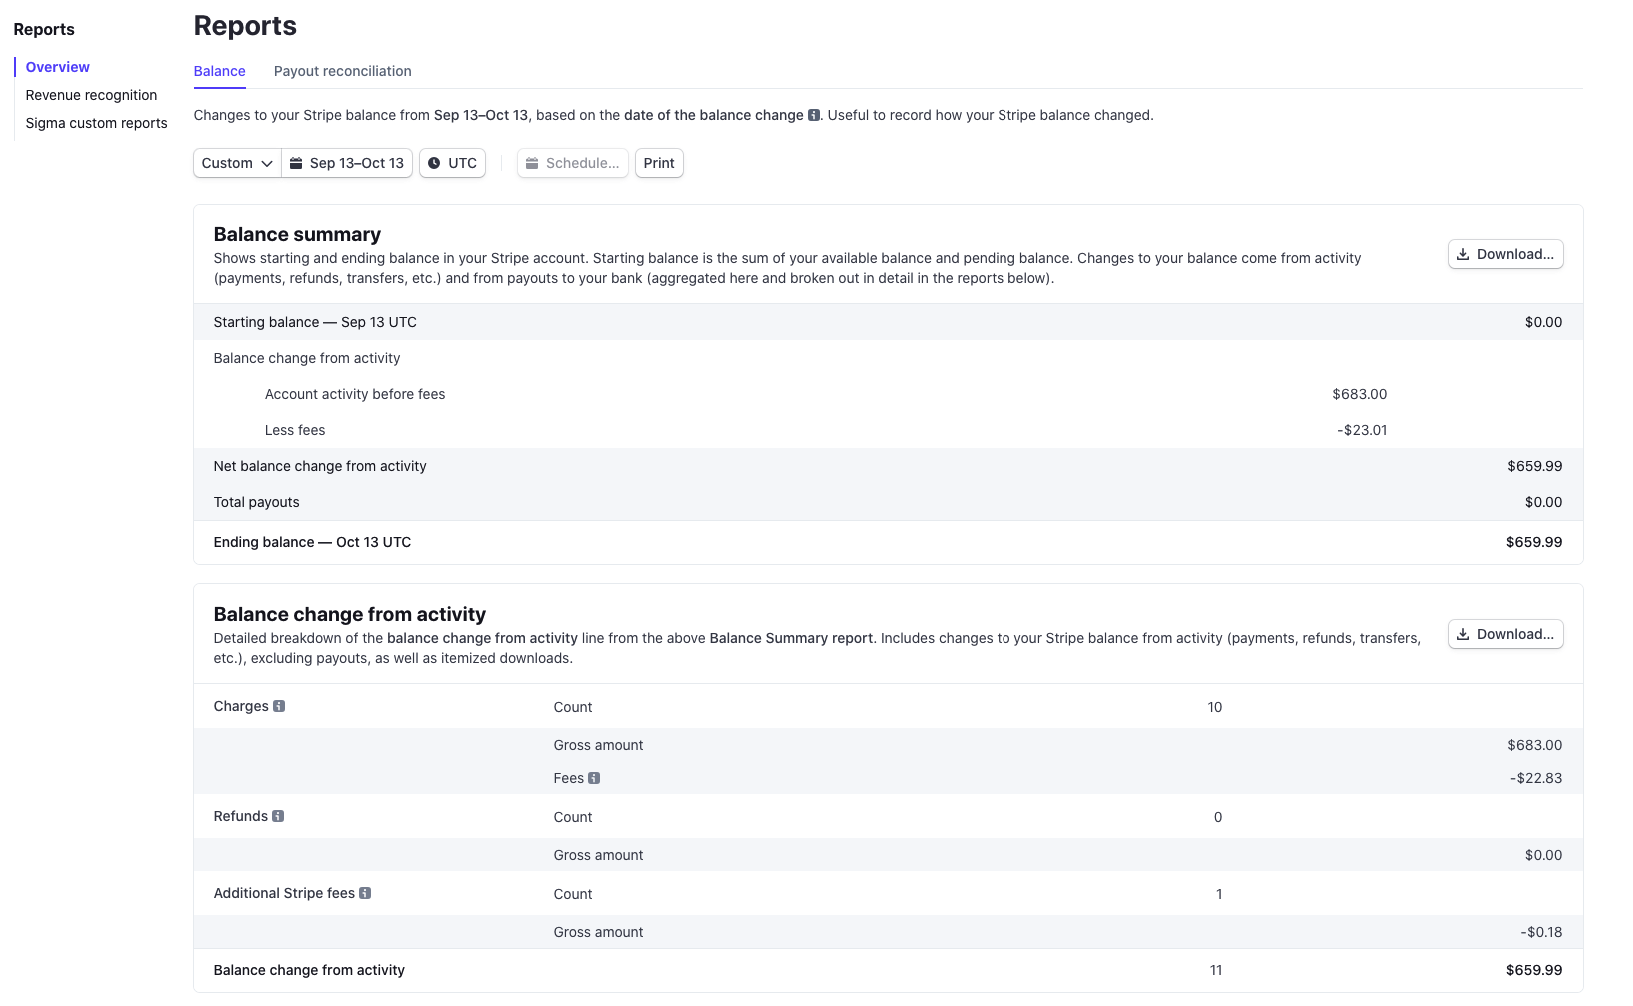
You can access and download this report by navigating to Reports → Overview→ Balance in your Stripe dashboard.
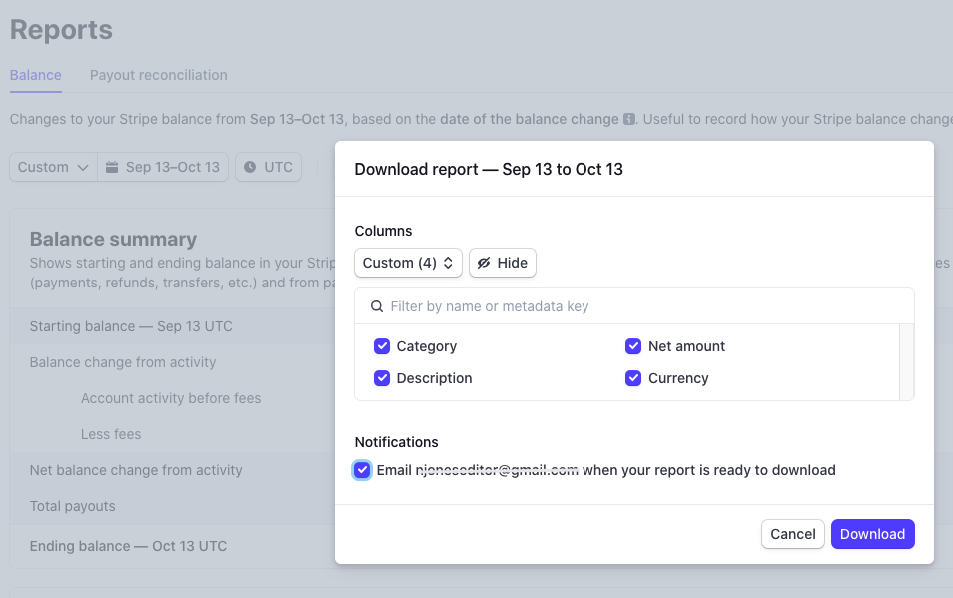
The first step to downloading this report is using the controls in your dashboard to set a specific date range. You’ll also have the options to add custom columns and have the report e-mailed to you.
Stripe Payout Reconciliation Report
If your business frequently pays out from your Stripe account, which is often to a business bank account, it might be a better idea to go with a Payout Reconciliation report. These reports provide you with detailed information regarding your payouts.
Similar to setting a date range for the Balance report, you’ll also want to set a date range to start the process.
The payout reconciliation report allows you to match transactions that hit your bank account to the purchases and payouts in your Stripe account.
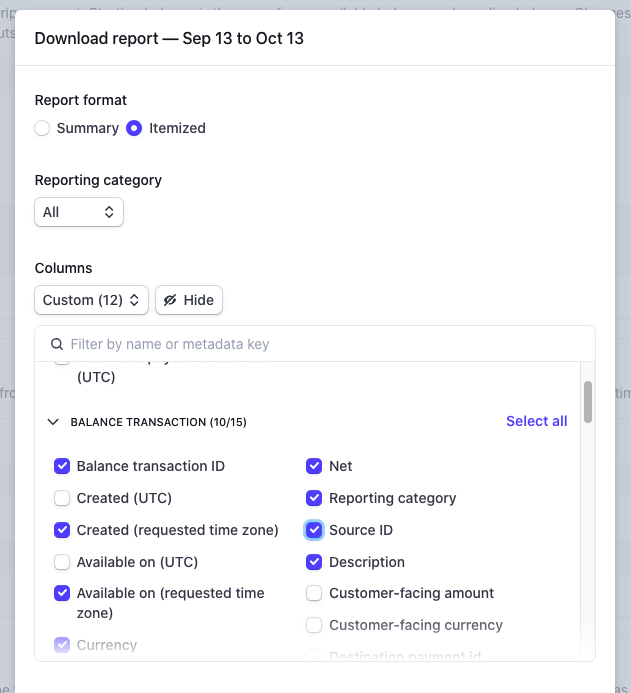
As is the case with Balance reports, you can also add custom columns to represent particular data that you are interested in seeing. A few specific custom columns that are particularly useful for the Payout Reconciliation report category include:
- balance_transaction_id: This column customization allows you to add a unique identifier to any transaction, for a certain type of payout.
- available_on: This column indicates when funds will be available in your Stripe account.
- source_id: Allows you to connect a transaction to a particular Stripe object.
- subscription_id: Is a useful customization for understanding how much of your sales are derived from billing subscriptions connected to your Stripe account.
Each of these custom columns can be applied in more specific reports, such as itemized reconciliation reports or ending balance reconciliation summaries.
By choosing the right type of report and customizing it with the necessary attributes, you can gain actionable insights into your Stripe reporting.
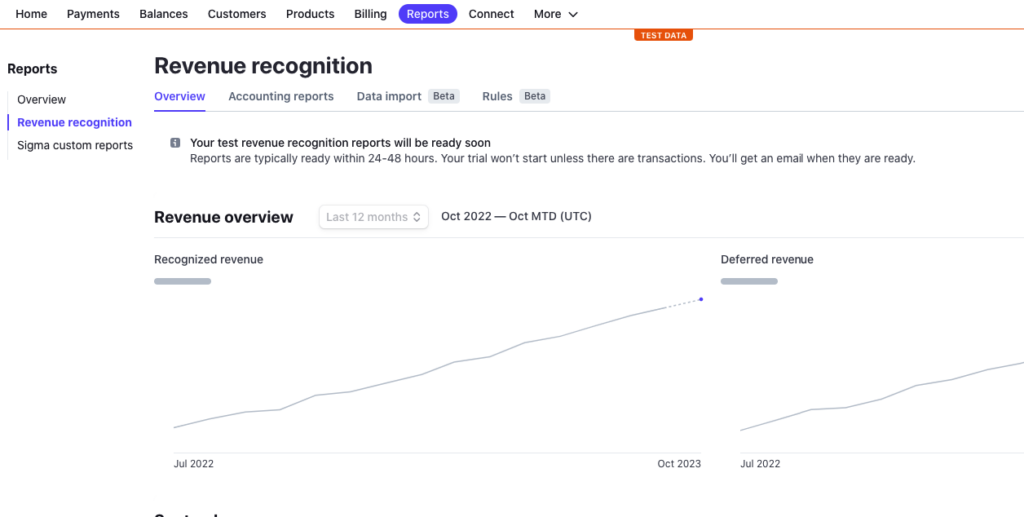
Stripe Revenue Recognition Report
With the Stripe Revenue Recognition report, you can simplify the process of recognizing revenue without the need for complicated configurations. It also automates and streamlines your accrual accounting.
This type of reporting is especially important for businesses that receive payments up front for products or services. Additionally, it’s helpful for subscription-based businesses because it manages changes, refunds, disputes, and prorations.
You can set up and customize your Revenue Recognition reporting by navigating to Reports → Revenue recognition.
Integrating Stripe Reports With Other Tools
Many eCommerce businesses rely on a full stack of software to ensure their operation runs successfully. If you have other tools or programs that need to integrate with accounting reports – such as QuickBooks or a similar suite of business tools – you may want to export reports directly into these systems.
Stripe has native integrations to export reports that are compatible with both QuickBooks and NetSuite, in addition to allowing users to download their financial reports as a normal .csv file.
If you’re using QuickBooks, navigate to Settings → Legacy exports in your dashboard and ensure that QuickBooks is set up. You can download an .iif file compatible with the system.
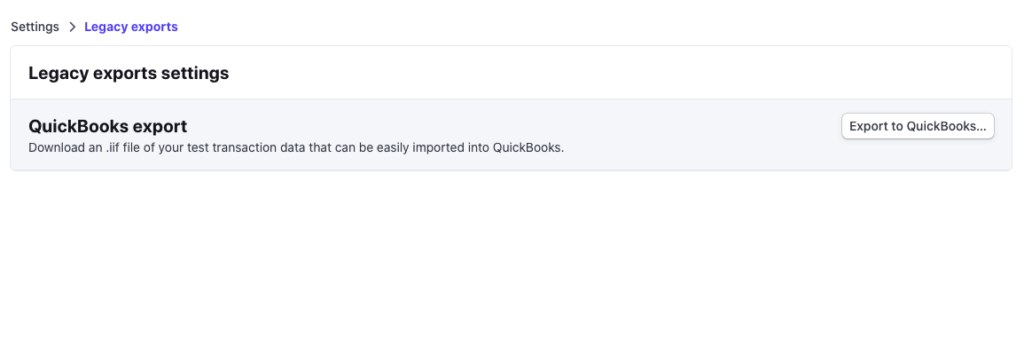
Note: Stripe will create its own accounts in QuickBooks if they haven’t already been created by a previous export.
For greater customization and integration of Stripe reports, you can also use the API. However, customizing, creating, and managing reports directly in the Stripe API does require some technical knowledge. If you are new to managing online accounting systems or Stripe in general, it might be difficult for you to confidently make use of this part of the platform.
Stripe Payment Reports in WP Simple Pay
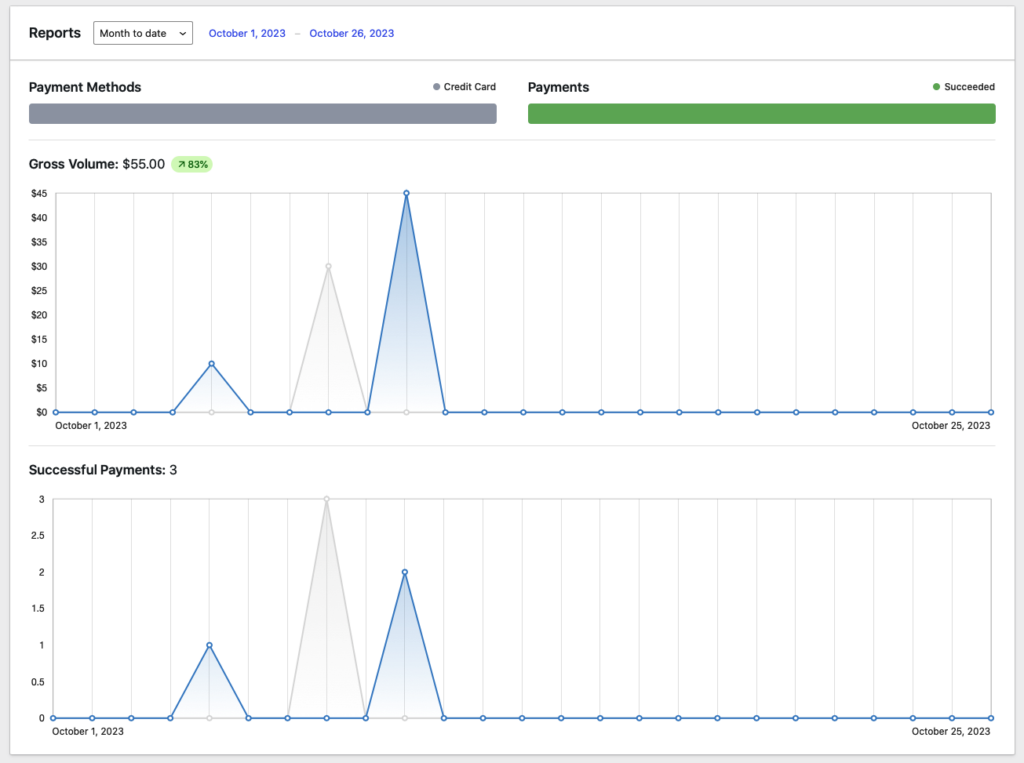
If you’re using WP Simple Pay to accept Stripe payments on your WordPress site, it is worth mentioning that you can get a quick overview of successful payments directly from the WordPress admin dashboard.
Simply navigate to WP Simple Pay → Activity & Reports and you’ll notice that you can see recent transactions, payment methods, and additional customer information.
How to Use Your Stripe Reports
By now, you should have a better understanding of Stripe reports and how to customize them to get the information you need. For more in-depth tutorials on specific steps, you can check out the comprehensive Stripe Reporting Documentation.
However, understanding how to access, modify, and create reports in your Stripe account isn’t enough. Once you have obtained financial information, you’ll need to apply it in a way that can help improve your business and better serve your customers.
Here are a few tips on how to maximize the benefits of your Stripe-generated reports.
Observe Patterns
Something that happens one time could be an anomaly, but if you notice things happening frequently in your reports, such as purchases from a specific area or with a specific type of payment method, it’s worth making a note of.
Analyze your daily, weekly and monthly reports by comparing them to one another so you can notice if anything stands out.
Create Knowledge Redundancy
Imagine this situation: You (or an employee or contractor) are completely up to speed on working with Stripe, creating and storing reports, analyzing them, and troubleshooting any issues. Everything is running great until you or the person responsible for handling your Stripe reporting has to go out of commission for an extended period of time. Maybe it’s an unexpected illness, a vacation, or simply a more important business matter that needs to be taken care of.
In these situations, it’s important to have a contingency plan that can help ensure things run smoothly if your main resource for Stripe reporting isn’t available.
Prevent Fraudulent Payment Attempts
You can analyze Stripe reports and set up fraud and risk rules to protect your eCommerce business from unauthorized charges, and more.
Radar Analytics allows you to view fraud and disputes so that you can make updates to your rules if needed.
Read our guide on how to protect your business from holiday fraud using Stripe features.
Connect Reports to Sales Strategies
Knowing the trends reflected in your report as outlined above isn’t enough. You need to act on these patterns by updating your marketing and sales strategies. Noticing a lot of purchases from customers in California? Maybe create an email campaign talking about the specific benefits of what you offer in the Golden State. Are a lot of purchases coming through in the evenings? You might want to run an evening flash sale.
Data is most valuable to your business when you can use it to take actionable steps that lead to increased sales or profit. By getting a better handle on your Stripe reporting, you can understand trends in your business that can lead to growth.
That’s all! We hope this article has helped you learn more about Stripe payment reports and how to customize and manage them for your business.
If you liked this article, you might also want to check out our guide on how to create a Stripe payments landing page in WordPress.
What are you waiting for? Get started with WP Simple Pay today!
To read more articles like this, follow us on X.
Disclosure: Our content is reader-supported. This means if you click on some of our links, then we may earn a commission. We only recommend products that we believe will add value to our readers.

