How to Pass Stripe Processing Fees for ACH Payments on to Customers in WordPress
Last updated on

 Spencer Finnell
Do you accept ACH Direct Debit on your WordPress site and want to pass the Stripe processing fees on to your customers?
The best payment processor, Stripe, has a fee structure of 0.8% (max $5) + $1.50 for ACH Direct Debits. If you offer high-value items, you could save more money than you think just by passing these processing fees on to your customers during checkout.
In this article, we’ll show you how to easily pass the Stripe processing fees for ACH Direct Debit payments on to your customers in WordPress and ensure that you collect the accurate amount.
Why Accept ACH Direct Debit Payments?
The biggest advantage of accepting ACH Direct Debit payments over traditional credit and debit cards is the lower processing fee Stripe charges. To compare, the Stripe fee for domestic credit and debit cards is 2.9% plus $0.30. As an eCommerce business, you can save a ton of money just by accepting ACH, especially if you sell high-value products or services.
You don’t need to worry about verifying ACH payments because there are Stripe payment plugins for WordPress that support instant verification and micro-deposit verification in instances when a customer needs to manually verify their bank information.
You can also choose a Stripe payments plugin that lets you send customers an automated email notifying them that their ACH payment is being processed. This is a great way to improve communication and protect yourself from disputes down the line.
Removing the Processing Fee for ACH Payments
When customers make a purchase on your site, you’ve probably noticed that you don’t receive the full net amount. This is because the Stripe processing fee gets deducted straight from the final sale price.
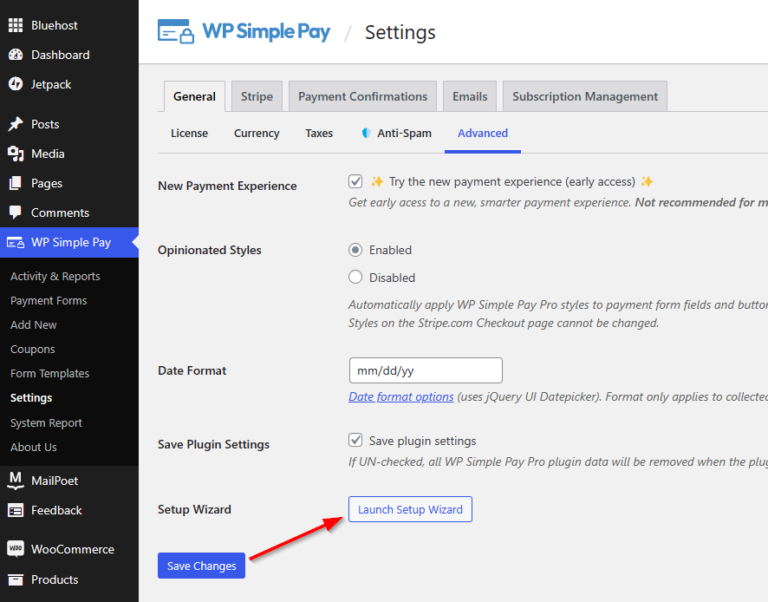
That said, if you’re using WP Simple Pay to collect payments on your site, you can remove the additional fee for ACH payments in a few easy steps to ensure that you collect the full net amount.
Remove the additional 3% fee!
Most Stripe plugins charge an additional 3% fee for EVERY transaction
…not WP Simple Pay Pro!
The plugin lets you accept 10+ payment methods, including traditional credit and debit cards, digital wallets like Apple Pay / Microsoft Pay / Google Pay, Alipay, and Cash App Pay, and offers an advanced no-code payment form builder. You can use it to create customized payment forms for products, services, event registrations, and more.
Using WP Simple Pay is the perfect alternative to more complicated platforms that require you to build a shopping cart or install addons.
It also allows you to pass the Stripe processing fees onto customers who choose to pay using ACH Direct Debit and enables you to do the same for other payment method options.
One of the best parts is that you can set a maximum amount to ensure that you don’t overcharge customers with an inaccurate additional fee.
How to Remove Stripe Fees for ACH Payments
Let’s take a look at how you can use WP Simple Pay to customize the fee recovery amount for ACH Direct Debit payments made on your site.
Step 1: Install and Activate WP Simple Pay in WordPress
To remove the Stripe processing fees for ACH payments and set up a maximum fee amount, you’ll first need to install and activate the plugin on your site.
Simply visit the pricing page and choose the best plan for your specific needs. Then, download the .zip file from your purchase confirmation email or your WP Simple Pay account.
Next, upload the plugin from your WordPress admin dashboard and click on Activate.
If this is your first time installing a plugin, check out our detailed guide on how to install WP Simple Pay.
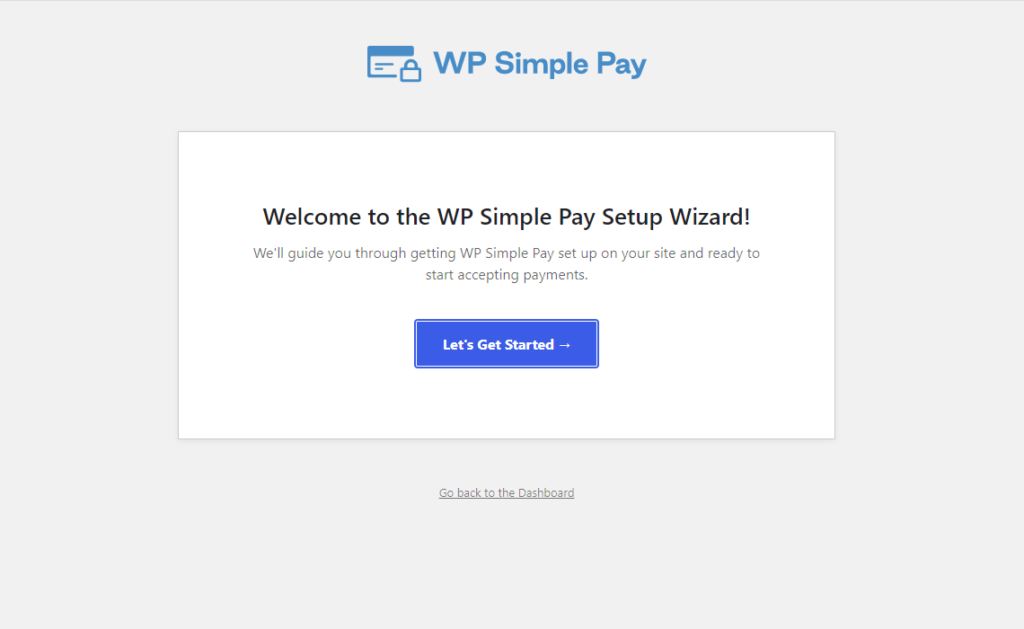
Once you’ve finished installing and activating the plugin, its advanced setup wizard will appear. You can use it to configure your settings and connect your Stripe account.
To get started, simply click on the Let’s Get Started button.
Step 2: Connect Stripe to WordPress
Now that you’ve installed and activated WP Simple Pay in WordPress, you’ll need to connect your Stripe account to your site in order to accept online payments and set up a customized fee recovery amount for ACH Direct Debit and pass it on to your customers.
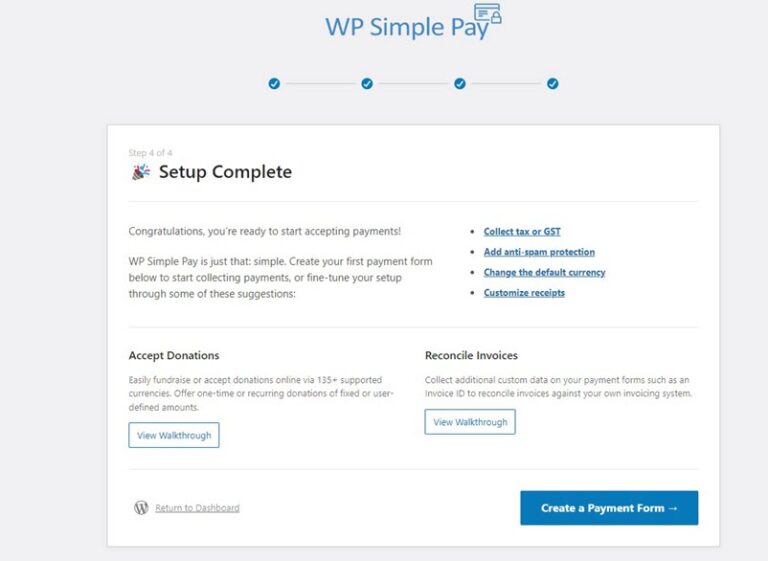
Click on the Connect with Stripe button in the setup wizard.
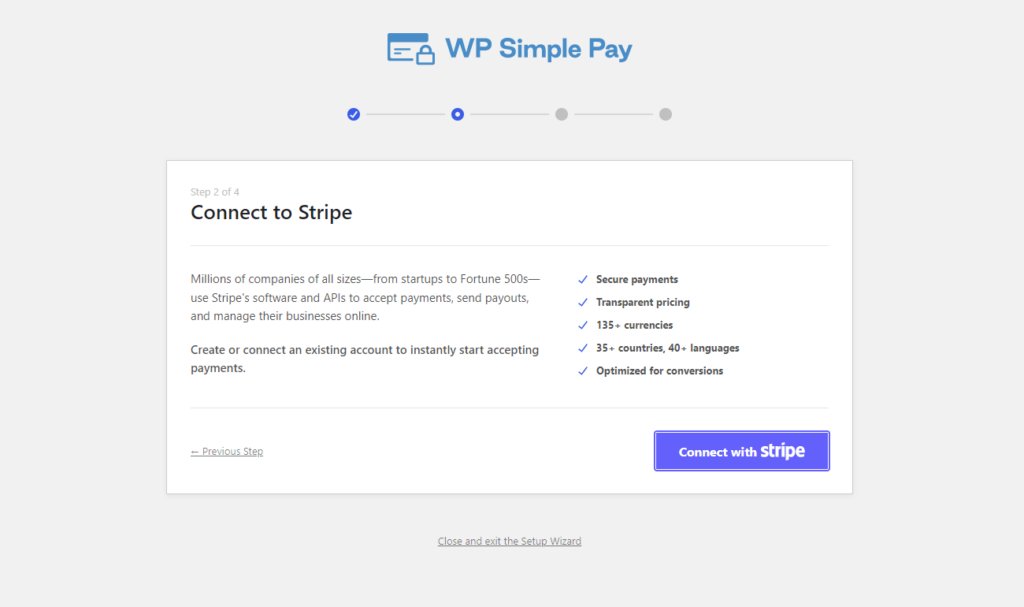
Once you have completed this process, you’ll see a success page that says “Setup Complete.”
Step 3: Create an ACH Direct Debit Payment Form
You’ll need to create an ACH payment form to begin accepting ACH payments on your site and passing the Stripe processing fee on to your customers.
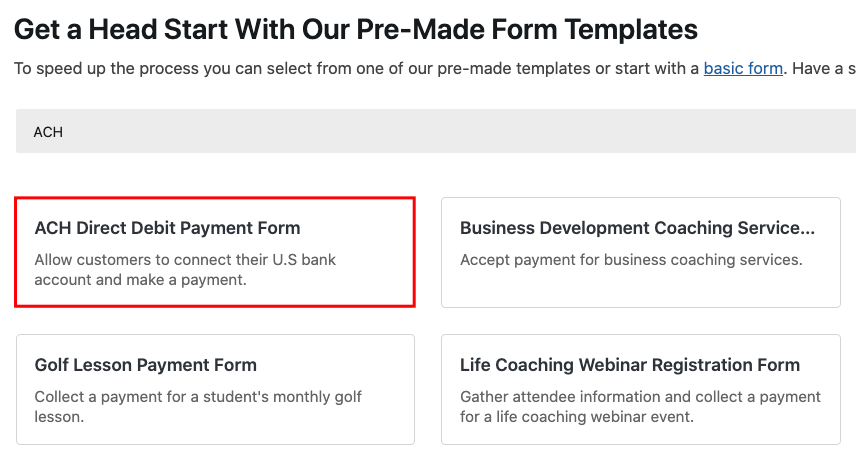
First, click on the Create a Payment Form button on the success page.
You should now be able to see a library of different types of payment form templates. For the purpose of this tutorial, let’s choose the basic ACH template.
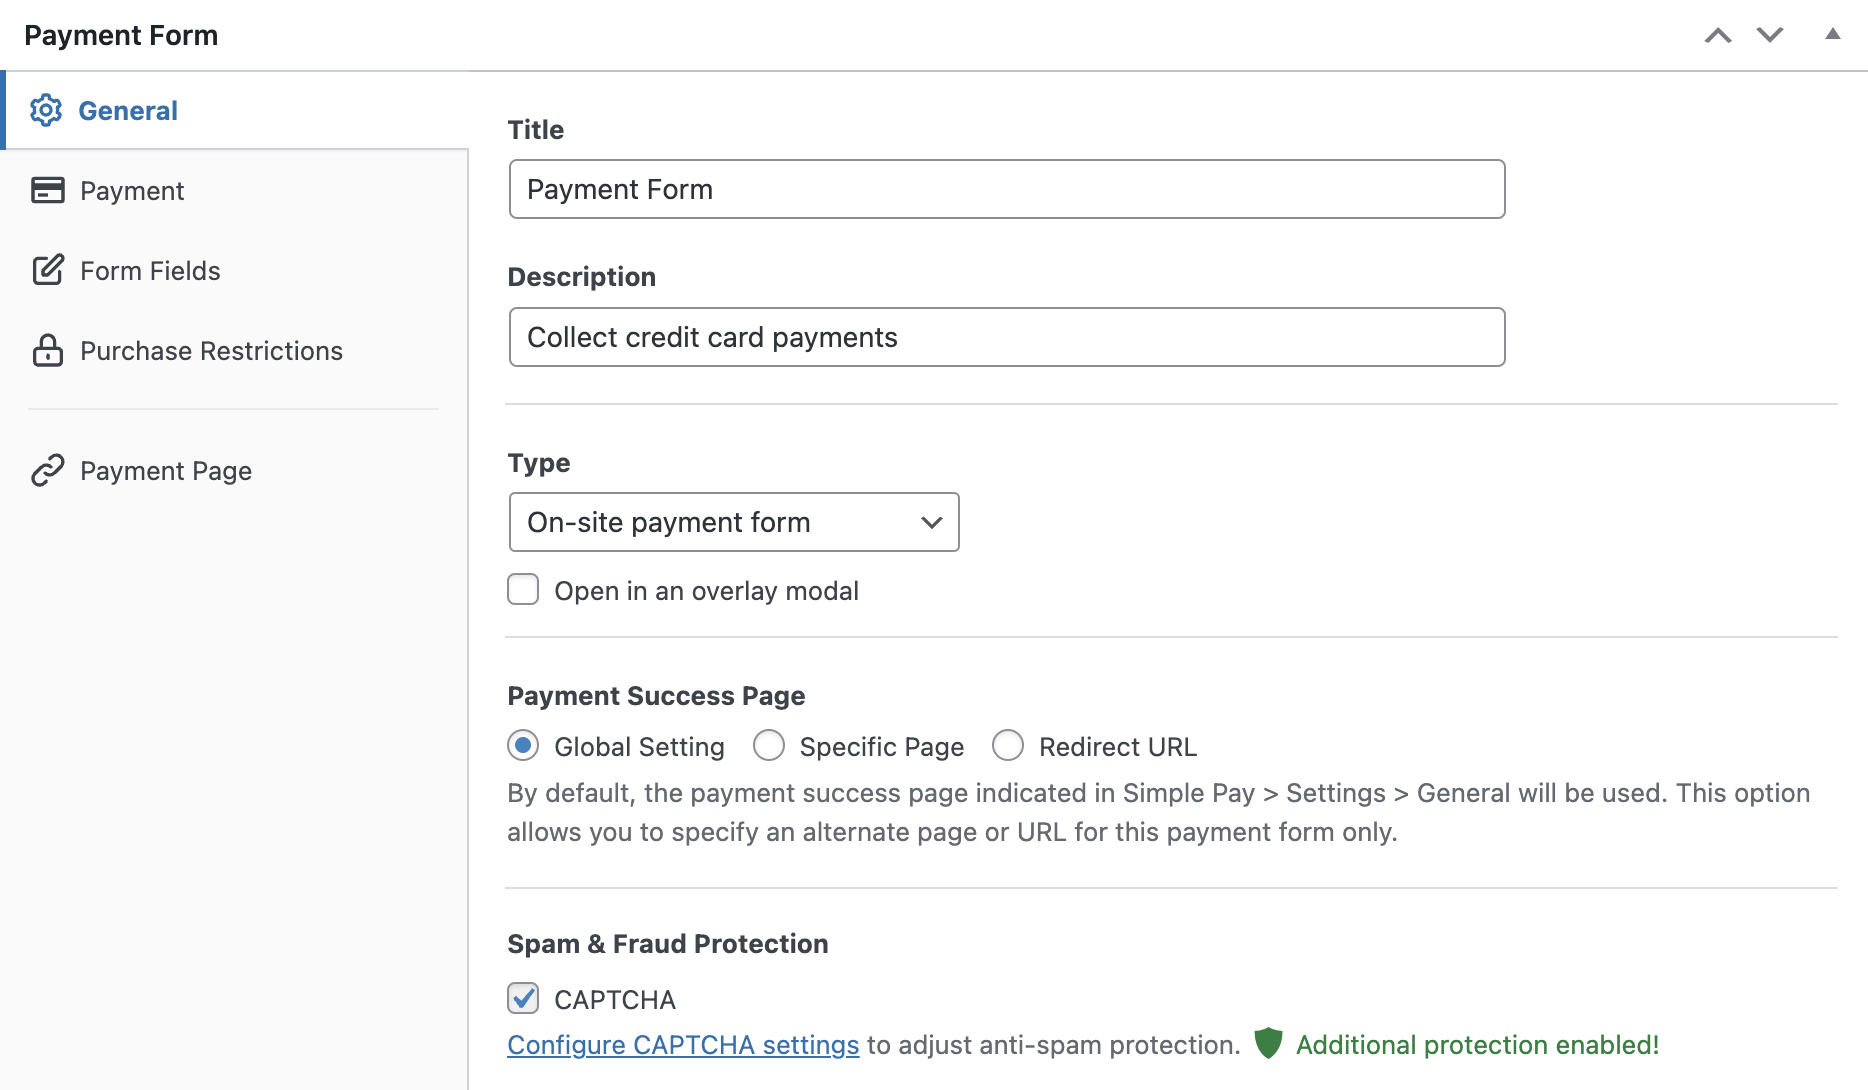
From the General tab, you can enter the title and description of your form. Be sure to leave On-site payment form selected as the Type.
Next, click on the Payment tab. From here, enter the price amounts and options. If you want to offer multiple pricing options and allow customers to check out in one transaction, check the “Allow purchasing multiple price options” box.
Then, scroll down and click on the Configure icon. Here, you can set up micro-deposits and fee amounts and enter a custom maximum amount for Fee Recovery. Adding a custom amount to the Maximum Amount field will ensure that the fee is capped at the amount of your choice.
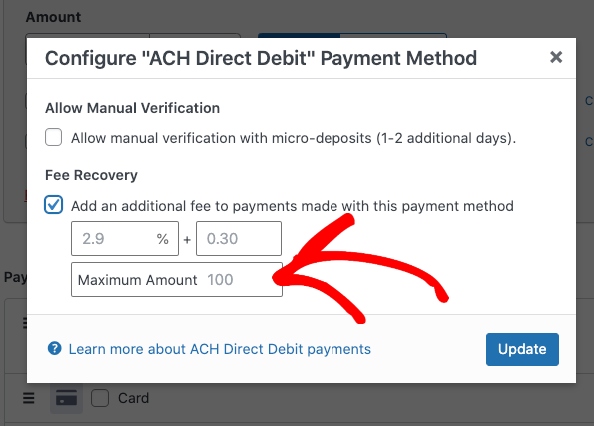
Once you’ve finished configuring the ACH settings, go ahead and click Update.
You can continue customizing your form using the additional tabs.
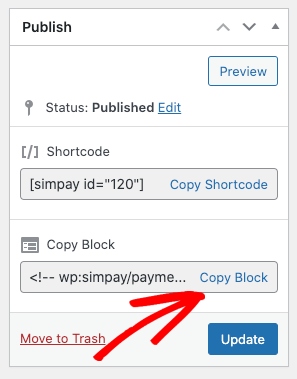
Step 4: Publish Your ACH Payment Form
Now that you’ve created your form, it’s time to add it to a page or post on your WordPress site.
Simply navigate to the Publish module and click on “Copy Block.”
Then, go to the page or post you want your form on and paste it into the Block editor. Your payment form will be displayed on the page.
There you have it! We hope this article has helped you learn how to pass the Stripe processing fee for ACH Direct Debit payments on to your customers in WordPress.
If you liked this article, you might also want to check out our guide on how to add a buy now button to your WordPress site.
What are you waiting for? Get started with WP Simple Pay today!
To read more articles like this, follow us on X.
Disclosure: Our content is reader-supported. This means if you click on some of our links, then we may earn a commission. We only recommend products that we believe will add value to our readers.


Leave a Reply