
Supercharge Your Sales: How to Easily Enable Multi-Item Purchases in One Transaction
Last updated on

 Spencer Finnell
Do you want to supercharge your sales by allowing customers to purchase multiple items or subscription-based services and products in one transaction?
Allowing customers to purchase multiple quantities using one payment form offers several significant benefits for online businesses. Eliminating friction during the payment process is essential to increasing conversion rates, reducing checkout abandonment, and boosting average order value.
In this article, we’ll cover how to easily enable multi-item purchases in one transaction on your WordPress site.
Offering Multiple Items in One Purchase
Enabling multiple items and quantities on a single payment form can improve customer satisfaction, increase sales, and improve overall payment processing efficiency.
It’s imperative for online businesses to make the checkout experience as easy and simplified as possible. If purchasing more than one item in different quantities is not offered on one payment form, many potential customers will leave your site and find one that does.
Just imagine wanting to buy several quantities from one business and having to complete separate transactions. Not ideal, right?
This scenario would be even more troublesome for organizations that offer tickets, event registrations, catering services, photography sessions, and so on.
Here are a few more reasons why you should enable multi-item purchases and quantities on a single payment form:
- Flexible payment forms result in reaching a broader audience. It can help attract shoppers who prefer to shop in bulk or seek the convenience of paying for several different products at different pricing amounts in a single transaction.
- Improved customer loyalty can be achieved by letting customers purchase the items in the quantities they want in one easy transaction.
Enabling Multiple Purchases in One Transaction
Let’s take a look at how you can save lost customers and boost sales with a few simple steps on your payment form.
Step 1: Install a Stripe Payments Plugin
Choosing the right Stripe payments plugin is a critical step to ensuring that you can enable customers multiple purchases in one transaction.
WP Simple Pay is the best Stipe payments plugin for WordPress because it makes it easy to accept payments directly on your site without using code. It also enables multi-item purchases on one payment form, which can help you grow your sales.
First, to install and activate WP Simple Pay on your site, simply visit the pricing page and choose the best plan for your specific needs.
Then, you’ll need to download the .Zip file from either your payment confirmation email or your WP Simple Pay account and upload it to your site from the WordPress admin dashboard.
If this is your first time installing a plugin, no worries! Simply follow our step-by-step guide to installing WP Simple Pay.
Once you’ve finished installing and activating WP Simple Pay, the setup wizard will walk you through configuring basic Email settings and connecting your Stripe account. Go ahead and click on the Let’s Get Started button.

If you didn’t see the setup wizard, simply head over to WP Simple Pay » Settings » Advanced tab and click the Launch Setup Wizard button.
2: Connect WordPress to Stripe
To connect your WordPress site to Stripe, click on Connect with Stripe.

Next up, enter the email address you use for your Stripe account and connect it to your site. If you don’t have a Stripe account, you can easily create one by entering your email address and completing the registration.
Upon completing this process, you’ll be shown a success page that says, “Setup Complete.” Next, click on Create a Payment Form.

Step 3: Create a Payment Form
Now that you’ve installed and activated WP Simple Pay on your site, it’s time to create a payment form that allows your customers to easily purchase multiple items.
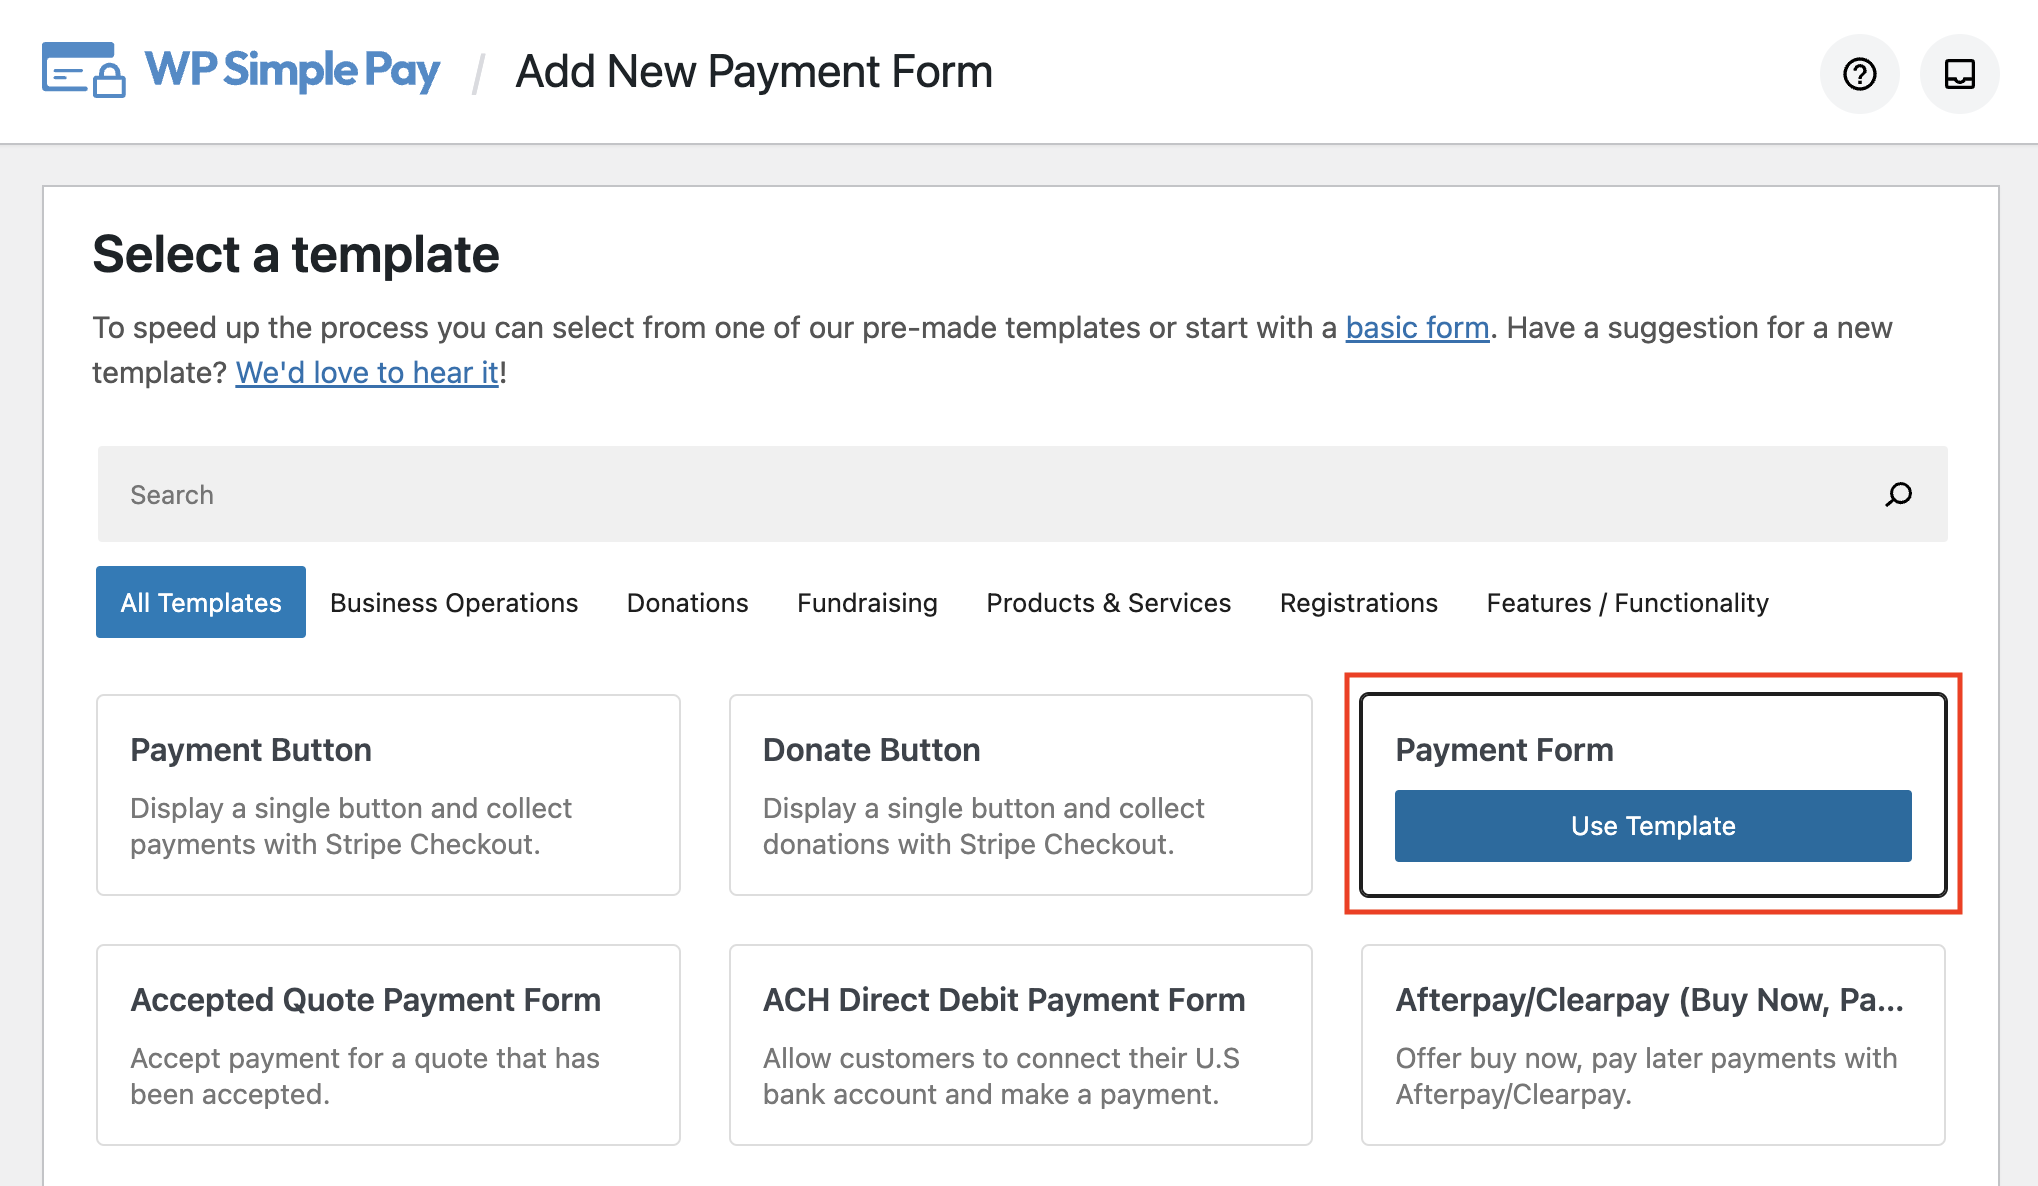
As you can see, WP Simple Pay provides several pre-built payment form templates for you to choose from.
For the purpose of this tutorial, you’ll want to select the basic Payment Form template. This template lets you create payment forms that enable your customers to offer multiple items on one form.
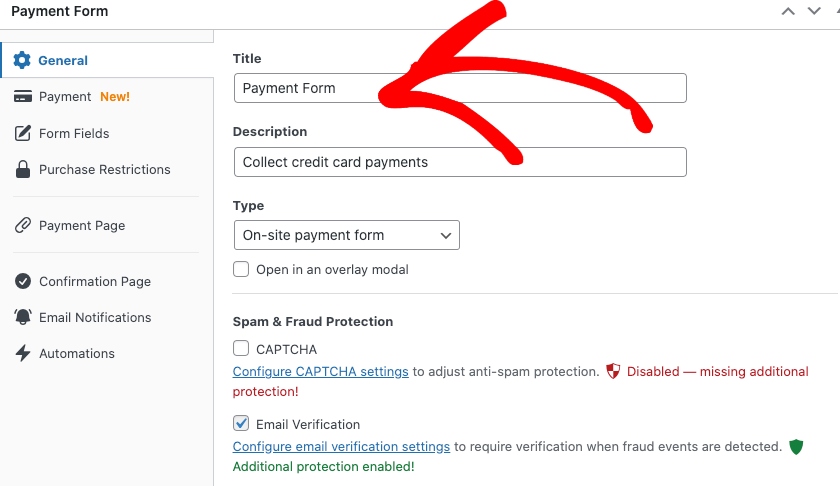
From the payment form builder, click the General tab to start creating your form without using code. Enter the title and description of your form and keep On-site payment form selected for the form Type.
Next, click on the Payment tab. The first thing you’ll need to do is check the box next to Allow purchasing multiple price options.
Then, go ahead and add your price options. For each price option, be sure to check the boxes next to Allow amount to be determined by the user and Allow quantity to be determined by the user.
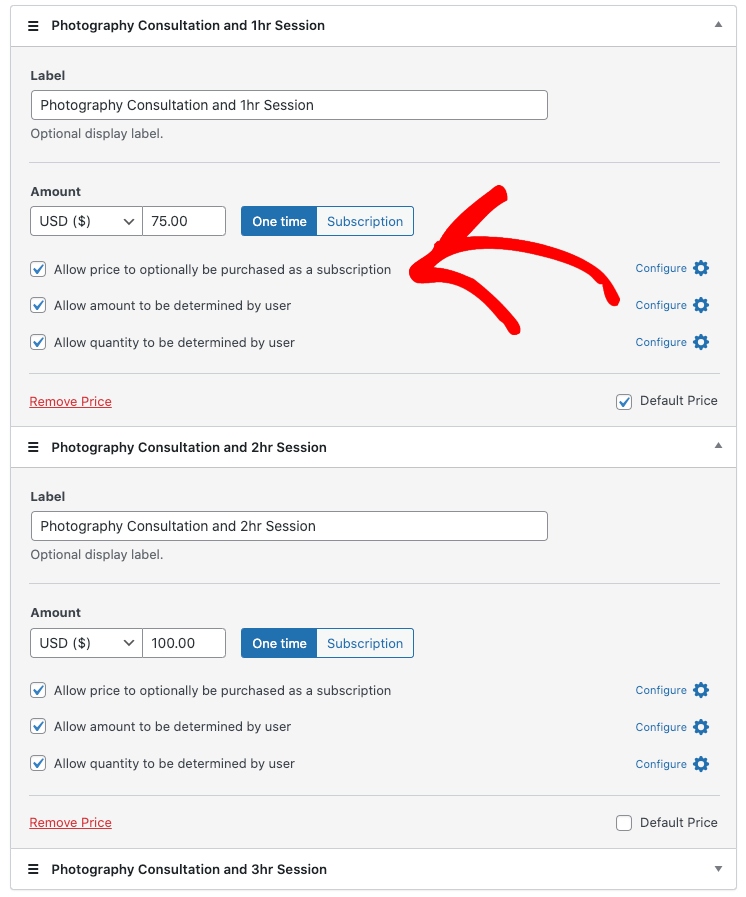
If you want to offer subscription-based services or products, you can toggle the subscription button to let customers set up automatic recurring payments for each price option.
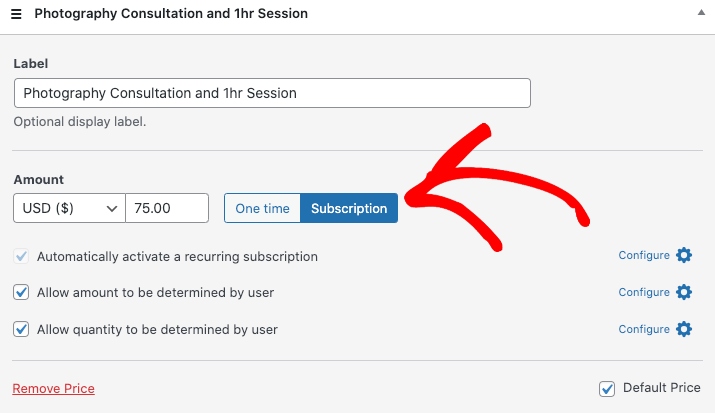
Alternatively, you can give allow customers to choose whether or not to opt in to recurring payments by checking the box next to Allow price to optionally be purchased as a subscription.

For the purpose of this tutorial, we’ll allow customers to choose between a one-time purchase or a subscription plan for each item. However, you can customize your multi-item payment form to meet your business’s specific needs.
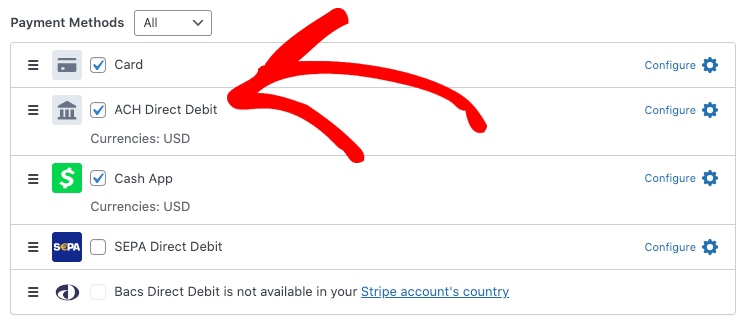
When you’ve set up your price options and amounts, scroll down to select the payment methods you want to accept.
Remember, the more payment method options you offer, the more sales you are likely to make.
Next, click on the Custom Fields tab. Here, you can add, edit, and remove custom fields and arrange them on your form.
For example, you can add the Text field to allow customers to provide notes or additional information about their specific needs.
Simply choose the Text field provided in the dropdown menu and enter the instructions in the Label field.

Once you’ve configured the custom fields, be sure to click on the Save Draft button and preview your form to ensure the price options and quantity buttons are functioning properly.
Once you’re happy with your form, go ahead and click on the Publish button.
Your form should appear similar to the one below:

Step 4: Publish Your Multi-Item Form
Now that you’ve created your multi-item payment form, you’ll need to add it to a page or post on your site.
First, go to the page or post and click on the + icon to bring down the WP Simple Pay block.
Next, from the dropdown menu, choose the payment form you just created.

Your payment form will now be displayed on the page. Be sure to click on the Update or Save button.
There you have it! We hope this article has helped you learn how to supercharge your sales by offering multiple items and quantities on one payment form.
If you liked this article, you might also want to check out our guide on how to improve customer communication with an itemized email receipt.
What are you waiting for? Get started with WP Simple Pay today!
To read more articles like this, follow us on X.
Disclosure: Our content is reader-supported. This means if you click on some of our links, then we may earn a commission. We only recommend products that we believe will add value to our readers.


Leave a Reply