
How to Stylize Stripe Payment Forms in WordPress
Last updated on

Have you ever created the perfect site where the colors are just right, the fonts are beautiful only to find your payment form looks… out of place?
I’ve been there. You spend all this time making your site look professional and trustworthy, but the generic “Pay Now” button or default field styles just don’t match your brand. It can make the final, most important step of getting paid feel disconnected from the rest of your customer’s experience.
That’s when I learned how powerful a few simple style tweaks can be. And with the right payments plugin, you don’t need to hire a developer or dig through complicated theme files to get it done.
Worried this is getting too technical? Don’t be. There’s no coding experience required here. I’m going to stick to simple, step-by-step instructions, and for the most powerful customizations, it’s really just a matter of knowing what to copy and where to paste it.
In this guide, I’ll show you beginner-friendly ways to customize your Stripe payment forms. I’ll cover everything from no-code visual tweaks to using custom CSS for complete control over the design.
Customizing Stripe Payment Forms in WordPress
Why Stylize Your Stripe Payment Forms?
The final step in any sale is the payment, and the design of your payment form plays a huge role in that moment. A form that looks clean, professional, and consistent with the rest of your site builds trust and reassures customers that their information is safe.
Think of it like a physical storefront; a cohesive, well-branded checkout counter feels more secure than a generic one. These small design details create a seamless experience that can directly impact your conversion rates.
Luckily, you don’t need to be a designer to make meaningful improvements.
Styling with Built-In Settings
I use WP Simple Pay all the time to create Stripe payment forms because it doesn’t require additional plugins or even creating a complicated shopping cart system.
It also includes a few built-in options to help you customize your forms in just a couple of clicks.
Before we begin, it helps to have WP Simple Pay set up on your site. If you haven’t used it yet, here are a couple of beginner-friendly tutorials to help you get started:
- How to Add a Payment Form to a Page in WordPress (Without Code)
- How to Add a Buy Now Button to Your WordPress Site
Once you’ve built a Stripe payment form with WP Simple Pay, you’re ready to stylize it. Let’s start with how to do that directly from your WordPress dashboard.
How to Customize The Payment Button with WP Simple Pay
The most prominent part of your form is the payment button. To give it a quick style adjustment, you can choose between two looks directly within the form settings.
WP Simple Pay allows you to alter the Checkout Button, Payment Button and Coupon Apply Button styles in individual form settings.
Simply visit the payment form you would like to edit and adjust the button style in the custom field settings.
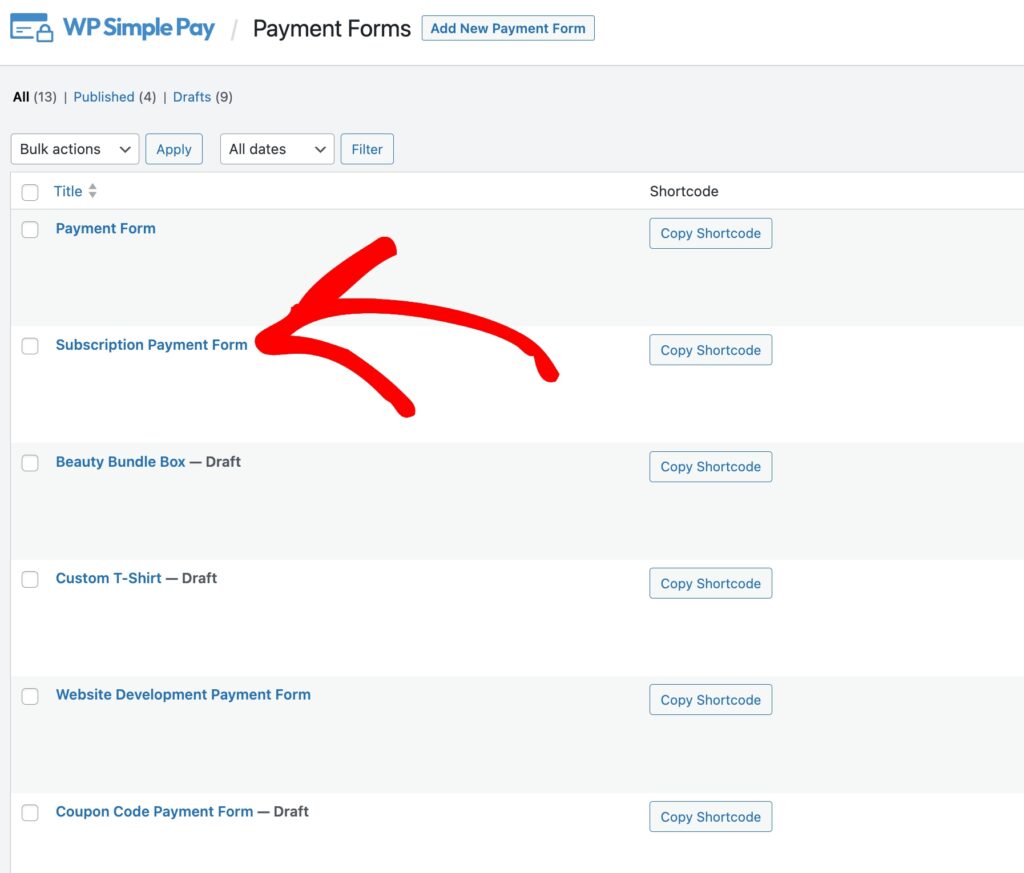
First, navigate to the Payment Forms tab and click on the payment form you want to stylize.
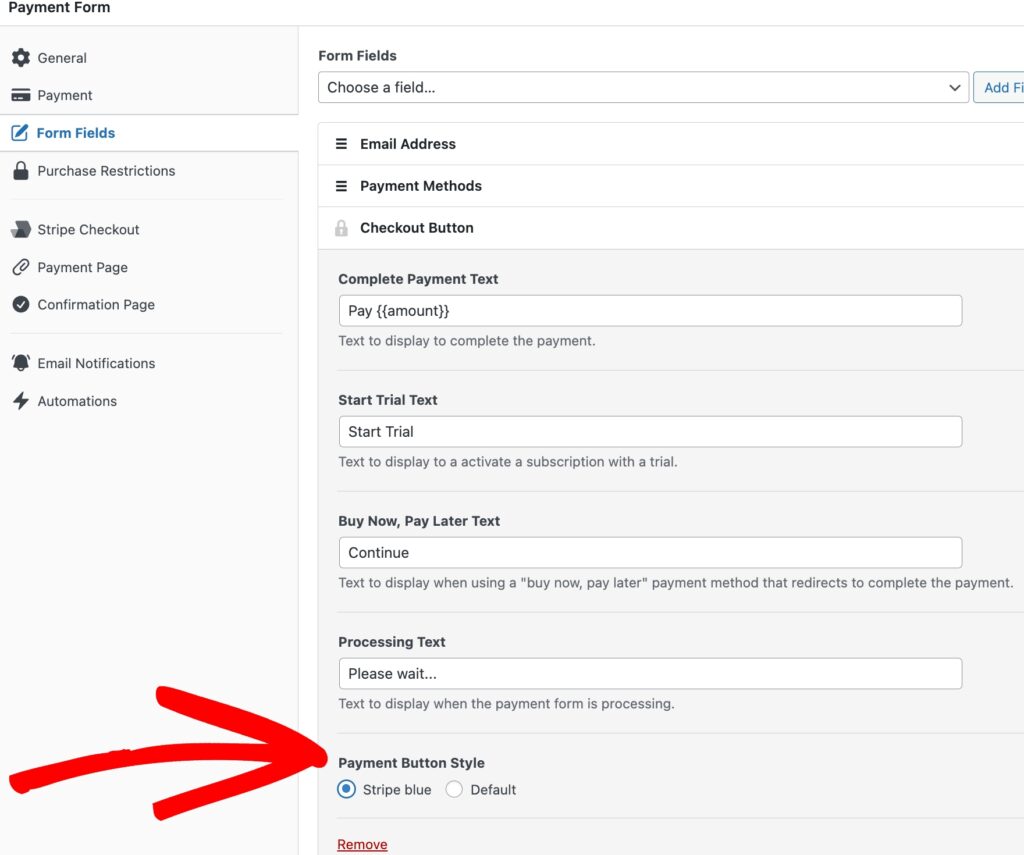
Next, click on the Form Fields tab. Here is where you can choose between Stripe blue or Default for the payment button.
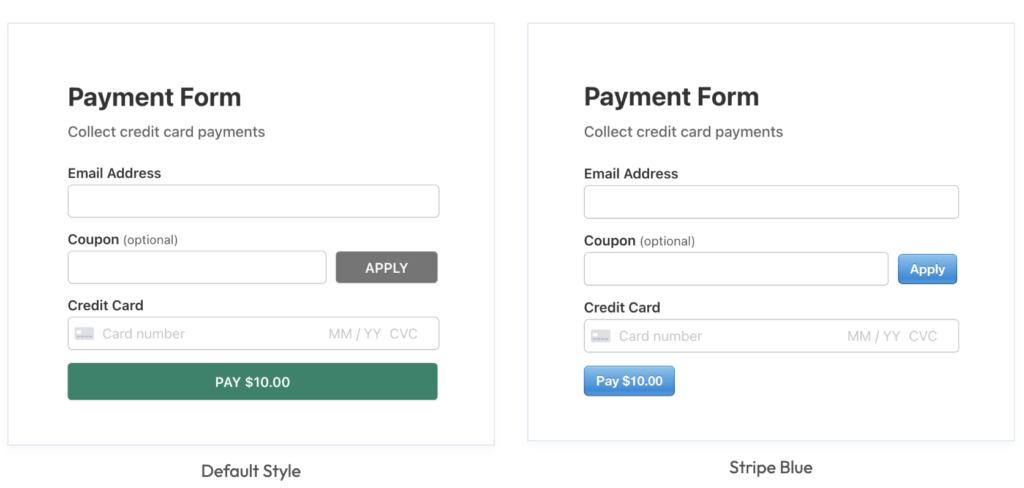
Here’s a quick look at the stylized payment buttons:
The Master Switch: “Opinionated Styles”
To ensure your forms look great from the start, WP Simple Pay includes a built-in stylesheet.
It’s called “Opinionated Styles” because it applies a default design to the form’s layout, spacing, and responsive behavior.
For most users, leaving this on is the best choice.
WP Simple Pay’s styles are designed to look great right away with no effort. But, if you feel confident and want a blank canvas to let your theme’s own styles take over, you absolutely have that option!
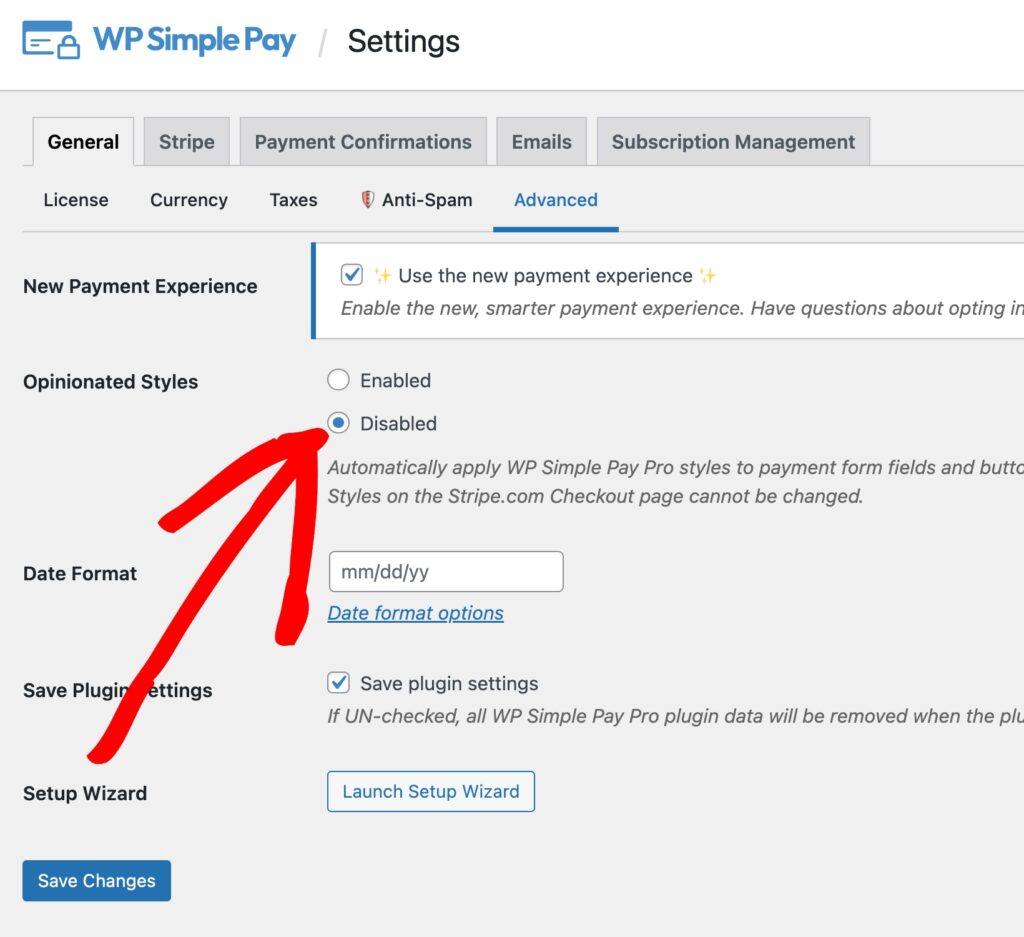
You can turn our styles off by going to WP Simple Pay → Settings → General → Advanced and toggling Opinionated Styles to Disabled.
Now that you know how the built-in settings work for WP Simple Pay, let’s explore how you can take full control of your form’s design.
The Custom Way — Styling Your Form with CSS
While the built-in settings are great for quick changes, you might want to match your payment form perfectly to your site’s unique brand. That’s where CSS (Cascading Style Sheets) comes in. It’s the language browsers use to style web pages, and you can use it to take full control of your form’s design.
Worried this is getting too technical? Don’t be. For most changes, it’s as simple as copying and pasting a small snippet of text into the right place. I’ll show you exactly how.
The next steps depend on the type of theme you’re using, either a classic theme or a block theme.
Classic themes use the older Customizer tool and often rely on widgets and page templates. Block themes, on the other hand, use the newer Site Editor, which lets you design your whole site with blocks.
Let’s start with classic themes.
Adding Custom CSS to your WordPress Site Using the Customizer Tool
The safest and easiest place to add custom CSS to your WordPress site is the Theme Customizer. This way, your changes won’t be lost when you update your theme.
- From your WordPress dashboard, navigate to Appearance → Customize.
- A new panel will open on the left, showing a live preview of your site on the right.
- Click on the “Additional CSS” tab at the bottom of the panel.
A text box will appear where you can paste the code. For example,
simpay-checkout-btn
{background-color:
#800080!important; /* This is a standard purple *}
This specific code will change the color of the payment buttons on all of your site’s WP Simple Payment forms to purple.
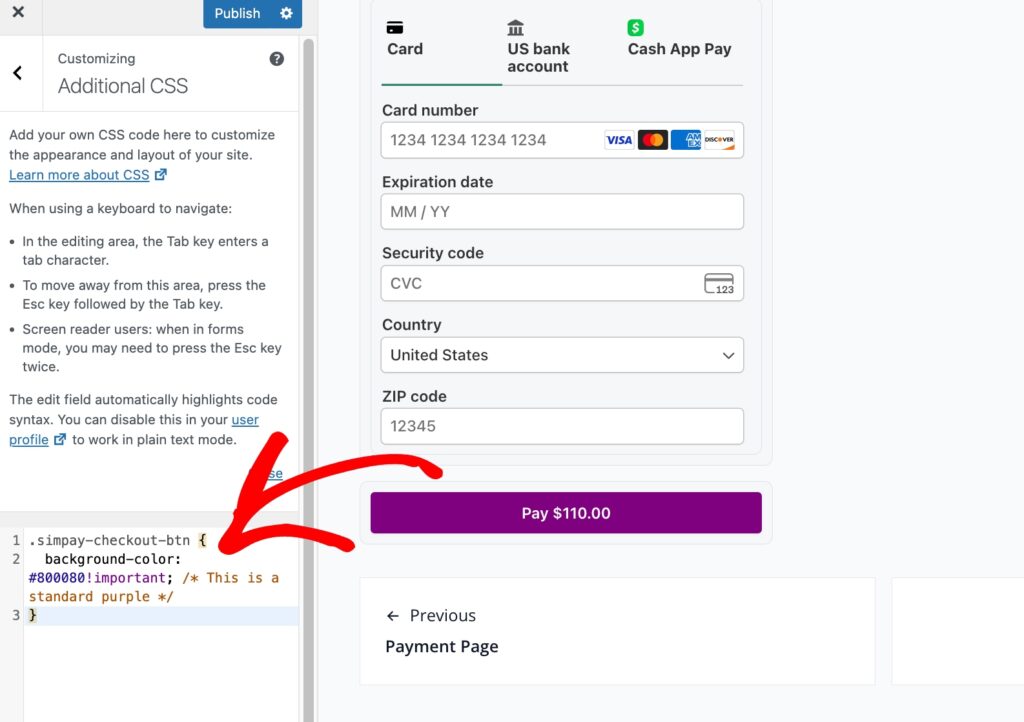
Any CSS code you add here will be applied to your site, allowing you to override your theme’s default styles. As you type, you’ll see a live preview of your changes on the right.
Another example is creating a CSS code recipe for adding a light grey background and rounded corners to the payment form fields. You can paste this directly into the “Additional CSS” box in the WordPress Customizer.
Using AI to Create CSS Recipes
Don’t want to write CSS from scratch? You don’t have to. You can use an AI assistant like Gemini Pro to generate custom recipes for you. Just describe what you want to achieve in plain English. For example, you could ask:
‘Write CSS code to give the WP Simple Pay button a subtle gradient background and make the text bold.’
AI is a powerful partner for creating custom styles, giving you a great starting point that you can then test and tweak on your site.”
Adding Custom CSS Using the Block Editor
If your site is using a block theme, you’ll manage your design using the full Site Editor instead of the Customizer.
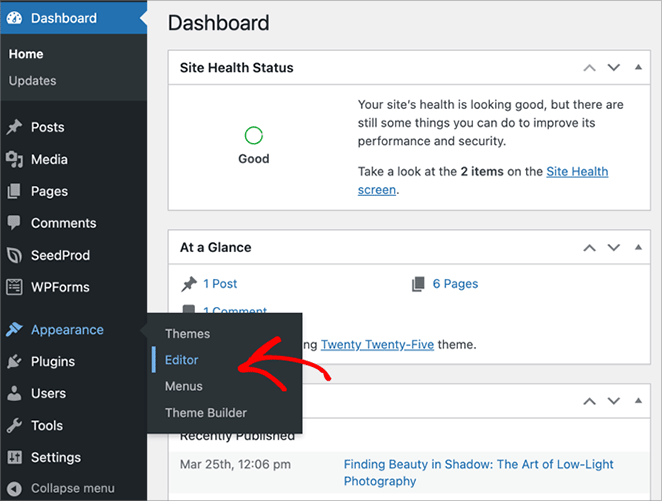
First, go to Appearance → Editor in your WordPress dashboard.
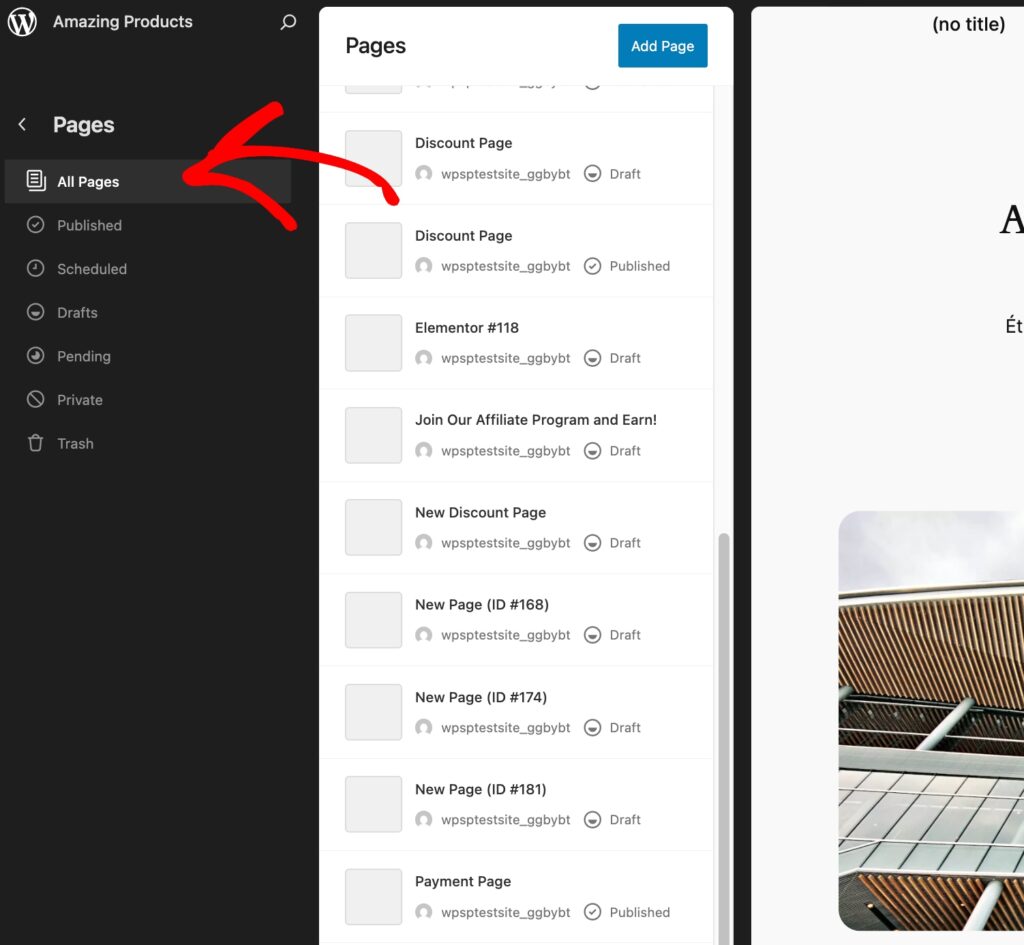
In the left-hand sidebar, click the Pages icon. Then, find the page that hosts the WP Simple Pay payment form.
You’ll now see the WordPress Editor. From the bottom right-hand corner of the screen, click on Additional CSS to bring up the box.
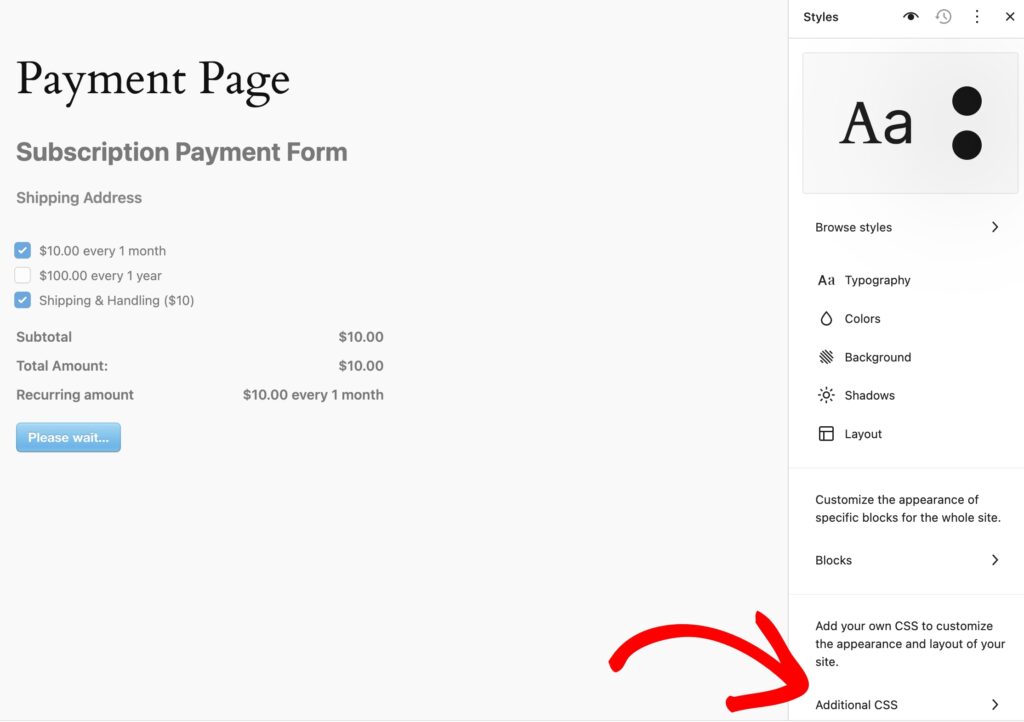
The thing that is nice about using the Block Editor is that it provides a specific place on each page or post to add CSS that will only apply to that single page.
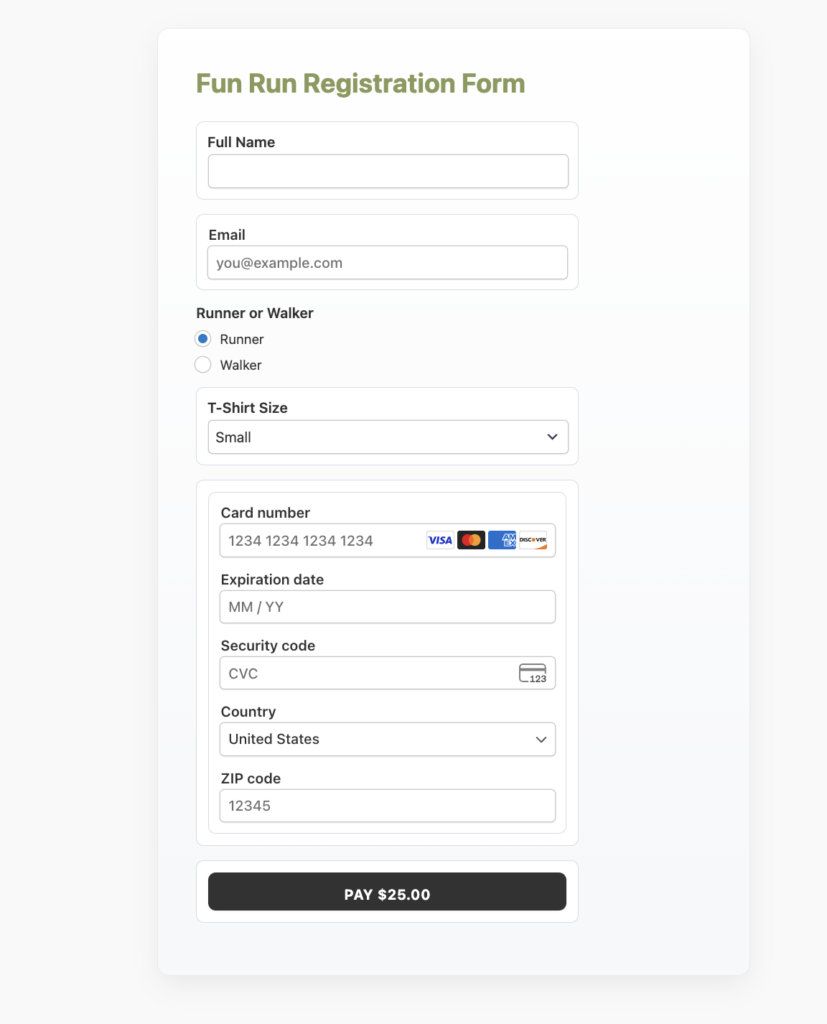
This is great for one-off changes. For example, you can easily change the color of the payment form title.
This is just one way you can use the Block Editor to customize your payment form on your site.
Remember, you don’t have to be a developer or write the code from scratch. Give Gemini Pro a try or choose another AI tool to help you come up with recipes.
Adding Custom CSS with Code Snippets
While the Customizer and the Block Editor are both super handy for quick tweaks, a more powerful and organized approach is to use a dedicated plugin like WPCode, which keeps your styles safe and separate from your theme.
WPCode is a lightweight and free plugin that lets you safely add custom code snippets—like CSS, HTML, or JavaScript—without ever having to edit your theme files directly.
It’s an excellent way to keep your customizations organized and independent from your theme, so you never lose them during an update.
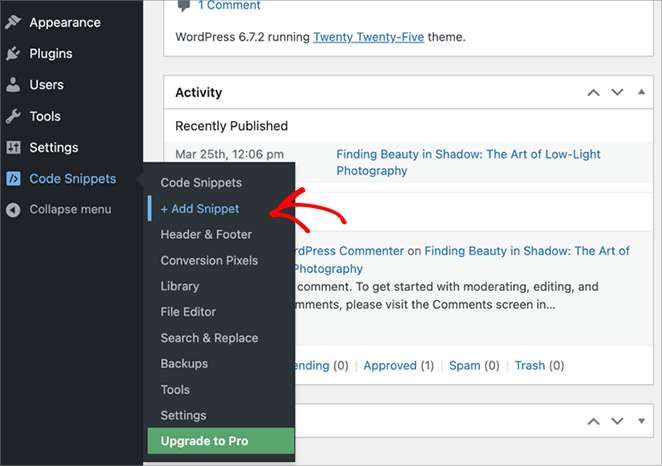
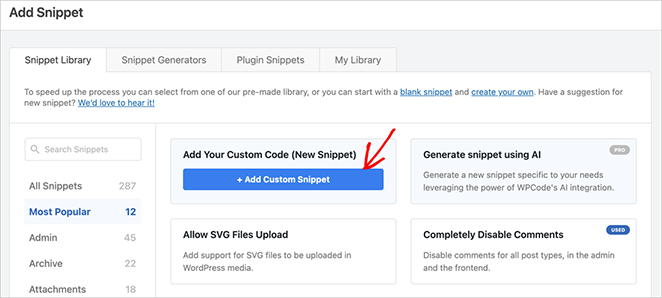
Once you’ve installed and activated WPCode, go to Code Snippets → Add Snippet in your WordPress dashboard.
Click the box that says Add Your Custom Code (New Snippet) and give your snippet a name, like WP Simple Pay Form Styling.
Under Code Type, select CSS Snippet from the dropdown.
Go ahead and paste your CSS into the code box. Then, click Save Snippet and toggle the switch at the top to Active.
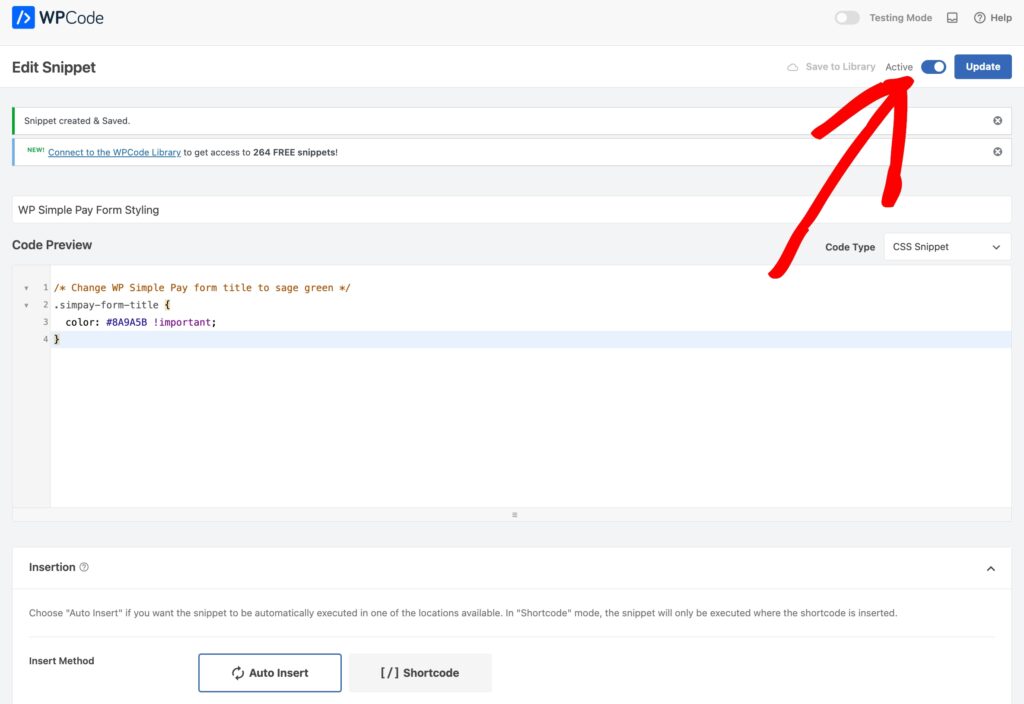
That’s it! Your custom styles are now live across your WP Simple Pay payment forms, and you can come back to this snippet anytime to make changes.
My favorite part about using WPCode is that you can easily experiment and try out different recipes to get your forms to look the way you want. You can use the plugin to apply completely different “themes” to your form with just a copy-and-paste.
Here is one example, but keep in mind that you have the power to create limitless customizations for your forms with WPCode.
The “Modern Floating Card”
This style gives the form a premium feel, making it appear to float off the page with a soft shadow and a subtle gradient background. It’s a very popular look on modern web apps.
What it does:
✅ Uses clean, simple field styles that fit the modern aesthetic.
✅ Wraps the form in a container with rounded corners and a soft shadow.
✅ Applies a gentle, two-tone gray gradient to the background.
Simply copy and paste the provided recipe into the box and click Update.
WPCode does the rest. You can go to the payment page to preview your form.
Ready to Customize Your WordPress Payment Forms?
You are now equipped with all the tools and techniques you need to transform your payment forms.
We’ve journeyed from simple, built-in settings to the powerful and flexible control of custom CSS.
You’ve learned how with a powerful plugin like WPCode you can create a reliable and organized home for all your design tweaks.
If you want to create customized Stripe payment forms for your WordPress site, the best way is to use WP Simple Pay and WPCode.
Do you want more tips on how to create high-converting Stripe payment forms and branded landing pages without code? I recommend the following guides:
- How to Create a Stripe Payments Landing Page in WordPress
- How to Create Perfect Payment Forms in WordPress (9 Easy Tips)
- How to Use Payment Form Templates in WordPress to Boost Sales
- How to Create Per-Form Email Confirmation Messages in WordPress
What are you waiting for? Get started with WP Simple Pay today!
To read more articles like this, follow us on X.
Disclosure: Our content is reader-supported. This means if you click on some of our links, then we may earn a commission. We only recommend products that we believe will add value to our readers.


Leave a Reply