
Fundraising: The Best Way to Boost Contributions With Multiple Causes on a Single Donation Form
Last updated on
 Reviewed By:
 Spencer Finnell
Do you want to maximize donations for your nonprofit, charity, or fundraiser using a donation form with multiple-line item capabilities and support for recurring donations?
Organizations aiming to boost online donations often succeed by providing donors with various donation options on one flexible donation form.
In this article, we’ll show you the best way to create a donation form that lets donors select multiple causes and complete their donations in a single transaction.
Why Offer Multiple Causes on One Donation Form?
When it comes to raising funds for your specific mission, creating multiple causes and options on one donation form is an effective way to simplify the process for donors who want to support several initiatives at once.
Additionally, providing various options on a single donation form strengthens visitors’ emotional connection to their personal interests, significantly increasing the likelihood of earning their contribution and loyalty to your mission.
That said, let’s examine how you can easily create a donation form for your WordPress site that offers limitless opportunities to give.
Creating a Donation Form with Multiple Causes
To create a donation form with multiple causes and donation options, you’ll first need to install a Stripe payments plugin for WordPress that supports multiple prices and causes on one donation form.
With WP Simple Pay, the leading Stripe payments plugin for WordPress, you can effortlessly create donation forms that accept contributions for multiple causes at once.
One of the best parts about the plugin is its ability to offer a wide range of causes on one donation form without distractions, allowing visitors to select exactly where they want their donations to go.
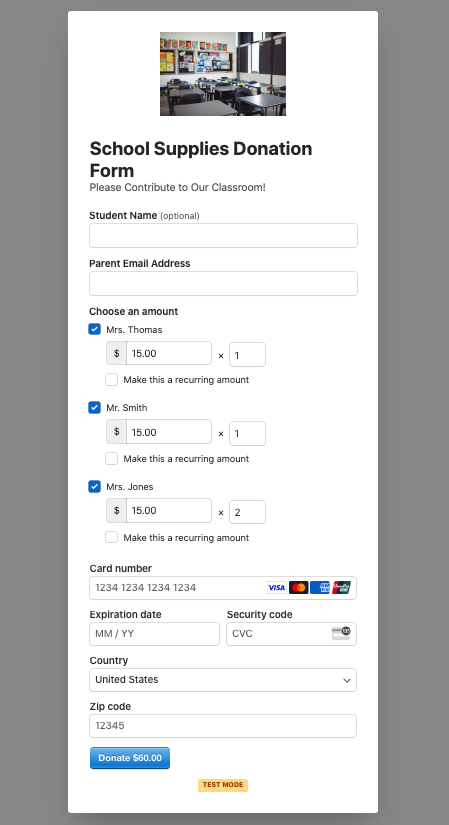
For the purpose of this tutorial, we’ll create a donation form like the one below. While this is specific to school classroom donations, you can tailor your donation form to meet your needs.

Step 1: Install and Activate WP Simple Pay
To get started, the first thing you’ll need to do is install and download WP Simple Pay in WordPress.
Simply visit the pricing page and choose a plan that works for you. Once you’ve completed your purchase, you can find the .Zip file in your email confirmation or from your WP Simple Pay account.
If this is your first time installing a plugin on your WordPress site, you can follow the steps in our step-by-step guide.
Once you’ve installed and activated the plugin, its advanced setup wizard will walk you through connecting your Stripe account. If you don’t have a Stripe account yet, no worries! You can easily create one using the setup wizard.
First, go ahead and click on the Let’s Get Started button.

If you didn’t see the setup wizard, simply head over to WP Simple Pay » Settings » Advanced tab and click the Launch Setup Wizard button.
2: Connect WordPress to Stripe
To connect your WordPress site to Stripe, click on Connect with Stripe.

Next up, enter the email address you use for your Stripe account and connect it to your site. If you don’t have a Stripe account, you can easily create one by entering your email address and completing the registration.
Upon completing this process, you’ll be shown a success page that says, “Setup Complete.” Next, click on Create a Payment Form.

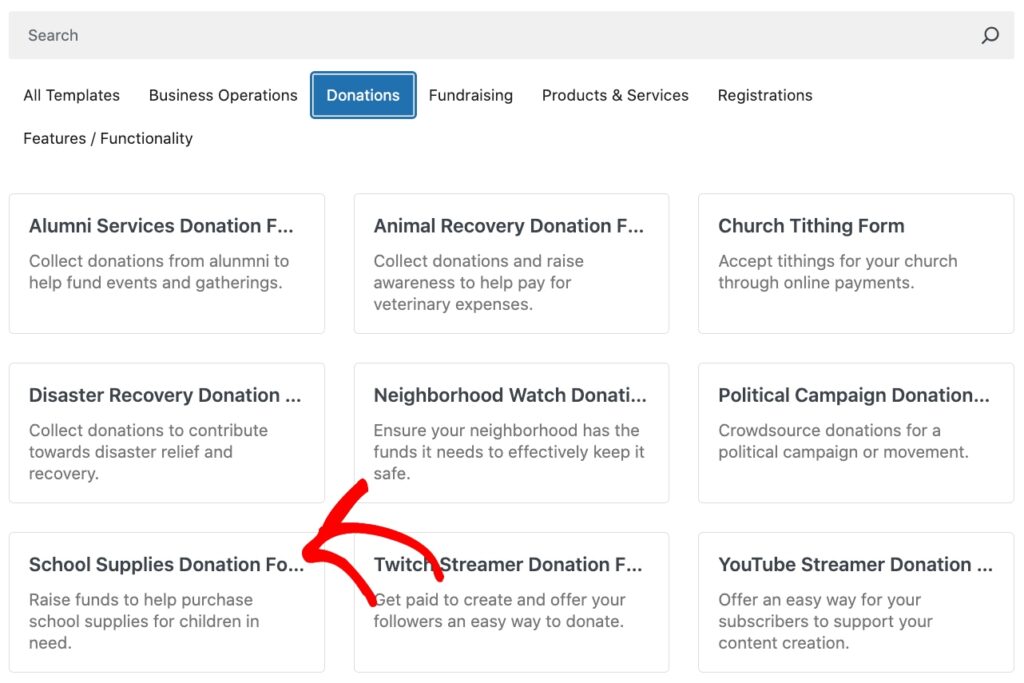
Once you are on the payment form templates library page, you can choose from several different pre-built forms.
For the purpose of this tutorial, choose the School Supplies Donation Form.
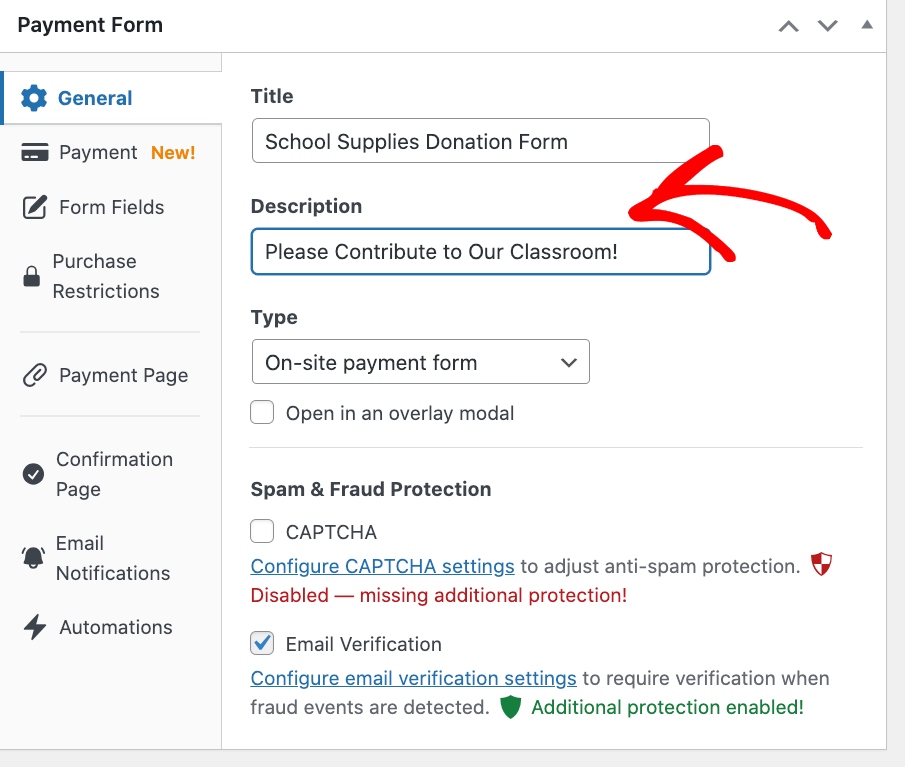
Next, in the General tab, enter the title and description of your donation form. Also, be sure to keep On-site payment form selected for the form Type. This ensures that your donors won’t need to leave your site to complete their donation.
Once you’ve customized the title and description, click on the Payment tab. Here, you can really get creative with donation opportunities.
First, be sure to check the box next to Allow purchasing multiple price options.
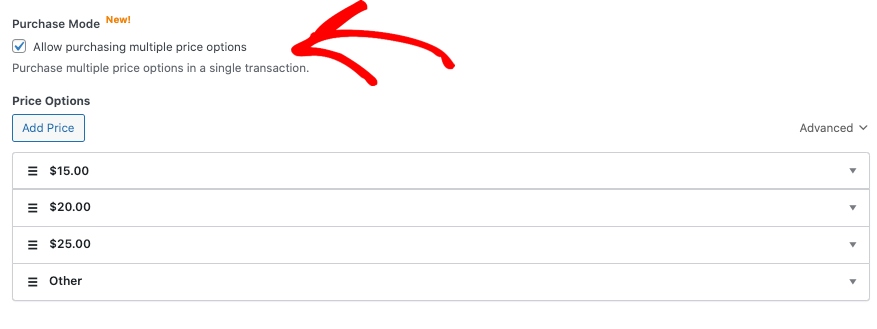
You’ll notice that several price options are already set up on your form. Feel free to customize the price amounts by removing the ones you don’t want to offer. You can easily add new price amounts by clicking on the Add Price button.
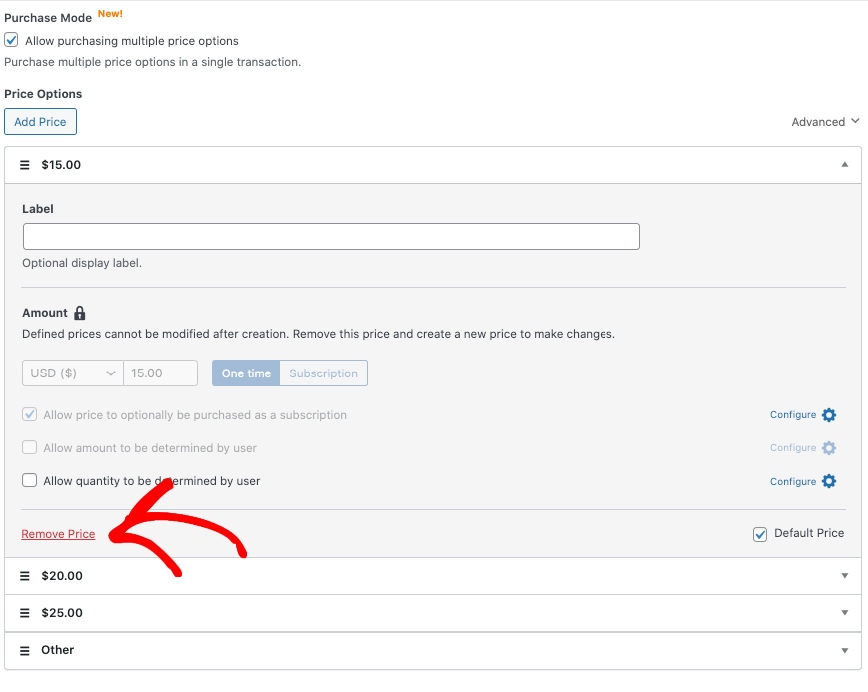
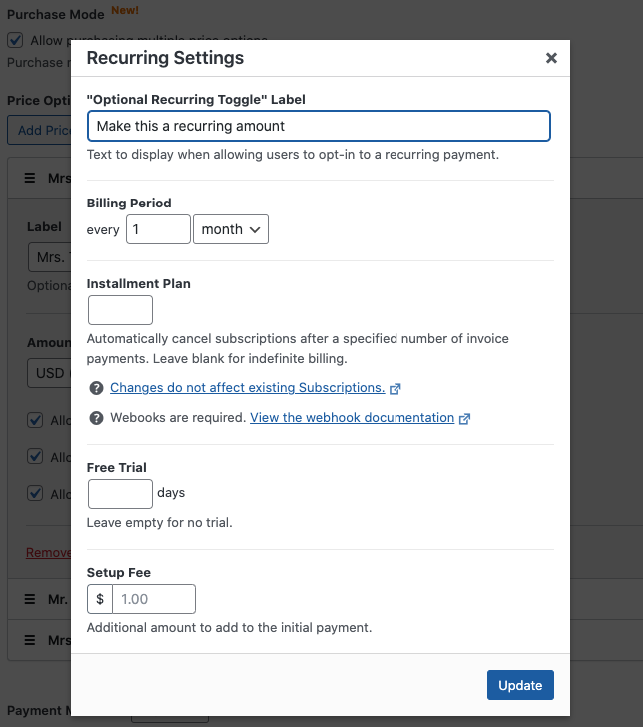
You can also allow donors to sign up for recurring donations to ensure that you consistently receive funds for your organization. Simply keep the box checked next to Allow price to optionally be purchased as a subscription. You can configure the recurring donations settings by clicking on the Configure icon.
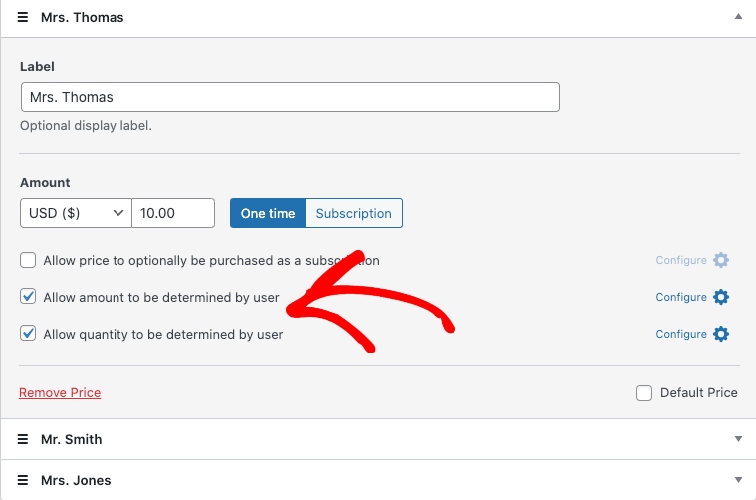
Next, be sure to check the boxes next to Allow amount to be determined by user and Allow quantity to be determined by user for each one of the price options.
Once you’ve finished configuring the donation price amounts and choosing the payment method options you want to offer donors, click on the Form Fields tab.
Here is where you can customize and arrange the fields on your form.
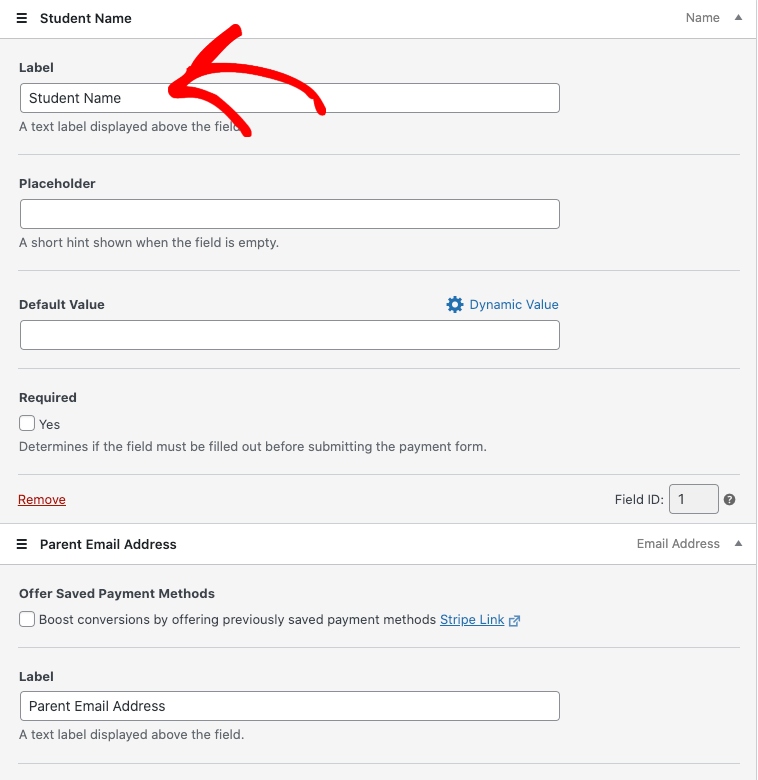
First, you’ll need to click on each field option and enter your custom labels. In this case, we’re naming the Name field “Student Name” and the Email Address field “Parent Email Address.”
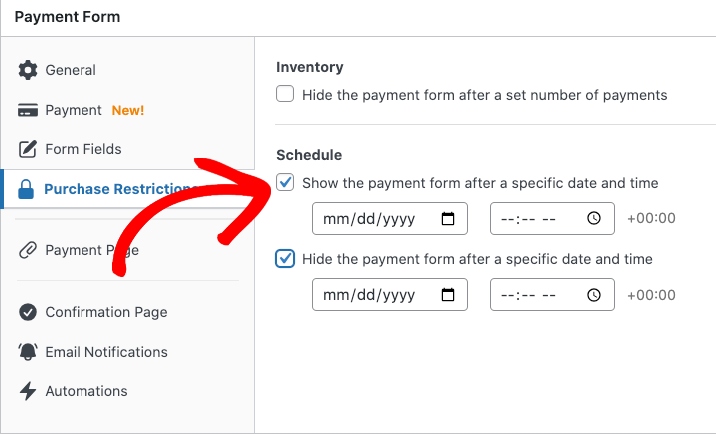
Next, feel free to configure Purchase Restrictions. These are great for time-sensitive fundraising events. You can schedule when the form begins and stops accepting donations.
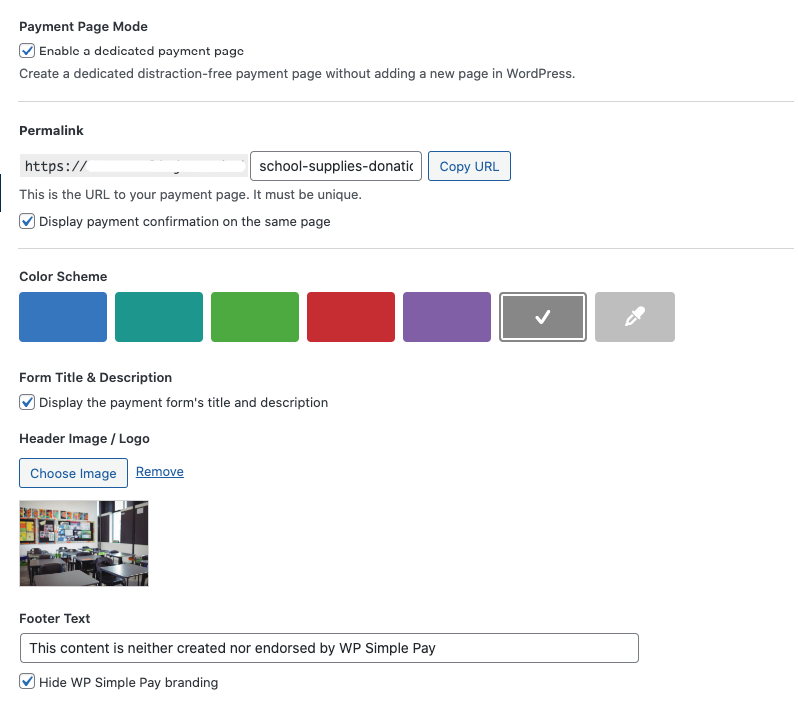
Next, if you’d like to publish your donation form on a dedicated payment page, click on the Payment Page tab and customize it. This will allow you to host the donation form on a distraction-free page that is easily shareable.
Publish Your Donation Form
Now that you’ve created your donation form with multiple donation opportunities and quantity options, it’s time to publish it on your site.
To embed the form, simply go to the post or page where you want to publish it and click on the + icon to add the WP Simple Pay block. Then, choose the form you just created and click Publish or Update.

Be sure to test your donation form. It should look similar to the one below:
There you have it! We hope this article has helped you learn how to boost donations by creating a form with multiple contribution choices and quantities.
If you liked this article, you might also want to check out our guide on how to maximize donations with easy online giving.
What are you waiting for? Get started with WP Simple Pay today!
To read more articles like this, follow us on X.
Disclosure: Our content is reader-supported. This means if you click on some of our links, then we may earn a commission. We only recommend products that we believe will add value to our readers.


Leave a Reply