
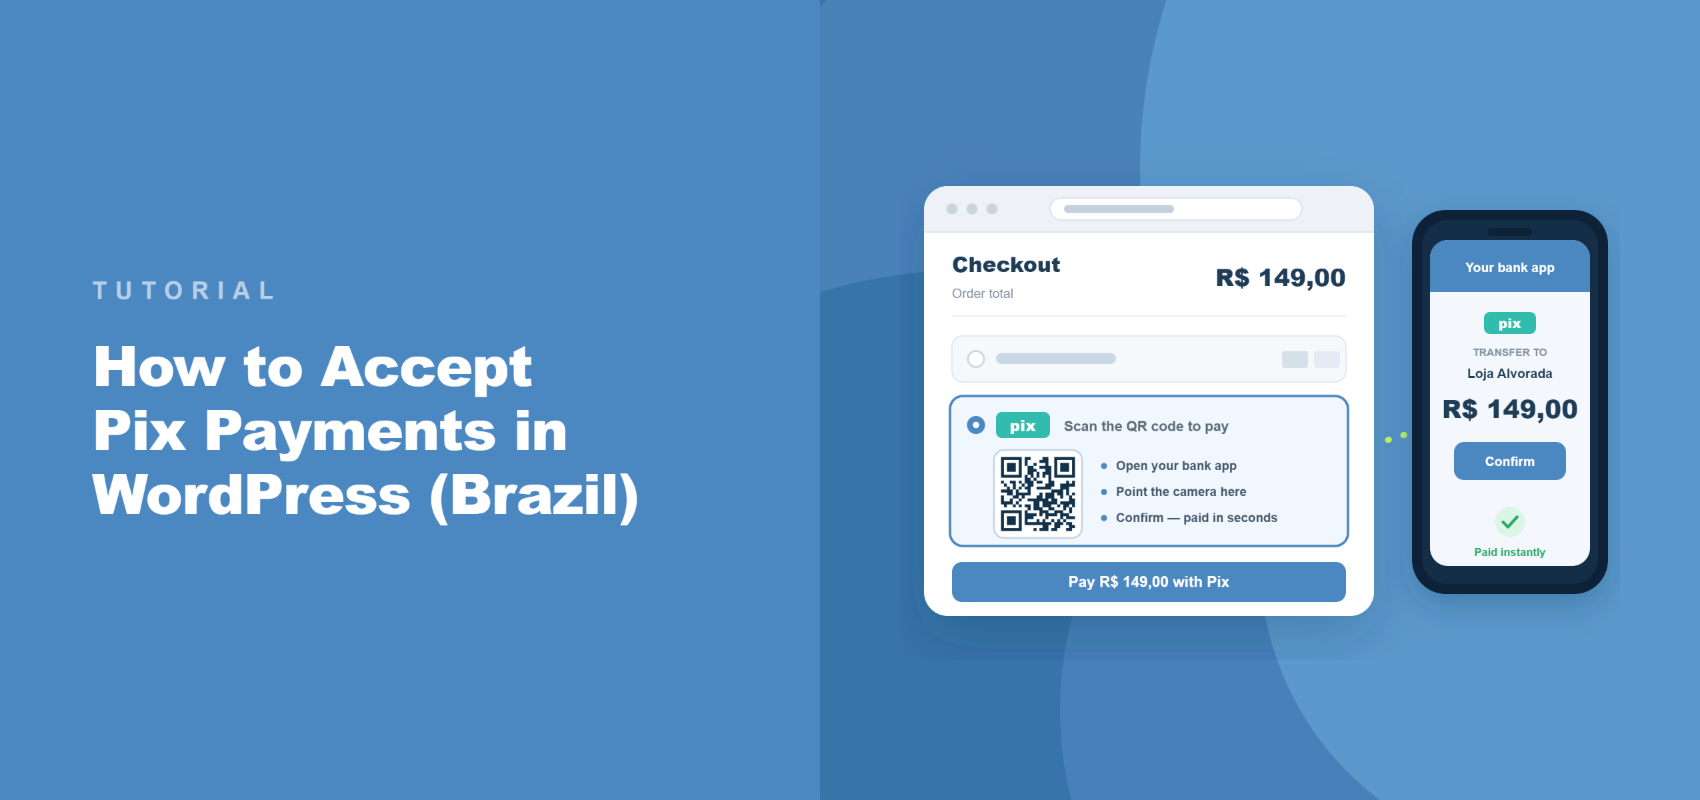
Cum să accepți plăți Pix în WordPress (Brazilia)
Ultima actualizare la

Ca proprietar al unui site WordPress, doriți să permiteți clienților din toate regiunile să plătească prin metoda lor de plată preferată. Aici intervine oferirea opțiunii de plată Pix utilizatorilor brazilieni, care vă poate crește exponențial conversiile.
Pix este o opțiune de plată populară, administrată de Banca Centrală a Braziliei. Mulți cumpărători brazilieni apelează la Pix, sistemul instant de transfer bancar al țării, înainte de a folosi un card. Este utilizat pentru achiziții zilnice, atât online, cât și în persoană.
Și acum puteți accepta cu ușurință plăți Pix pe site-ul dvs. datorită WP Simple Pay, pluginul #1 pentru plăți Stripe pentru WordPress.
În acest articol, vă vom arăta cum să acceptați plăți Pix în WordPress.
Ce este Pix?
Pix este sistemul de plată instant din Brazilia, creat și administrat de Banca Centrală a Braziliei. Transferă bani direct între conturi bancare în timp real, în orice zi a săptămânii, fără ca un număr de card să fie transferat.
Clienții plătesc scanând un cod QR sau copiind o cheie de plată din aplicația lor bancară. Nu există carduri de introdus și nici așteptare pentru confirmarea unui transfer bancar.
Clienții brazilieni de pe un formular de abonament trebuie totuși să plătească cu cardul. Ghidul nostru despre acceptarea plăților recurente prin WordPress acoperă această configurare.
Un lucru important de reținut este că Pix este, deocamdată, doar pentru Brazilia. Contul Stripe conectat trebuie să fie înregistrat în Brazilia, iar prețul formularului specific trebuie să fie stabilit în Real brazilian (BRL).
Deci, de ce ar trebui să adăugați Pix ca opțiune de plată pe site-ul dvs.?
De ce să acceptați plăți Pix în WordPress
Am observat că proprietarii de site-uri care vând în Brazilia presupun adesea că un câmp pentru card acoperă pe toată lumea. Iată câteva motive pentru care această presupunere vă costă vânzări:
- Ajungeți la cumpărătorii care renunță complet la carduri. Adoptarea largă a Pix în Brazilia înseamnă că un checkout bazat doar pe carduri respinge în tăcere o mare parte dintre cumpărătorii locali.
- Fiți plătit în timp real. Pix se decontează imediat ce clientul confirmă, în loc să așteptați autorizarea cardului sau transferul bancar.
- Reduceți fricțiunea pe mobil. Scanarea unui cod QR este mai rapidă decât tastarea unui număr de card de 16 cifre pe tastatura telefonului.
- Funcționează alături de metodele de plată existente. Pix apare lângă Card și orice altă metodă activată pe un formular cu preț în BRL, deci nu este nevoie să eliminați nimic altceva.
Adăugarea Pix nu necesită modificarea niciunei linii de cod, iar activarea în sine durează aproximativ un minut odată ce formularul este configurat corect. Să vedem cum îl puteți configura în WordPress.
Cum să adăugați plăți Pix în WordPress
Cel mai simplu mod de a face plățile Stripe să funcționeze pe un site WordPress fără un coș de cumpărături este WP Simple Pay.
WP Simple Pay este pluginul #1 pentru plăți Stripe pentru WordPress, de încredere pentru peste 14.000 de clienți și procesând peste 1,1 miliarde de dolari în plăți în fiecare lună. Permite freelancerilor, organizațiilor non-profit și afacerilor mici să accepte plăți unice și recurente direct pe site-ul lor, fără a configura un coș de cumpărături sau a scrie cod.
Pentru proprietarii de site-uri care vând în Brazilia, aceasta include acum Pix, gata de activat din același constructor de formulare utilizat pentru carduri și orice altă metodă de plată.
- 10+ Metode de Plată — Acceptați Card, Pix și alte metode suportate de Stripe, cum ar fi Cash App, din același formular, toate gestionate dintr-un singur loc.
- Constructor de Formulare Drag-and-Drop — Creați un formular de plată personalizat și activați sau dezactivați metodele de plată fără a atinge codul.
- Stripe Connect — Conectați un cont Stripe printr-un expert de configurare ghidat, fără chei API de copiat și lipit.
- Monede Multiple — Stabiliți prețul unui formular specific în BRL sau în oricare dintre cele peste 135 de monede suportate, fără a schimba moneda implicită pentru restul site-ului.
Pix este inclus în fiecare plan WP Simple Pay Pro, dar nu este disponibil în versiunea gratuită Lite.
Acum, să vedem cum puteți folosi WP Simple Pay pentru a accepta plăți Pix în WordPress.
Pasul 1: Instalați și activați WP Simple Pay
Pentru a începe, accesați pagina de prețuri WP Simple Pay și alegeți planul potrivit. Pix este inclus în fiecare plan WP Simple Pay Pro, de la Personal la Elite, deci orice plan plătit îl deblochează.
Eliminați taxa suplimentară de 3%!
Majoritatea pluginurilor Stripe percep o taxă suplimentară de 3% pentru FIECARE tranzacție
…nu și WP Simple Pay Pro!
După înregistrare, accesați tabloul de bord al contului WP Simple Pay și descărcați fișierele pluginului. Apoi, va trebui să încărcați fișierele pluginului pe site-ul dvs. și să instalați pluginul.
Cititorii noi în instalarea pluginurilor pot consulta acest ghid de instalare a unui plugin WordPress pentru o prezentare detaliată a acestui pas.
Expertul de configurare se lansează automat după activare. Puteți face clic pe Să Începem și urma instrucțiunile de pe ecran pentru a începe conectarea unui cont Stripe.
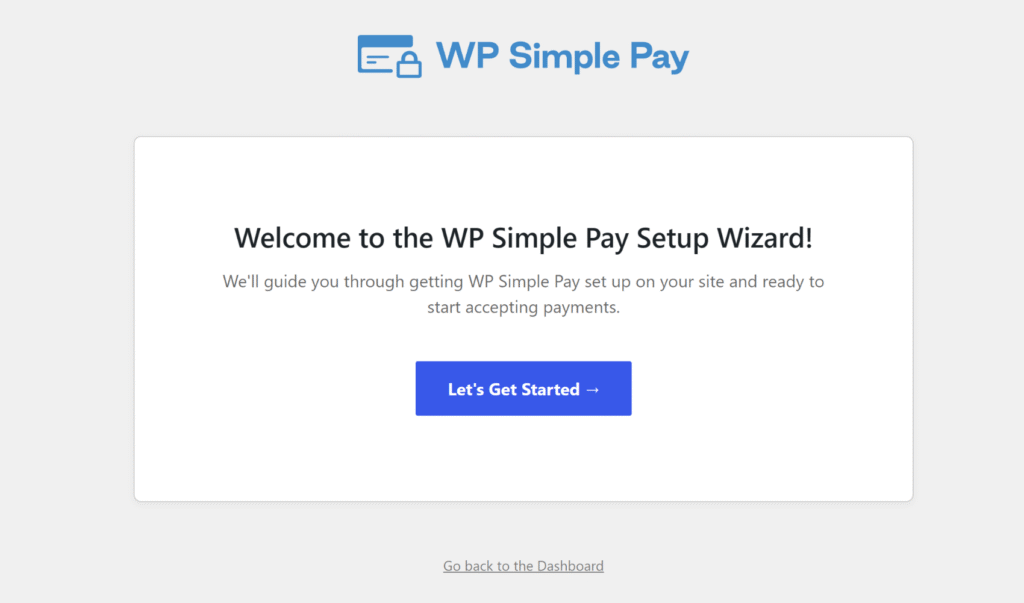
Notă: Dacă expertul de configurare nu apare automat, accesați WP Simple Pay » Setări » General » Avansat și faceți clic pe Lansați Expertul de Configurare.
WP Simple Pay va fi acum instalat și gata. Apoi, îl puteți conecta la un cont Stripe eligibil pentru Pix.
Pasul 2: Conectați WordPress la Stripe
În expertul de configurare, puteți pur și simplu face clic pe Conectați-vă cu Stripe pentru a lega site-ul WordPress de un cont Stripe. Utilizatorii noi pot crea un cont Stripe din aceeași fereastră.
Notă: Pix funcționează doar cu un cont Stripe bazat în Brazilia. Dacă acel cont nu a finalizat încă cerințele de verificare Stripe pentru Brazilia, Pix nu va fi disponibil până atunci, deci merită să consultați ghidul nostru despre finalizarea cerințelor de verificare Stripe pentru Brazilia mai întâi.
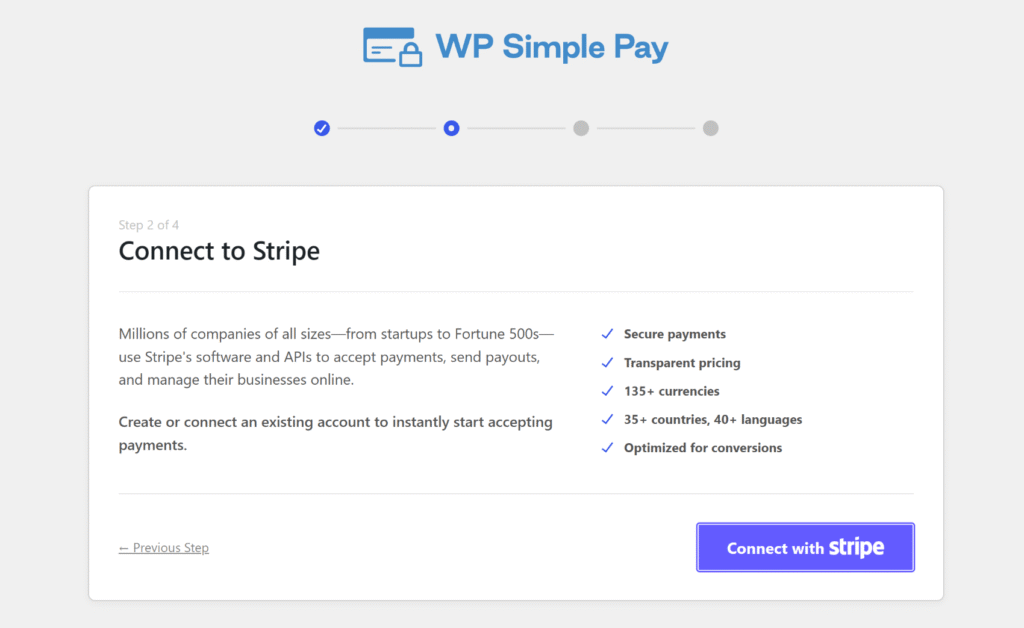
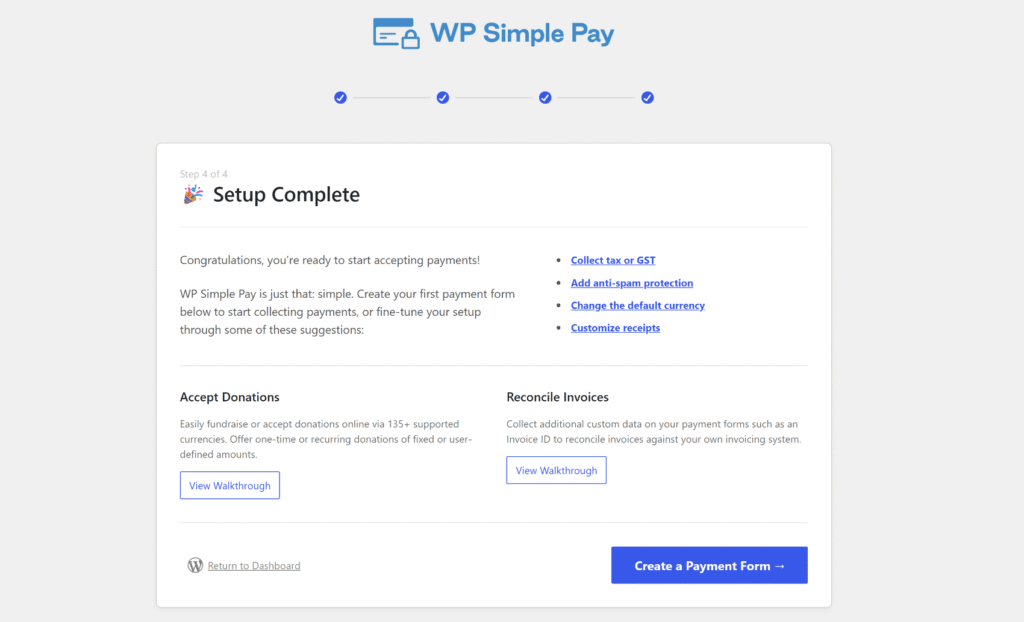
Odată ce configurarea este completă, veți vedea mesajul Configurare Completă în expert.
Pasul 3: Setați Prețul Formularului la BRL
Apoi, puteți accesa WP Simple Pay » Adăugați Formulare de Plată Noi și alegeți un șablon pentru a începe un nou formular de plată.
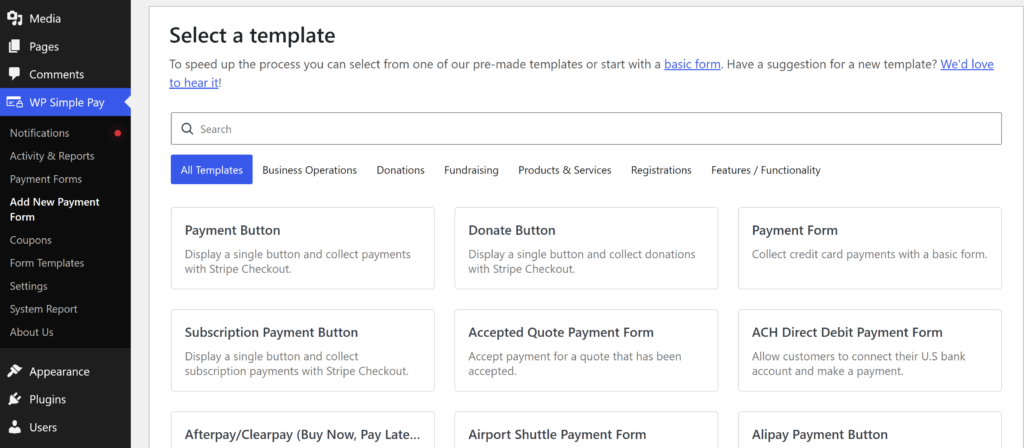
Orice șablon funcționează, deoarece Pix este adăugat ulterior în fila Plată. De exemplu, să selectăm șablonul „Formular de Plată” pentru acest tutorial.
Apoi, puteți accesa fila Plată pentru a selecta moneda și a introduce un preț.
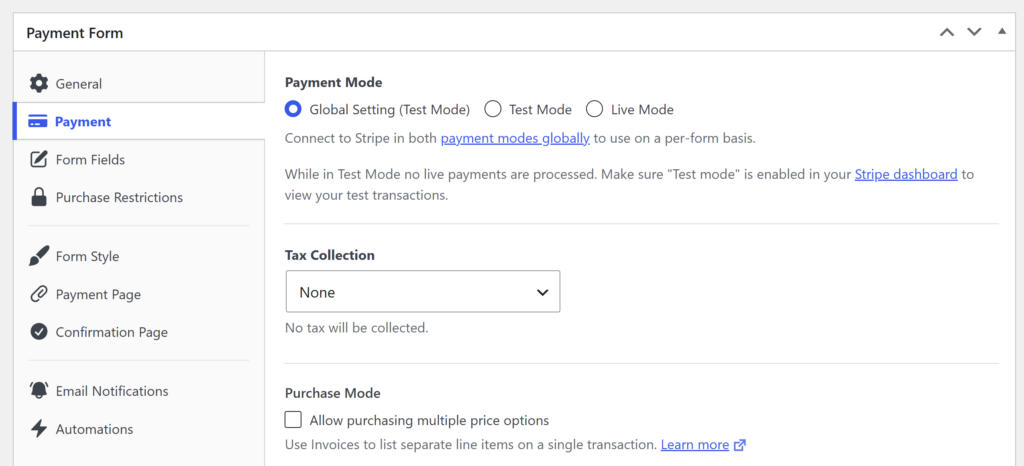
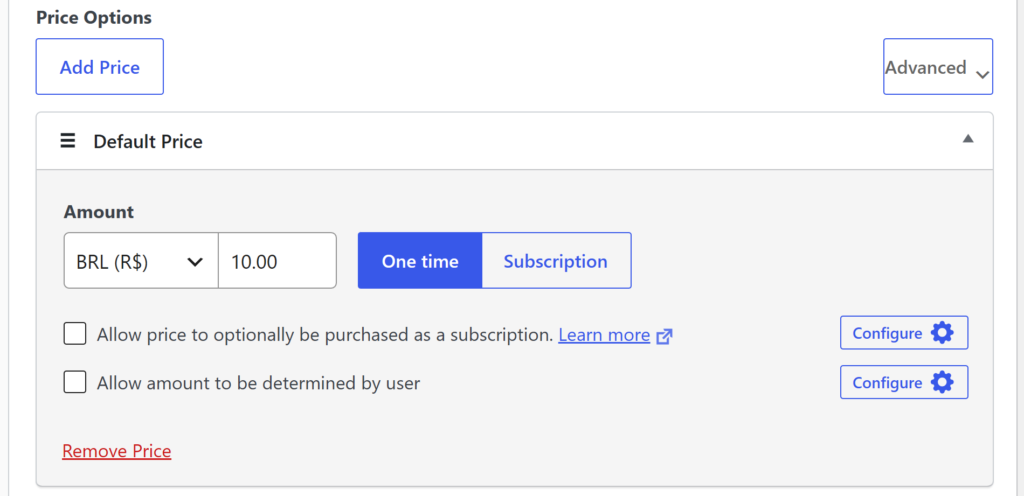
Pur și simplu derulați în jos la secțiunea „Opțiuni de Preț” și apoi adăugați un preț și selectați BRL din meniul derulant al monedei de lângă câmpul sumei.
Acest lucru setează acel formular specific la Real Brazilian, fără a schimba moneda oricărui alt formular de pe site.
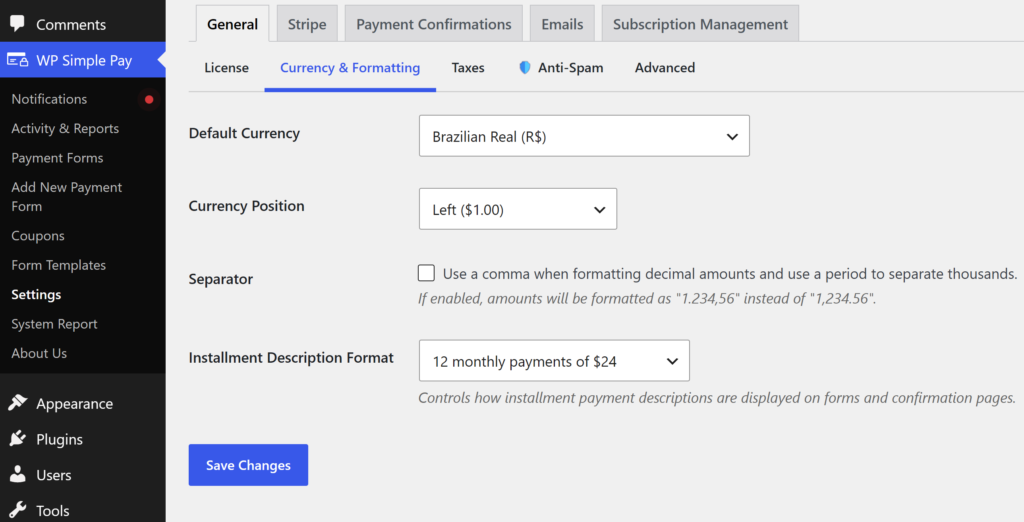
Sfat pro: Vinzi exclusiv în Brazilia? Moneda implicită generală a site-ului poate fi modificată în schimb la WP Simple Pay » Setări » General » Monedă și formatare.
Pasul 4: Activați Pix în fila Plată
Apoi, în fila Plată, derulați în jos la secțiunea metode de plată și apoi schimbați Metodele de plată din „Populare” în „Toate” din meniul derulant din partea de sus.
Aceasta va afișa toate opțiunile de plată pe care le puteți adăuga pe site-ul dvs.
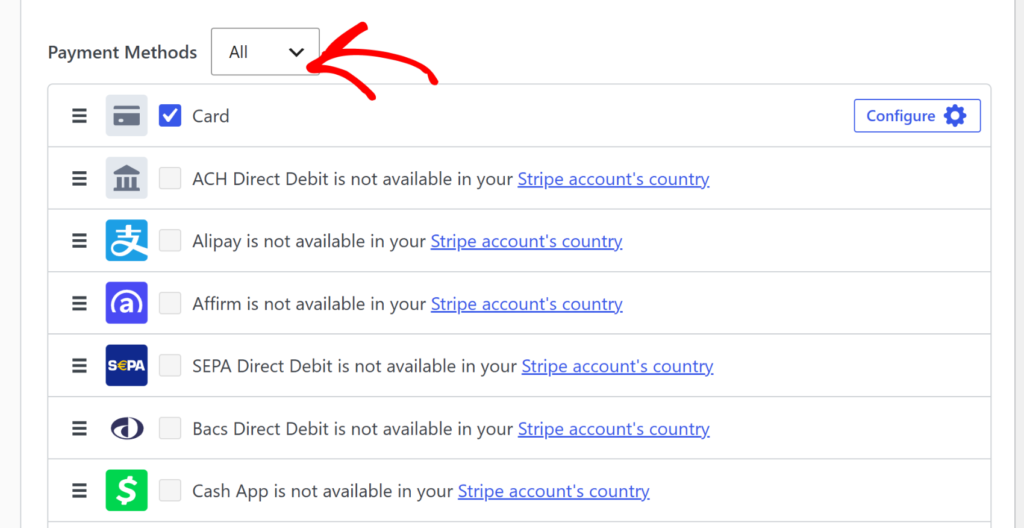
De aici, puteți derula în jos și bifa căsuța de lângă Pix.
Pix este o metodă de plată unică, deci nu va apărea ca opțiune pe un formular configurat pentru abonamente.
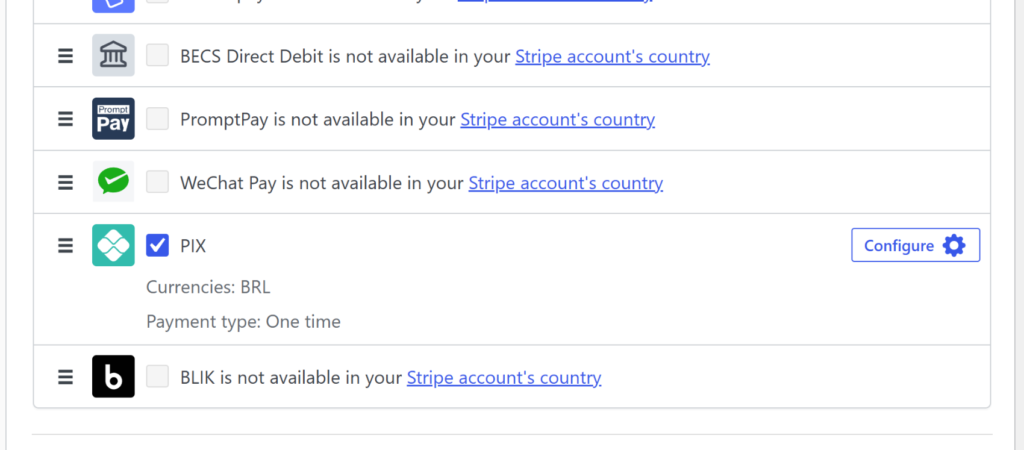
Sfat pro: Dacă Pix nu apare ca opțiune, verificați de două ori dacă contul Stripe conectat este bazat în Brazilia și dacă Pix este activat în setările proprii ale metodelor de plată Stripe.
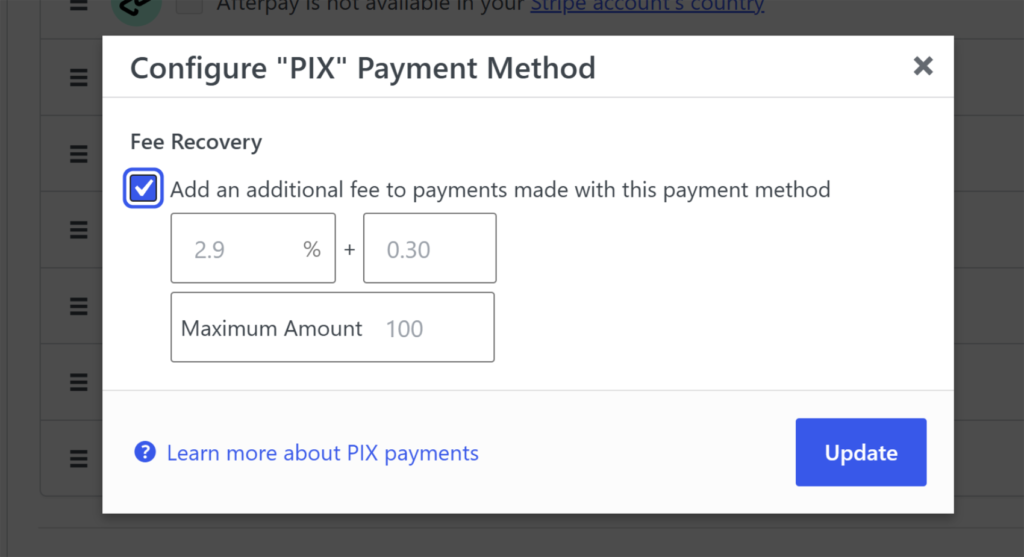
Apoi, puteți face clic pe butonul „Configurare” de sub Pix pentru a adăuga Recuperarea Taxei. Acesta este un pas opțional și puteți sări peste adăugarea Recuperării Taxei.
Pasul final: Testați formularul de plată Pix
Când ați terminat, publicați formularul și încorporați-l pe o pagină folosind blocul WP Simple Pay sau shortcode.
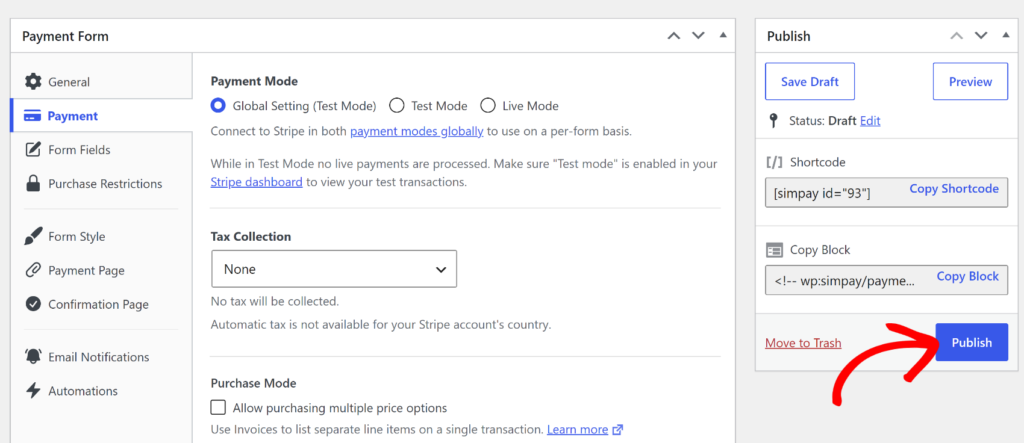
Puteți afla mai multe urmând ghidul nostru despre cum să adăugați un formular de plată în WordPress (6 locații de încorporare).
Apoi, deschideți pagina într-un browser și confirmați că Pix apare ca opțiune de plată lângă Card.
Pur și simplu efectuați o plată de test în modul de testare Stripe, apoi verificați WP Simple Pay » Activitate și rapoarte pentru a confirma că tranzacția apare în jurnalul de tranzacții.
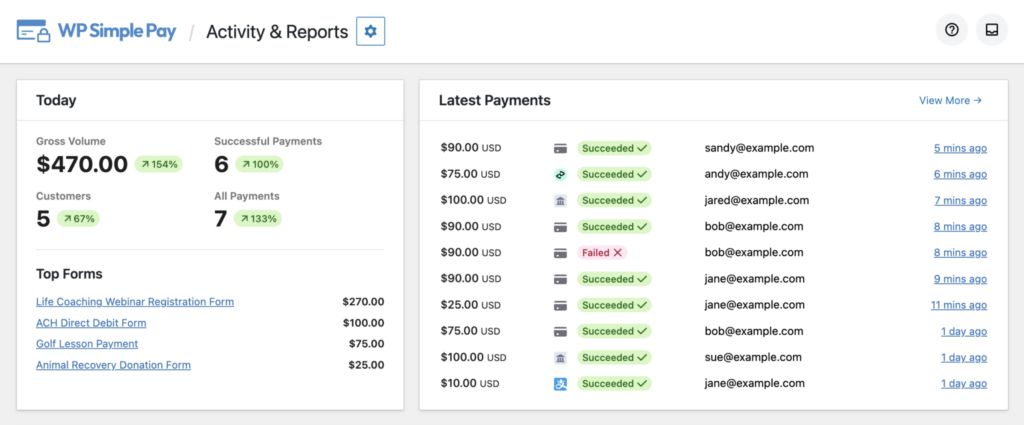
O tranzacție de test completată listată acolo înseamnă că formularul este gata să fie lansat.
Întrebări Frecvente
1. Ce este Pix și cum funcționează în WordPress?
Pix este sistemul de transfer bancar instantaneu din Brazilia, administrat de Banca Centrală a Braziliei. Cu WP Simple Pay, clienții plătesc scanând un cod QR sau copiind o cheie de plată din aplicația lor bancară, iar transferul se finalizează în timp real.
2. WP Simple Pay suportă plăți recurente Pix?
Nu, Pix este o metodă de plată unică în WP Simple Pay, deci nu va apărea pe un formular de abonament sau de facturare recurentă. Clienții brazilieni care folosesc un formular recurent au nevoie de un card sau de o altă metodă de plată care suportă facturare repetată.
3. De ce nu apare Pix ca metodă de plată pe formularul meu?
Pix apare doar atunci când contul Stripe conectat este bazat în Brazilia, cu Pix activat în setările proprii ale metodelor de plată Stripe. Prețul formularului trebuie, de asemenea, să fie setat la BRL folosind meniul derulant pentru monedă din fila Plată.
4. Am nevoie de un cont Stripe brazilian pentru a accepta Pix?
Da, Pix este disponibil doar pentru conturile Stripe înregistrate în Brazilia, deoarece funcționează pe infrastructura de plăți a Băncii Centrale a Braziliei. Un cont Stripe bazat într-o altă țară nu va avea Pix disponibil, indiferent de moneda pe care o folosește formularul.
5. Pot oferi Pix alături de carduri de credit pe același formular?
Da, Pix apare lângă Card și orice alte metode de plată activate pe un formular cu preț în BRL. Clienții brazilieni pot alege oricare opțiune preferă la finalizarea comenzii, fără ca nimic altceva să fie eliminat.
Gata să acceptați plăți Pix?
Pix este acum disponibil în formularul de plată, gata să ofere clienților brazilieni o modalitate mai rapidă de plată decât introducerea numărului cardului. Sperăm că acest articol v-a ajutat să acceptați plăți Pix în WordPress cu WP Simple Pay.
De asemenea, ați putea dori să consultați ghidurile noastre despre completarea cerințelor de verificare Stripe pentru Brazilia și acceptarea plăților ACH în WordPress.
Ce mai așteptați? Începeți astăzi cu WP Simple Pay!
Pentru a citi mai multe articole ca acesta, urmăriți-ne pe X.
Dezvăluire: Conținutul nostru este susținut de cititori. Acest lucru înseamnă că dacă faceți clic pe unele dintre linkurile noastre, este posibil să câștigăm un comision. Recomandăm doar produse despre care credem că vor adăuga valoare cititorilor noștri.

Lasă un răspuns