How to Create Customized Payment Buttons in WordPress
Last updated on
Do you want to create customized payment buttons for your WordPress site?
Using the “Button” block, you can easily edit the appearance of your payment buttons directly in the block editor. This enables you to match your payment buttons with your brand and the overall design of your site while also providing customers with a quick and easy checkout experience.
In this article, we’ll show you step-by-step how to create a customized payment button that allows customers to check out without ever leaving your site.
Customizing Your Payment Buttons
The WordPress block editor allows adding elements like pricing tables, callouts, and buttons to any post or page in WordPress.
If you’re already using WP Simple Pay to accept payments on your site, you can easily integrate your payment forms with these elements. This will allow you to launch overlay payment forms directly on your site or redirect users to an off-site Stripe Checkout form.
To learn more, see our guide: Payment Form Types: Embedded vs. Overlay vs. Stripe Checkout.
Using the “Button” block, you can customize the style and appearance of the payment button, including its width, text, and color options.
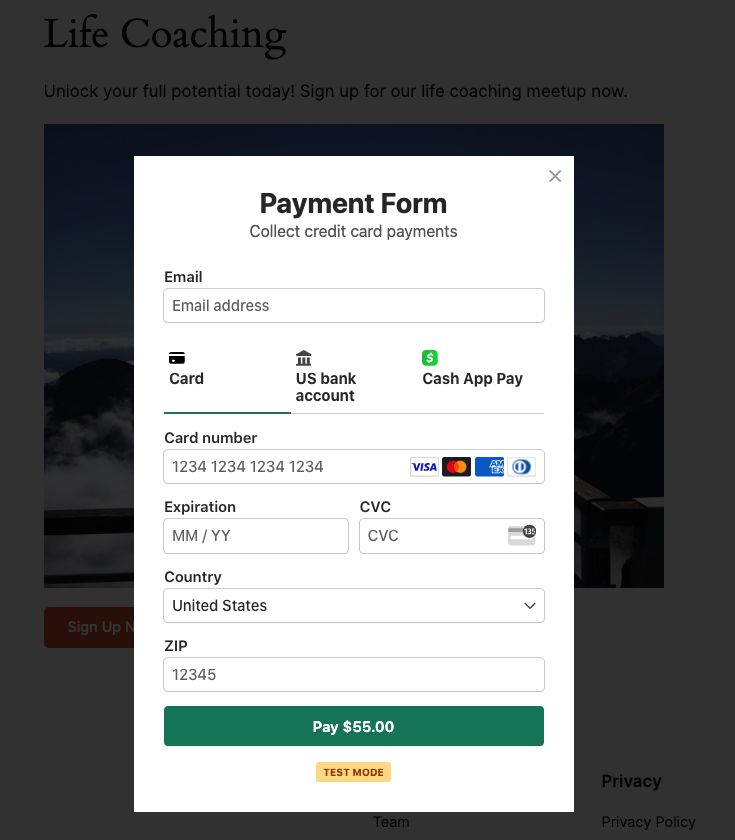
For the purpose of this tutorial, we’ll be creating a styled payment button like the one below.

While you can configure your payment button to launch the payment form on a Stripe-hosted checkout page, this particular example will show you how to launch the form directly on your site. This is a great way to reduce checkout abandonment because it requires fewer steps for your potential customers.
Let’s get started!
Step 1: Create a Payment Form
If you’re already using WP Simple Pay to create payment forms for your WordPress site, you’ll need to create a payment form using the advanced drag-and-drop form builder.
If you haven’t already installed and activated the plugin, simply visit the pricing page, choose the best plan for your specific needs, and activate it on your site.
To learn more, see our step-by-step guide on how to install WP Simple Pay.
Once you’ve finished activating the plugin, its setup wizard will walk you through connecting your Stripe account.
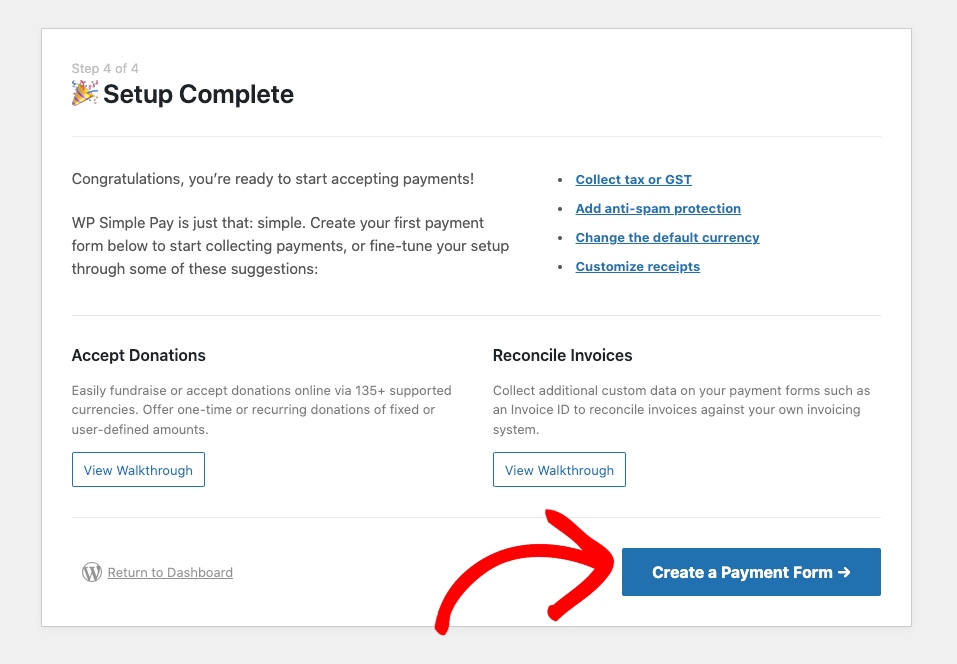
When setup is complete, you’ll see a success page where you can click on Create a Payment Form.
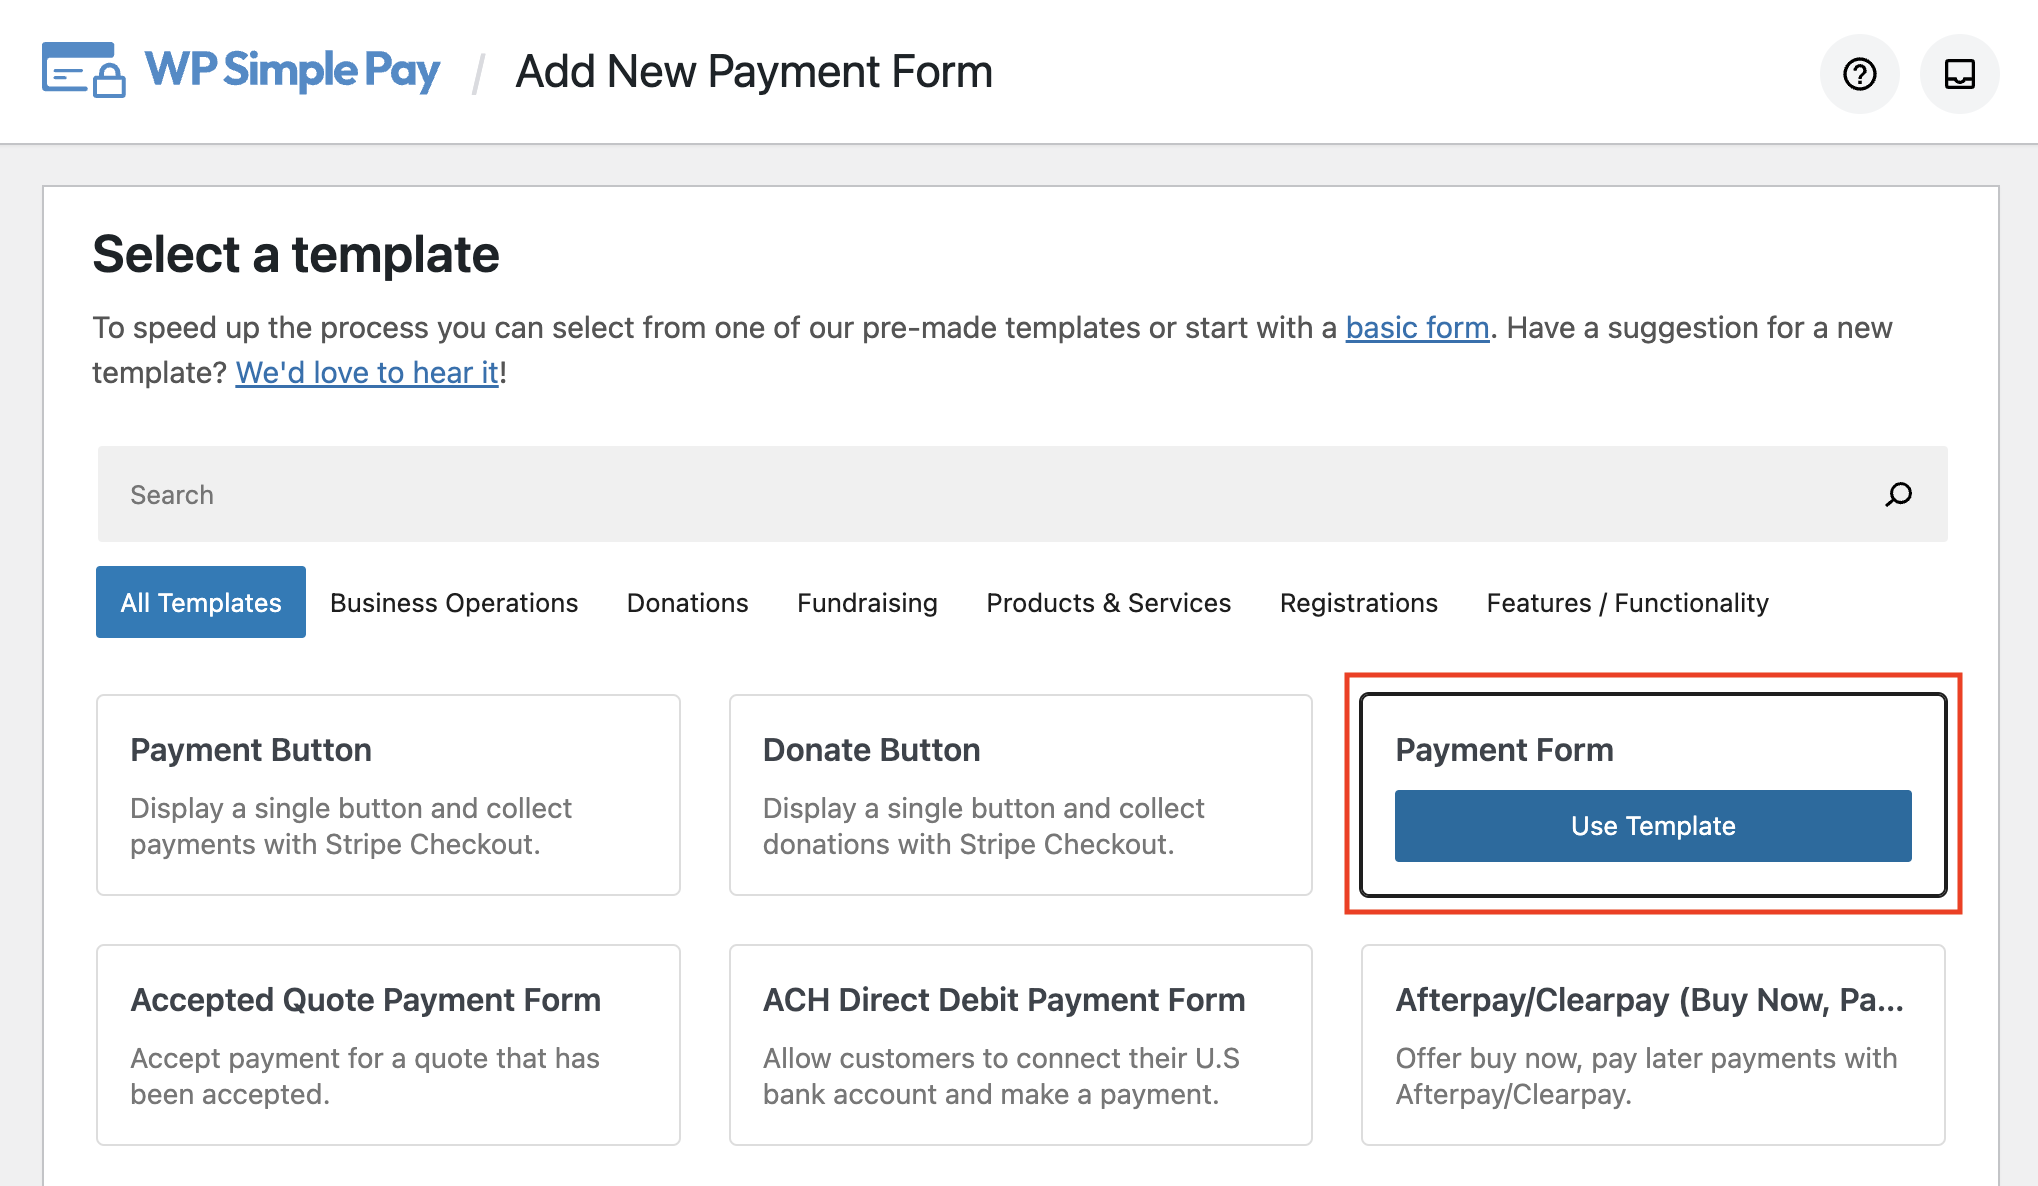
Next, on the payment form templates page, you’ll see several options. Go ahead and choose Payment Form.
In the General tab, be sure to add the title and description of your form. You’ll also need to select On-site payment form for the Type and check the box next to Open in an overlay modal.
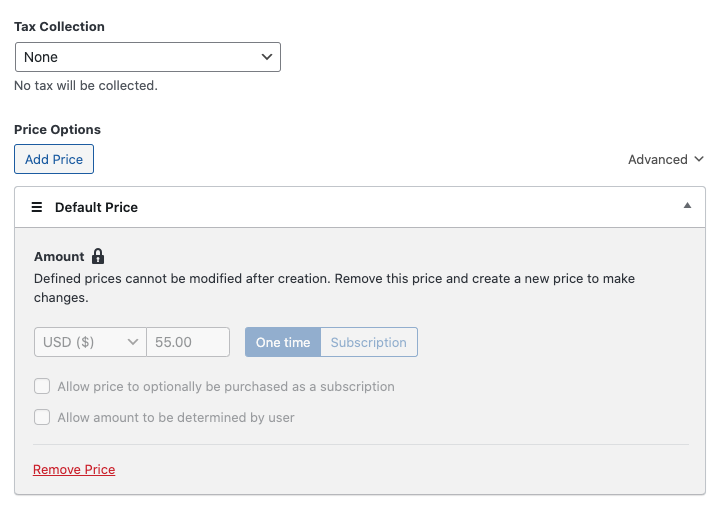
Next, in the Payment tab, add your price amount and select One time. You can also check the boxes next to each of the payment methods you want to offer.
Next, in the Form Fields tab, you can easily add, remove, and edit form fields.
To learn more about customizing your form fields, see our guide on how to collect customer data during checkout in WordPress.
Once you’ve finished configuring your payment form, be sure to click on Publish.
Step 2: Publish Your Payment Form
Now that you’ve finished creating your payment form using WP Simple Pay, you can add it to a page or post on your site.
First, navigate to the page or post that you want your form on.
Next, click on the + icon to bring down the Buttons block.
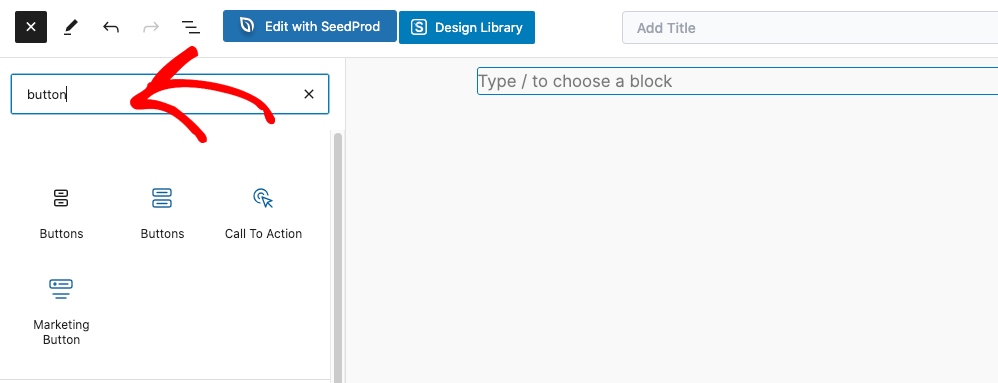
Be sure to choose the first Buttons option from the list. This will allow you to select the payment form you just created from the dropdown menu.
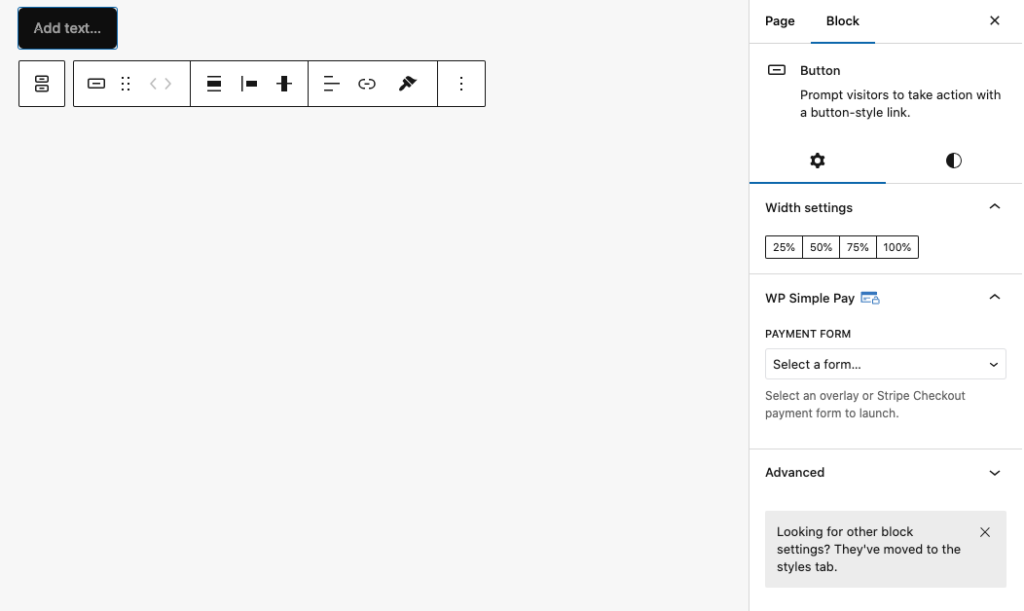
Once your button has been added to the page and you’ve selected the payment form, click on the Styles icon.
Here is where you can change the button’s font, color, typography, and more.
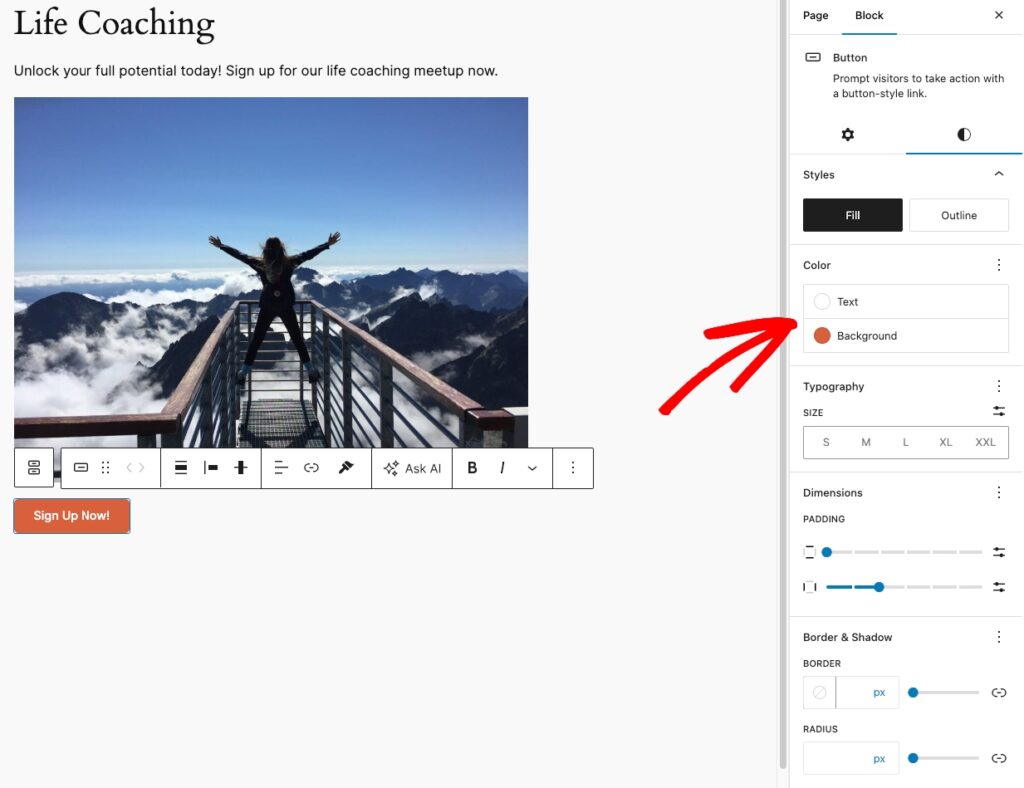
Once you’re happy with the style of the payment button, be sure to click on Save or Update.
When you view your page and test the payment button, it should display as an overlay modal so that your customers can complete their transactions right on the page.
There you have it! We hope this article has helped you learn how to create a customized payment button for your WordPress site.
If you liked this article, you might also want to check out our guide on how to create an overlay payment form in WordPress.
What are you waiting for? Get started with WP Simple Pay today!
To read more articles like this, follow us on X.
Disclosure: Our content is reader-supported. This means if you click on some of our links, then we may earn a commission. We only recommend products that we believe will add value to our readers.


Leave a Reply