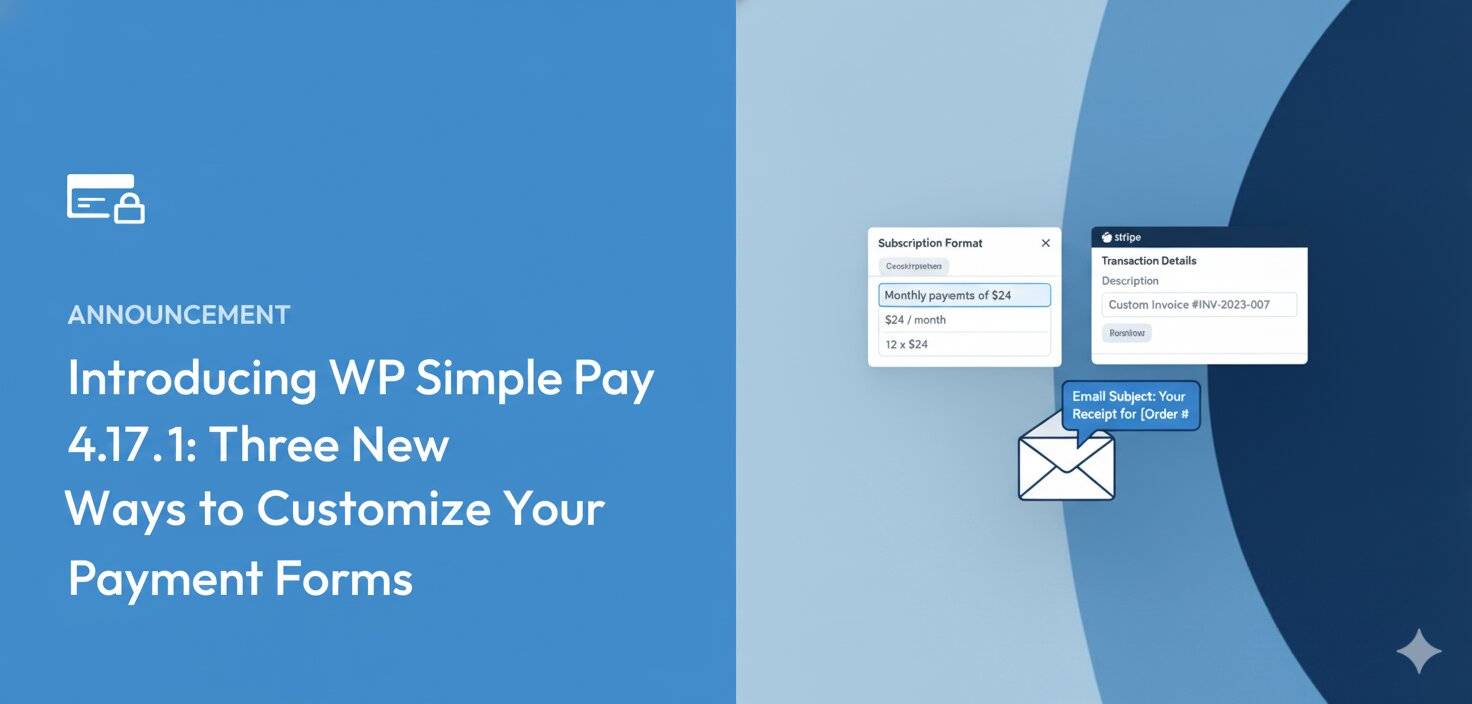
Introducing WP Simple Pay 4.17.1: Three New Ways to Customize Your Payment Forms
Last updated on

If you offer subscriptions or installment plans, you know how important it is for customers to understand exactly what they’re paying for. But until now, the way recurring payment descriptions appeared on your forms, confirmation pages, and emails was one-size-fits-all. Not every business communicates pricing the same way.
With WP Simple Pay 4.17.1, you now have full control over how subscription descriptions appear, what shows up in your Stripe dashboard, and even what subject lines your payment emails use. Let’s take a look at what’s new.
Choose How Recurring Payment Descriptions Appear
When a customer signs up for a subscription or installment plan, they see a description of their payment schedule. Previously, this description used a single hardcoded format that didn’t always read naturally, especially for multi-month billing intervals like “every 3 months.”
Now you can choose from three clear, grammatically correct formats:
- Count + Adjective + Amount (default): “12 monthly payments of $24”
- Amount Per Interval: “$24 per month for 12 payments”
- Amount Every Interval: “$24 every month, 12 payments total”
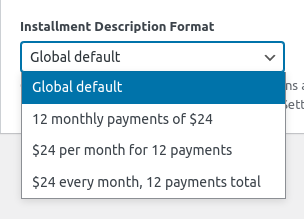
You can set a global default under Settings → General → Currency & Formatting, and override it on individual forms through the Payment Options panel. This means your donation forms can use one style while your course enrollment forms use another.

Descriptions also handle singular and plural intervals correctly in every language, so translators can provide natural-sounding text for both “monthly” and “every 3 months” without awkward workarounds.
Learn more about installment plans
Control What Appears in Your Stripe Dashboard
When you manage payments in Stripe, the transaction description helps you quickly identify what each payment was for. Previously, every transaction used the same auto-generated description.
Now you can choose the transaction description source for each form individually. Your options include:
- Auto (default): Uses the price option label if available, otherwise the form title
- Form Title: Always uses the form’s title
- Form Description: Uses the form’s description field
- Price Option Label: Pulls directly from each price option’s label
- Custom: Enter any text you want
This is especially helpful if you run multiple forms for different products or services. Instead of seeing generic descriptions in Stripe, you’ll see exactly what each payment was for.
Personalize Email Subjects Per Form
Different forms serve different purposes, so why should they all send the same email subject line? With this release, you can now override the global email subject on individual forms for both payment receipts (sent to customers) and payment notifications (sent to you).
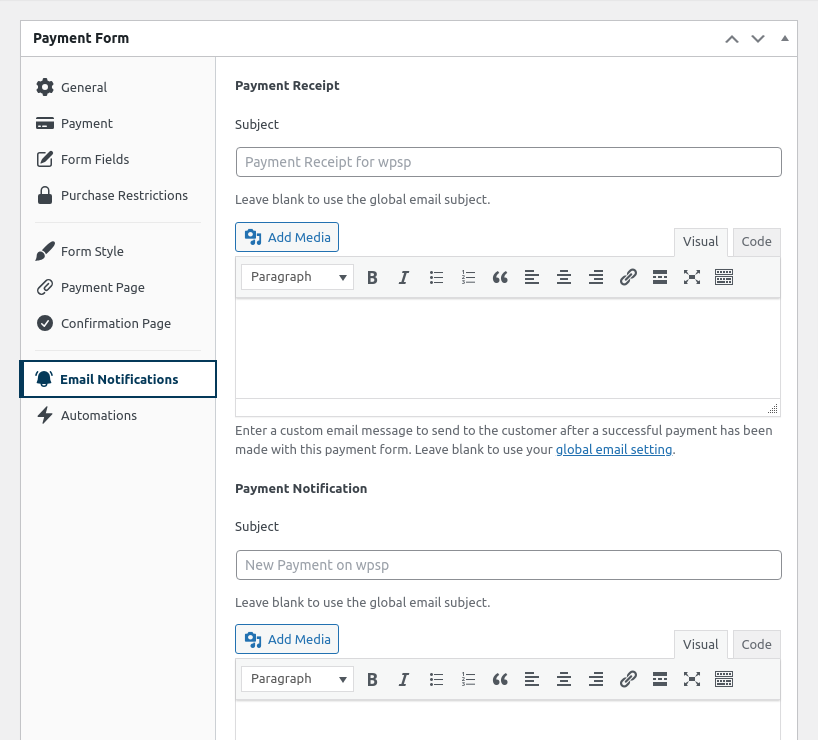
For example, your donation form can send “Thank You for Your Generous Gift” while your course enrollment form sends “Your Course Registration is Confirmed.” Just fill in the subject field on the form’s Notifications panel. Leave it blank to keep using the global default.
Learn more about email settings
Show Customers How They Paid
The new {payment-method} smart tag lets you display the payment method your customer used, such as “Credit Card,” “Bank Account,” or “Klarna,” in confirmation pages and email templates.
This small detail adds a professional touch to your post-payment experience and helps customers quickly confirm their payment went through the way they expected.
More Improvements in This Release
- Faster page loads: Plugin styles and scripts now only load on pages that actually contain a payment form. Stripe.js still loads site-wide for advanced fraud detection, but everything else stays out of the way.
- Cleaner Stripe webhook logs: The webhook endpoint now returns a success response for events from other plugins, so you won’t see unnecessary failure warnings in your Stripe Dashboard.
- Receipt line items match form order: Line items in payment receipts now display in the same order as your price options in the form editor.
- Stripe Link fix: Resolved an issue where a “Bank” tab appeared in the payment form when Stripe Link was enabled.
- Font size fix: Font size settings in the form style editor no longer override your theme’s typography when left empty.
View the full changelog for a complete list of changes.
Start Customizing Your Payment Experience Today
WP Simple Pay 4.17.1 gives you more control over the details that matter: how subscriptions are described, what shows up in Stripe, and how your emails read. These are the kind of small touches that make your payment experience feel polished and professional.
Update to 4.17.1 from your WordPress dashboard today. If you have any questions or run into anything, our support team is here to help.
We’d love to hear what you think, and what you’d like to see next. Drop us a line anytime.
Disclosure: Our content is reader-supported. This means if you click on some of our links, then we may earn a commission. We only recommend products that we believe will add value to our readers.


Leave a Reply