Using Smart Tags For Confirmation Pages and Emails
In This Document
What are Smart Tags?
A Smart Tag is a type of placeholder text that dynamically replaces itself with relevant information about your customers and payments in payment confirmation pages, receipts, and emails.
Smart Tags use curly brackets and look something like this:
{smart-tag}
How can I Use Smart Tags?
Smart Tags can be used on Payment Confirmation pages and WP Simple Pay emails. Click the links for examples of those use cases.
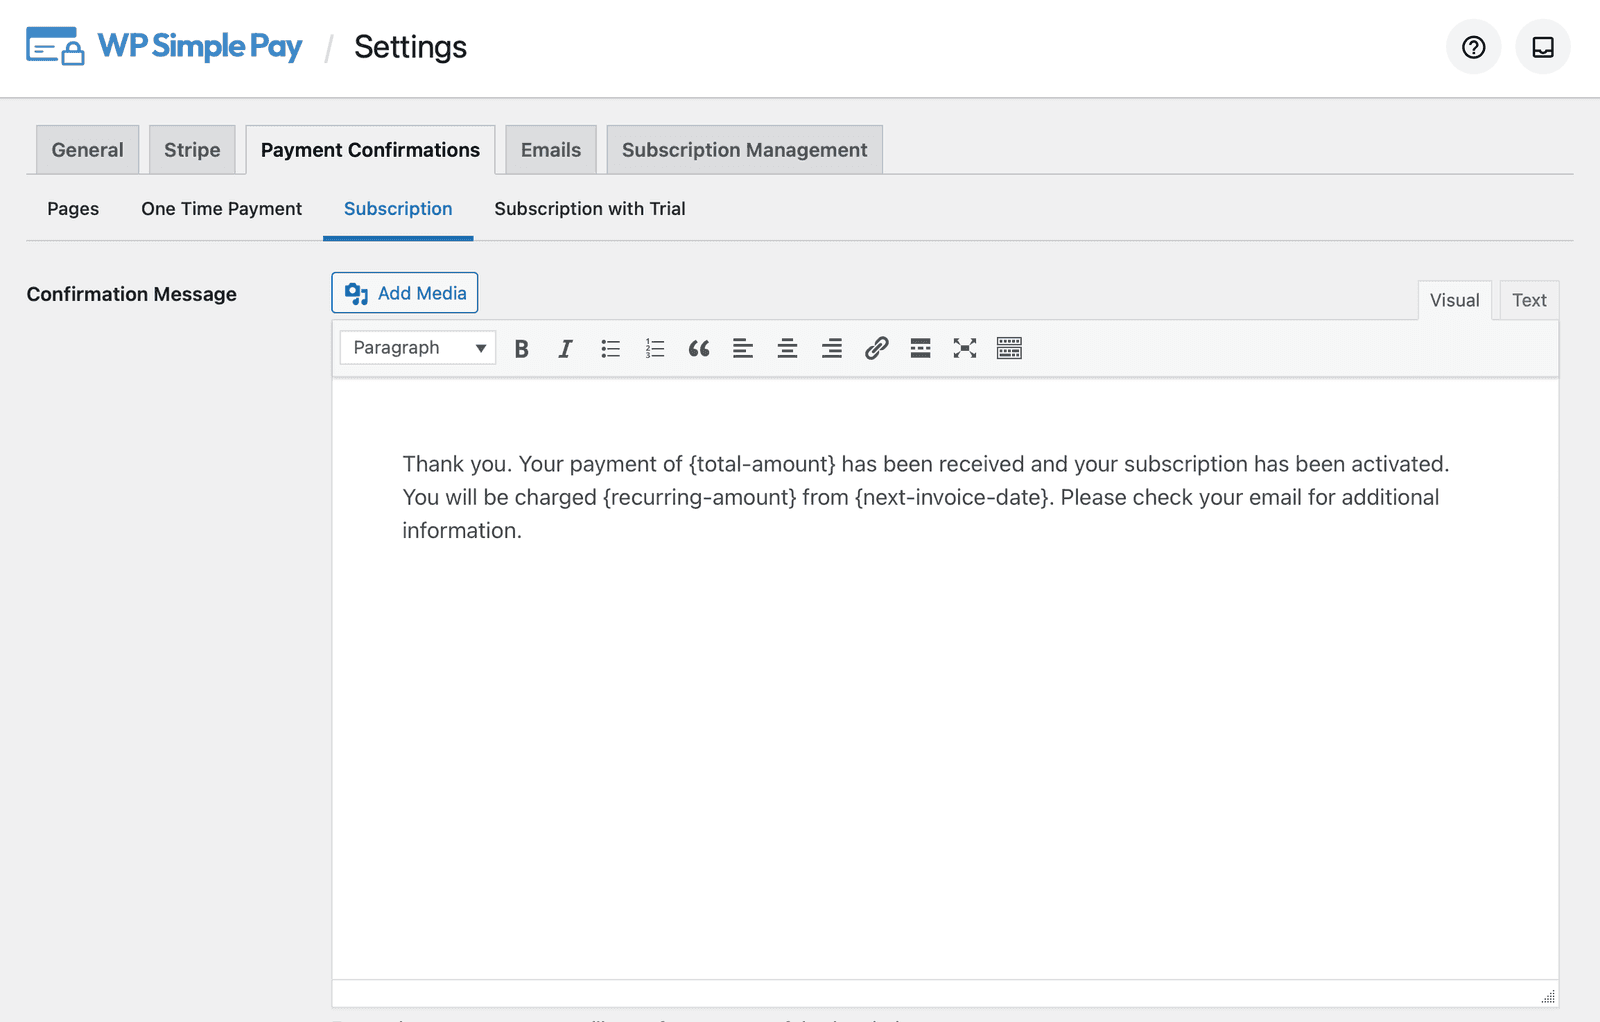
Payment Confirmation Page Example
Below is the default text for the subscription payment confirmation page. Several smart tags are already in use. You can add additional Smart Tags from the smart tag reference list shown further down this document.
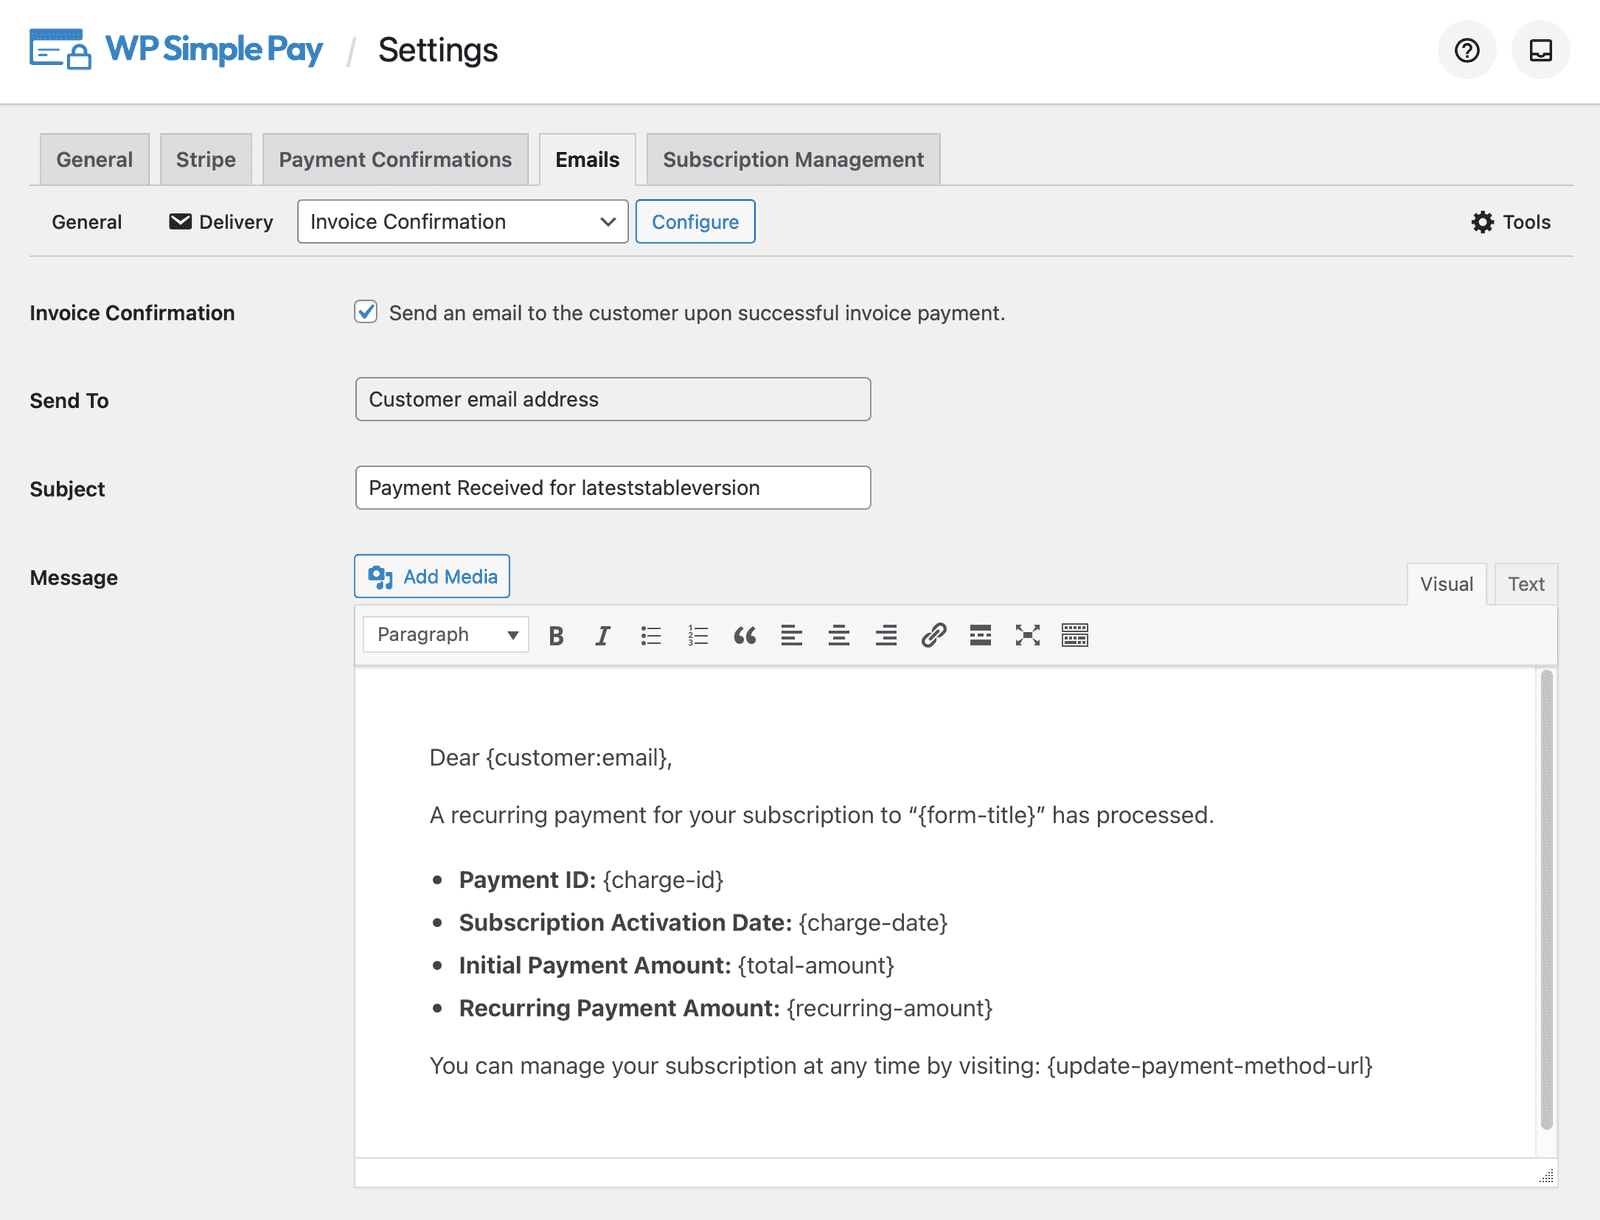
Email Example
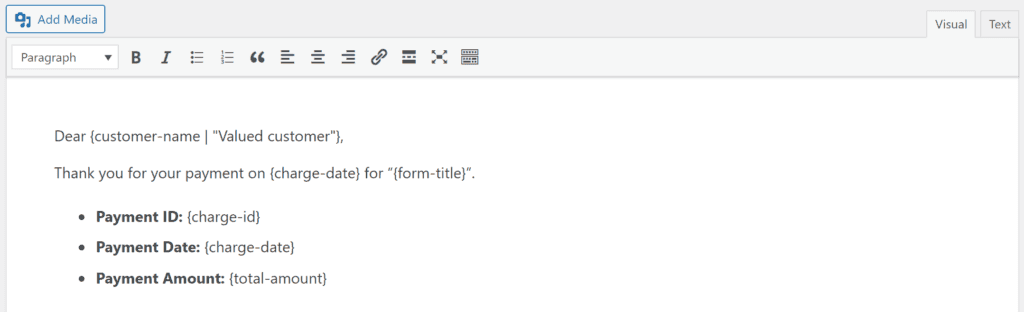
Below, you see the default text for the invoice payment confirmation email. Notice that there are several Smart Tags already in use. You can add additional Smart Tags from the smart tag reference list shown further down this document.
What Smart Tags Are Available?
The following Smart Tags are built into WP Simple Pay to help you customize your payment confirmation pages and emails.
Receipt Tag
{receipt}
Outputs a breakdown of the purchased line items and other relevant amounts that affect the purchase total.
Form Related Smart Tags
{form-title}
The form’s item Title value.
**{form-description}
**The form’s Item Description value.
Customer Related Smart Tags
**{customer-email}
**The email from the Email Address form field
**{customer-name}
**The name from the Name form field
**{customer-tax-id}
**The collected tax ID when using the Tax ID form field.
**{customer-url}
**A direct link to the Customer record in the Stripe Dashboard
Billing Address Smart Tags
These tags pull the billing address that Stripe captured for the payment method. They are available on both Stripe Checkout and on-site (Payment Element) forms. If no billing address was collected, the tag is replaced with an empty value.
{billing-country}
The two-letter country code from the customer’s billing address (for example, US, GB, AU). Available since WP Simple Pay 4.17.2.
{billing-zip}
The postal/ZIP code from the customer’s billing address. Available since WP Simple Pay 4.17.2.
Payment Related Smart Tags (one-time and subscription payments)
**{card-brand}
**The brand of card used. Visa, Amex, etc.
**{card-last4}
**The last four digits of the card used
**{coupon-amount}
**The amount of the coupon applied to the payment
**{custom-fields}
**Outputs all information stored in the Payment’s metadata.
**{charge-date}
**The charge date returned from Stripe.
**{charge-id}
**The charge ID returned from Stripe.
**{fee-recovery-amount}
**The calculated fee recovery amount based on the form total and fee recovery settings
**{payment-type}
**The type of payment (one-time or recurring).
**{payment-url}
**A direct link to the Payment record in the Stripe Dashboard
**{refund-amount}
**The amount of the refund that has been processed
**{refund-date}
**The date that the refund was processed
**{subtotal-amount}
**The amount prior to any discounting or fees
**{tax-amount}
**The calculated tax amount based on the total and tax percentage setting
**{total-amount}
**The total price of the payment.
Subscription Specific Smart Tags
**{recurring-amount}
**The recurring amount to be charged each period of the subscription. Applies to subscriptions without trials only.
**{max-charges}
**The maximum number of charges until the subscription ends if installment plans are set up. Applies to subscriptions without trials only.
**{next-invoice-date}
**The date of the next invoice payment date, based on recurring payment settings.
**{trial-end-date}
**The day the plan’s free trial ends. Applies to subscriptions with trials only.
**{update-payment-method-url}
**A unique URL that can be used by your customers to manage their Subscription.
Creating Advanced and Custom Smart Tags
Advanced Smart Tags
To output additional information related to payments or subscriptions, use the **{payment:key}**, and **{customer:key}** smart tags to access Stripe object data.
You can generate your own Smart Tags to access properties of the Customer, Payment, Subscription, or Invoice records, such as:
For example:
{[payment](https://stripe.com/docs/api/payment_intents/object):currency}{[](https://stripe.com/docs/api/payment_intents/object)`[subscription](https://docs.stripe.com/api/subscriptions/object)`:currency}{[subscription](https://docs.stripe.com/api/subscriptions/object):[latest_invoice](https://docs.stripe.com/api/invoices/object):number}{[customer](https://docs.stripe.com/api/customers/object):address:line1}{[customer](https://docs.stripe.com/api/customers/object):address:line2}{[customer](https://docs.stripe.com/api/customers/object):address:city}{[customer](https://docs.stripe.com/api/customers/object):address:state}{[customer](https://docs.stripe.com/api/customers/object):address:postal_code}{[customer](https://docs.stripe.com/api/customers/object):phone}{[customer](https://docs.stripe.com/api/customers/object):shipping:address:line1}{[customer](https://docs.stripe.com/api/customers/object):shipping:address:line2}{[customer](https://docs.stripe.com/api/customers/object):shipping:`address:`city}{[customer](https://docs.stripe.com/api/customers/object):shipping:`address:state`}{[customer](https://docs.stripe.com/api/customers/object):shipping:`address:postal_code`}
Not all nested objects are expanded or available.
Using these custom smart tags, you can create more personal and flexible payment confirmation pages and emails.
Custom Smart Tags
If you use our custom form fields to collect user data, you may wish to use that data for other purposes. Below, you will see how to collect custom form field data, use it in your payment confirmation pages and various emails, and record it in the Stripe Dashboard.
When adding a custom field, enter the label you want to show in the Stripe dashboard into the Stripe Metadata Label area.
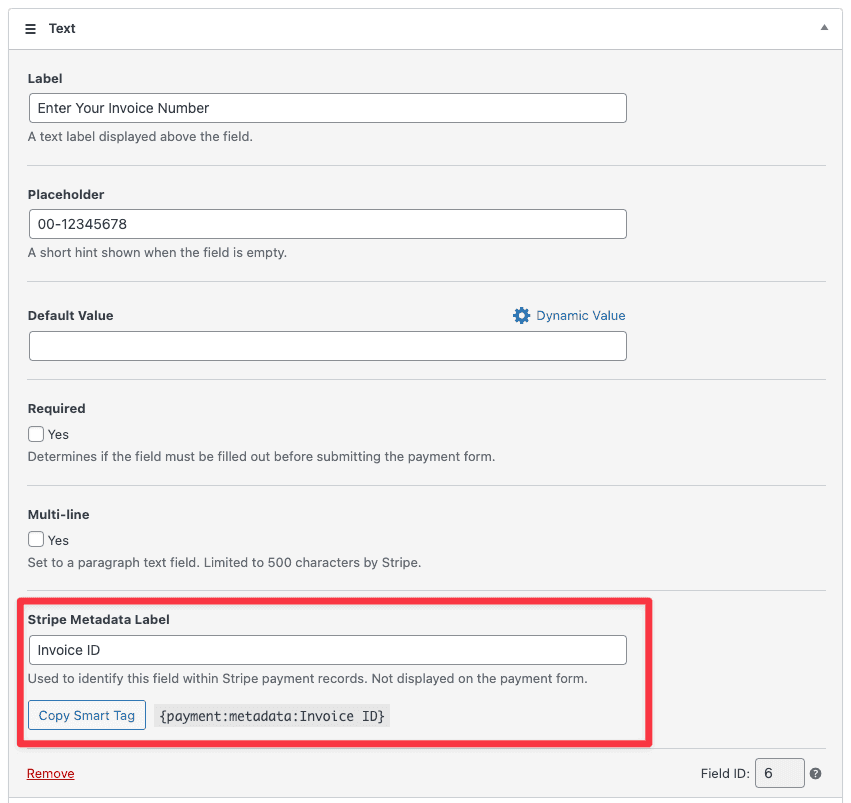
You are automatically presented with the appropriate smart tag:
Once copied, the smart tag can then be pasted into your payment confirmation page, one of your WP Simple Pay emails, etc.
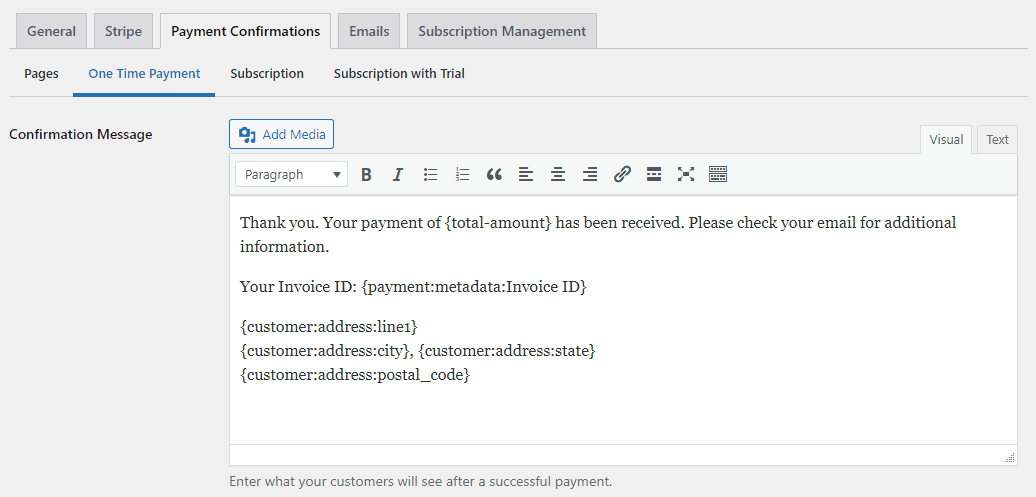
An example showing the smart tag pasted into a payment confirmation page
All custom form field labels and the submitted data will also automatically be sent to the Stripe Payment object Metadata section.
Fallback Values for Optional Fields
When adding a Smart Tag for any optional form field, such as the Name field or Form Description, you can provide a fallback value for your notification emails and confirmation pages.
{customer-name | “Valued customer”}
Only optional fields can utilize fallback values
Still have questions? We're here to help!
Last Modified: