How to Use Smart Tags to Personalize Payment Confirmation Emails
Last updated on

Have you been wanting to use smart tags to personalize your payment confirmation emails?
While smart tags may initially seem daunting to WordPress newcomers, you don’t need coding expertise to harness their power for enhancing customer communication and streamlining post-purchase processes.
In this article, we’ll show you how you can easily use smart tags to personalize your payment confirmation emails in WordPress.
Why Personalize Payment Confirmation Emails?
Personalizing your payment confirmation emails is important for a couple main reasons.
- Foster a stronger connection with your customers: personalizing payment confirmation emails allows you to add a human touch to your “thank you” messages. Customers are more likely to return to you for more products or services if they feel like you genuinely care about their needs.
- Improve transparency: personalizing your confirmation emails allows you to address any next steps required in the purchase journey, like dates of an event or a download link for digital files.
What are Smart Tags?
Smart tags identify certain words and data types on web pages and other digital content to help users perform tasks quickly and easily. By automating tasks, smart tags enhance productivity.
That said, when it comes to your WP Simple Pay payment forms, smart tags make it super easy for you to automatically add personalized details collected during checkout to payment receipts and confirmation emails without code. This makes them a great tool for elevating customer communication without taking up your time.
How to Use Smart Tags to Personalize Payment Confirmation Emails
If you’re already using WP Simple Pay to accept online payments, you can personalize your confirmation emails using smart tags that the plugin currently supports.
If you aren’t already using the best Stripe payments plugin to accept payments on your site, you’ll need to choose a plan from the pricing page that best suits your needs. Then, upload the .zip file via your WordPress admin dashboard.
If this is your first time installing a plugin, check out our step-by-step guide on how to install WP Simple Pay.
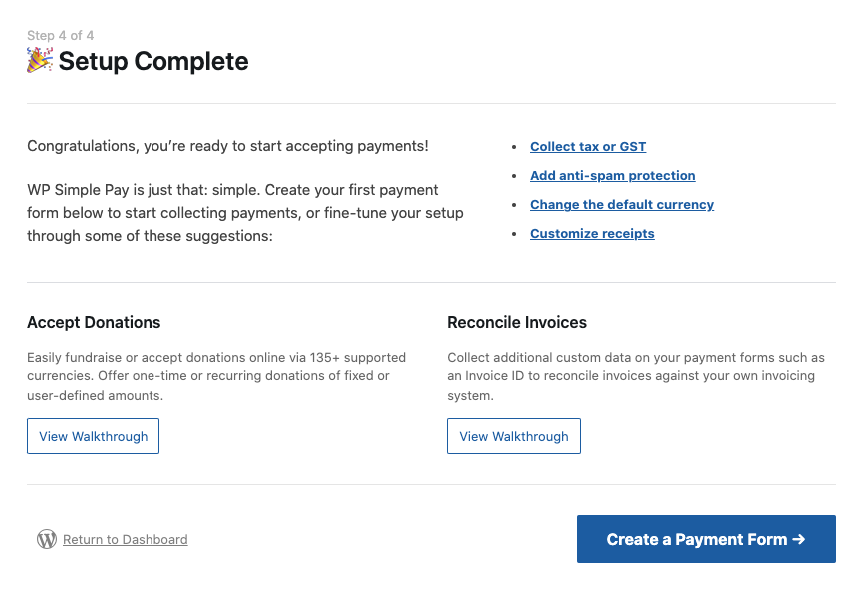
Once you’ve installed and activated the plugin, the setup wizard will walk you through configuring your settings and connecting your Stripe account. Once you’re finished, click on the Create a Payment Form button on the success page.
Step 1: Create a Payment Form
You’ll first need to create a payment form to begin accepting payments on your site and sending personalized payment confirmation emails to customers.
You’ll notice that there are several different pre-built payment form templates for you to choose from. Let’s go ahead and choose the basic Payment Form.
Next, on the General tab, be sure to enter the title and description of your form and keep On-site payment form selected for the Type.
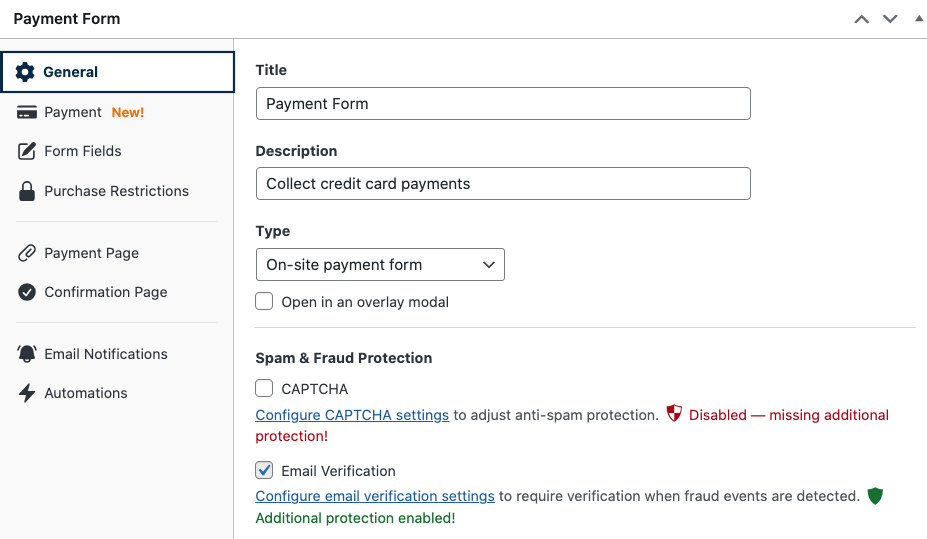
Then, click on the Payment tab. If you want to offer multiple items in one transaction, you’ll need to enter the price amounts and quantities for each item.
Finally, scroll down the page and choose the payment method options you want to accept.
Once you’ve finished, go ahead and click on Form Fields. Here, you can collect specific information from your customers to personalize email confirmations.
To learn more, see our detailed guide on what information to collect from customers during checkout.
For the purpose of this tutorial, let’s add Name to the payment form. Simply choose ‘Name’ from the dropdown menu and click on the Add Field button.

If you want to create a dedicated payment page to host your payment form, continue on to the Payment Page tab and configure your settings.
Using the Confirmation Page tab, you can also create a dedicated confirmation page message that customers are redirected to following their purchases.
Step 2: Add Smart Tags to Your Email Confirmation
So far, you’ve installed and activated WP Simple Pay on your site, connected your Stripe account, and created a payment form.
The next step to personalizing your payment confirmation email message for this specific form is to click on the Email Notifications tab.
In the text field, enter your message and add smart tags to personalize it.

For this specific example, {customer-name}, {total-amount}, {form-title}, {charge-date}, and {form-description} have been added.
WP Simple Pay conveniently supports the following smart tags:
| {form-title} – The form’s title. {form-description} – The form’s description. {form-amount} – The total price of the payment. {customer-name} – The value of the Name form field. {charge-date} – The charge date returned from Stripe. {charge-ID} – The unique charge ID returned from Stripe. {subtotal-amount} – The cumulative cost of selected items. {payment-type} – The type of payment (one-time or recurring). {card-brand} – The brand of the card used. Visa, Amex, etc. {card-last4} – The last four digits of the card used. {tax-amount} – The calculated tax amount based on the total and the tax percent setting. {free-recovery-amount} – The calculated fee recovery amount based on the total and the fee recovery percent setting. {receipt} – The receipt breakdown of the payment including items, adjustments, and totals. {coupon-amount}- The amount of the coupon applied to the payment. |
Once you’re finished writing your personalized message, be sure to click on Publish.
Step 3: Publish Your Payment Form
Now that you’ve created your payment form and added smart tags to your payment confirmation email, you’ll need to publish your form on a page or a post on your site.
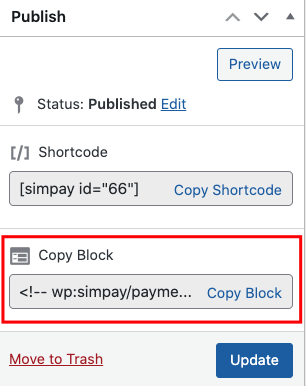
All you need to do is simply click on Copy Block under the Publish section of your screen and paste it on the page or post.
Your personalized payment confirmation email will automatically be sent to customers when they check out using this form.
If you liked this article, you may also want to check out our guide on how to create custom payment flows with per-form confirmation messages in WordPress.
What are you waiting for? Get started with WP Simple Pay today!
To read more articles like this, follow us on X.
Disclosure: Our content is reader-supported. This means if you click on some of our links, then we may earn a commission. We only recommend products that we believe will add value to our readers.


Leave a Reply