
How to Boost Online Course AOV by Adding a Workbook to Your WordPress Payment Form
Last updated on
 Reviewed By:
 Cristian Rossi
Are you looking for a simple, effective way to increase the revenue from your online course?
While digital courses are fantastic, many creators leave money on the table by not maximizing their average order value (AOV). One of the most powerful strategies to fix this is by offering a tangible, physical product alongside your digital offering.
Think about it: a beautifully printed workbook not only enhances the learning experience for your students but also instantly increases the perceived value of your course.
In this step-by-step guide, I’ll show you exactly how to add a physical workbook as an optional or required, one-time purchase to your digital course payment form.
Why a Physical Workbook is the Perfect AOV Booster
Did you know that offering a simple, relevant upsell at checkout can increase average order value by 10-30%? When it comes to digital courses, a physical workbook is one of the most natural and effective upsells you can offer.
This strategy works so well because it hits on several key principles at the most critical moment: when the visitor is already on your payment form, ready to buy.
Let’s break down why this is a win-win for both you and your online students:
- It Adds Tangible Value: A physical workbook makes your course feel more “real” and substantial. It’s a premium companion that students can hold, write in, and keep on their desk, enhancing their connection to your course and brand.
- It Creates a Better Learning Experience: A workbook isn’t just a gimmick; it’s a powerful learning tool. It encourages students to actively participate, complete exercises, and take notes, which can lead to better results. When your students succeed, your course’s reputation grows.
- It’s a Low-Friction Decision: The beauty of offering this on your payment form is that the visitor is already in “buying mode.” Adding a workbook with a single click is an easy, impulse-friendly decision. They don’t have to go through the checkout process again.
- It Increases Perceived Value: By pairing a physical product with your digital course, the overall value of your offering instantly increases in the student’s mind. This makes the one-time cost of the workbook feel like an incredible deal.
Ultimately, offering a workbook is about more than just increasing AOV. It’s about creating a superior experience for your students that they can’t get anywhere else.
Now that you see the power of this strategy, let’s dive into the practical steps of setting it up on your WordPress site.
Quick Summary: Here’s what you’ll learn in this guide:
What You’ll Need to Get Started
Before we jump into the steps, let’s quickly gather the tools and information you’ll need to follow along. Having these ready will make the process effortless.
Here’s your checklist:
- WP Simple Pay Pro: To create a high-converting, on-site payment form for your course and use our pre-built form template, you’ll need a Pro-level license for WP Simple Pay. It includes all the advanced features we’ll be using today.
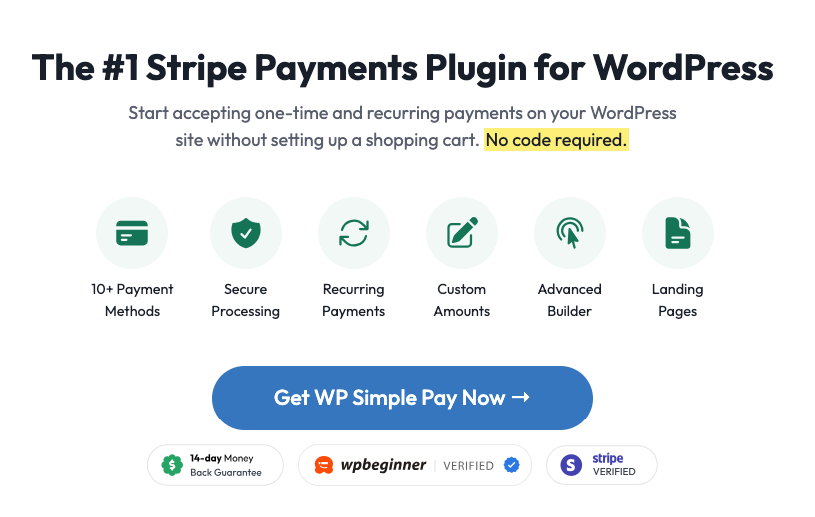
- A Connected Stripe Account: WP Simple Pay uses Stripe to process payments securely. Make sure you have an active Stripe account connected to the plugin. You can easily connect your Stripe account during the setup process. See our step-by-step guide on how to install WP Simple Pay to learn more.
- Your Digital Course Details: Know the price and billing frequency (one-time, monthly, yearly) for your main digital course offering.
- Your Physical Workbook Details: Decide on the one-time price for your physical workbook. You should also have a plan for how you will handle fulfillment and shipping once an order comes in.
- Pre-built Template: The magic ingredient! We’ll provide this in the steps below.
Once you have these items ready, you’re all set to create your high-converting payment form.
Creating a Digital Course Payment Form with a Physical Workbook Addon
The first thing you’ll need to do once you’ve installed and activated WP Simple Pay on your WordPress site is navigate to Form Templates in your dashboard.
Step 1: Choose the Pre-built Template
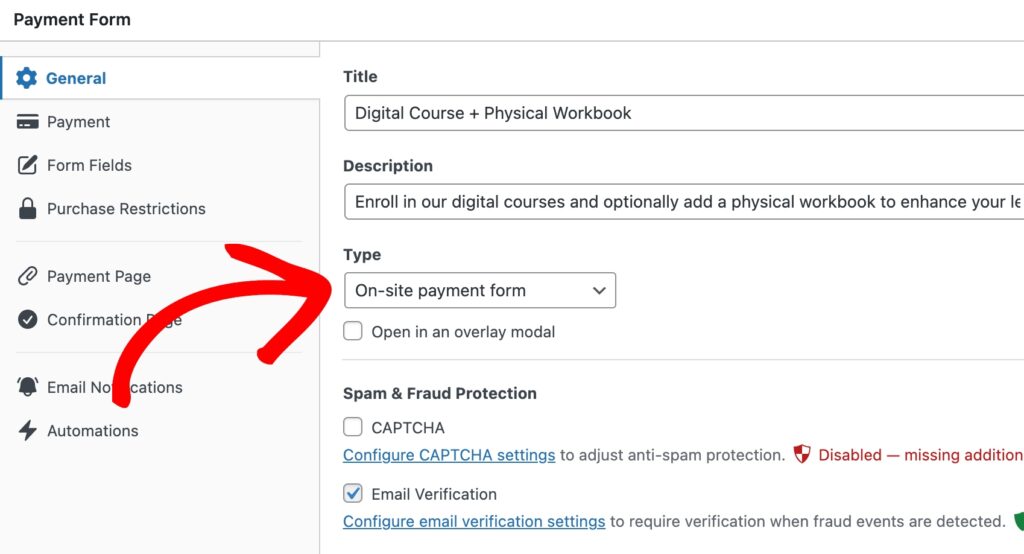
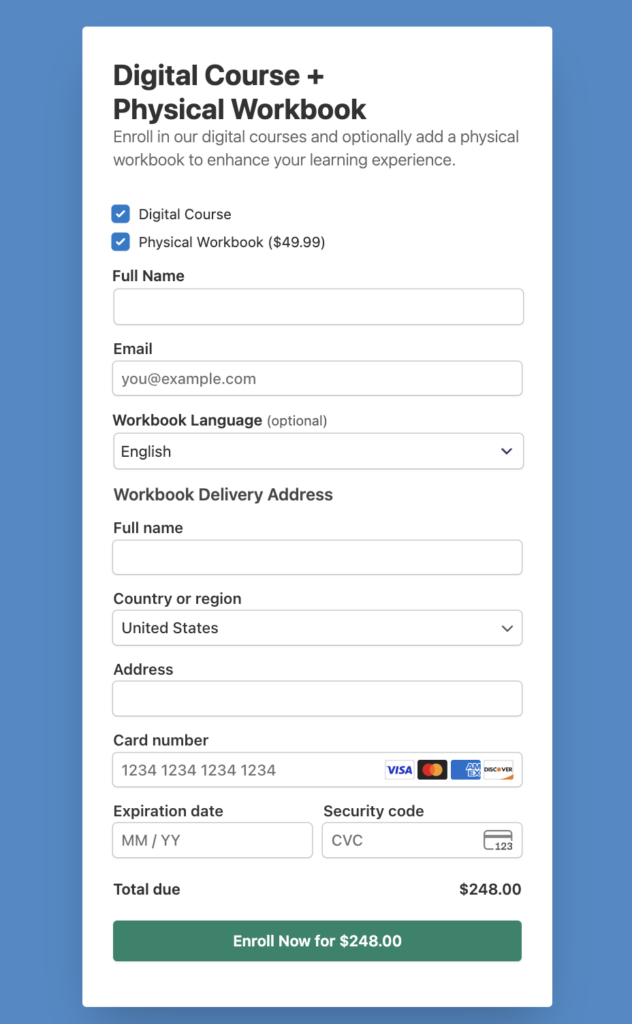
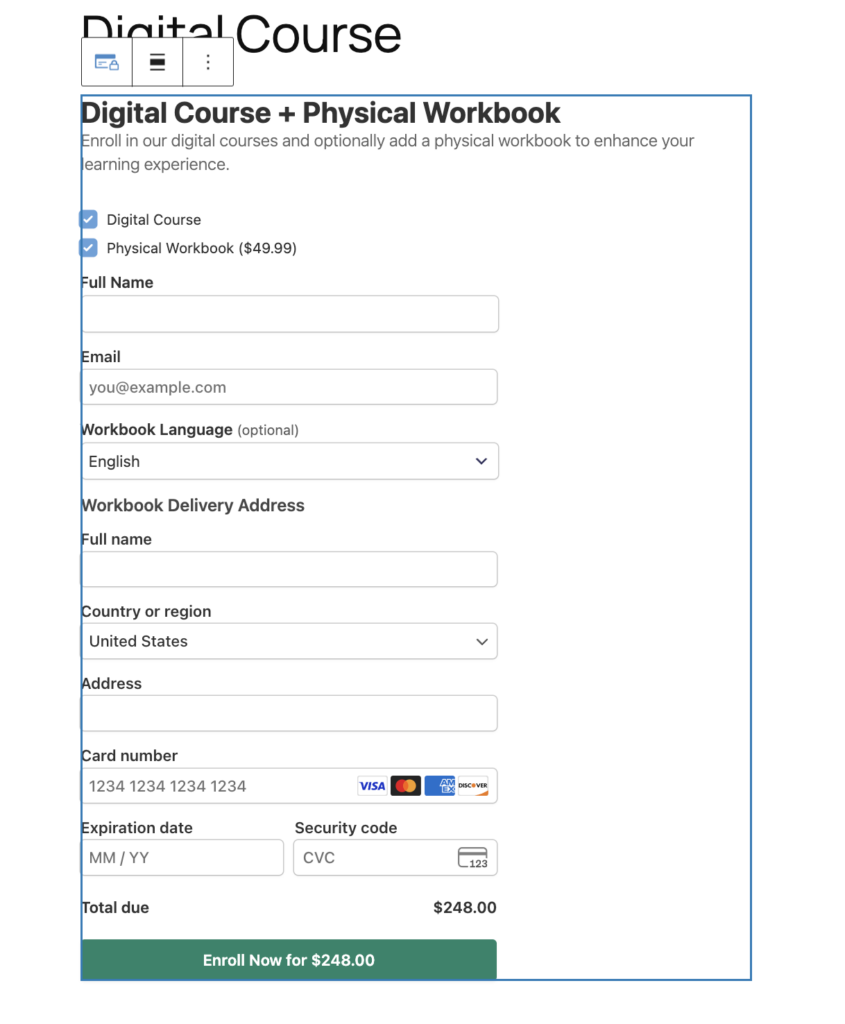
Here, you’ll notice several pre-built payment forms. Go ahead and choose the Digital Course + Physical Workbook template.

Next, in the General tab, enter the title and description of your form. You’ll also want to leave the Type set to On-site payment form.
Step 2: Configure Your Pricing Options
So far, we’ve created an on-site digital course payment form. Now, it’s time to configure the price options.
Click on the Payment tab to enter the price amounts of your digital course and the optional workbook.
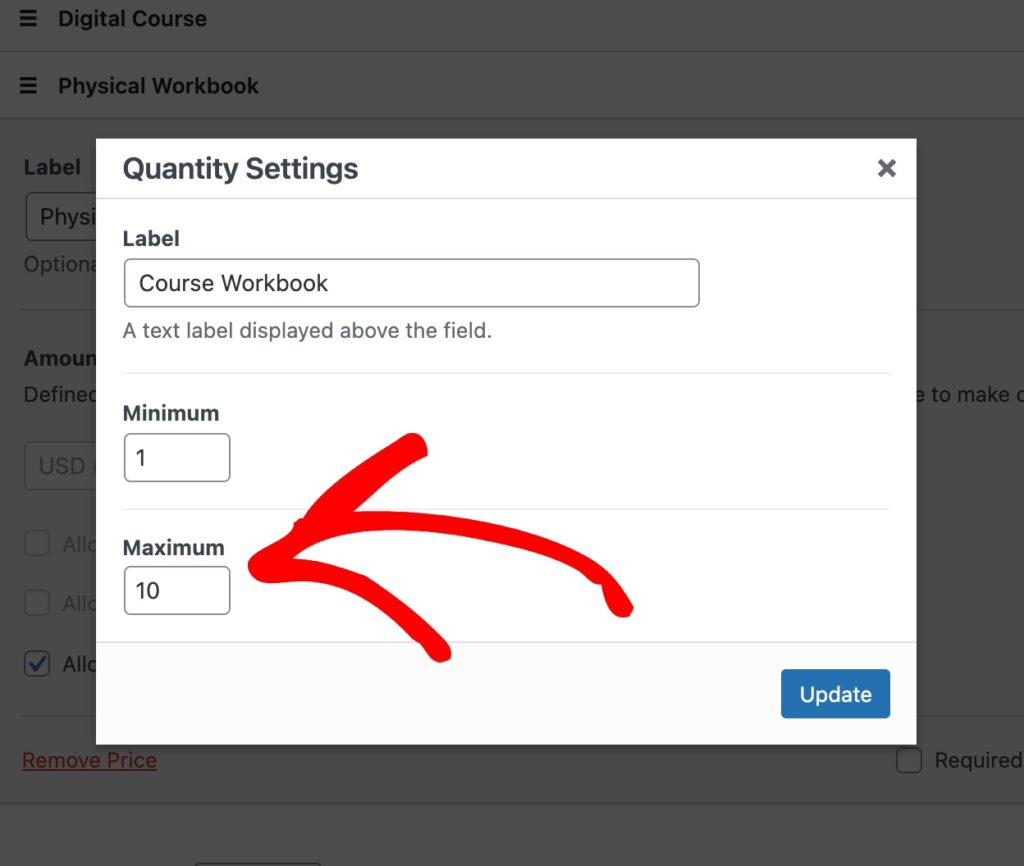
WP Simple Pay lets you offer multiple workbooks in case a student wants more than one. You can also require students to purchase it if it’s necessary for the course. Simply check the box for Required and Allow quantity to be determined by the user.
Then, click Configure and set up the minimum and maximum amounts.
Be sure to scroll down and select the payment method options you want to offer.
Step 3: Add Custom Form Fields
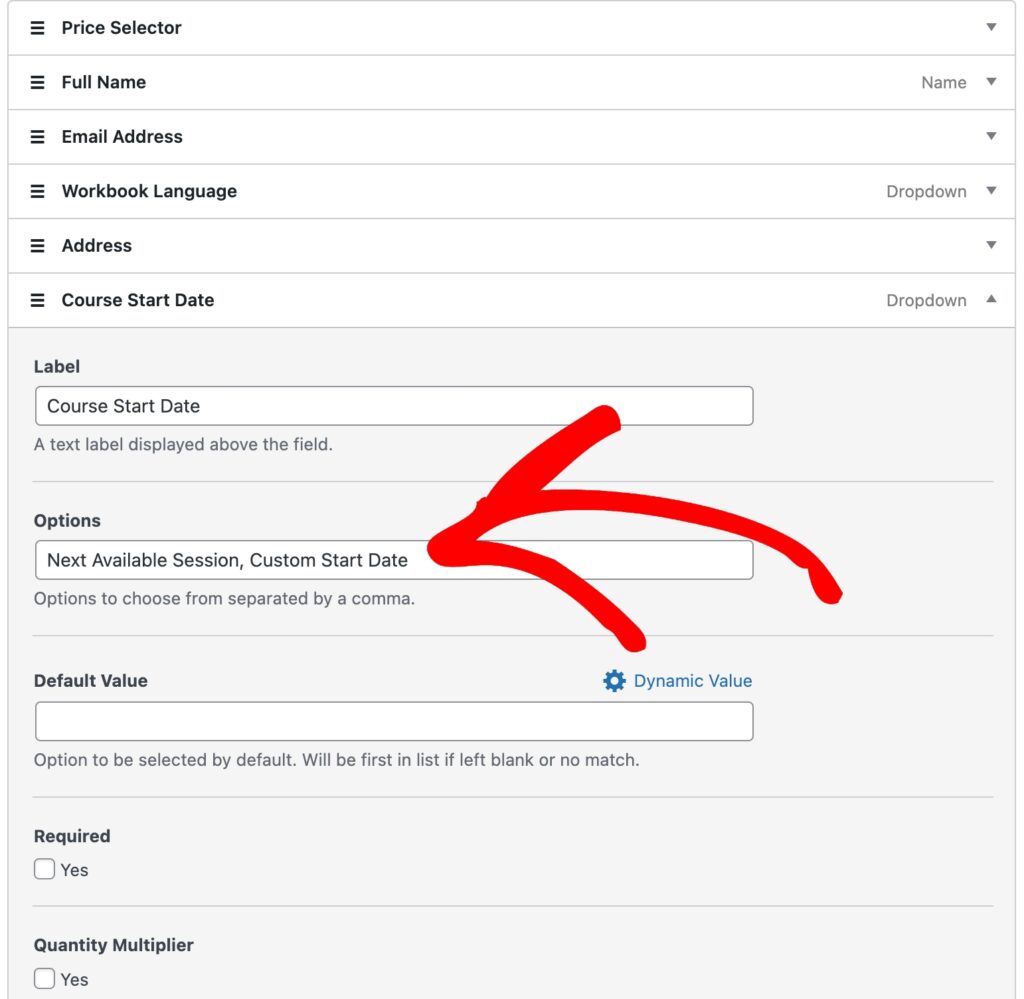
When you click the Form Fields tab, you’ll see that the form already has custom fields configured.
You can easily edit, add, rearrange, and remove fields based on your specific needs. For example, you can provide options for Course Start Dates, as well as Workbook Language, and more.
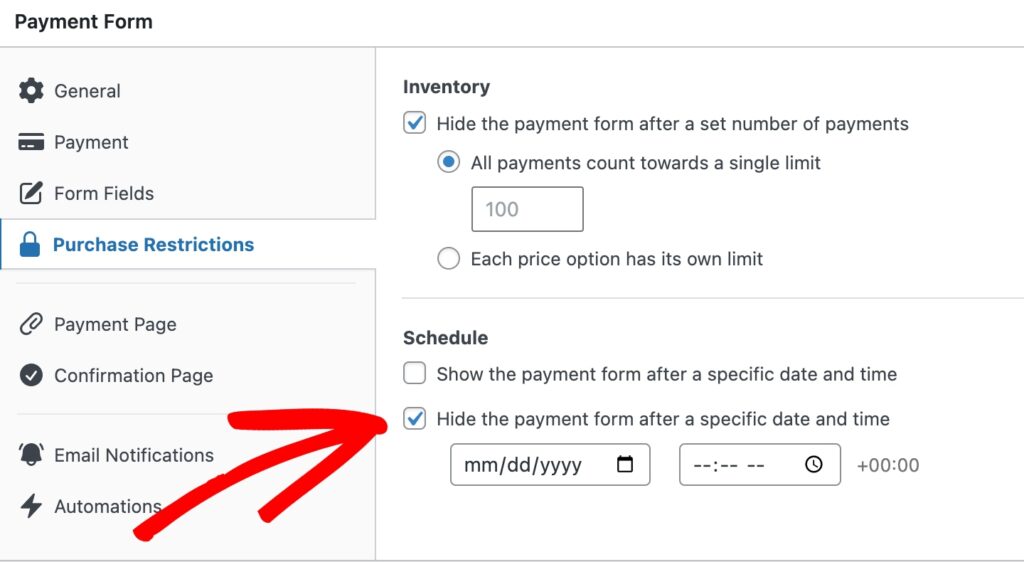
Step 4: Add Purchase Restrictions
Once you’ve finished configuring the form fields, click on the Purchase Restrictions tab.
If you want to limit the amount of students accepted for this specific online course, you can set up the form to stop allowing signups after a specific date. You can also set a maximum number of purchases.
Step 5: Publish Your Payment Form
Once you’ve added optional purchase restrictions to your form, it’s a smart idea to preview it before making it live on your site.
Simply click Preview to see the form on a separate page.
If you’re happy with the form, go ahead and click Publish.
Then, simply click Copy Block and go to the page you want your form on.
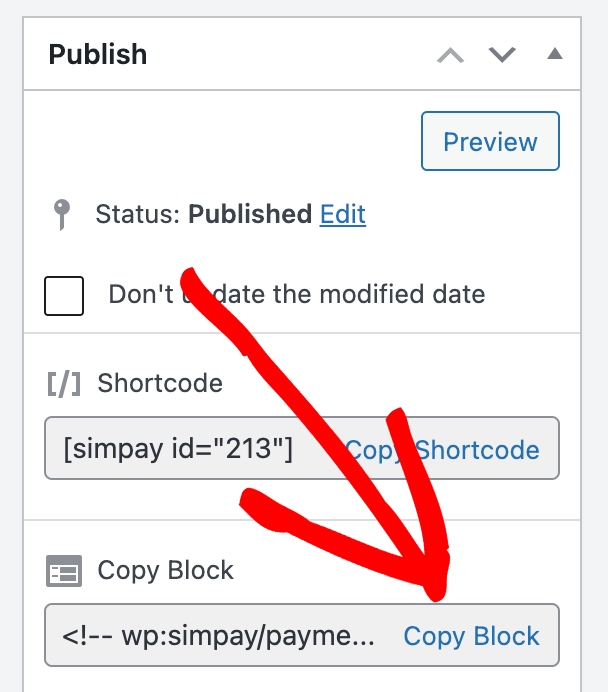
Once you’re on the payment page you want the form on, paste the block into the Block Editor.
There you have it! I hope this post has helped you learn how to boost average order value for your digital course by offering a physical workbook.
If you liked this article, you might also want to check our guide on how to use payment form templates in WordPress to boost sales.
What are you waiting for? Get started with WP Simple Pay today!
To read more articles like this, follow us on X.
Disclosure: Our content is reader-supported. This means if you click on some of our links, then we may earn a commission. We only recommend products that we believe will add value to our readers.


Leave a Reply