
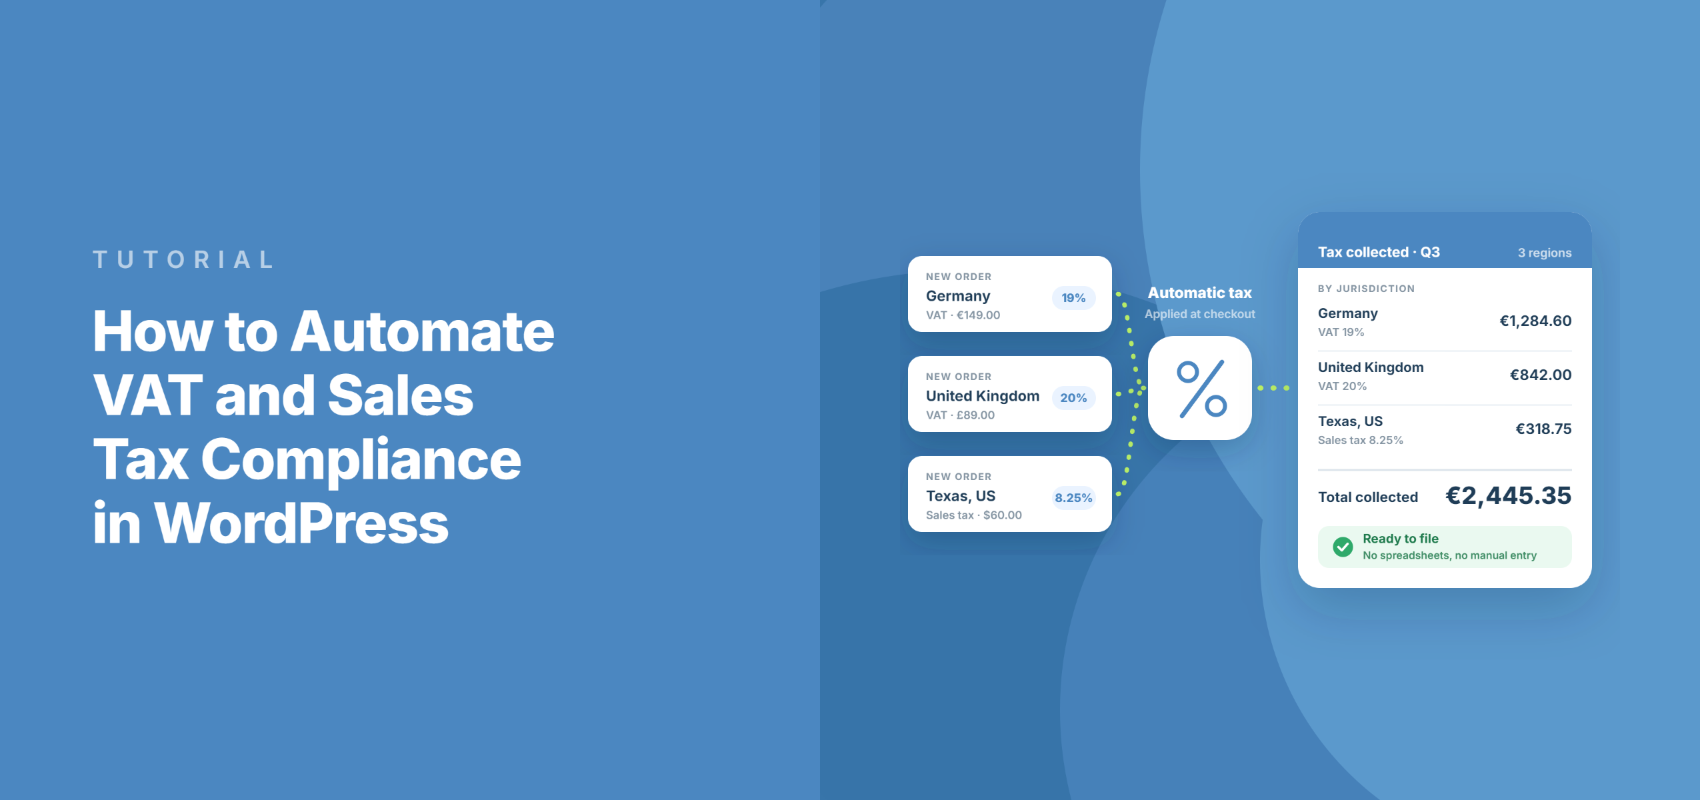
How to Automate VAT and Sales Tax Compliance in WordPress
Last updated on

Are you tired of manually managing tax rates on your WordPress site? You’re not alone.
Between downloading CSV files, mapping ZIP codes to local rates, and worrying about whether your EU VAT rules are actually correct, tax compliance is one of the most tedious problems WordPress site owners face.
The good news is that you don’t actually need a massive shopping cart plugin, and you definitely don’t need to pay hundreds of dollars a month for enterprise tax software. You can automate the whole thing using Stripe Tax tied into WP Simple Pay. It calculates the math, keeps you out of trouble, and doesn’t drag your site speed down to a crawl.
In this article, we’ll walk you through exactly how to set up automated tax compliance on your WordPress site using WP Simple Pay and Stripe Tax. Let’s get it running.
Disclaimer: Tax laws and rates vary by jurisdiction and are subject to change. This article is for informational purposes only and does not constitute tax or legal advice. You are responsible for ensuring your own compliance. We recommend consulting a qualified tax professional for guidance specific to your business.
Why Does Your WordPress Site Have Tax Compliance Problems?
WordPress is brilliant for many things, but out of the box it has no built-in understanding of taxes. It’s a content management system. The moment you start selling a consultation, an ebook, or a digital course, tax obligations come into the picture, and that’s where things can get complicated without the right tools.
The main challenge is economic nexus. In the US, you’re required to collect sales tax in states where your sales exceed certain thresholds, often around $100,000 in revenue, though the exact amount varies by state. It’s possible to reach those thresholds across multiple states, each with its own rules and filing dates, without even realizing it.
In the UK and the European Union, things work a bit differently. VAT is destination-based, meaning you charge the tax rate of the buyer’s country. If you sell digital products to customers in other EU countries, you’ll need to navigate VAT MOSS (Mini One Stop Shop) or OSS (One Stop Shop) to handle reporting correctly. Check out our guide on how to collect taxes for Stripe payments if you want a deeper walkthrough.
Managing all of this manually with spreadsheets and CSV files takes real effort. You’re matching ZIP codes to local rates, tracking municipal add-ons, and keeping everything up to date as rates change. Automating the process is a much more reliable approach, and it frees up time you’d rather spend on your actual business.
Pro Tip: If you’re already thinking about EU compliance, it’s worth handling GDPR cookie consent at the same time. We recommend pairing tax automation with WPConsent to tackle both in one go.
The Hidden Cost of Heavy Sales Tax Addons
A common approach to solving WordPress tax problems is to install WooCommerce and pair it with a service like TaxJar or Avalara. That works well for full-featured online stores, but if you’re not running a traditional retail operation, it may be more than you need.
WooCommerce is designed for traditional eCommerce. It includes inventory management, shipping calculations, and complex product variations.
If you’re just selling a coaching session, a digital download, or a simple service, those features add overhead without adding value. WooCommerce’s automated tax feature also requires a WordPress.com connection, which adds another step to the setup.
The full WooCommerce stack also loads cart, checkout, and store management features that you may not use, which can affect your page speed and SEO performance.
SaaS tax platforms like Avalara and TaxJar are another option. They’re powerful tools built for businesses processing high volumes across many tax jurisdictions. Pricing typically starts around $50 a month and can go well over $200, which makes sense at scale but may not be the right fit if you’re running a smaller operation.
If you’re an independent creator or service provider, you probably don’t need a full shopping cart. You just need a payment form that handles the tax math for you. That’s exactly what WP Simple Pay is built for.
It connects directly to Stripe Tax, so Stripe’s servers handle the rate lookups and compliance logic. You get a clean, lightweight form without extra plugins or monthly platform fees.
Because it’s standalone, WP Simple Pay works independently of WooCommerce or Easy Digital Downloads. You can just install it, connect your Stripe account, and you’re ready to accept payments.
Automate VAT and Sales Tax Compliance in WordPress
WP Simple Pay acts as a bridge between your WordPress site and Stripe’s massive payment infrastructure. Stripe Tax is genuinely impressive.
For US addresses, it calculates rates with rooftop-level accuracy by matching the buyer’s address against postal databases. If a customer lives in a tricky overlapping taxing district where one side of the street pays 7% and the other pays 7.5%, Stripe figures it out.
For addresses outside the US, it uses country, state, and postal code to determine the correct rate.
Forget managing rate tables. We’re going to connect the plugin, turn on the tax engine, and add an address field to a checkout form so Stripe knows where the buyer is sitting.
Let’s look at all the steps to get started.
Step 1: Install and Activate WP Simple Pay
First, you can head over to the WP Simple Pay website and grab a copy. After purchasing, you can head to your account area and then download the plugin ZIP file under the ‘Downloads’ tab.
From here, you can simply upload the plugin files to your WordPress website and install the plugin. If you need help with this process, then please see this guide on how to install a WordPress plugin.
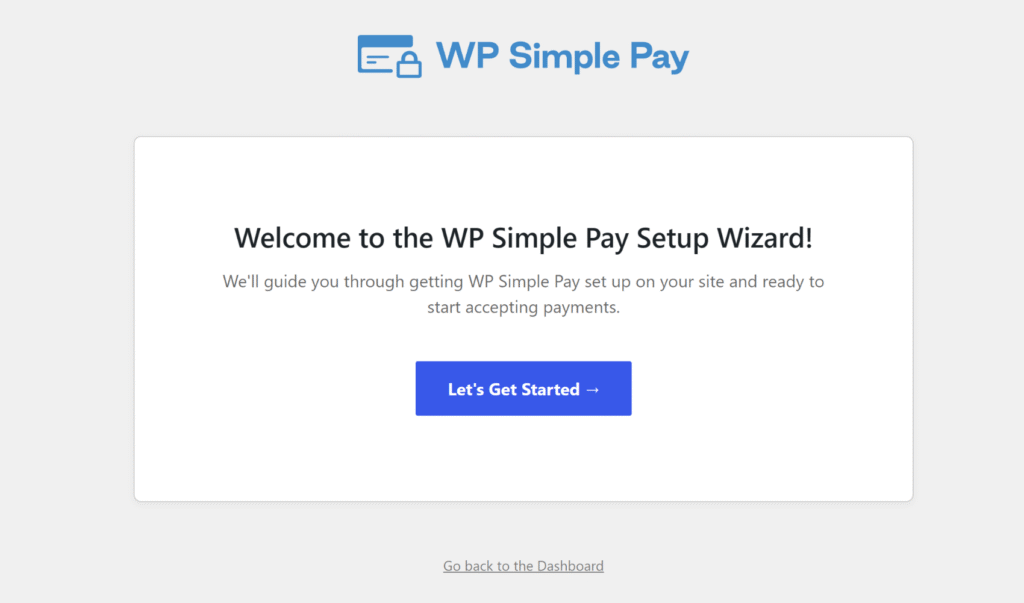
Right after activation, a setup wizard pops up. Setup wizards can actually save you time by walking you through the mandatory configuration steps so you aren’t hunting through settings menus later.
Go ahead and click the Let’s Get Started → button and follow the onscreen instructions.
Step 2: Connect Your Stripe Account
The wizard’s first major task is connecting your Stripe account. If you already have one, click ‘Connect with Stripe’ and log into your Stripe account.
This uses secure OAuth authentication, so WP Simple Pay never stores your actual login credentials in your WordPress database.
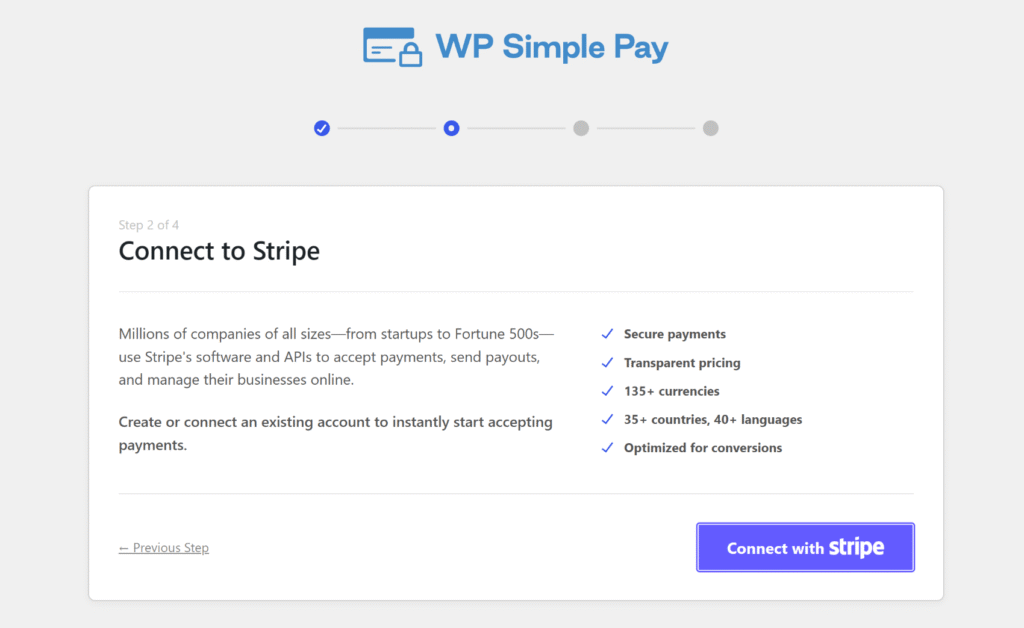
If you don’t have a Stripe account yet, the wizard lets you spin one up on the spot. You’ll just need your basic business info and a bank account routing number so you can actually get paid.
Once connected, all your customer data and tax records stay securely in Stripe’s PCI-compliant environment. Learning everything you need to know about PCI compliance helps you realize why keeping that data off your own web server is a massive security relief.
Step 3: Enable Stripe Tax Settings
Do note that the automatic tax calculation via Stripe Tax requires the WP Simple Pay Professional plan or higher. If you’re on a free or lower tier plan, then you’ll only see fixed-rate tax options, so upgrade first if you need this feature.
Remove the additional 3% fee!
Most Stripe plugins charge an additional 3% fee for EVERY transaction
…not WP Simple Pay Pro!
With your Stripe account connected, open the form you want to sell through (or create a new one) and head to its Payment Options tab.
From here, find the Tax Collection setting and switch it from None or Fixed tax rates to Automatically calculated by location. This offloads all the hard math to Stripe.
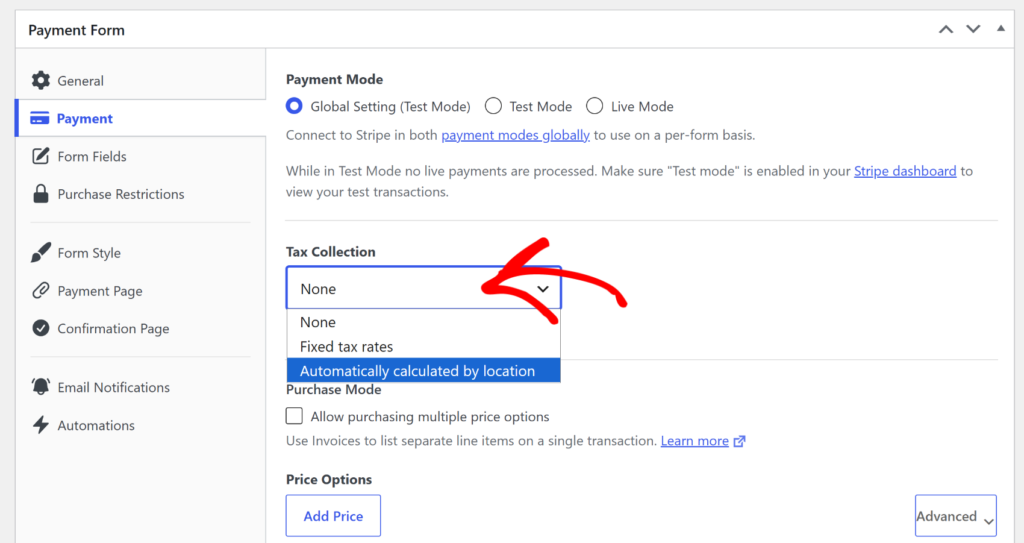
Here is how it plays out in practice. A customer types their billing address into your checkout form. Stripe reads the address, checks it against its global tax database covering US sales tax, EU VAT, UK VAT, and more, then instantly applies the correct tax rate to the total. You don’t lift a finger.
If you are legally registered to collect tax in specific places, you just check those boxes inside your Stripe dashboard. If you’re registered in certain US states, Stripe only taxes buyers in those states. If you’re registered for EU VAT OSS, it correctly applies the destination rate for buyers in other EU countries.
Step 4: Create a Tax-Optimized Payment Form
Now let’s actually make a checkout form. Go to WP Simple Pay » Payment Forms from the WordPress admin menu and click the ‘Add New Payment Form’ button.
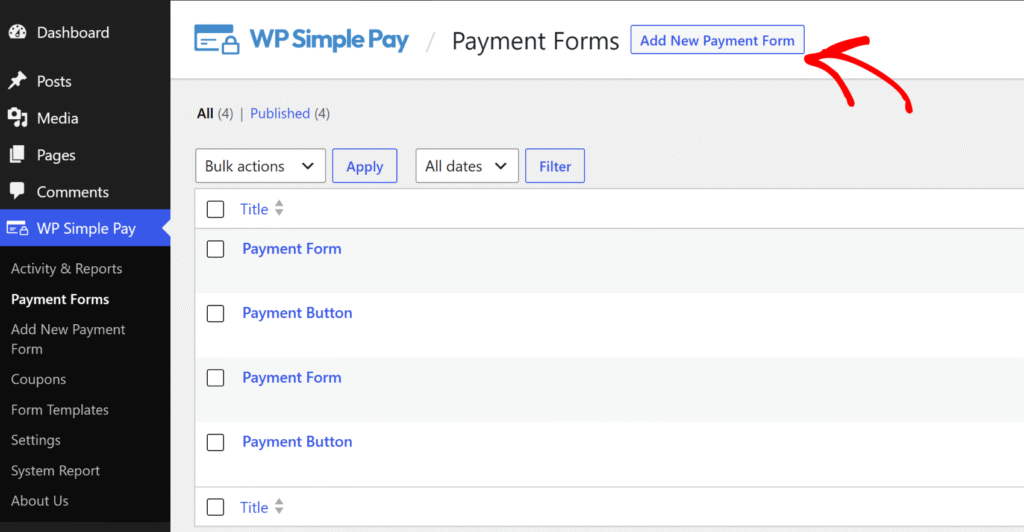
This will launch the form builder. You can start with a blank slate or use one of the pre-built templates to save time.
Do note that Stripe Tax needs the customer’s location to calculate the correct rate, so make sure your form includes the Address field. Drag it in manually from the form builder if it isn’t already on the form. The total amount breakdown will automatically show the tax line once Stripe Tax is enabled.
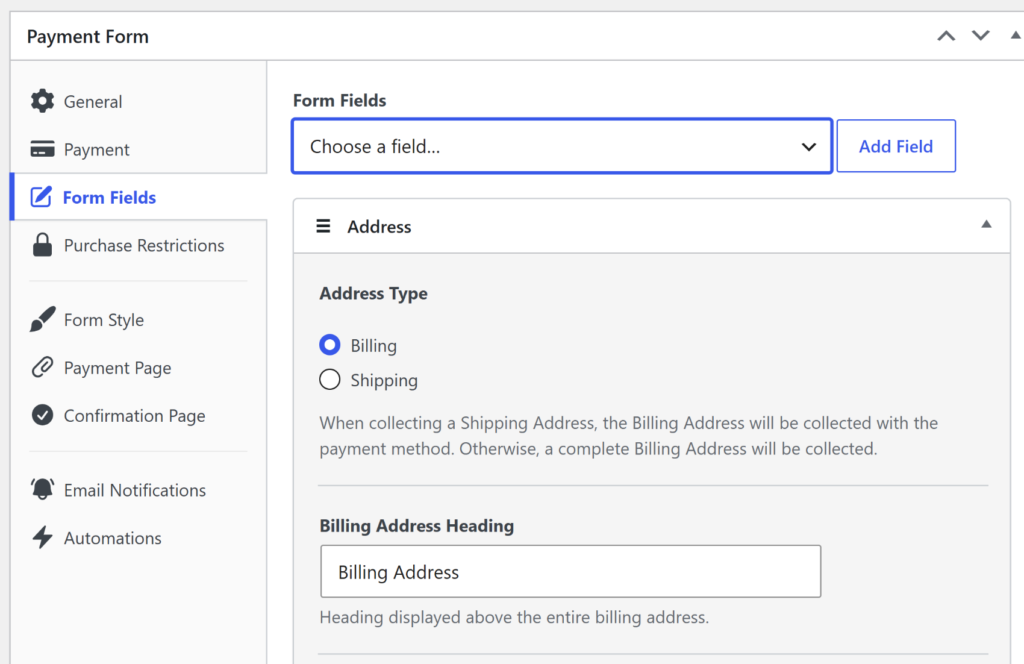
You can learn more by following our guide on how to add a payment form to a page or post in WordPress.
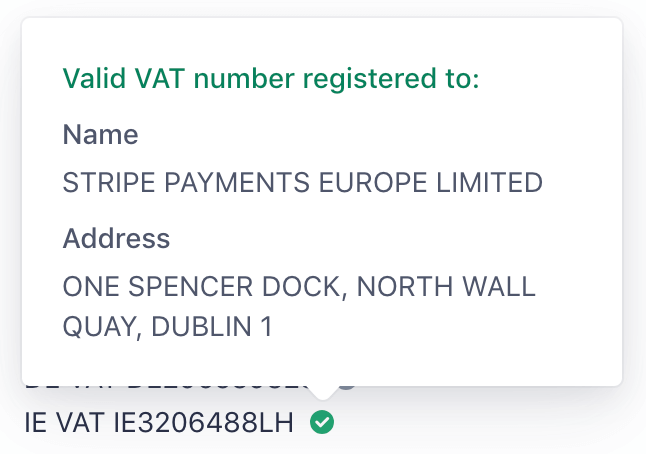
If you sell B2B, you might also want to drag in the ‘Tax ID’ field. When a European business enters their VAT number, Stripe automatically validates it against the VIES database to validate and collect customer tax IDs.
If it’s valid, Stripe applies reverse charge rules, zeros out the VAT on your end, and lets the business handle the reporting themselves.
How to Handle Tax Exemptions and B2B VAT
Selling to other businesses makes taxes messy. In the US, nonprofits, government agencies, and resellers usually have tax-exempt status. Over in Europe, B2B sales often trigger reverse charge VAT.
Coding these exceptions into a custom website is incredibly tedious, but Stripe Tax helps you handle both.
For US buyers with tax exemptions, you can manage their exempt status through the Stripe dashboard. Once a customer is marked as exempt, future purchases from that buyer automatically bypass sales tax.
You don’t have to manually override their invoices or issue refunds. If you need to collect and validate exemption certificates at scale, Stripe also offers an EXEMPTAX integration through the Stripe Apps Marketplace that automates certificate management.
For European B2B clients, the ‘Tax ID’ field does all the heavy lifting. Stripe validates the VAT number against the VIES (VAT Information Exchange System) database to ensure it’s real. If the system confirms it, Stripe automatically removes the VAT charge and logs the validated number into the customer’s permanent record.
The best part is that you don’t have to monitor any of this. Once you toggle the setting on, the compliance engine just runs quietly in the background. If you do any sort of international business, this feature alone is worth using Stripe.
FAQs about Automating VAT and Sales Tax Compliance
1. Does WordPress collect sales tax automatically?
No. WordPress core is completely oblivious to taxes and eCommerce. It’s a blogging tool that evolved into a CMS. If you need to collect sales tax, you have to add a payment gateway that supports tax calculation. You can learn how to accept Stripe payments in WordPress step by step.
2. How do I automatically calculate sales tax in WooCommerce?
WooCommerce has a native feature called WooCommerce Tax that provides automated calculations, but it requires a WordPress.com connection and sits on top of a full eCommerce stack. If you are selling digital goods or services and don’t strictly need a full shopping cart, you can bypass WooCommerce entirely. Setting up WP Simple Pay with Stripe Tax gives you the same automated calculations with a much lighter footprint.
3. Can I use Stripe Tax natively in WordPress?
Only if you use a plugin that directly connects to the Stripe API. WP Simple Pay is the go-to option for this because it was built specifically to expose Stripe’s best features, including the tax engine, inside WordPress. You just connect your account and toggle it on. There is no complicated mapping and no coding. Stripe Tax charges an additional 0.5% per transaction where tax is collected, but there are no monthly subscription fees on top of that.
4. Does Stripe Tax cost extra?
Yes. Stripe Tax adds a 0.5% fee per transaction in jurisdictions where you’re registered to collect tax. This is on top of Stripe’s standard processing fees (2.9% + 30¢ for US cards). There are no monthly subscription fees for this tier, which Stripe calls Tax Basic. Stripe also offers a Tax Complete plan starting at $90/month for businesses that need automated filing and remittance, but that’s not required to use Stripe Tax with WP Simple Pay.
5. What is the best lightweight tax plugin for WordPress?
WP Simple Pay is easily the strongest contender. It handles standalone payments and tax compliance without dumping a full shopping cart onto your server. It doesn’t rely on third-party bridge plugins or force you to install an ecosystem of add-ons. You get real-time math, B2B VAT handling, and exemption support through a fast, clean interface.
Fix Your Tax Headaches Today
That’s it! We hope this article helped you see how easy it is to automate VAT and sales tax compliance on your WordPress site using WP Simple Pay and Stripe Tax.
You really don’t have to bog down your website with a massive shopping cart, nor do you have to drain your budget paying hundreds of dollars a month for a standalone enterprise tax calculator.
WP Simple Pay paired with Stripe Tax gives you a global, automated compliance setup right out of the box. No more downloading messy CSV files. No more guessing at local municipal tax boundaries. And thankfully, no more doing tax math in your head.
It strikes the right balance between power and usability. It’s lightweight enough so your website stays fast and snappy, but the underlying Stripe engine is powerful enough to handle complicated tax scenarios like economic nexus monitoring and European reverse-charge VAT.
It saves you an immense amount of time, drastically cuts down on manual accounting errors, and gives your customers a smooth checkout experience.
We hope this article helped you learn how to automate VAT and sales tax compliance in WordPress. You may also want to see our guide on how easy it is to collect customer tax IDs in WordPress and the best tax compliance plugins and software for WordPress.
What are you waiting for? Get started with WP Simple Pay today!
To read more articles like this, follow us on X.
Disclosure: Our content is reader-supported. This means if you click on some of our links, then we may earn a commission. We only recommend products that we believe will add value to our readers.

Leave a Reply