
How to Validate and Collect Customer Tax IDs in WordPress
Last updated on

Want to validate and collect customer tax IDs in WordPress?
Collecting and associating a Tax ID with a customer enables you to display it on invoice headers and credit note PDFs.
In this article, we’ll show you how easy it is to collect customer tax IDs in WordPress with Stripe.
Collecting Customer Tax IDs in WordPress
Displaying a customer’s tax ID and legal business name on the invoice is a common requirement in most jurisdictions.
With Stripe, you can easily collect and validate customer tax IDs along with the payment.
The easiest way to validate and collect customer tax IDs on your WordPress site is to use a Stripe plugin, like WP Simple Pay.
WP Simple Pay is the best WordPress Stripe plugin that lets you create any type of payment form, collect and validate tax IDs, and it even supports the Stripe Tax feature. With Stripe’s automatic tax feature, you can calculate and collect tax based on the user’s location.
WP Simple Pay also comes with tons of different form templates, which make it easier for you to create any payment form, such as credit card payment form, recurring payments, donation forms, and more.
With our tax ID validation, an error message will be shown if the entered ID isn’t formatted properly.
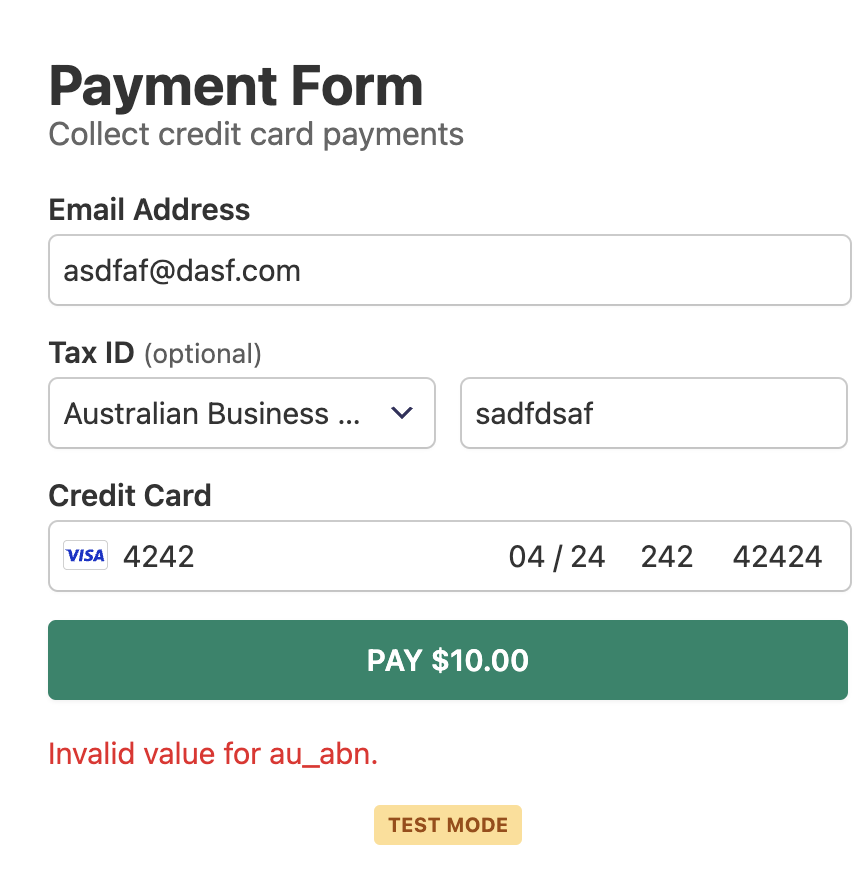
In addition, Stripe also performs automatic validation against government databases for Australian Business (ABN) numbers, European Value-Added-Tax (EU VAT) numbers, and United Kingdom Value-Added-Tax (GB VAT) numbers.

Let’s take a look at how to create a payment form that collects tax IDs.
Step 1: Install and Activate WP Simple Pay
To start collecting tax IDs along with your payment, the first thing you’ll need to do is to install and activate WP Simple Pay.
Remove the additional 3% fee!
Most Stripe plugins charge an additional 3% fee for EVERY transaction
…not WP Simple Pay Pro!

If you didn’t see the setup wizard, simply head over to WP Simple Pay » Settings » Advanced tab and click the Launch Setup Wizard button.
2: Connect WordPress to Stripe
To connect your WordPress site to Stripe, click on Connect with Stripe.

Next up, enter the email address you use for your Stripe account and connect it to your site. If you don’t have a Stripe account, you can easily create one by entering your email address and completing the registration.
Upon completing this process, you’ll be shown a success page that says, “Setup Complete.” Next, click on Create a Payment Form.

Step 3: Create a Payment Form That Collects Tax IDs
Next up, let’s create a payment form that collects tax IDs.
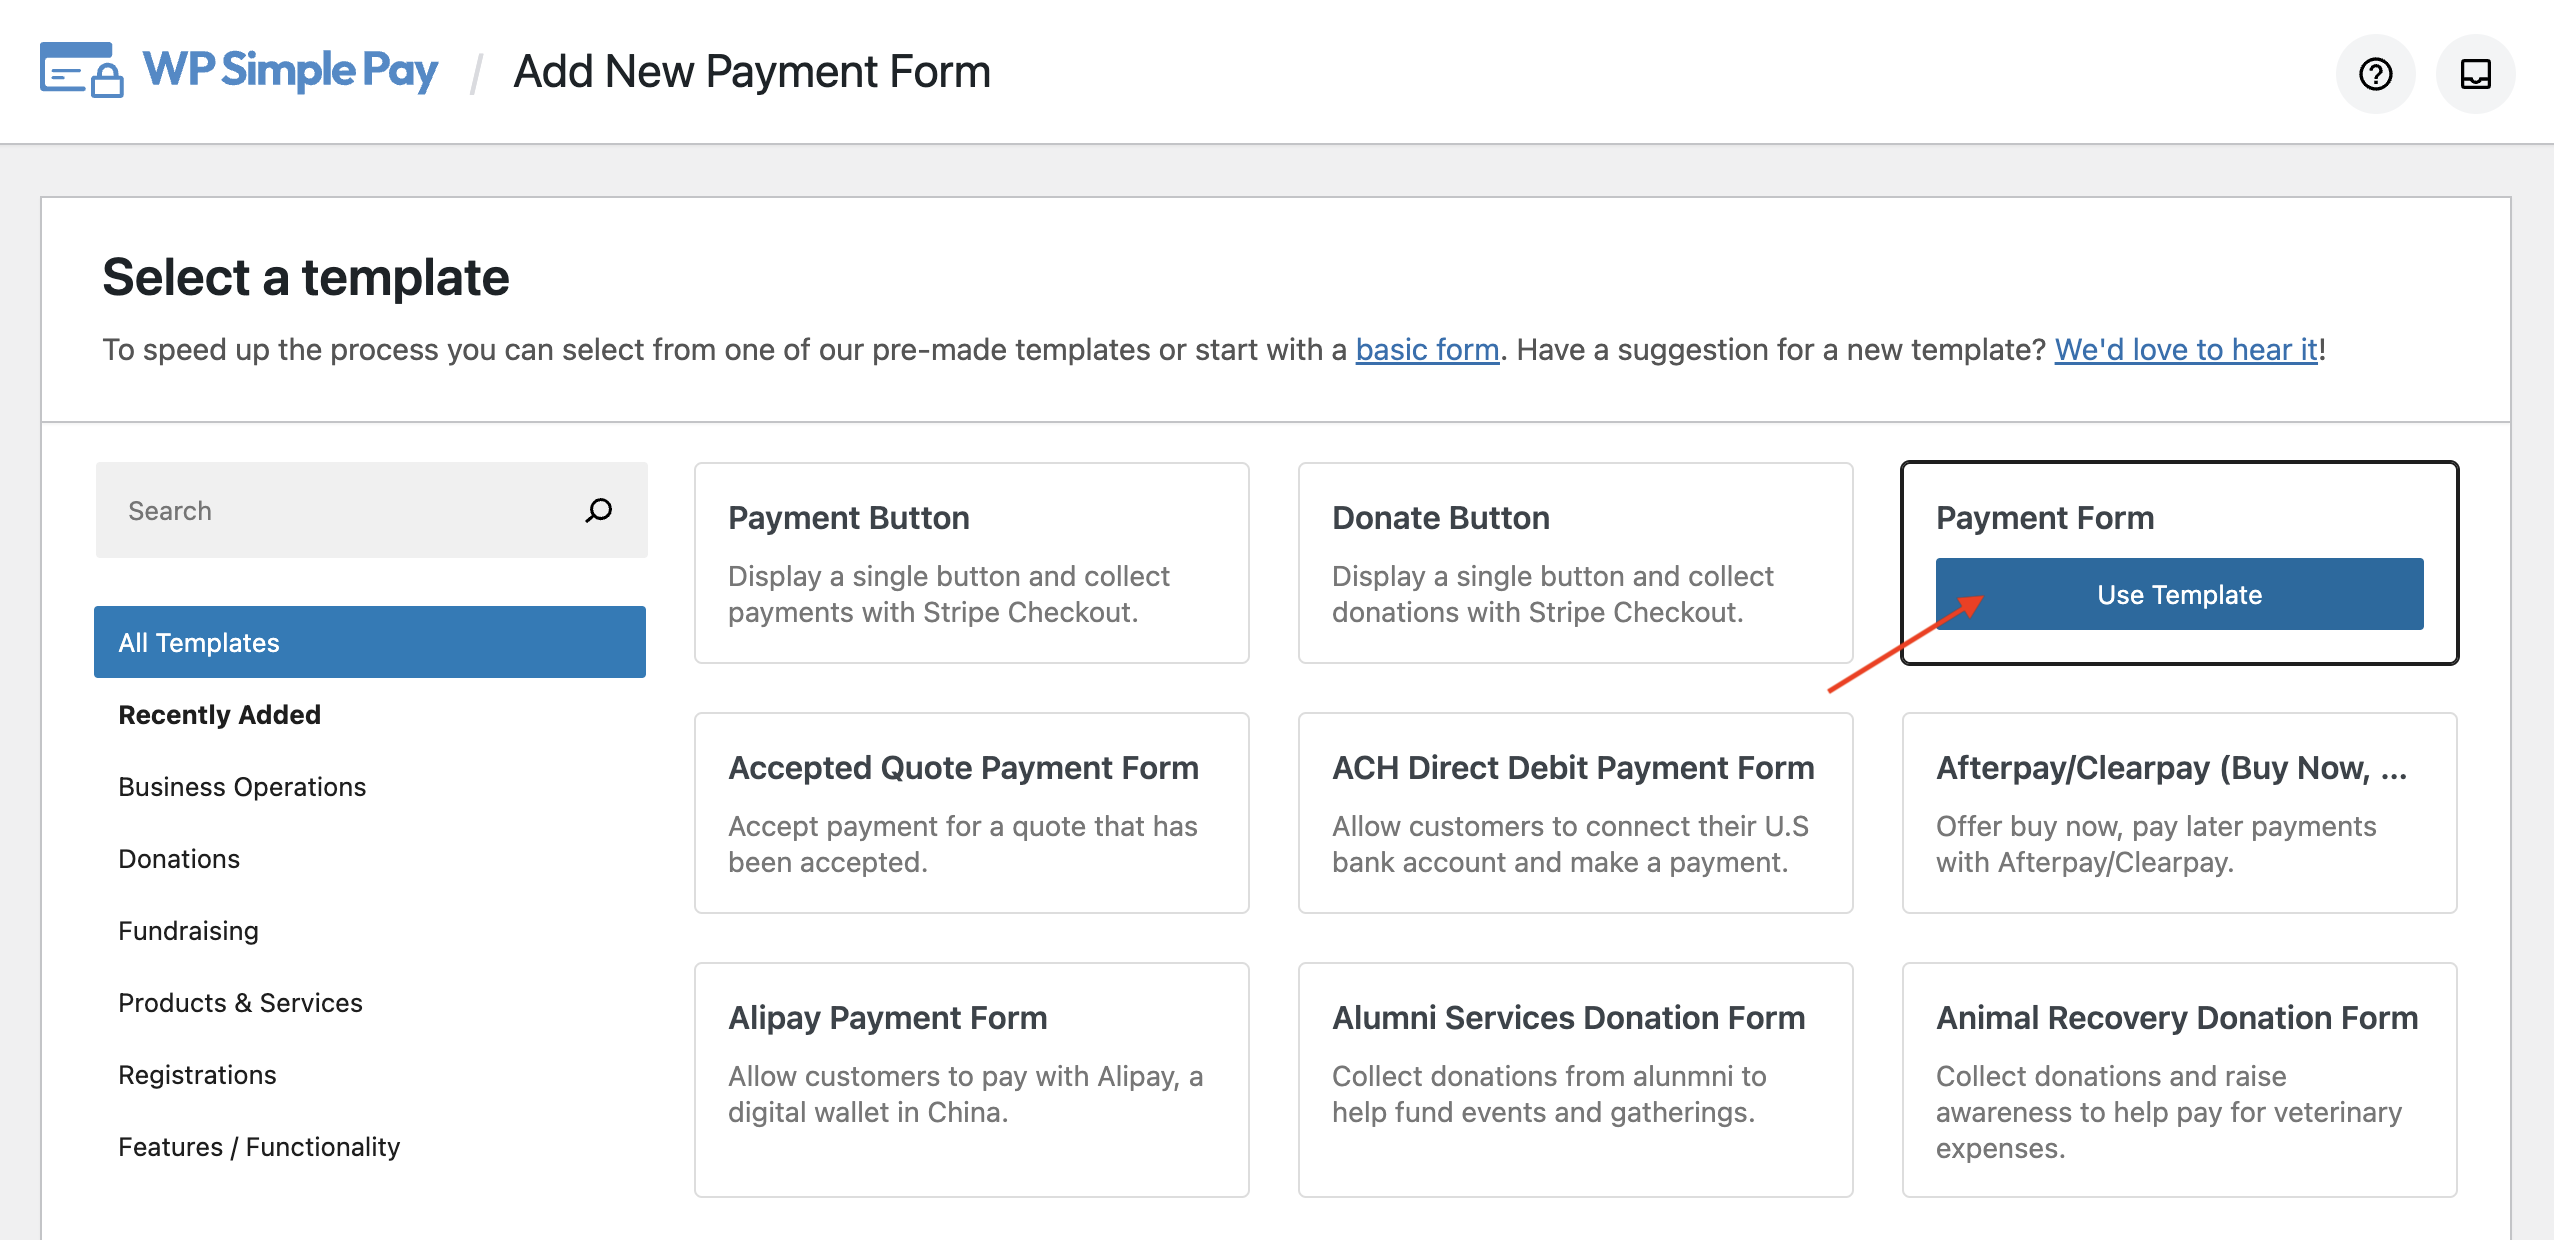
You can start building the form by choosing a template that best suits your needs. Let’s choose the Payment Form template. This template preselects all the essential form elements you need for a basic form.
Once the template is selected, you’ll be directed to the configuration page, where you can name the form and add a description. You’ll also be prompted to choose the Type of your form. If you want to host the form on your site, choose on-site payment form. Choose off-site Stripe checkout if you want to host it on Stripe.
For this form, let’s select On-site payment form.
Check out on-site vs. off-site checkout form for more details.
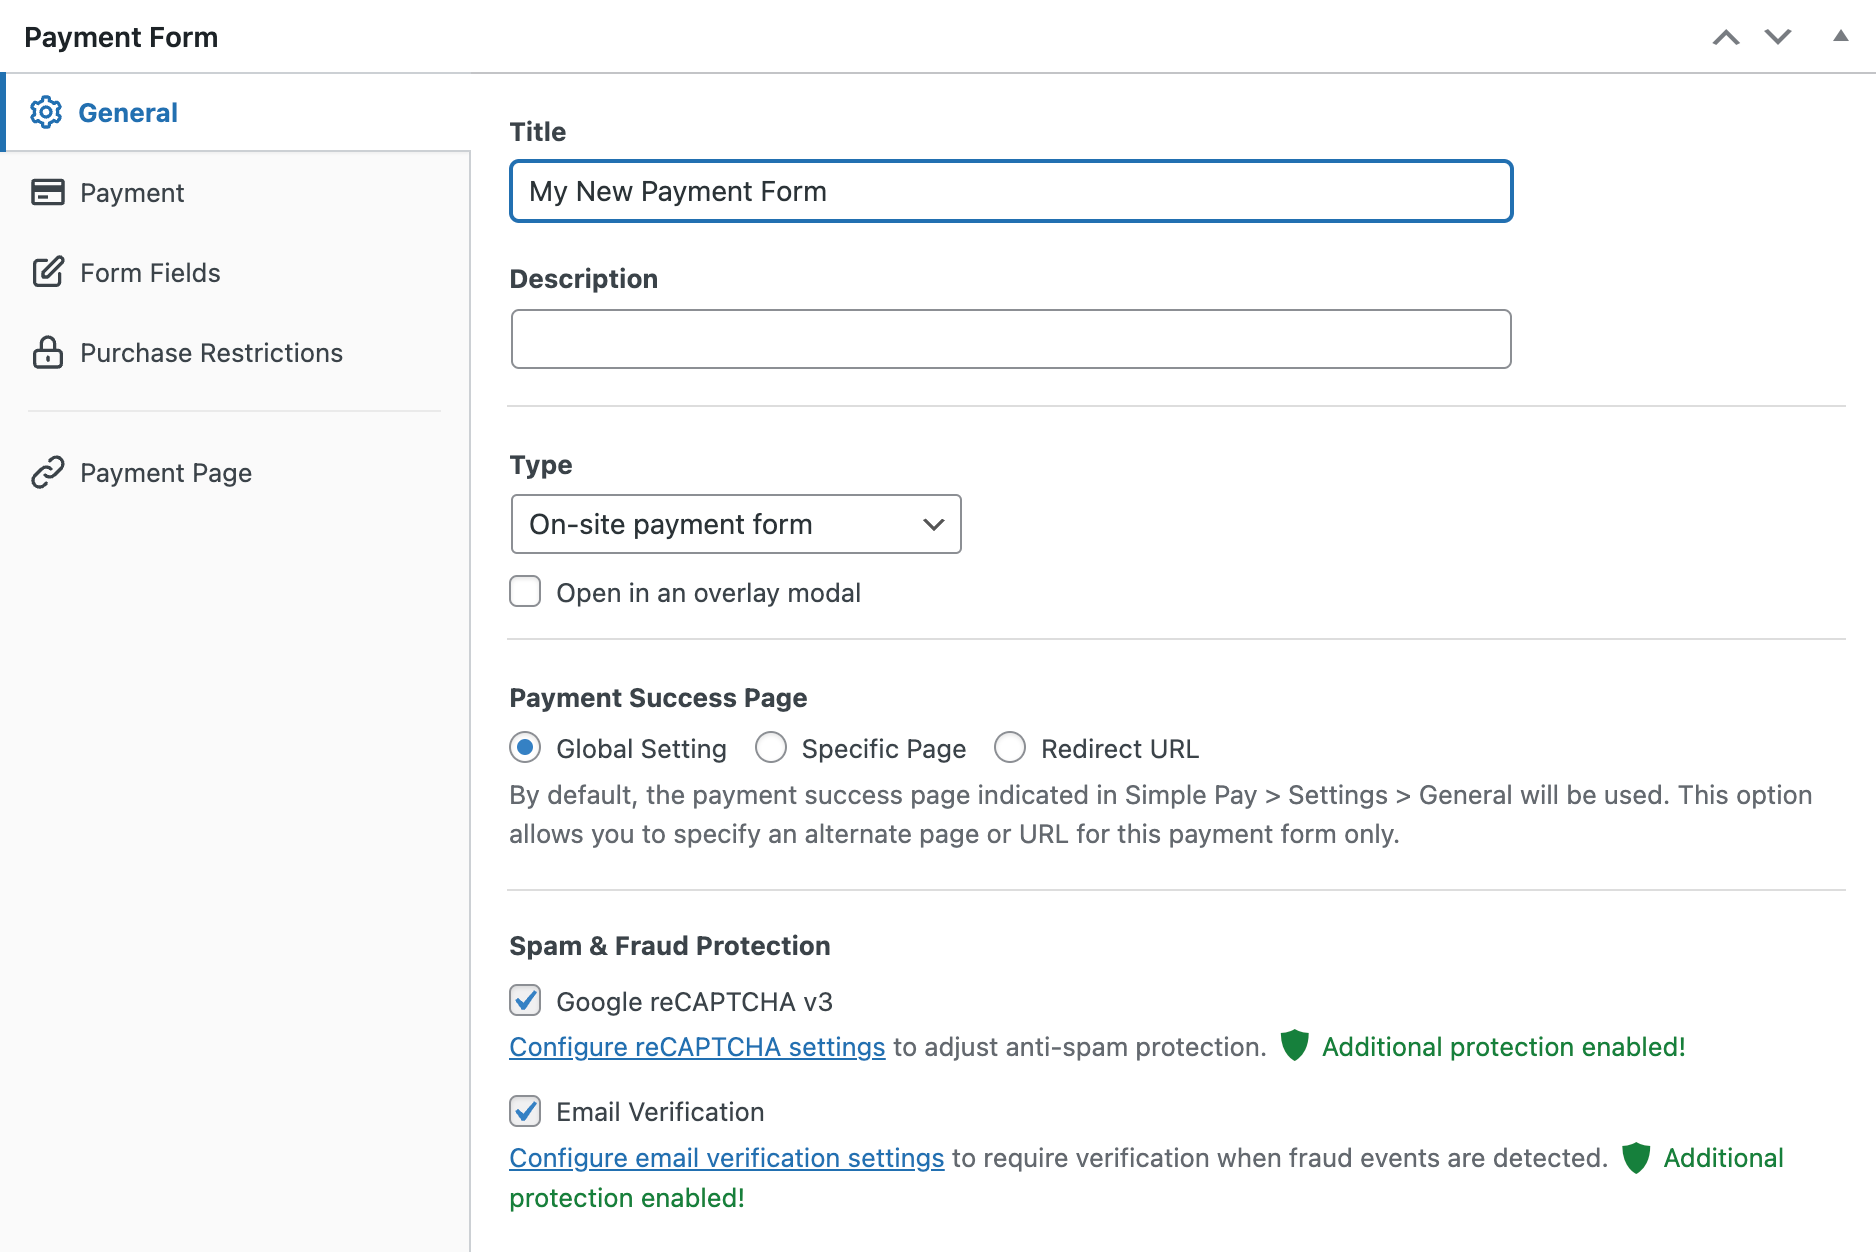
As soon as you install and activate WP Simple Pay, the plugin automatically creates a payment success page to show after a payment is processed. If you want to change the default success page, choose Specific Page and you can redirect users to one of your existing pages on your site upon form submission. Or choose Redirect URL if you want to redirect users to an external page.
Next, click on the Payment option from the left, and you’ll be able to customize the currency, amount, and even choose between one-time and subscription payment. WP Simple Pay makes it easy to collect taxes along with your payment.
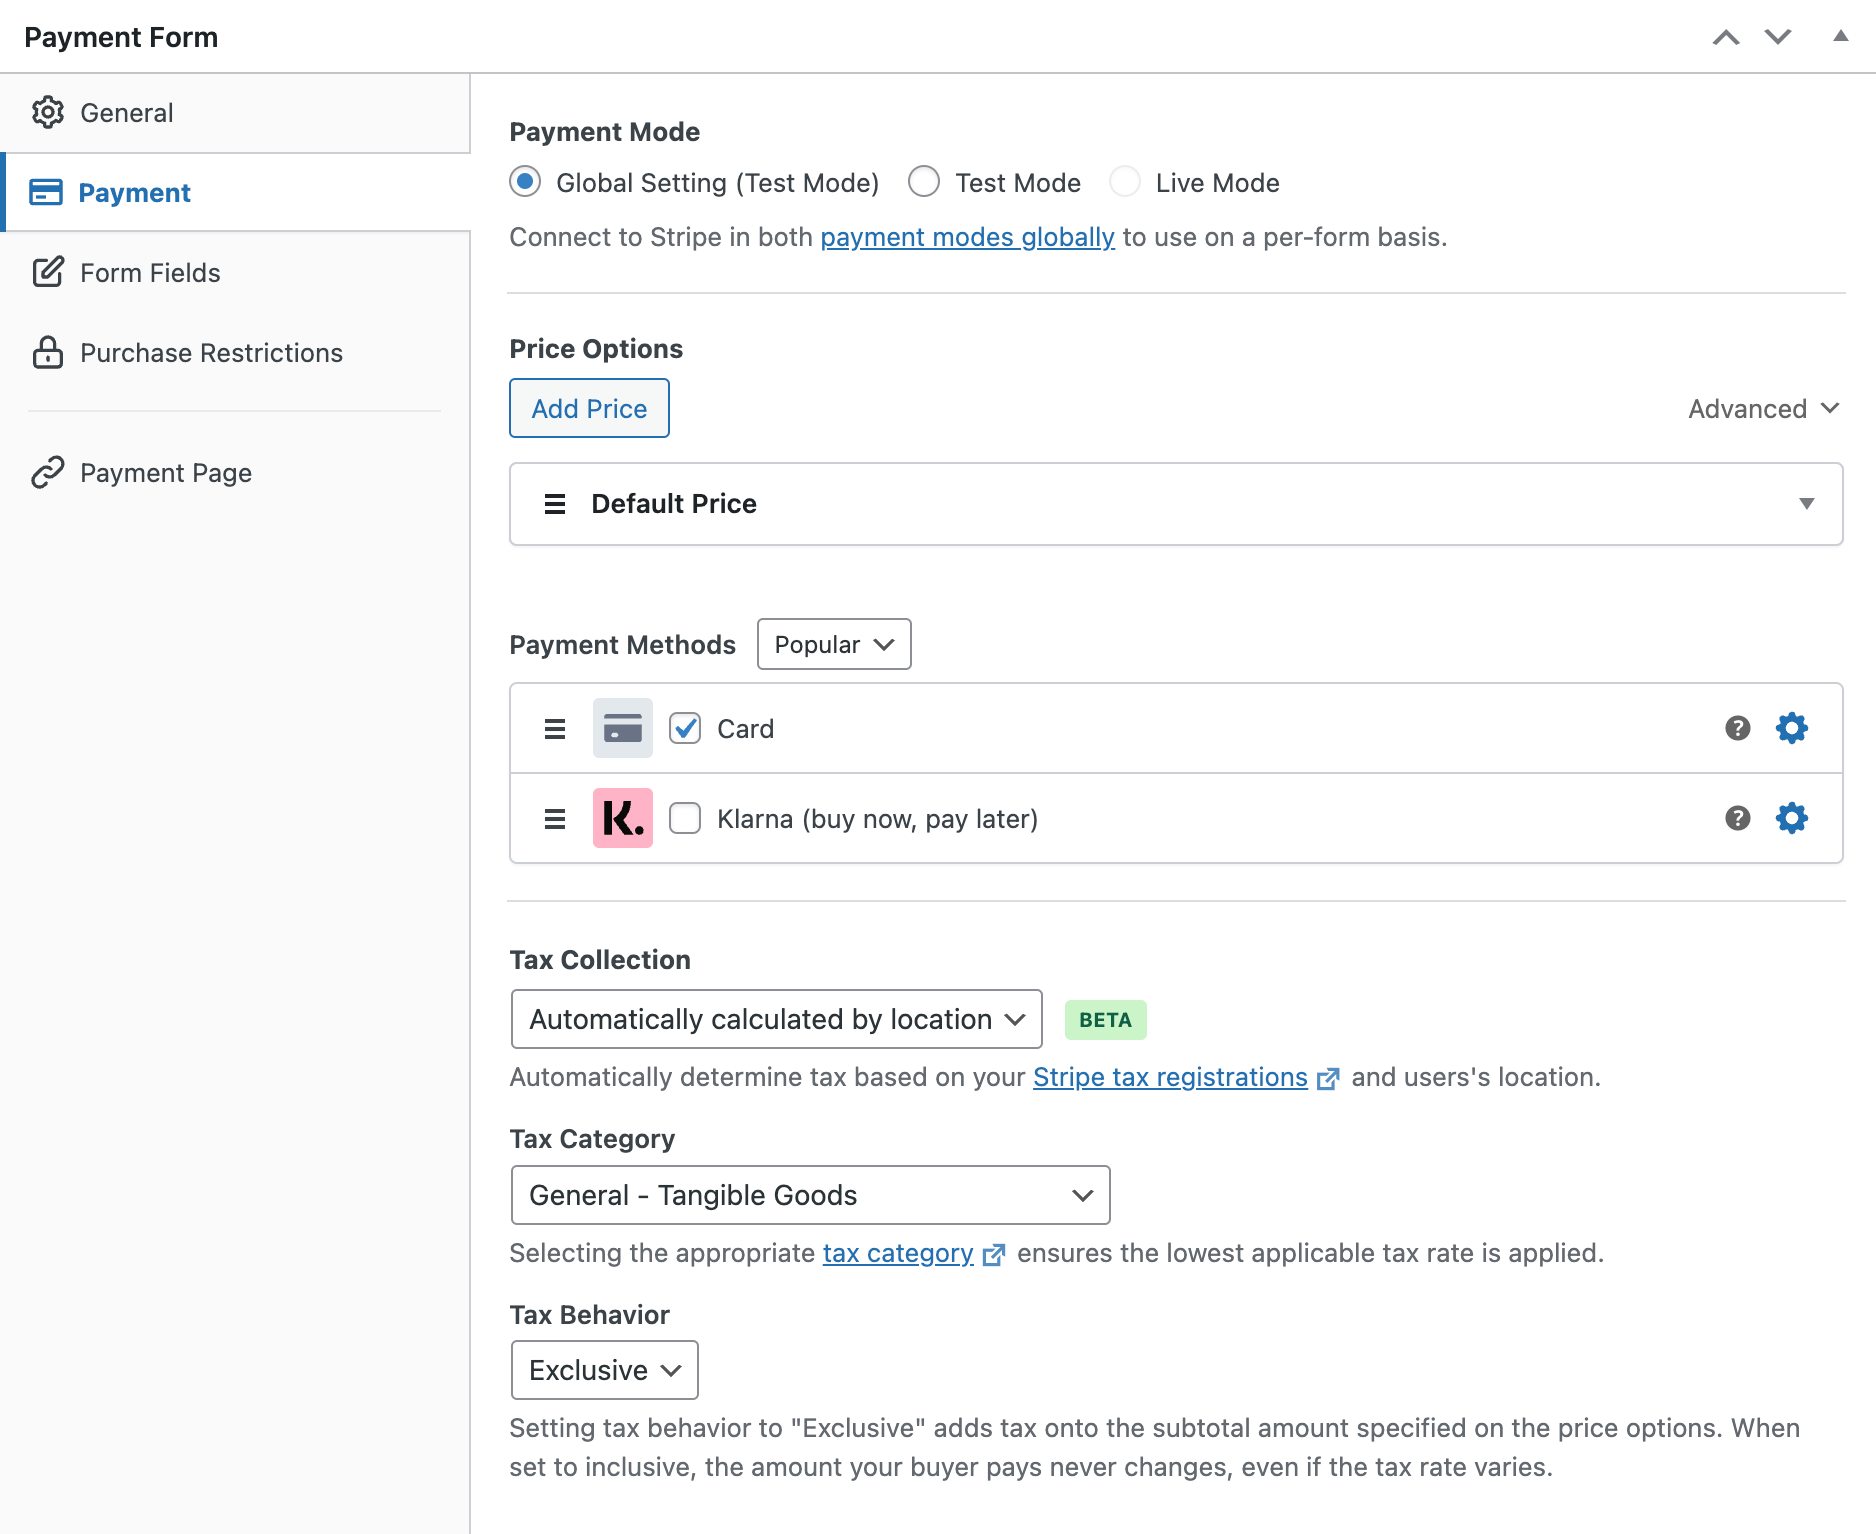
If you want to collect tax, you can choose between automatic tax and global tax rate. For the sake of this article, we’re only collecting tax IDs from your customers and NOT accepting tax. So, let’s choose None.
However, if you want to collect tax and need to know more about fixed and automatic tax collection in WordPress, then check out this guide: How to collect tax for Stripe payments in WordPress.
Next, click on the Form Fields option on the left. Here, you can add or customize any existing form fields the way you want. Let’s add Tax ID to your form to collect your customer’s tax ID.
Click on that field to customize the label and placeholder. You can also make it a required field if you want.
After making the necessary changes, you can save the form and preview it to see if it works as intended. If it works as intended, you can publish the form.
Step 4: Add the Payment Form to a Page
Now that your order form is ready, it’s time to embed it on your website.
Make sure you test the form first before it goes live. You can toggle your entire site or individual payment forms between test and live modes (read more about Test mode).
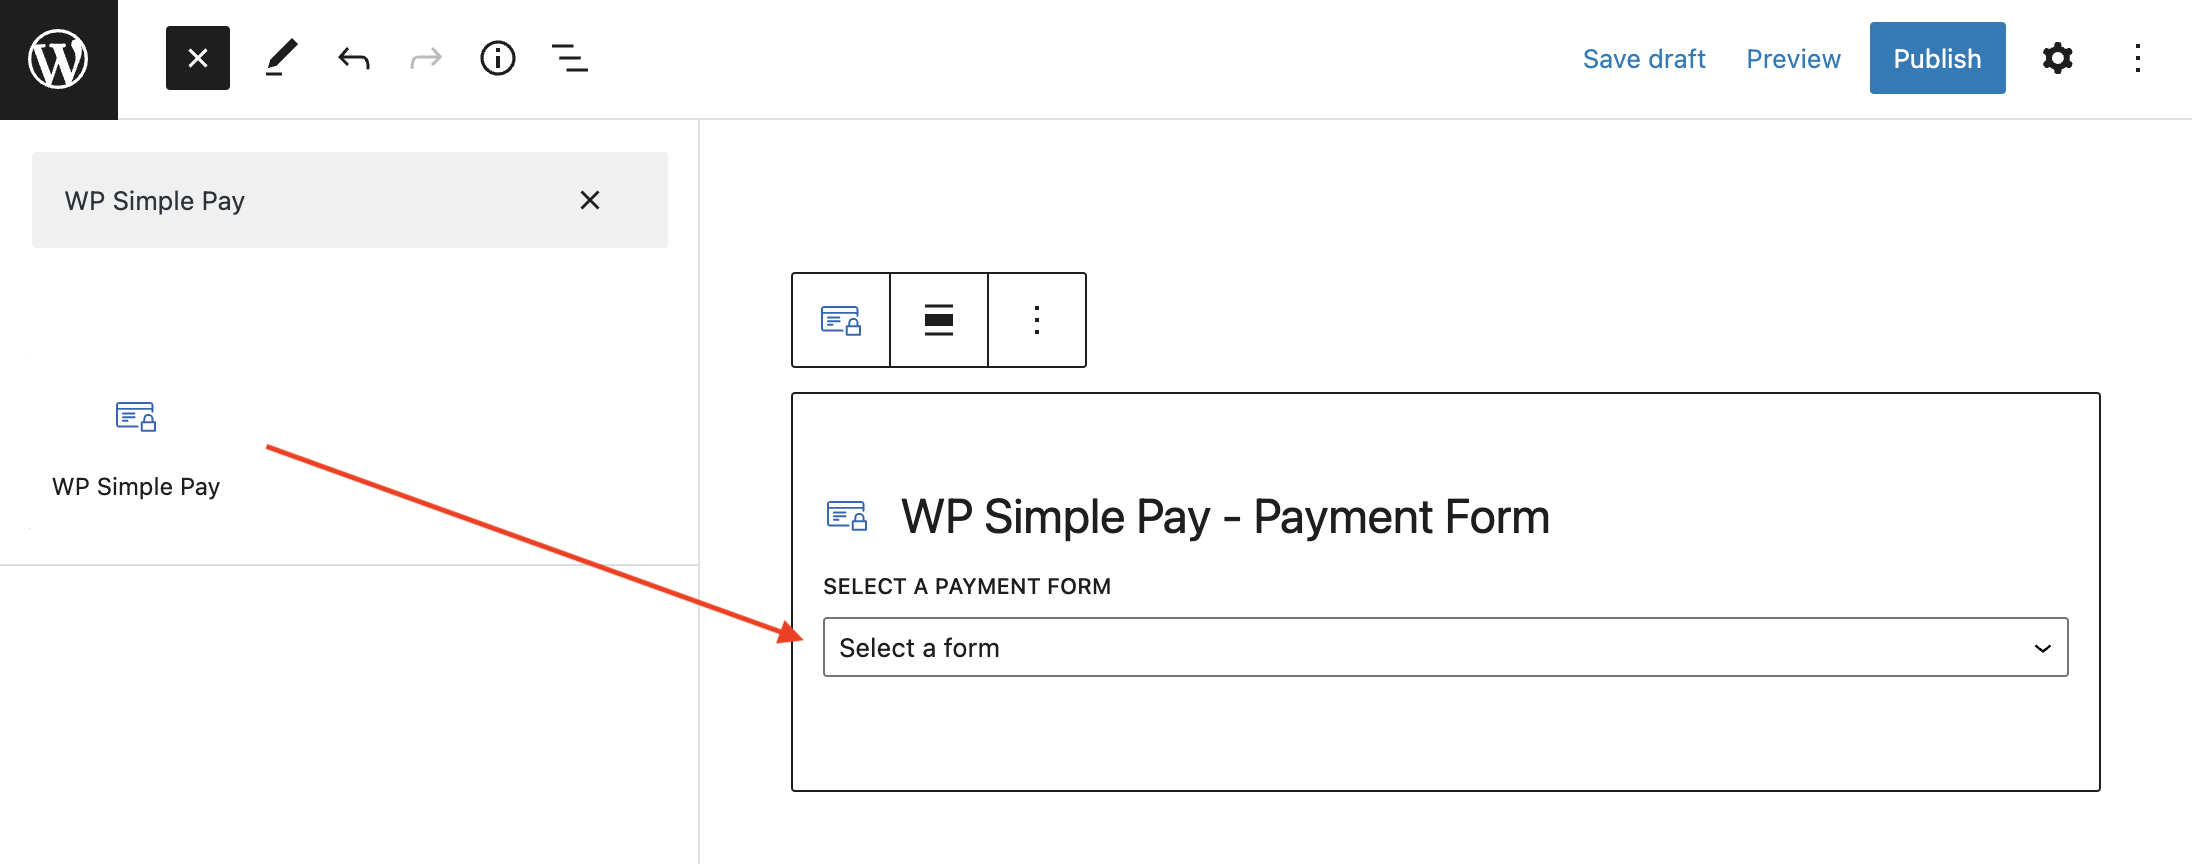
To embed the form, go to the post or page where you want to publish it. Then click on the + icon to add the WP Simple Pay block. Then choose a form you just created. And then, click Publish or Update.
There you have it!
We hope this article helped you validate and collect customer tax IDs in WordPress.
If you liked this article, you might also want to check out how to collect tax along with the payment in WordPress.
What are waiting for? Get started with WP Simple Pay now!
To read more articles like this, follow us on Facebook and Twitter.
Disclosure: Our content is reader-supported. This means if you click on some of our links, then we may earn a commission. We only recommend products that we believe will add value to our readers.


Leave a Reply