How to Add hCaptcha to WordPress Payment Forms (Step by Step)
Last updated on
Do you want to combat fraudulent payment attempts in WordPress?
Enabling an anti-spam technique like CAPTCHA helps you protect your payment forms from card testing and other automated scripts that attempt payment form submission.
While plenty of captcha services are available on the market, hCaptcha stands out from the rest with its privacy-first approach.
In this article, we’ll explain how to prevent fraudulent payments in WordPress with hCaptcha.
Why Enable hCaptcha on Payment Forms?
hCaptcha is a privacy-first anti-spam CAPTCHA service that prevents automated payment form submissions.
Compared to reCAPTCHA, hCaptcha discloses in its privacy policy what data is collected, processed, and shared with third parties.
When it comes to privacy, hCaptcha is better than reCAPTCHA.
Adding hCaptcha to WordPress Payment Forms
WP Simple Pay is the #1 Stripe plugin for WordPress that lets you create a payment form and also add hCaptcha to your forms to prevent fraudulent payments.
WP Simple Pay supports 3 different CAPTCHA services, so you can choose the right one that best suits your needs:
- Google reCAPTCHA
- hCaptcha
- Cloudflare Turnstile
Step 1: Install WP Simple Pay in WordPress
To combat spam payments with hCaptcha, the first thing you’ll need to do is to install and activate WP Simple Pay on your site.
Remove the additional 3% fee!
Most Stripe plugins charge an additional 3% fee for EVERY transaction
…not WP Simple Pay Pro!
Just go to the pricing page, pick a plan, and create a WP Simple Pay account. Then download the plugin from your account and install it on your site by uploading it.
For a detailed guide, check out how to install WP Simple Pay
Step 2: Sign Up for hCaptcha
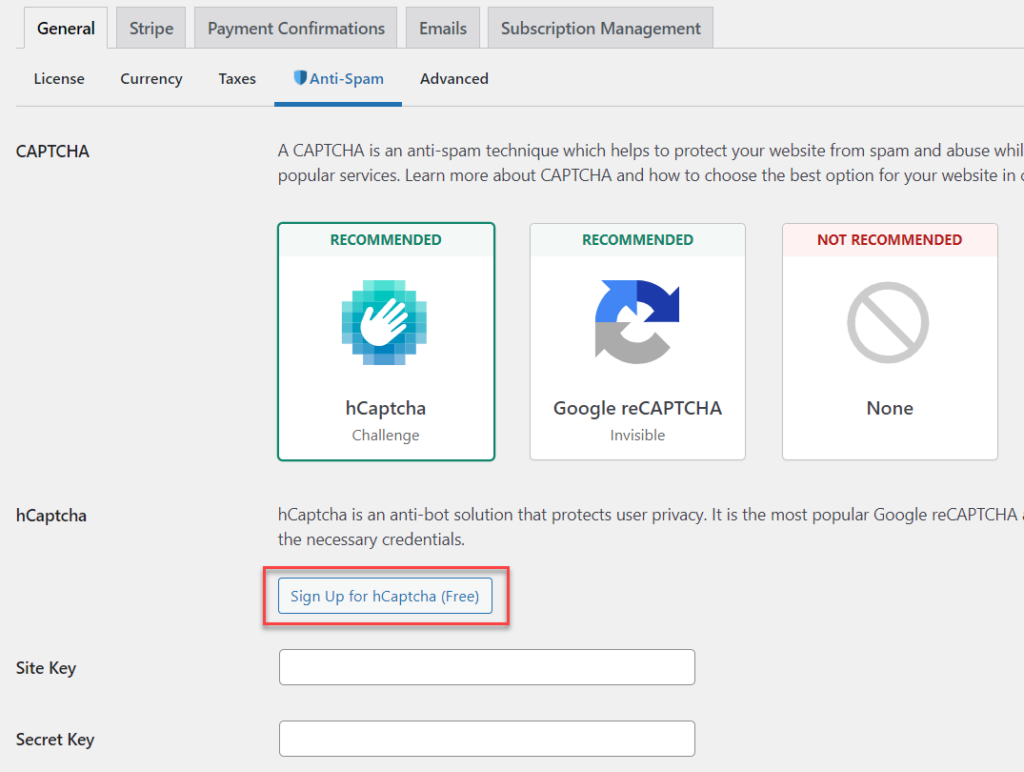
Navigate to WP Simple Pay » Settings and then under the General tab, click on Anti-Spam where you’ll find a big hCaptcha button. Now hCaptcha configuration settings will show up.
To get hCaptcha to work with WP Simple Pay, you’ll need to sign up for hCaptcha by clicking the Sign Up for hCaptcha (Free) button.

You need to submit relevant information on hCaptcha site during registration.
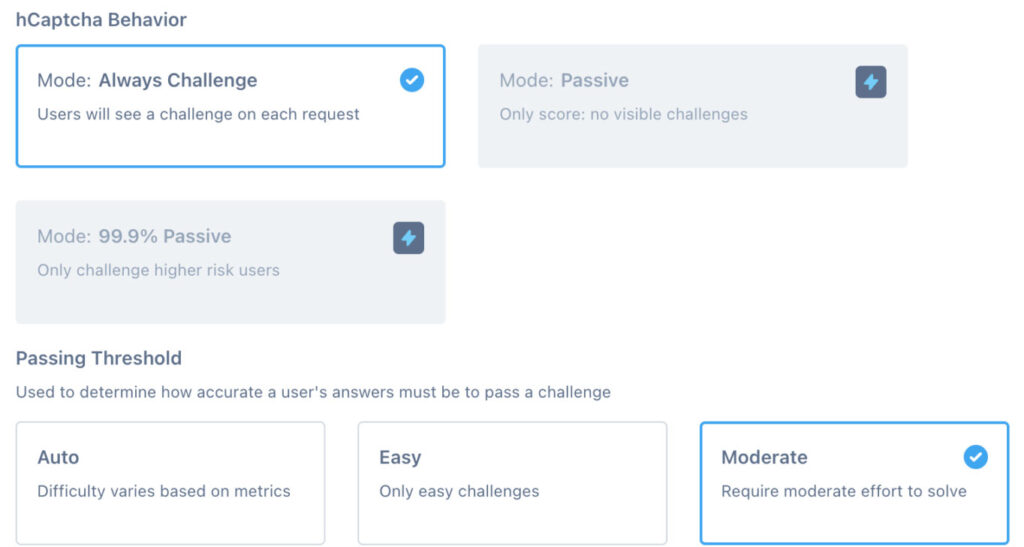
If you find the Moderate Passing Threshold setting is not reducing card testing or spam, you’ll need to switch to the Difficult setting, which will show harder challenges.

After registering your site, you will be redirected to a page where you’ll get access to Sitekey.

Copy the Sitekey and paste it into your WP Simple Pay Settings.
Similarly, you’ll also need to copy your Secret Key. You can find it by clicking your hCaptcha profile in the top right corner of your screen. Open your account menu and click Settings. Then copy your Secret Key and paste it into the Settings page of your WP Simple Pay dashboard.
Next, click Save Changes.
Step 3: Start Accepting Legitimate Payments
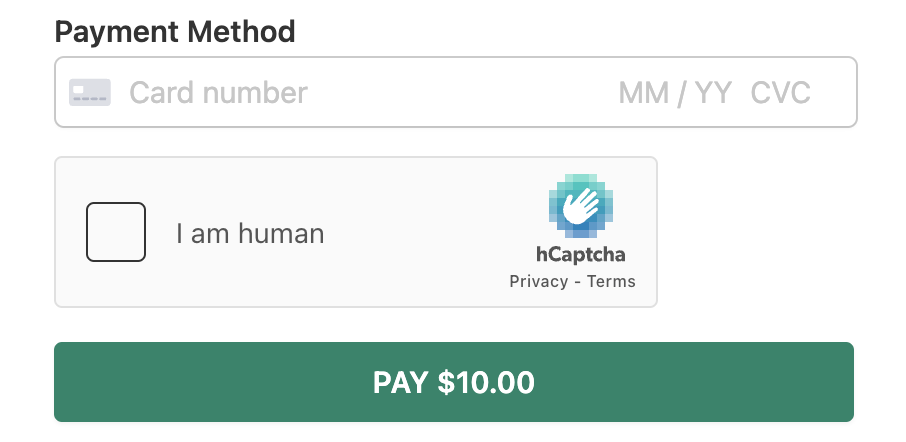
You’ll know things are set up correctly when you visit or preview your payment form and see hCAPTCHA’s challenge added to the payment form.

If you need guidance to create a payment form with WP Simple, follow the below guides:
- How to create a payment form
- How to create a recurring subscription form
- How to create an order form
That’s it!
We hope this article helped you add hCaptcha to your WordPress payment forms with ease.
You might also want to check out how to combat card testing in Stripe.
What are you waiting for? Get started with WP Simple Pay today to accept legitimate payments.
To read more articles like this, follow us on Facebook and Twitter.
Disclosure: Our content is reader-supported. This means if you click on some of our links, then we may earn a commission. We only recommend products that we believe will add value to our readers.


Leave a Reply