How to Accept Deposit Payments in WordPress
Last updated on
 Reviewed By:
 Spencer Finnell
Do you want to accept deposit payments on your WordPress website?
Requesting deposit payments can serve as a strategic safeguard for your business, mitigating the risk of lost time and resources and simultaneously ensuring an engaged and committed customer base.
In this article, we’ll show you how to easily accept a one-time deposit for subscription payment plans.
Accepting Deposit Payments
For businesses that sell custom products, services, or event registrations, accepting a non-refundable upfront deposit is a great way to secure your customer’s commitment.
Requiring a deposit can be especially beneficial for businesses that make custom products or offer tailored services. The deposit amount should be determined by what is being purchased and the potential risk involved.
If you provide event registrations or long-term services for specific projects like consulting, asking for a deposit acts as a safeguard against potential losses relating to time and resources, as well as cancellations and no-shows.
How to Collect Deposit Payments in WordPress
To collect a non-refundable deposit on your WordPress website, the best way is to use a Stripe payments plugin that allows you to set up subscriptions and accept a one-time fee.
WP Simple Pay, the #1 Stripe payments plugin for WordPress, enables you to accept one-time or recurring payments directly on your website without having to set up a shopping cart.
Using the plugin, you can accept deposit payments upfront for subscription-based products and services to ensure your customers stay committed throughout their agreement with you.
Let’s take a look at one way you can use WP Simple Pay to collect a deposit payment.
Step 1: Install and Activate WP Simple Pay
To accept an upfront deposit, you’ll need to install and activate the plugin on your WordPress website.
First, visit the pricing page and choose the best plan for your needs.
Once you’ve purchased the WP Simple Pay plugin, you can download it from your email receipt or your WP Simple Pay account.
For more details, check out our detailed guide on how to install WP Simple Pay.
After you’ve installed and activated the plugin, you’ll be directed to the setup wizard, which will walk you through setting up a Stripe account and connecting it to your website.
In the setup wizard, go ahead and click Let’s Get Started.

If you didn’t see the setup wizard, simply head over to WP Simple Pay » Settings » Advanced tab and click the Launch Setup Wizard button.
2: Connect WordPress to Stripe
To connect your WordPress site to Stripe, click on Connect with Stripe.

Next up, enter the email address you use for your Stripe account and connect it to your site. If you don’t have a Stripe account, you can easily create one by entering your email address and completing the registration.
Upon completing this process, you’ll be shown a success page that says, “Setup Complete.” Next, click on Create a Payment Form.

Step 3: Create a Subscription Payment Form
Now that you’ve installed and activated WP Simple Pay and connected your Stripe account to your website, it’s time to create a subscription payment form.
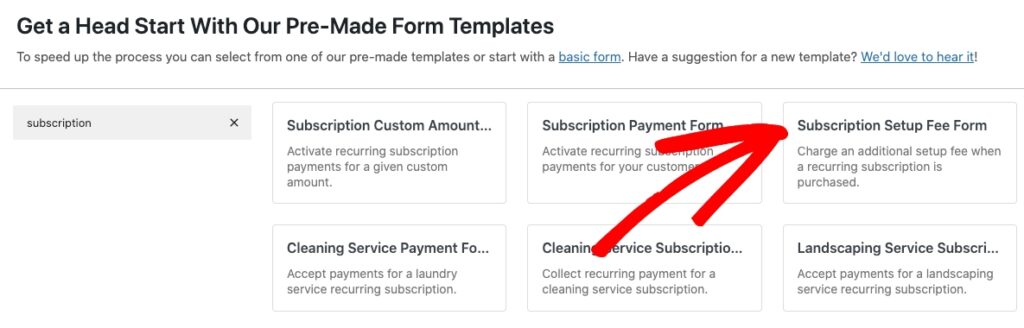
You should have already been redirected to the pre-built payment form templates library page. For the purpose of this tutorial, go ahead and choose the Subscription Setup Fee Form.
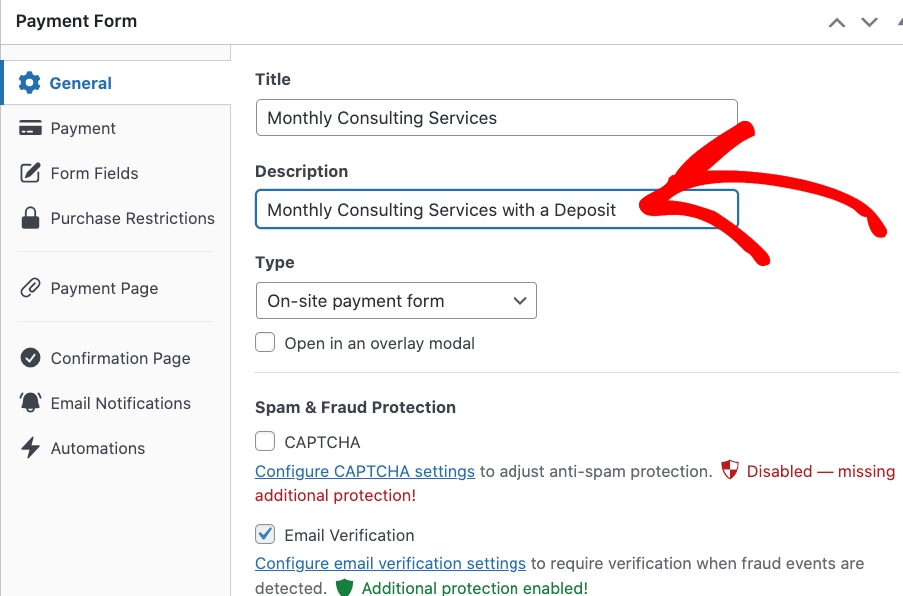
Next, in the General tab, add the title and description for your form and keep On-site payment form selected for the form Type. This will ensure that your visitors remain on your website throughout the checkout process.
Step 4: Add a Deposit Amount
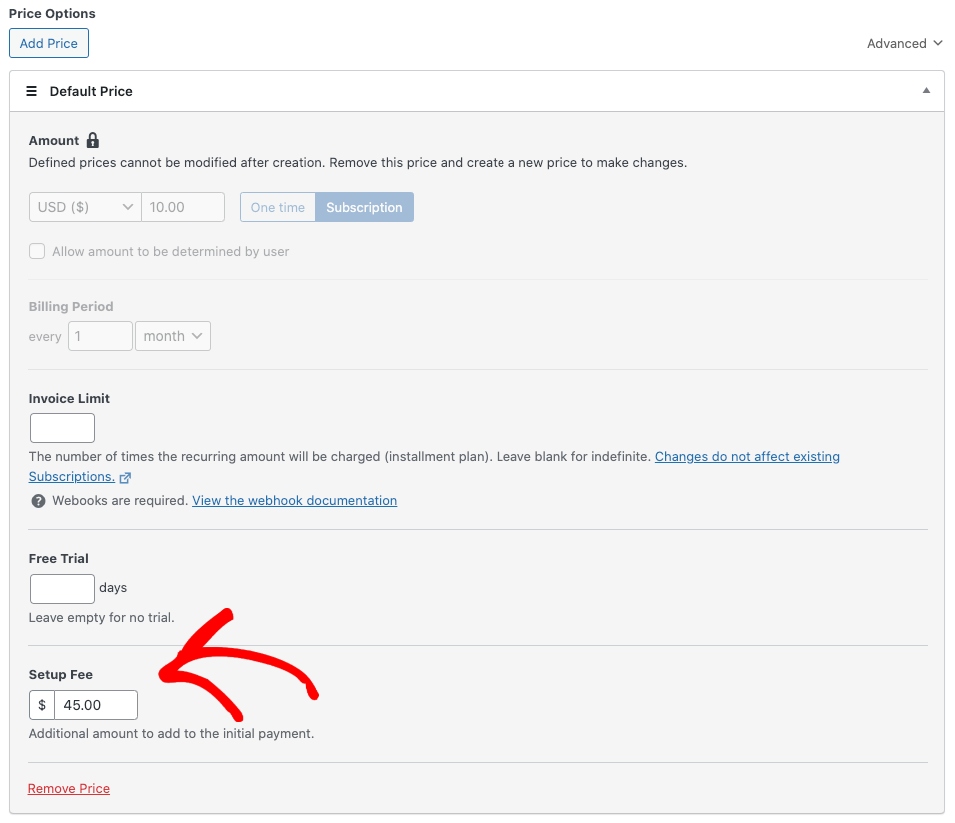
Next, from the Payment tab, add the price, frequency, and invoice limit. Here, you can also enter the deposit amount in the Setup Fee text field. You’ll notice we’ve added $45 for the one-time deposit.
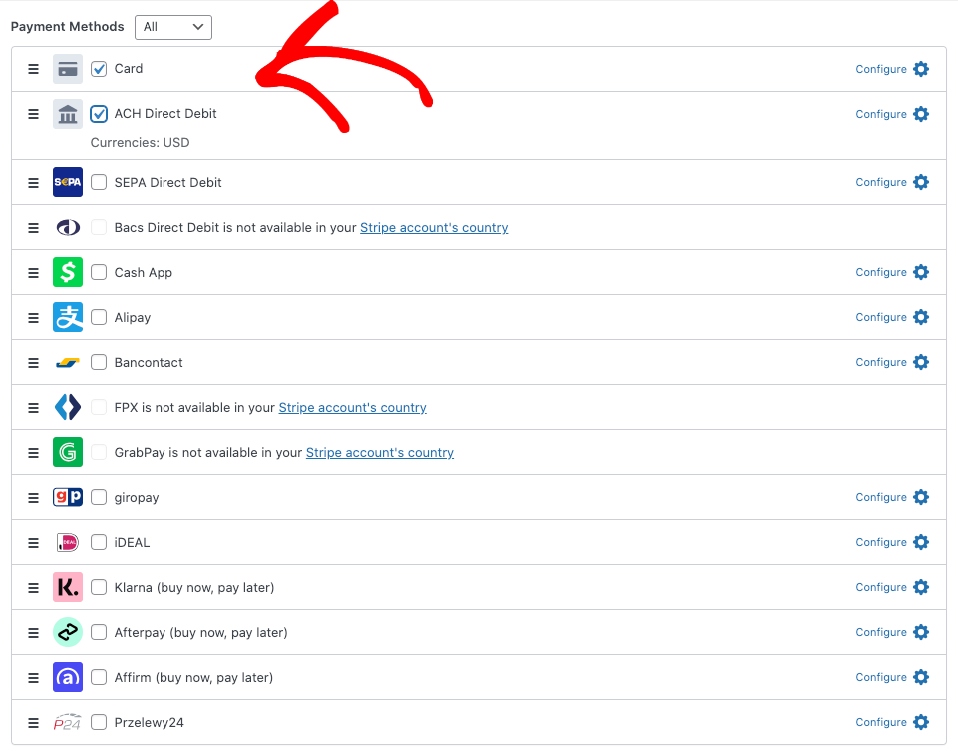
Finally, be sure to select the payment method options you want to accept from the list. WP Simple Pay lets you accept 10+ payment methods, including credit and debit cards, ACH Direct Debit, digital wallets, and more, to help you expand your reach and boost conversions.
Now that you’ve created your subscription payment form and added a one-time deposit, you can move on to the Form Fields tab. Using the dropdown menu, you can edit, add, or remove custom fields.
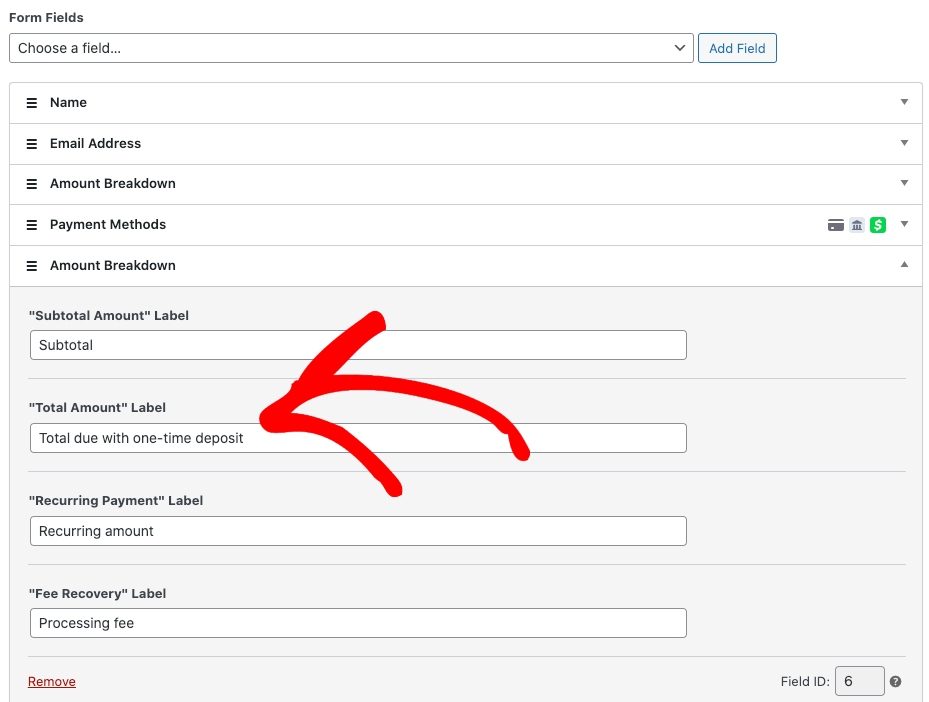
We strongly recommend adding the Amount Breakdown field to your form and customizing it so that your customers understand that they’re making a one-time deposit payment.
Simply find the Amount Breakdown option from the dropdown menu and fill in the Total Amount Label to reflect the deposit amount.
Step 5: Customize Your Email Confirmation Message
So far, you’ve created your subscription payment form and added a one-time deposit amount that will be collected along with the first subscription payment.
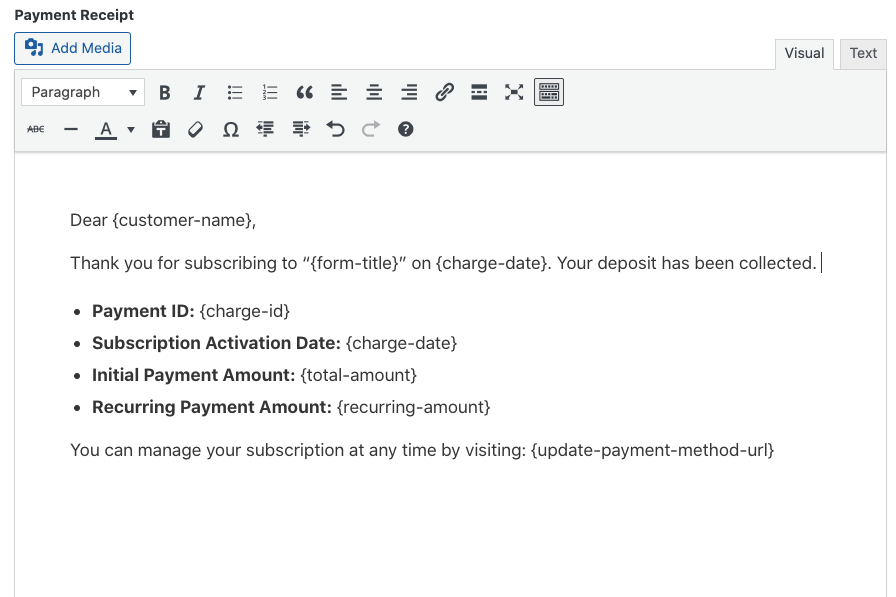
Next, to enhance customer communication, you’ll need to create a custom message for your subscription confirmation email that lets subscribers know they’ve paid a deposit.
Simply click on the Email Notifications tab and enter your message. This feature is especially great because you can personalize your message with Smart Tags.
To learn more about customizing your confirmation emails using Smart Tags, see our detailed guide on how to alert customers about refund statuses in WordPress.
Step 6: Add Your Payment Form to a Page or Post
Once you’ve published your payment form, you’ll need to add it to a page or a post on your site.
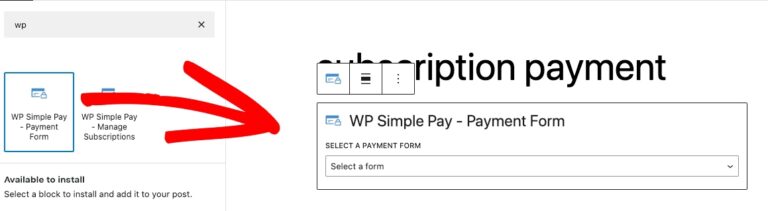
Simply navigate to the post or page where you want to publish it. Then click on the + icon to add the WP Simple Pay block. Then, choose the subscription form you just created from the dropdown menu. Finally, click Publish or Update.
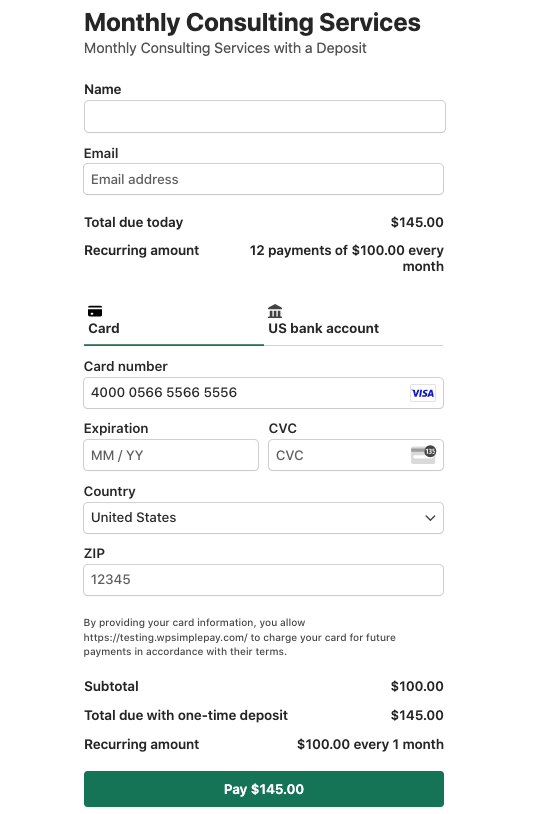
After you’ve published your form, it should look something like the one below. The amount breakdown clearly states the deposit amount.
That’s it! We hope this article has helped you learn how to accept a one-time deposit payment in WordPress.
If you liked this article, you might also want to check out the following guides:
- How to Add a Setup Fee to a Subscription Payment Plan in WordPress
- How to Offer 100% Discounts on Subscription Signups in WordPress
- How to Offer Installment Payment Plans in WordPress
What are you waiting for? Get started with WP Simple Pay today!
To read more articles like this, follow us on X.
Disclosure: Our content is reader-supported. This means if you click on some of our links, then we may earn a commission. We only recommend products that we believe will add value to our readers.


Leave a Reply