What’s Coming in 3.0 Part 4 – Custom Amount Improvements
Last updated on

In Part 1 we told you configuring massive shortcodes should be a thing of the past when creating payment forms in WP Simple Pay Pro 3.0.
In Part 2 we showed off the new payment form designer, which allows you to easily add, then drag & drop custom fields wherever you need them.
In Part 3 we introduced the new payment confirmation editor and currency settings.
Now we want to show you how we’ve simplified the setup and improved the abilities of the custom amount feature (i.e. “pay what you want”).
For one-time payments, you can simply enable the custom amount feature in the options. On top of that, you’ll be able to add a minimum amount.
Custom Amount Subscriptions
Want to add a custom amount field after a selection of Stripe subscription plans? Not a problem.
You’ll just need to enable the option, then set the minimum amount, interval, and frequency (i.e. once a month or every 2 weeks).
Here’s what this will look like to your site visitors/potential customers:
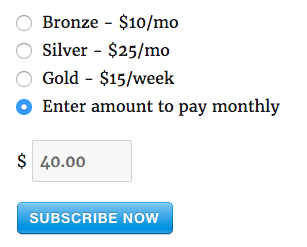
You can still prevent your site visitors from selecting a plan altogether and require them to enter an amount to pay recurring.
Hopefully, this makes it easier and more flexible to set up Stripe payment forms with custom amounts going forward.
Disclosure: Our content is reader-supported. This means if you click on some of our links, then we may earn a commission. We only recommend products that we believe will add value to our readers.

