How to Pass Stripe Fees On To Your Customers in WordPress
Last updated on
Wouldn’t it be nice to remove the payment processing fee every time a user makes a purchase on your WordPress site?
Similar to all online payment processors, Stripe charges an additional fee for every transaction it processes. The fee is often percentage-based, which means the higher the sale price, the higher the fee is.
In this article, we’ll show you how you can receive the full net payment amounts by passing the Stripe processing fee on to your customers.
Recovering the Stripe Processing Fee in WordPress
You’ve probably noticed that after a transaction on your site occurs, you don’t receive the exact amount you specified. This is because the Stripe processing fee is deducted from your earnings.
Stripe processing fee amounts vary depending on where you’re located, and the payment method chosen by your users.
For example, let’s say you’ve set the price of a product on your site at $100. If you’re based in the United States and your customer uses a credit card to check out, you would only actually receive $96.80. This is because Stripe collects 2.9% plus 30¢ to process a successful credit card transaction.
While this can be frustrating, having a way to add an extra amount to your site’s payment forms is the perfect way to recover the cost of the Stripe processing fee. That way, you’ll receive the exact amount you’re expecting from each sale.
The #1 Stripe payments plugin for WordPress, WP Simple Pay, comes with tons of pre-made payment form templates that let you easily customize form fields and also configure fee recovery options.
Here are a few of the benefits of WP Simple Pay’s Fee Recovery feature:
- Receive the total payment amount by forcing or requesting users to pay the Stripe processing fee.
- Collect the processing fee on a per-payment method basis. This way, you can ensure that the full processing fee for all the different payment methods is covered including the more expensive ones like credit cards.
- Require or allow users to cover the Stripe processing fee for donations so your cause doesn’t lose out on needed funds.
Remove the additional 3% fee!
Most Stripe plugins charge an additional 3% fee for EVERY transaction
…not WP Simple Pay Pro!
Without any more delay, let’s take a look at how to easily pass the Stripe processing fee on to your customers in WordPress so you can start collecting your desired amount without any deductions.
Step 1: Install and Activate WP Simple Pay
To either request or force customers to cover the Stripe processing fee on your WordPress site, the first thing you’ll need to do is install and activate WP Simple Pay.
You can do this by visiting the pricing page, purchasing the best plan for your needs, and uploading the plugin to your WordPress site.
For more details, check out this step-by-step guide on how to install WP Simple Pay.
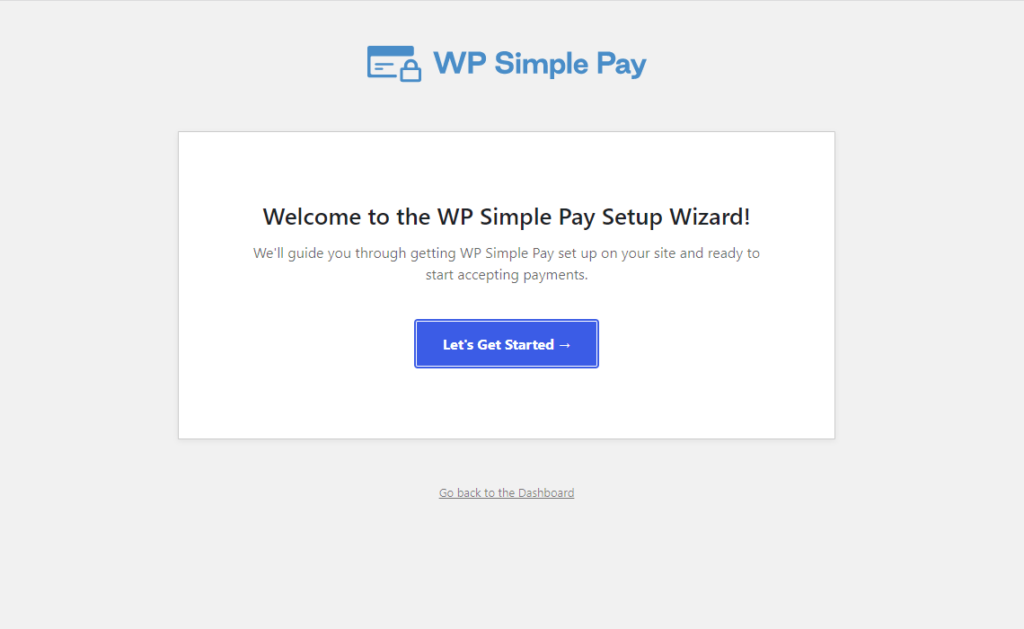
Once you’ve activated the plugin in WordPress, go ahead and click on the Let’s Get Started button.
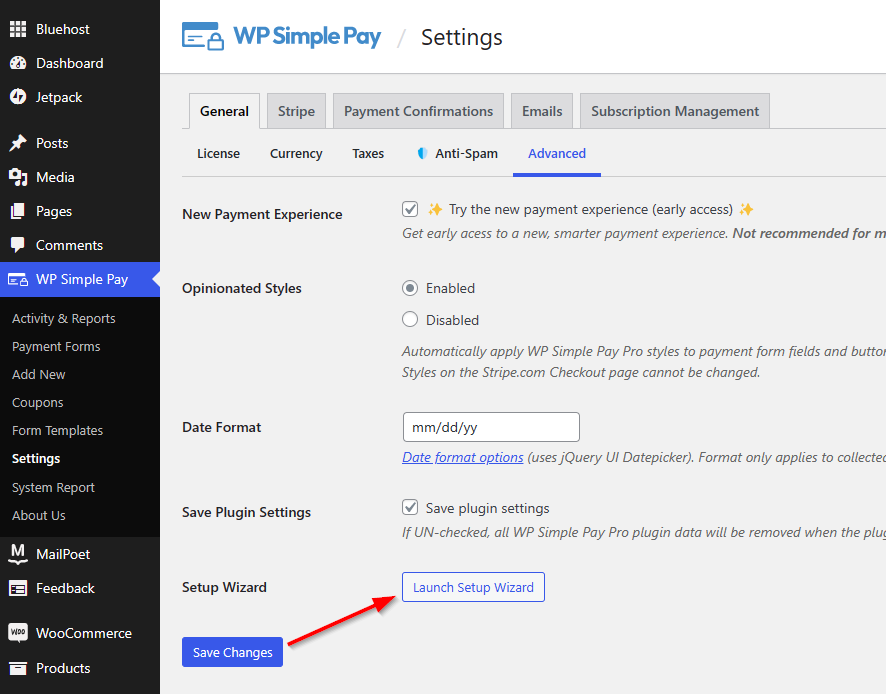
Note: If you’re not directed to the setup wizard automatically, you can navigate to your WordPress dashboard, go to WP Simple Pay » Settings » Advanced and click on the Launch Setup Wizard button.
Step 2: Connect Stripe to WordPress
Now that you’ve installed and activated WP Simple Pay, you’ll need to connect your Stripe account to WordPress in order to begin accepting payments and configuring recovery fee options.
Click on the Connect with Stripe button in the setup wizard.
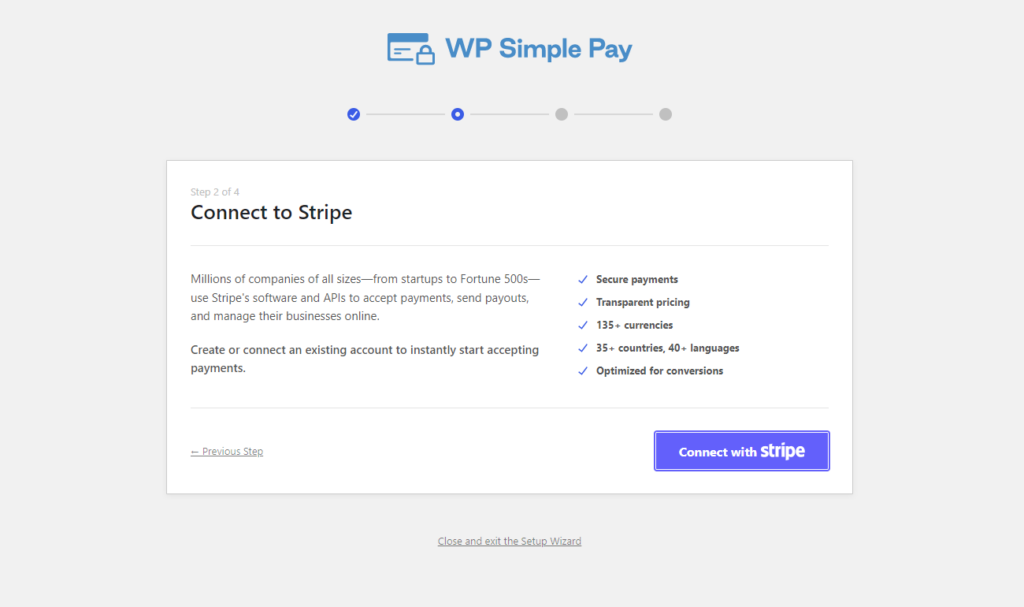
If you already have a Stripe account, all you need to do is go ahead and connect it to your site. To create a Stripe account, click on the Create a new account button.

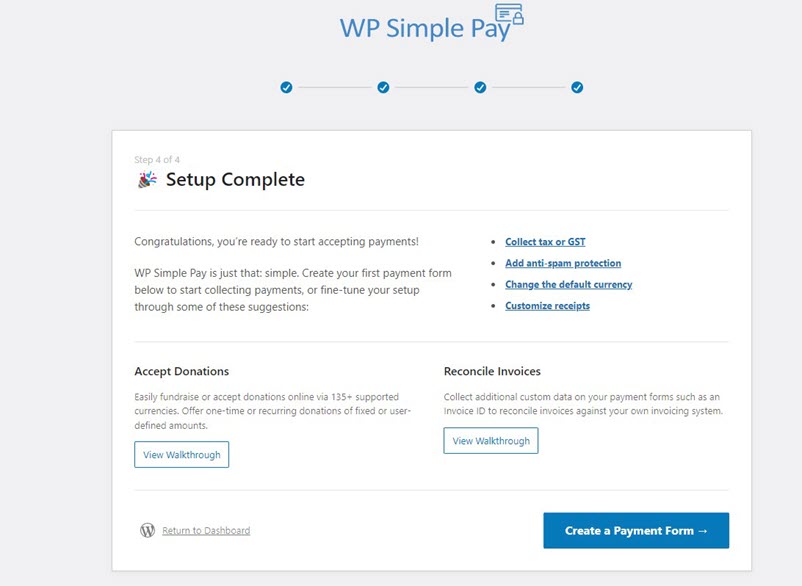
Once you have completed this process, you’ll see a success page that says Setup Complete.
Step 3: Create a Payment Form
To begin accepting payments on your site and passing the Stripe processing fee on to your customers, you’ll need to create a payment form.
First, click on the Create a Payment Form button on the success page.
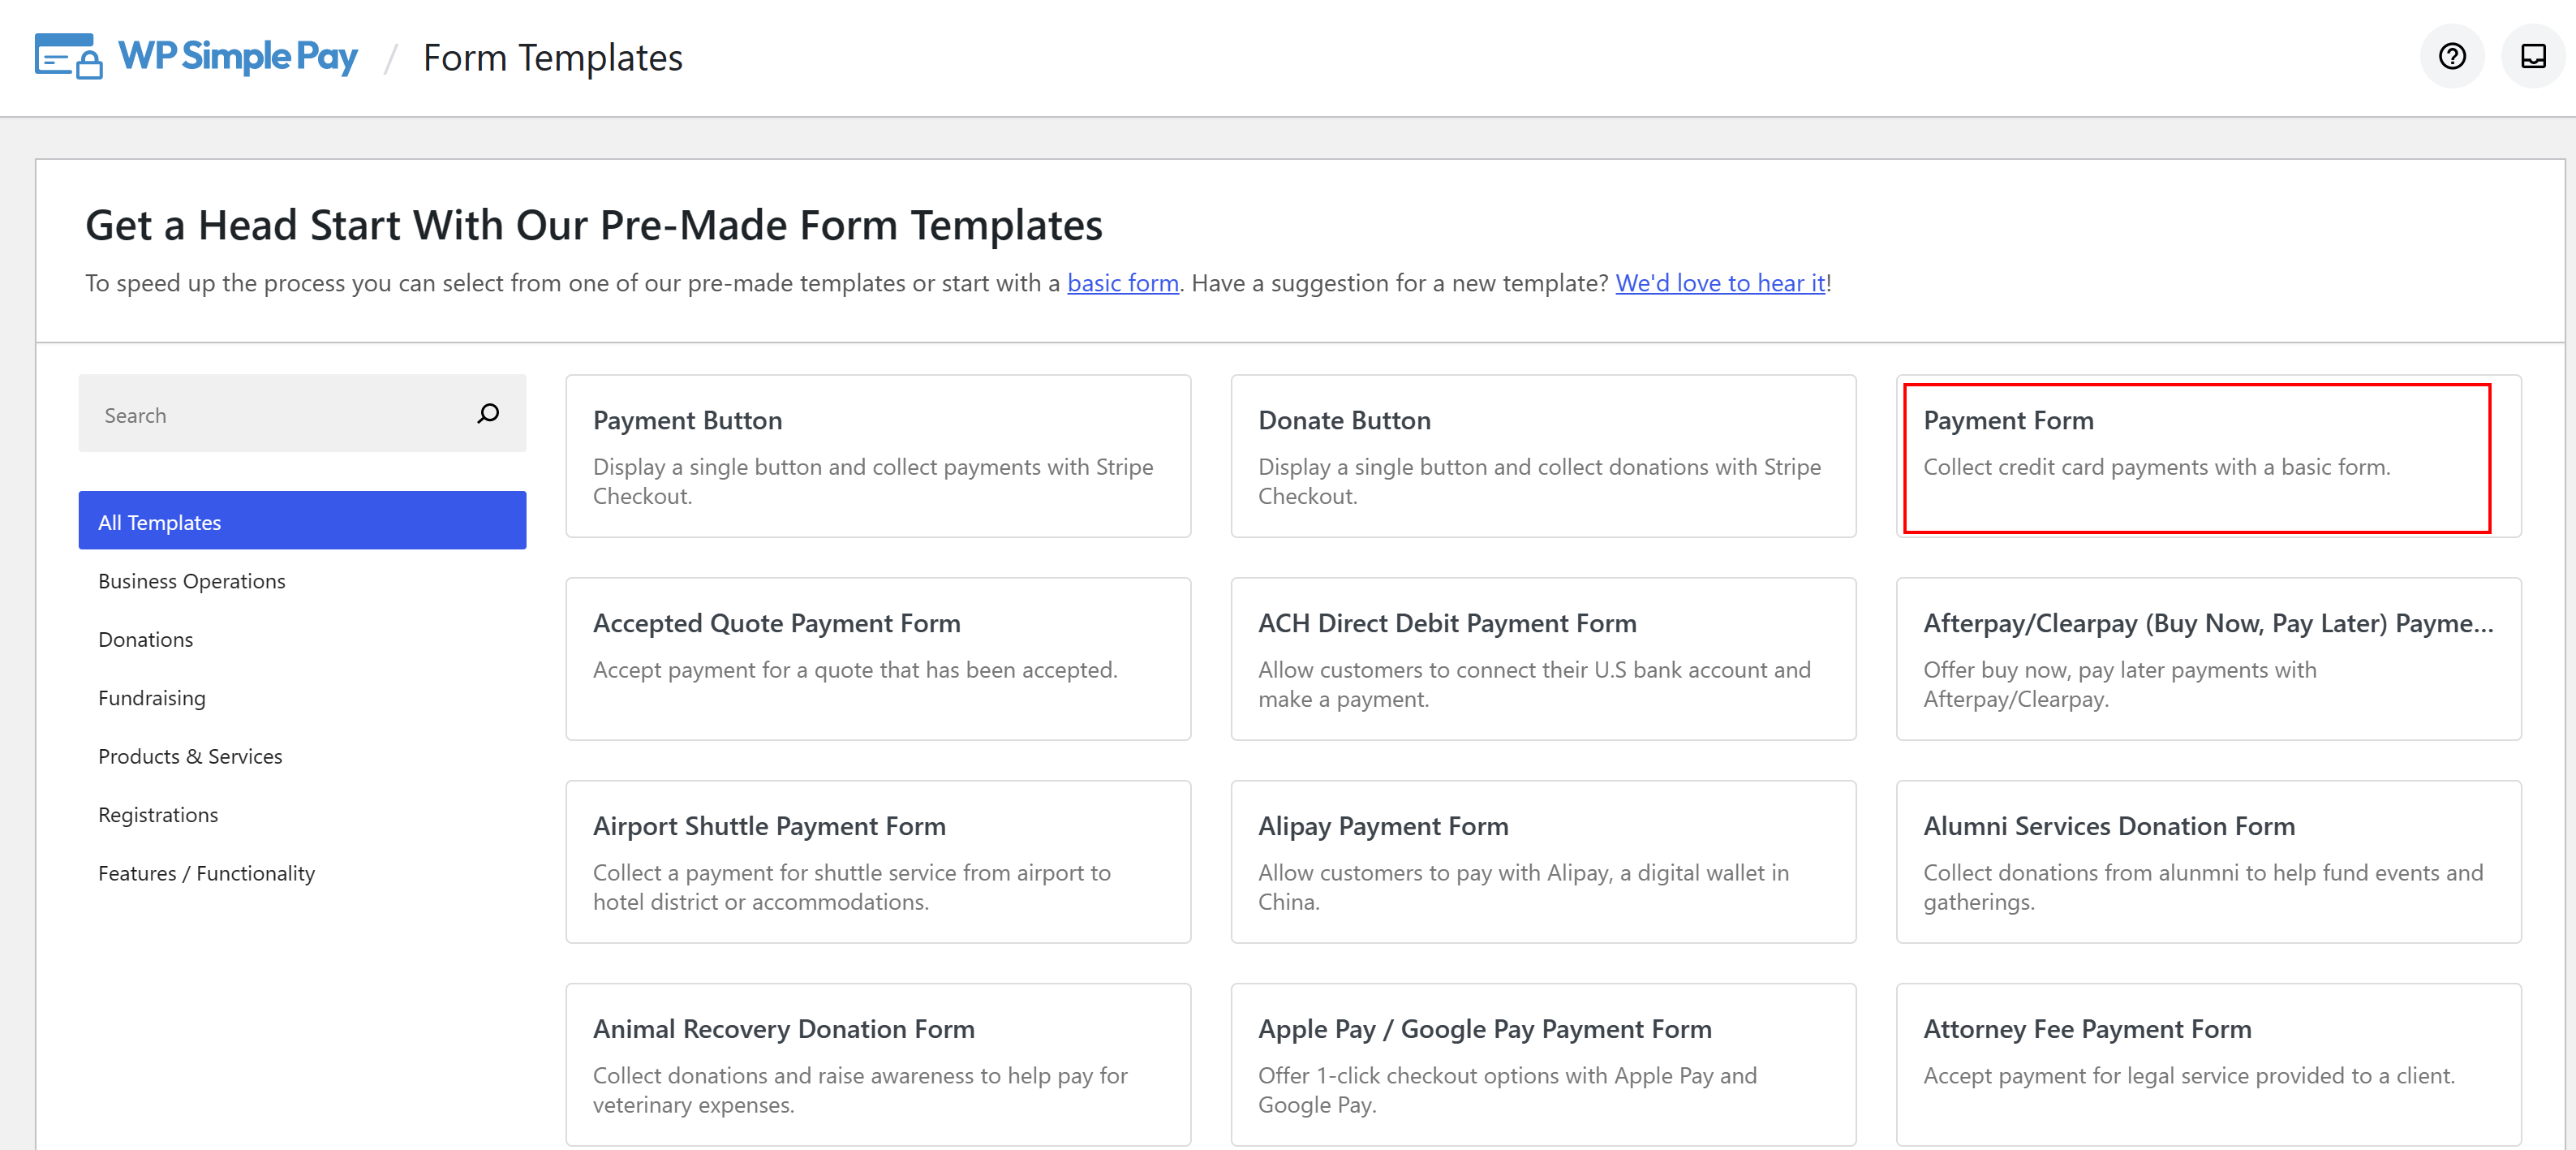
You should now be able to see a library of different types of payment form templates. For the purpose of this tutorial, let’s go ahead and choose the basic Payment Form template.
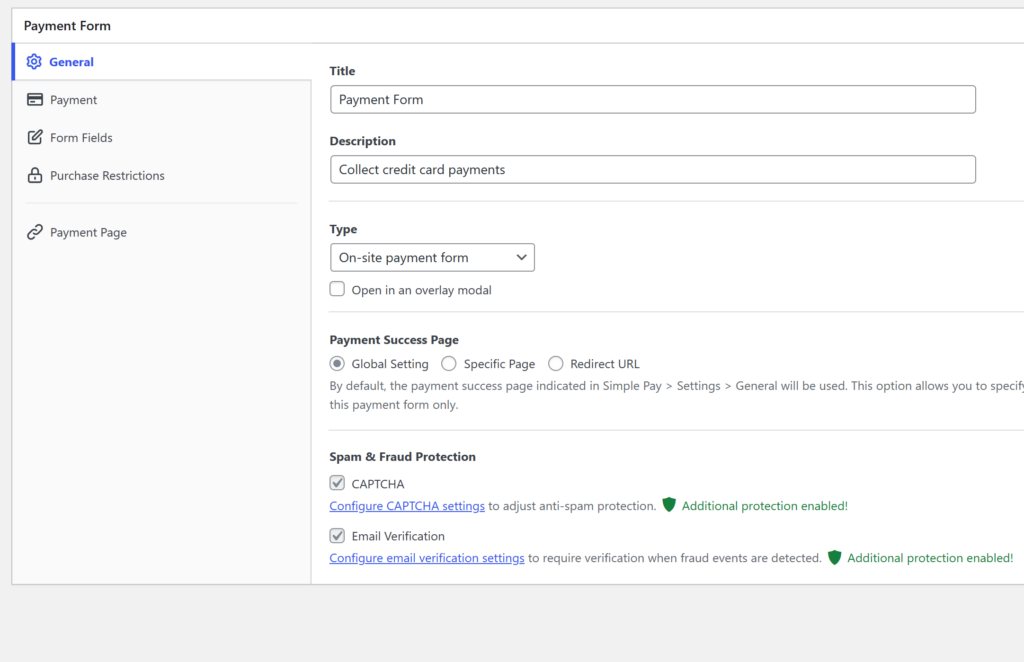
This will take you to the General tab of your payment form template, where you can customize your form’s title, description, and choose between an on-site payment form or having it show up off-site on the Stripe checkout page.
To customize the Payment Success Page, you can choose a specific page from your site or you can redirect customers to a third-party site by selecting Redirect URL.
Spam and fraud protection settings can also be set on this page.
Step 4: Configure the Form to Accept Payments
After creating the payment form, it’s time to configure it to accept payments.
First, navigate to the Payment option on the left to customize the currency, amount, and also select between a one-time or subscription payment.
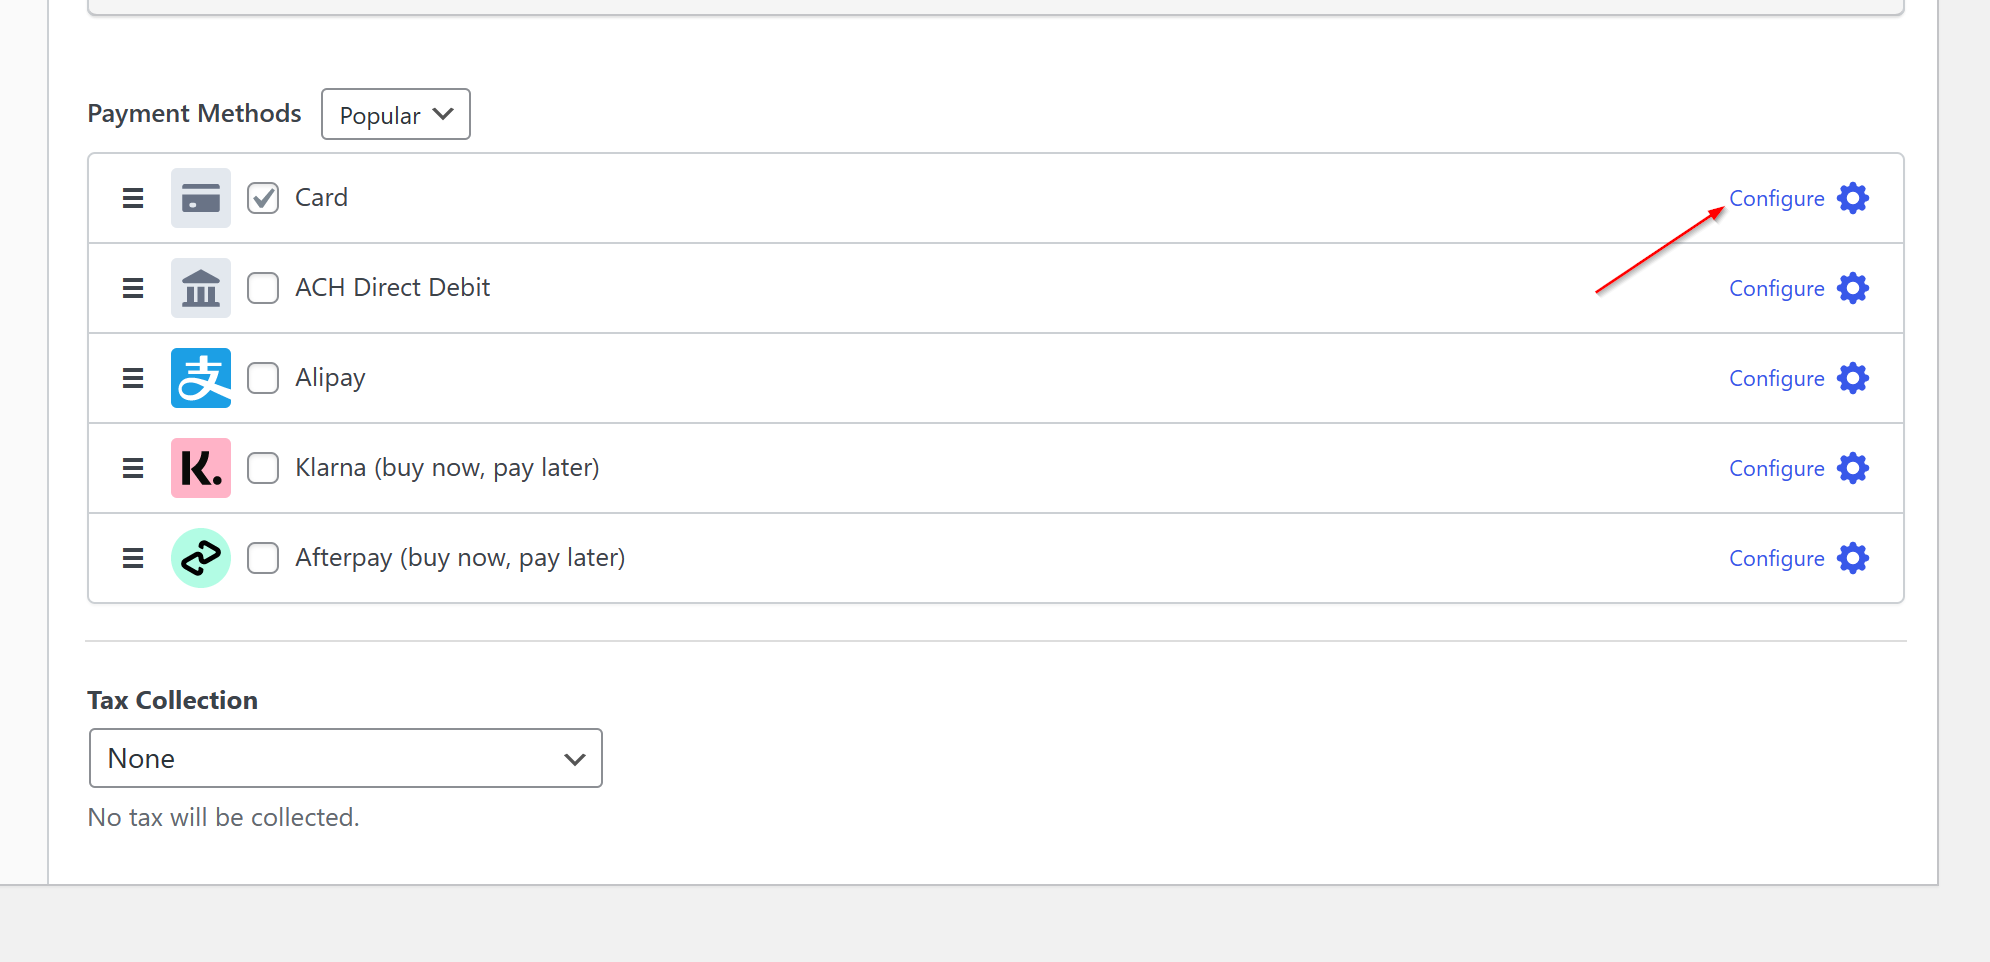
Next, navigate down to Payment Methods. Here is where you can see all the different payment methods that are available in your country and choose the ones you want to allow your users to use.
To add a recovery fee for credit cards, simply click on Configure.
A popup appears, allowing you to customize the Fee Recovery values.
Because Stripe collects 2.9% plus 30¢ when processing credit cards, you’ll want to add this to the fields to ensure that the fee gets passed on to your customers.
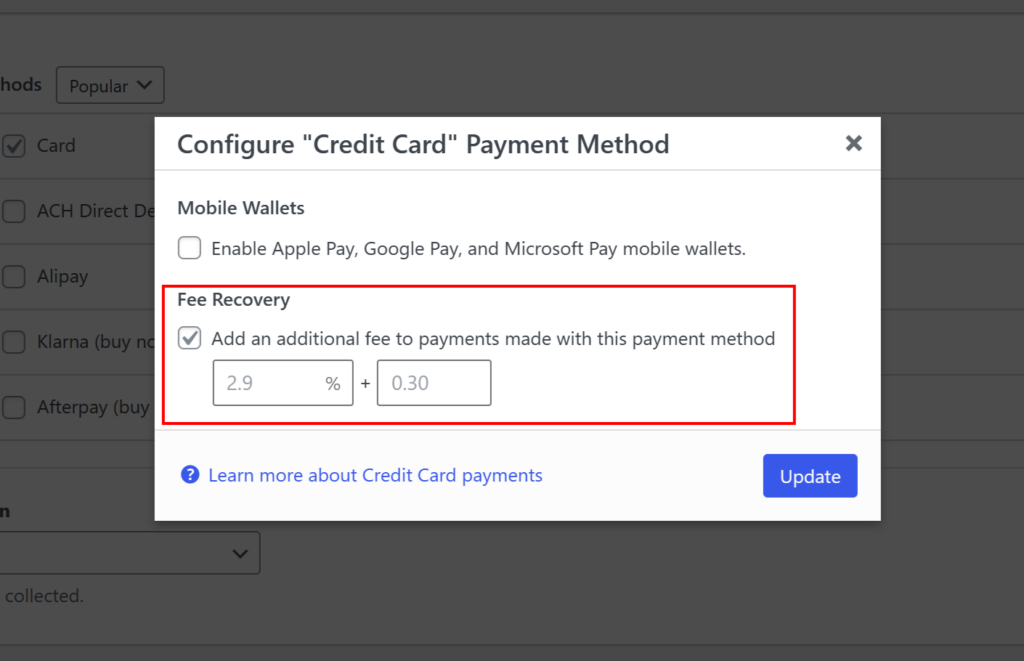
You can configure the fee recovery amounts for each of the different payment methods by following the same steps.
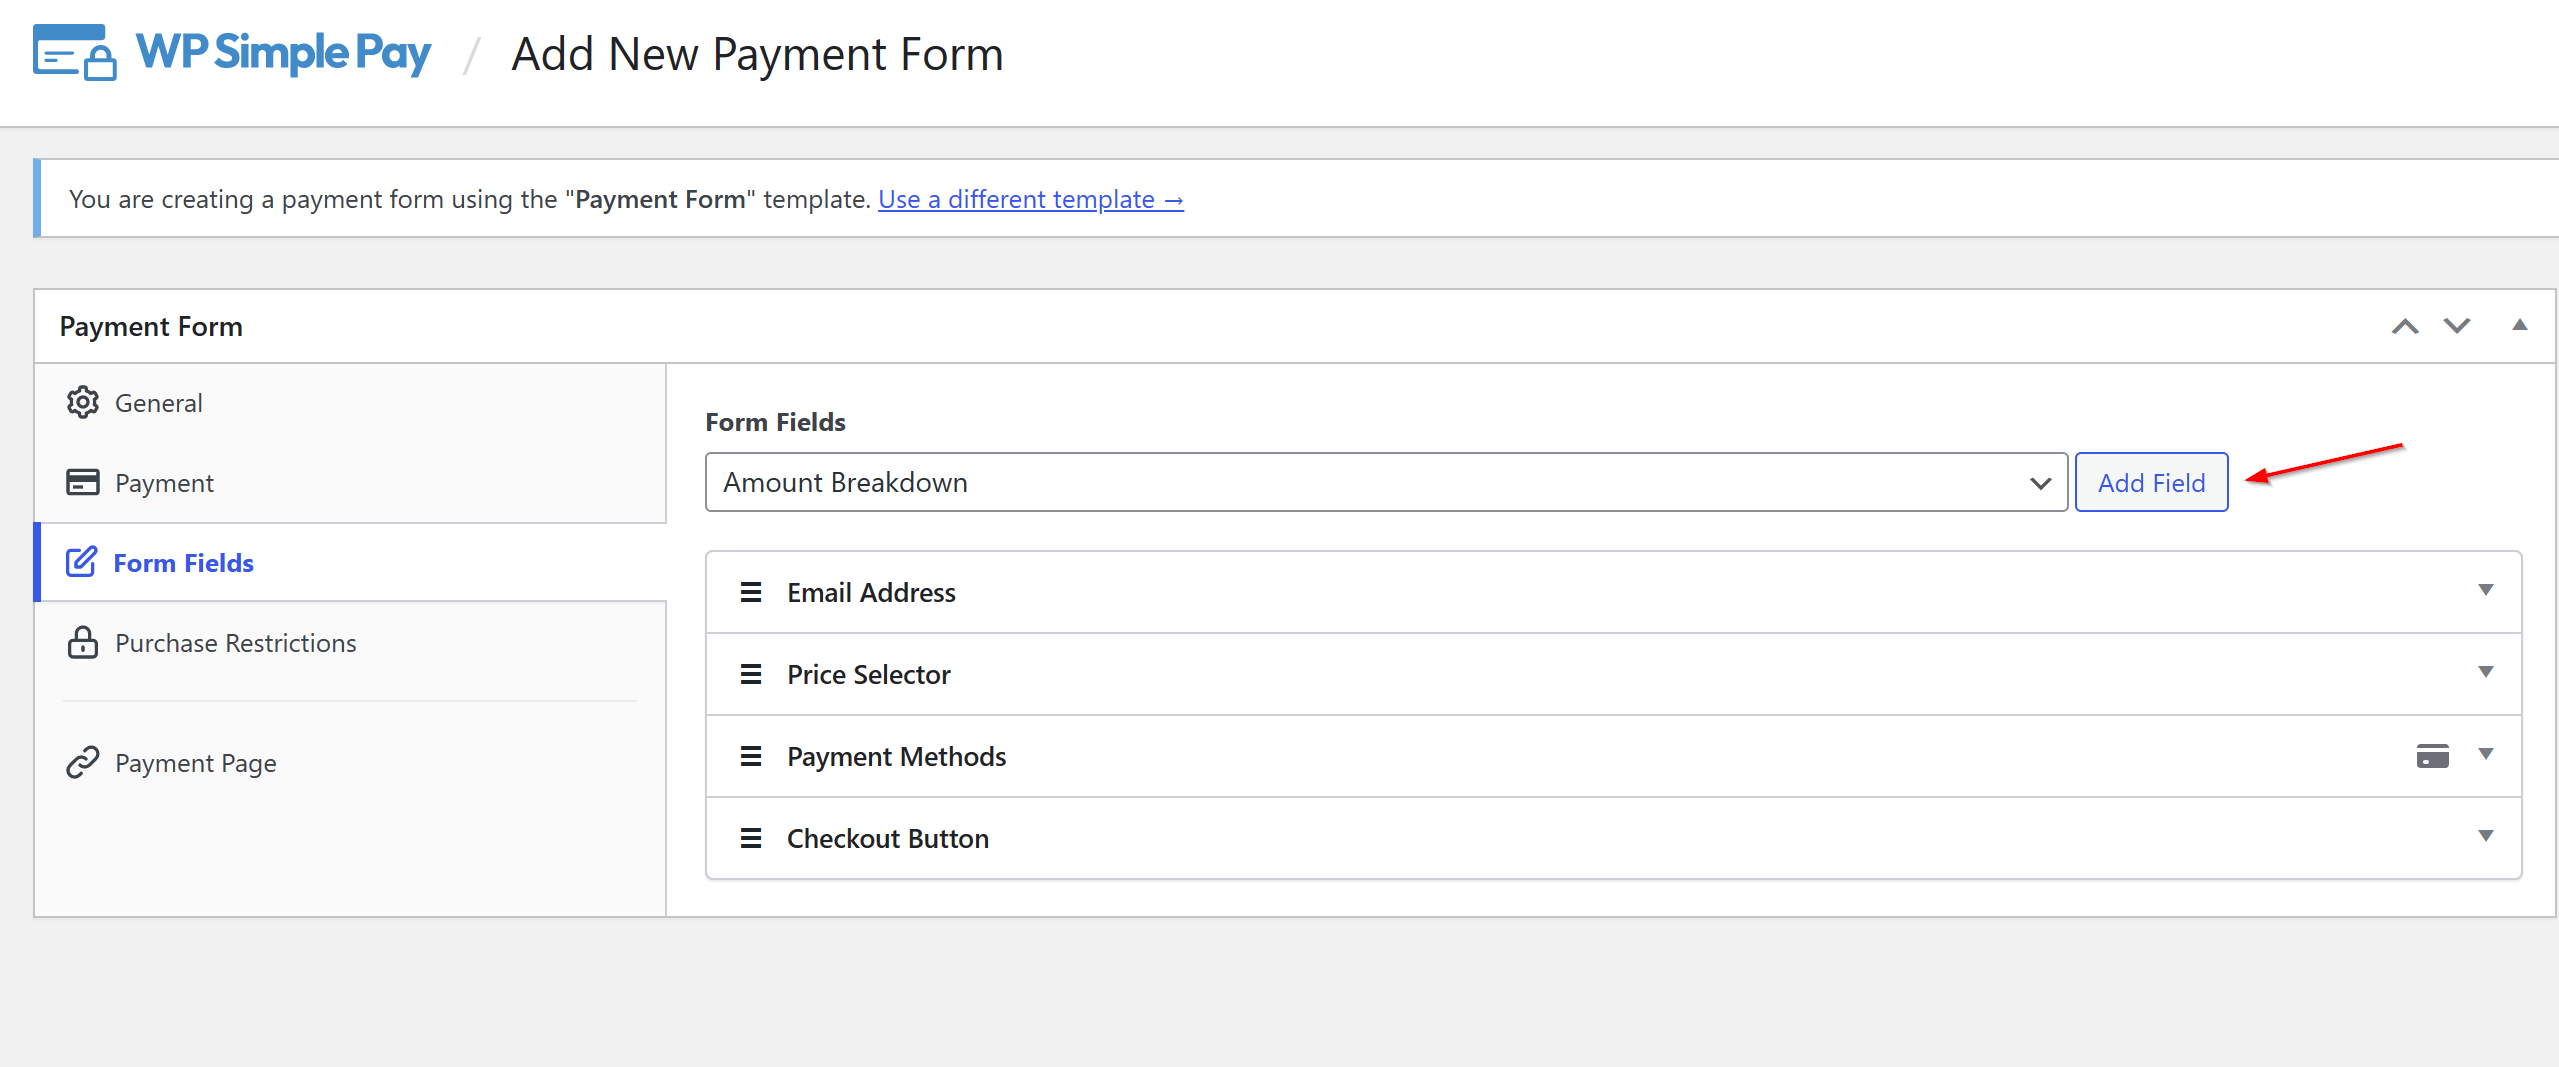
Next, you can add, remove, or customize any existing form fields by clicking on Form Fields on the left.
It’s a good idea to show your customers exactly how much you’re charging them by using the Amount Breakdown field.
To include the amount breakdown on your form, select the field Amount Breakdown in the dropdown and click Add Field.
This is how your Amount Breakdown will appear on your live form.

Step 5: Allow Users to Cover the Processing Fee
If you’re concerned about how forcing customers to cover the Stripe processing fee will impact your sales, there is no need to worry.
WP Simple Pay lets you offer users a choice whether or not to pay the fee during checkout.
You can do this by simply going to Form Fields and adding a Fee Recovery Toggle to the list of form fields from the dropdown menu.
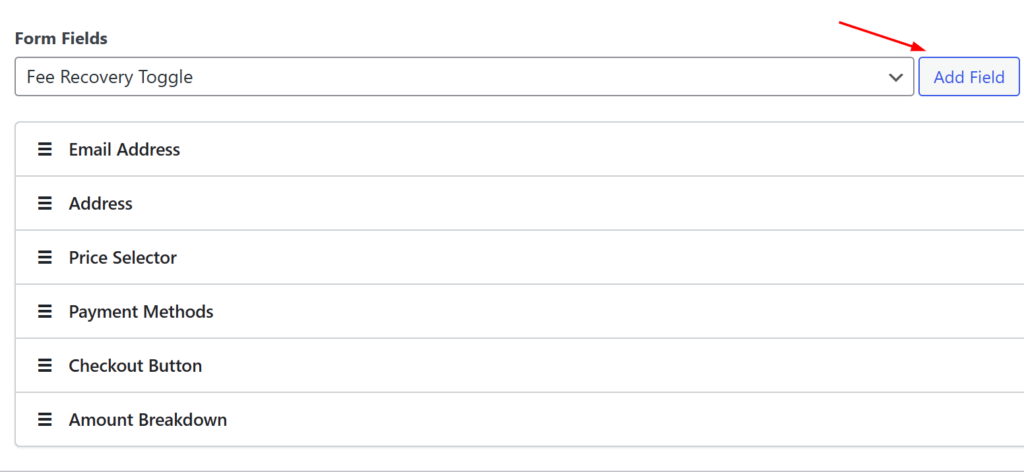
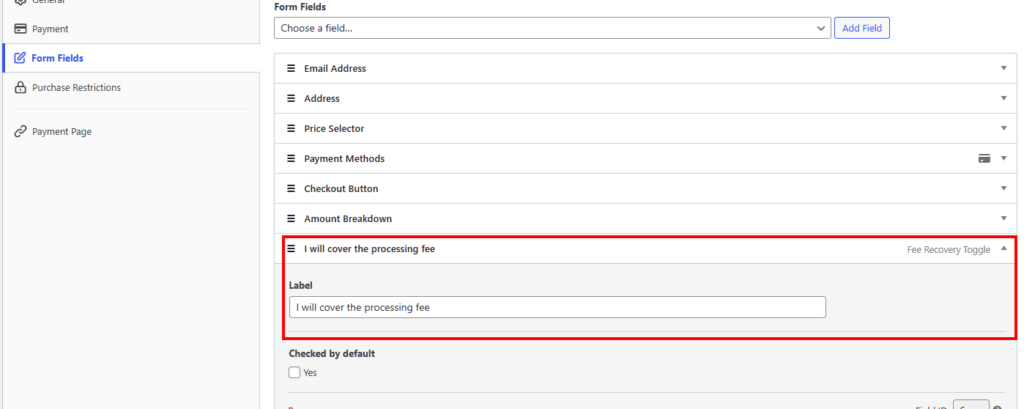
Once the Fee Recovery Toggle has been added to the list, you can customize the label to meet your needs.
For example, for a donations payment form, you can add a personal message that lets your users know that they’re choosing to pay the processing fee in addition to making a donation.
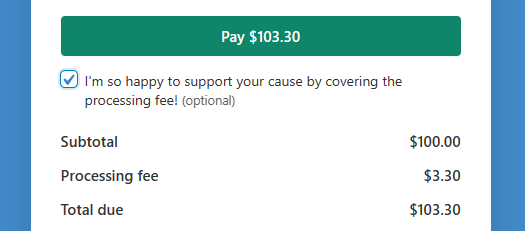
Your live form will look something like this with the fee recovery toggle and customized label.
Now that your payment form has been created and configured to pass the Stripe processing fee on to your customers, you are ready to begin accepting payments.
Step 6: Add Your Payment Form to a Page
The final step to begin accepting payments with the Stripe processing fee covered by your customers is to embed the form on your site.
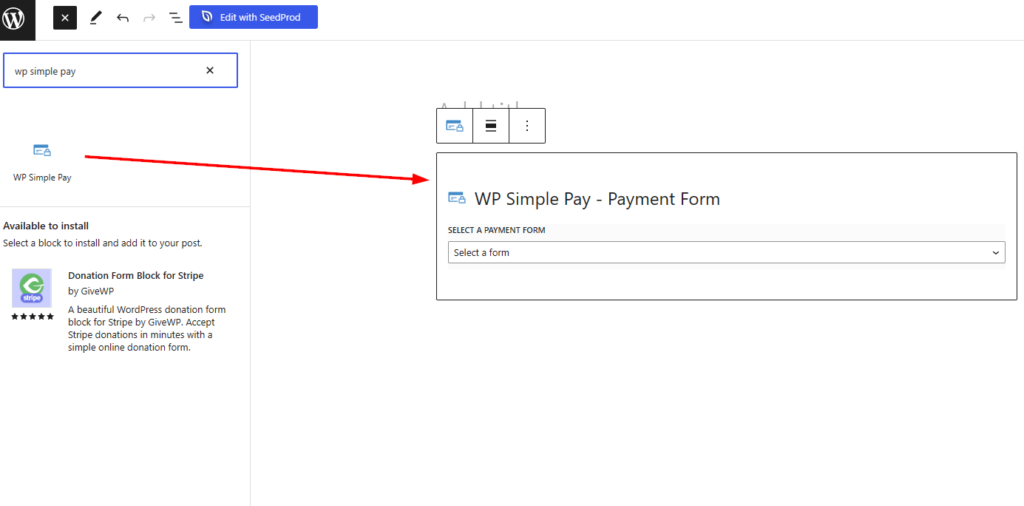
Simply go to the page or post where you want your payment form and click on the + icon to add the WP Simple Pay block.
Choose the form you just created from the dropdown menu and click Publish or Update in the upper right corner of your dashboard.
You did it!
We hope this article has helped you learn how to pass the Stripe processing fee on to your customers in WordPress.
If you liked this article, you might also want to check out how to enable Stripe Test Mode in WordPress.
What are you waiting for? Get started with WP Simple Pay today!
To read more articles like this, follow us on X.
Disclosure: Our content is reader-supported. This means if you click on some of our links, then we may earn a commission. We only recommend products that we believe will add value to our readers.


Leave a Reply