
How to Improve Customer Communication with an Itemized Email Receipt
Last updated on
 Reviewed By:
 Spencer Finnell
Do you want to create a payment confirmation page with an itemized breakdown of the line items purchased?
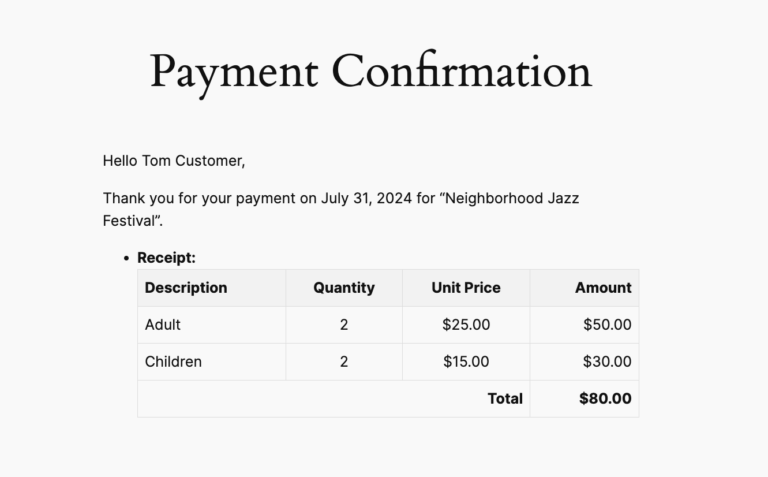
An itemized breakdown will help customers understand what they can expect to receive from you and what each item costs. It will provide the details in a way that clears up any confusion about the charges.
In this article, we’ll show you how to easily create a personalized email with an itemized receipt to help you improve customer communication.
In this article
Why Send an Itemized Email Receipt?
Itemized email receipts can be sent automatically to customers after they’ve completed a transaction on your site.
The customer receives the payment confirmation email within a few minutes, providing them assurance that their product or service is on the way.
You can use itemized email receipts to inform customers exactly what they’ve purchased and the cost of each individual item, clarifying any questions they might have.
That said, let’s examine how to send a personalized email receipt with an itemized breakdown.
How to Send an Email Receipt with a Breakdown
The easiest way to create a personalized email receipt with an itemized breakdown is to use a Stripe payments plugin for WordPress, like WP Simple Pay, which allows you to automate email receipts without using code. It’s the #1 Stripe payments plugin on the market and lets you accept payments on your WordPress site without needing to install additional plugins or build a complicated shopping cart.
The plugin offers many Smart Tags that you can use to generate specific details about the transaction automatically in your email receipts without writing a single line of code.
First, you need to install and activate the plugin on your site. Then, visit the pricing page and choose the best plan for your needs. Once you’ve finished installing the plugin, upload the .Zip file to your site via your WordPress admin dashboard.
If you need help, just follow our step-by-step tutorial on how to install WP Simple Pay Pro.
Upon activation, the plugin will automatically launch its setup wizard.
Go ahead and click on the Let’s Get Started button.
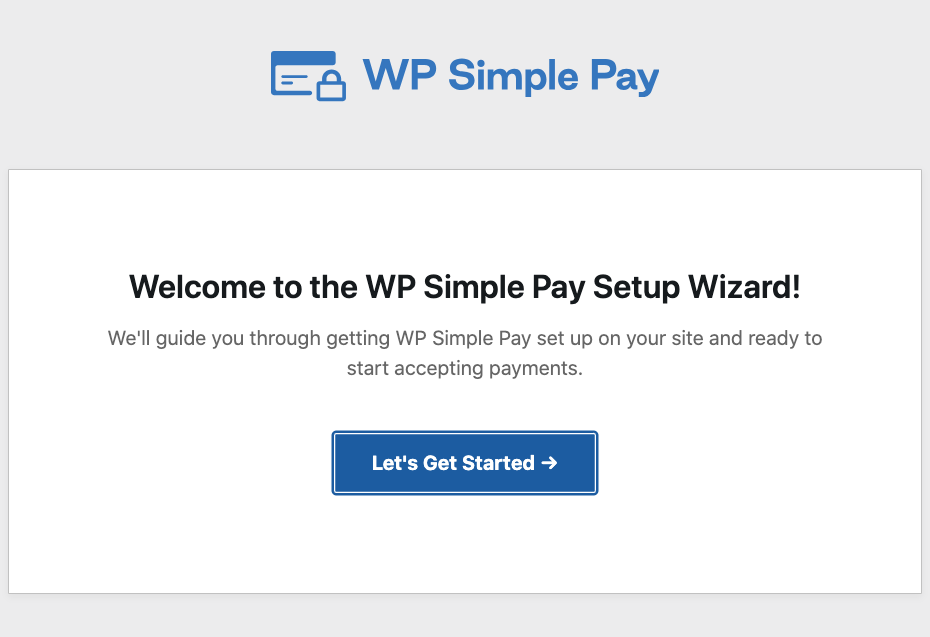
The wizard will quickly walk you through connecting your Stripe account with your site.
Once you’ve finished, you should see a success message. Click on the Create a Payment Form button.

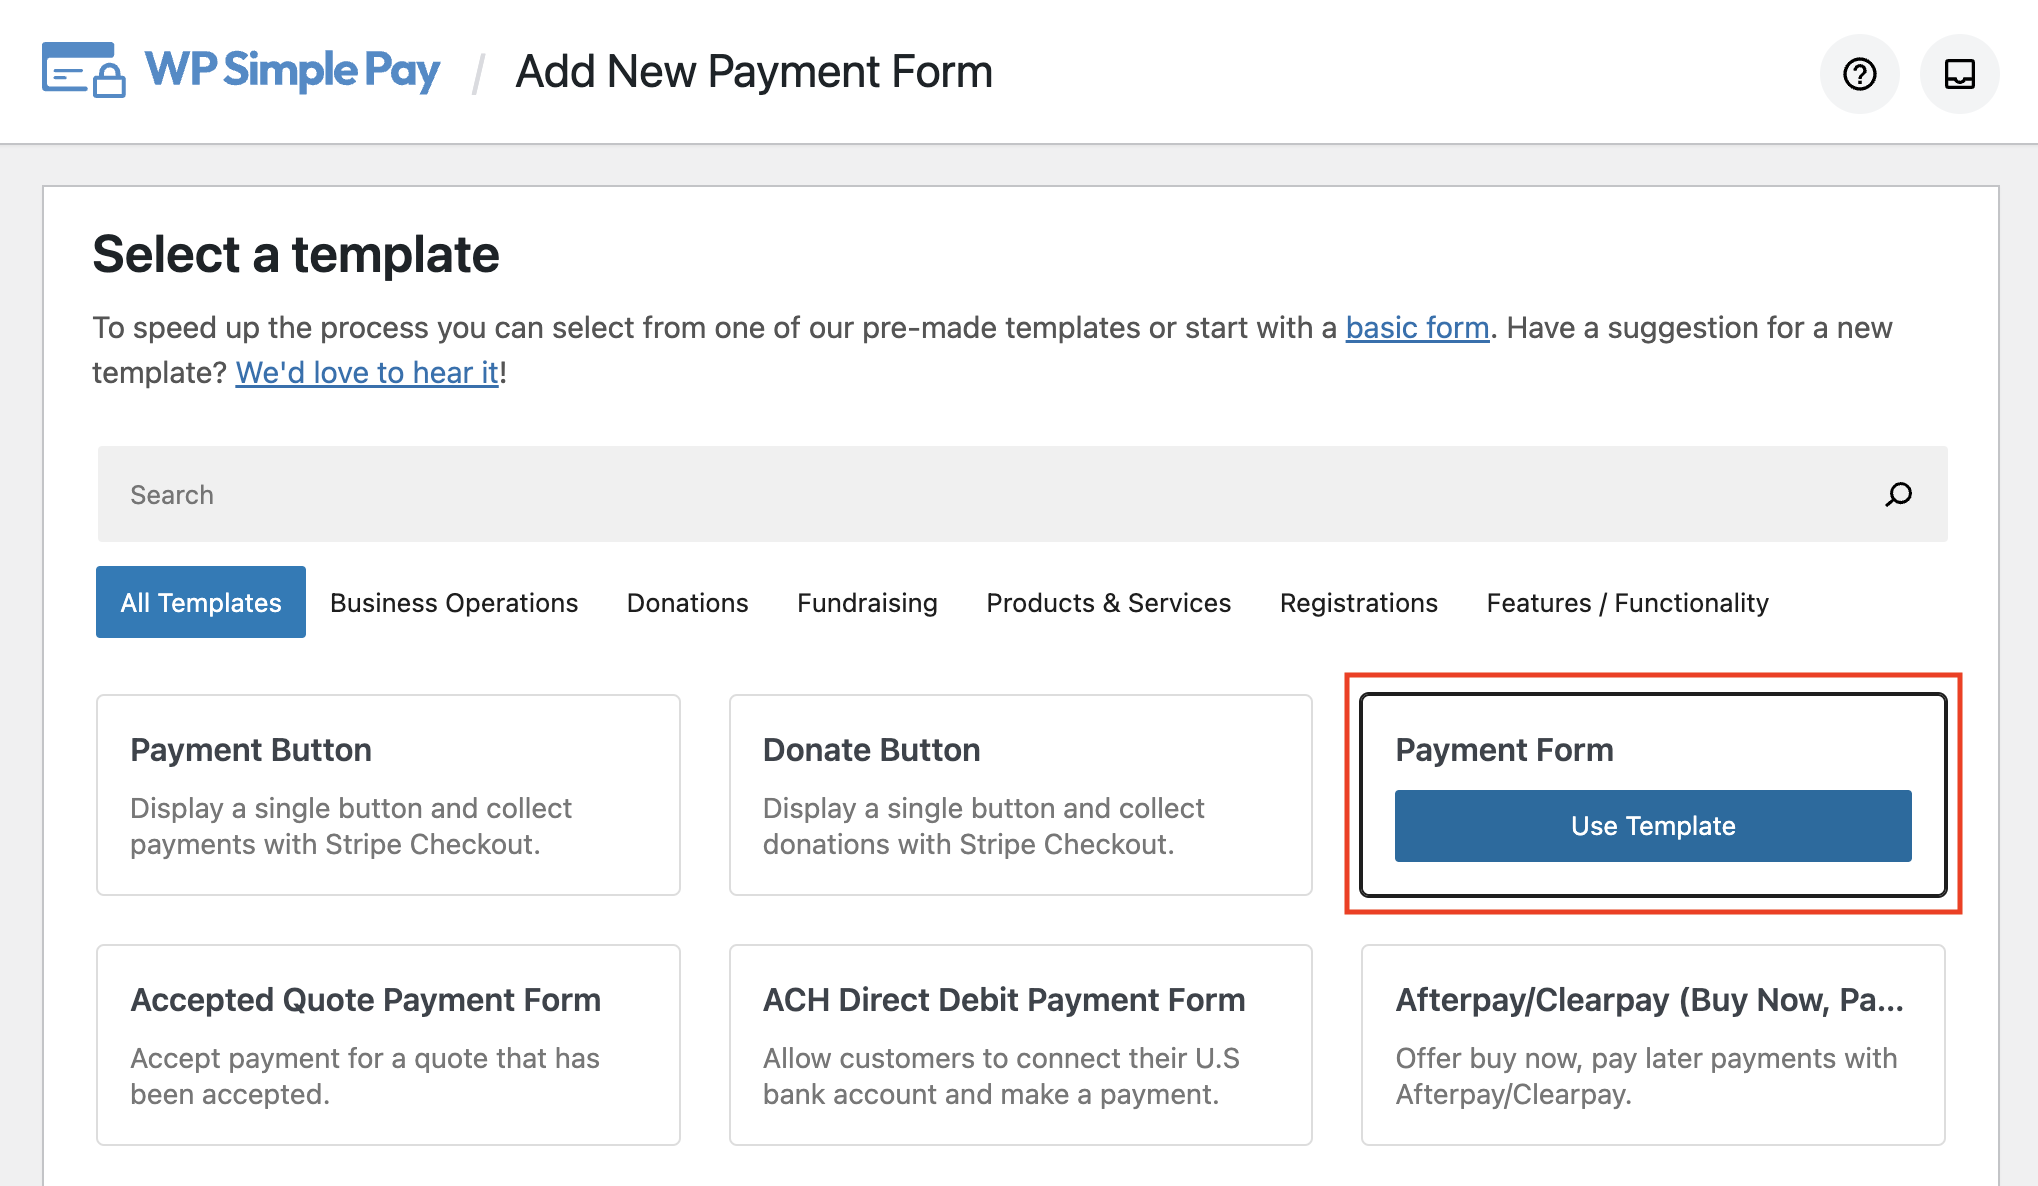
Once you are on the payment form templates library page, you can choose from several different pre-built forms. The best part about using a template is that most of the work has already been completed for you. You can easily make changes to the default settings to meet your specific needs.
First, click on the Payment Form template. While you can use WP Simple Pay to create payment email confirmations and email receipts with itemized breakdowns for all kinds of different payment forms, we’ll use the basic Payment Form template for this tutorial.
Creating a Payment Form
Now that you’ve installed WP Simple Pay and connected your Stripe account, it’s time to create a payment form that you can use to accept online payments directly on your site. You can also create your personalized email receipt message from the payment form builder.
First, in the General tab, enter the title and description of your payment form. Also, be sure to leave On-site payment form selected for the Type.

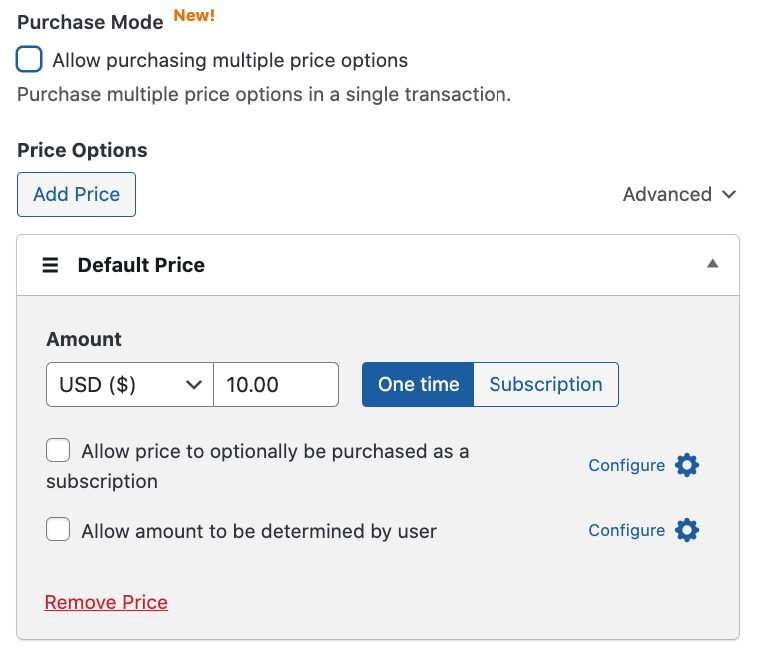
Next, in the Payment tab, enter the price amount and details for the items you want to sell. You can click on the Add Price button to create multiple price options and choose between a one-time or subscription payment for each individual item.
Then, scroll down and choose the payment method options. WP Simple Pay offers 10+ payment methods to help you boost conversions.
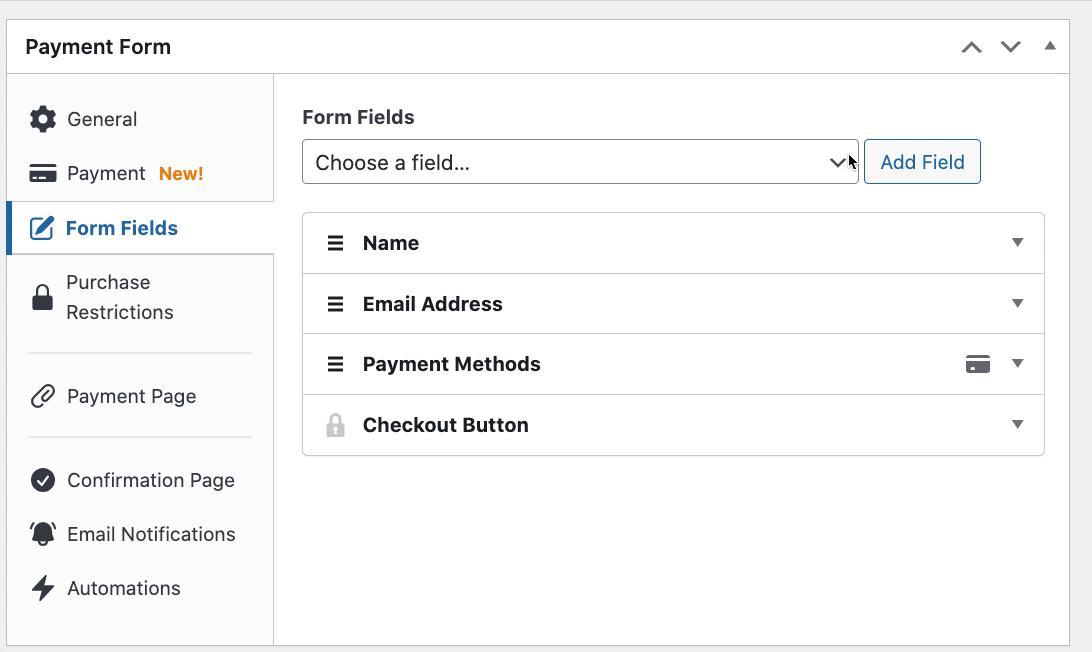
Once you’ve finished configuring the payment methods, click on the Form Fields tab. You can add, edit, and remove fields to completely customize your form. Additionally, feel free to click on the hamburger icon to drag and drop them in the order you’d like them to appear.
Creating an Itemized Breakdown for Email Receipts
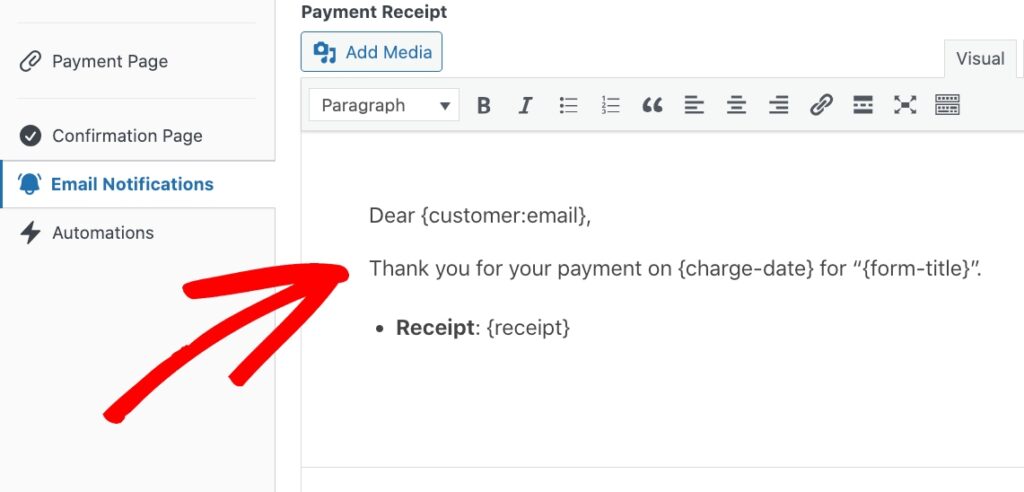
Now that you’ve created your payment form, click on the Email Notifications tab.
Here, you’ll need to enter a customized message in the field provided. You can choose from several different Smart Tags to auto-populate the data in your email receipt.
To create an itemized breakdown table for your email, simply enter {receipt}.
Finally, go ahead and click on the Publish button.
Publishing Your New Payment Form
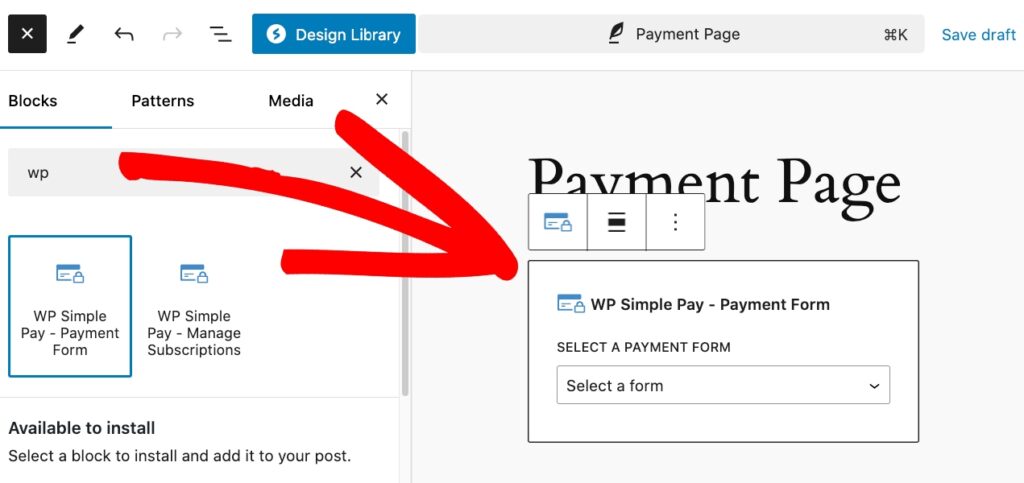
Now that you’ve created your payment form and your email receipt, it’s time to publish the form on your site.
Just go to the page or post you want your form on and click on the + icon to add the WP Simple Pay block.
Next, choose the form you just created from the dropdown menu and click Publish or Update.
There you have it!
We hope this article has helped you learn how to send an email receipt with an itemized breakdown.
If you liked this article, you might also want to check out our guide on how to create an event registration form with multiple price and quantity options.
What are you waiting for? Get started with WP Simple Pay today!
To read more articles like this, follow us on X.
Disclosure: Our content is reader-supported. This means if you click on some of our links, then we may earn a commission. We only recommend products that we believe will add value to our readers.


Leave a Reply