
How to Boost Revenue with Required Price Options in WordPress
Last updated on
 Reviewed By:
 Spencer Finnell
Ever wonder why some businesses consistently generate higher revenue per sale? The secret often lies in their pricing structure. Specifically, how they bundle mandatory fees and addons with their core offerings.
Studies show that businesses using required pricing components can increase average order values by 20-30%.
With that said, manually adding these fees or trying to explain them separately often leads to customer confusion and abandoned checkouts.
In this article, I’ll show you how to easily add support charges, essential addons, and more to your WordPress payment forms so you can generate more revenue for your business.
You’ll learn how to:
✅ Set up required price options
✅ Create sustainable revenue models
✅ Implement mandatory support fees
✅ Design effective pricing structures
Understanding Required Price Options
Required Price Options are mandatory line items that automatically attach to your payment forms. Think of them as essential components that customers must include in their purchase.
Common Use Cases for Required Price Options:
✔️ Monthly support fees for subscription services
✔️ Processing fees for high-value transactions
✔️ Mandatory setup costs for new customers
✔️ Required add-ons for specific services
Key Benefits of Required Price Options:
Using required price options transforms how you structure your pricing. Instead of coming up with different pricing components or trying to explain additional fees after a purchase, you can present a clear, comprehensive pricing structure from the start.
Furthermore, implementing mandatory fees and addons directly into your WordPress payment forms, you create a more predictable revenue stream. Each transaction automatically includes any required fees, ensuring you capture the full value of your offerings.
- Streamlined Pricing: No more complicated workarounds or manual fee additions
- Transparent Billing: Customers see all required costs upfront
- Consistent Revenue: Guaranteed additional revenue per transaction
- Simplified Accounting: Automatic inclusion of necessary fees
- Better Customer Experience: Clear, upfront pricing without surprises
How to Add Required Price Options in WordPress
Previously, many business owners just like you faced a frustrating challenge: adding mandatory fees or charges to WordPress payment forms was a complex maze of workarounds and limitations. Many resorted to creating multiple forms, using complicated price calculations, or manually tracking additional charges – all while risking lost revenue and confused customers.
The result? Businesses either absorbed costs they should have been charging for, or they struggled to implement the pricing structure their services actually deserved. Not only did this impact bottom lines, but it also created unnecessary administrative headaches and potential pricing inconsistencies.
Consider this all-too-common scenario: A course creator wanting to include a mandatory materials fee with their online training had to either bury the cost in their base price (reducing transparency) or create separate payment forms. Neither option was ideal for business growth or customer satisfaction.
Now, with required price options, you can easily attach mandatory fees, support charges, or essential addons to any payment form – all while maintaining clear, professional pricing that reflects your true value.
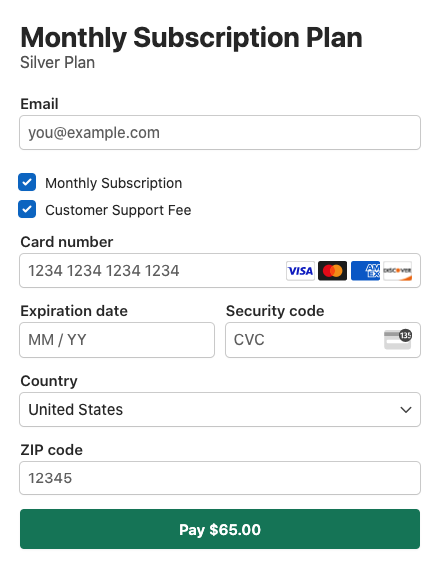
For the purpose of this tutorial, we’ll be creating a payment form that includes additional support fees like the one below:
Step 1: Install and Activate WP Simple Pay
To get started, visit the pricing page and choose the best plan for your needs.
Once you’ve purchased a plan, download the .zip file from the confirmation email or your WP Simple Pay account page.
Next, upload the file on your WordPress website and activate it.
For step-by-step instructions on how to install WP Simple Pay, see our full guide.
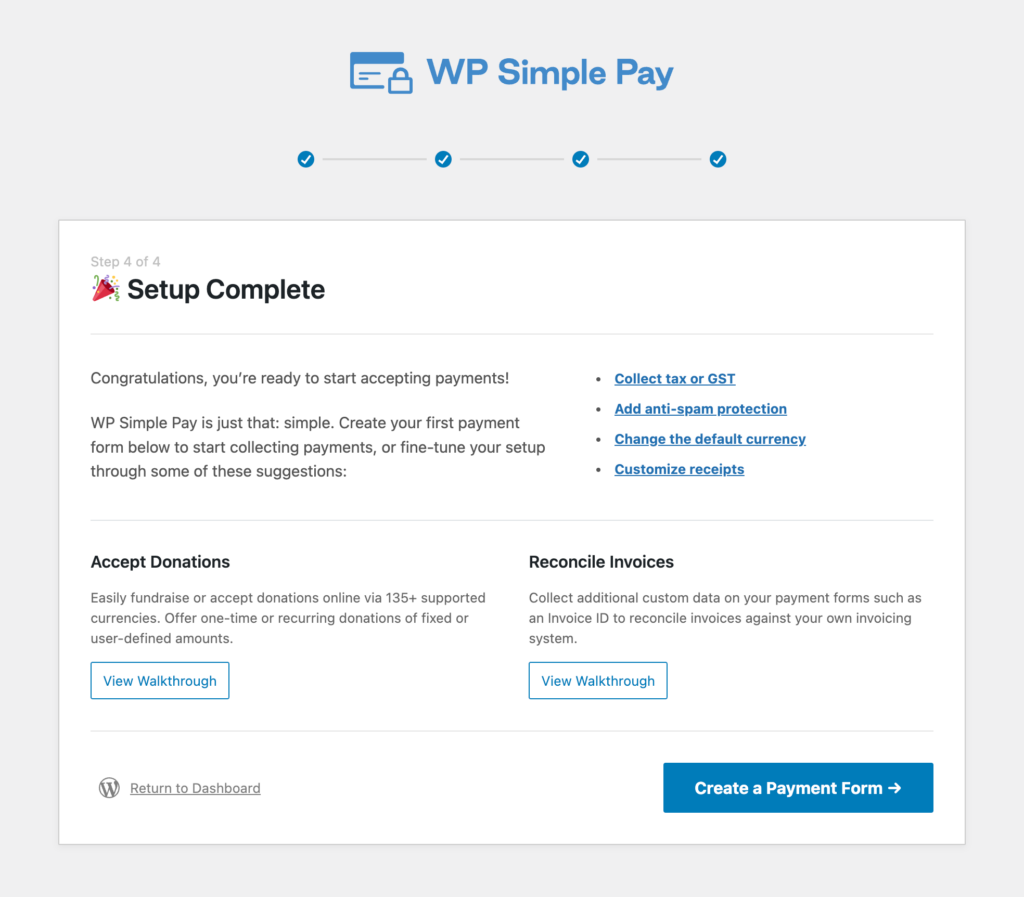
Once you’ve installed and activated the plugin, its advanced setup wizard will walk you through setting up your account and connecting your Stripe account. After you’ve successfully completed the setup process, a success page will appear.
Go ahead and click on Create a Payment Form.
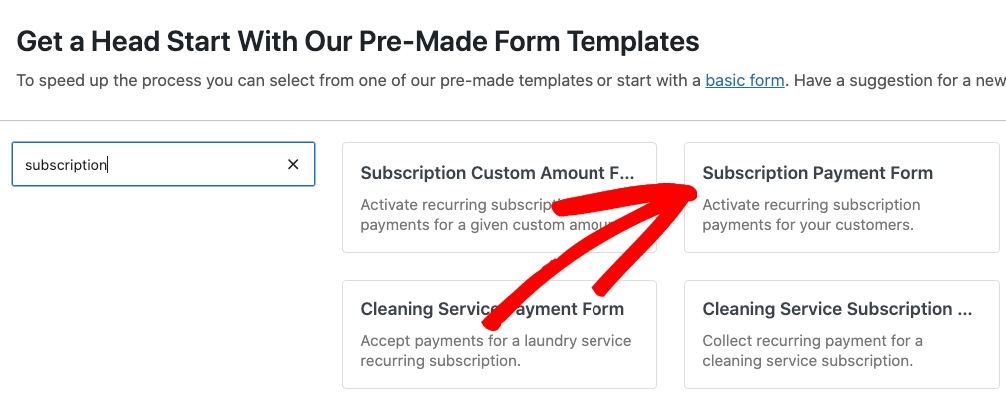
You’ll notice there are tons of pre-built templates for you to select from. Once you’ve selected yours, you can use the drag-and-drop form builder to create an optimized checkout form for one-time and subscription payments.
Go ahead and choose the Subscription Payment Form template.
Step 2: Create a Payment Form
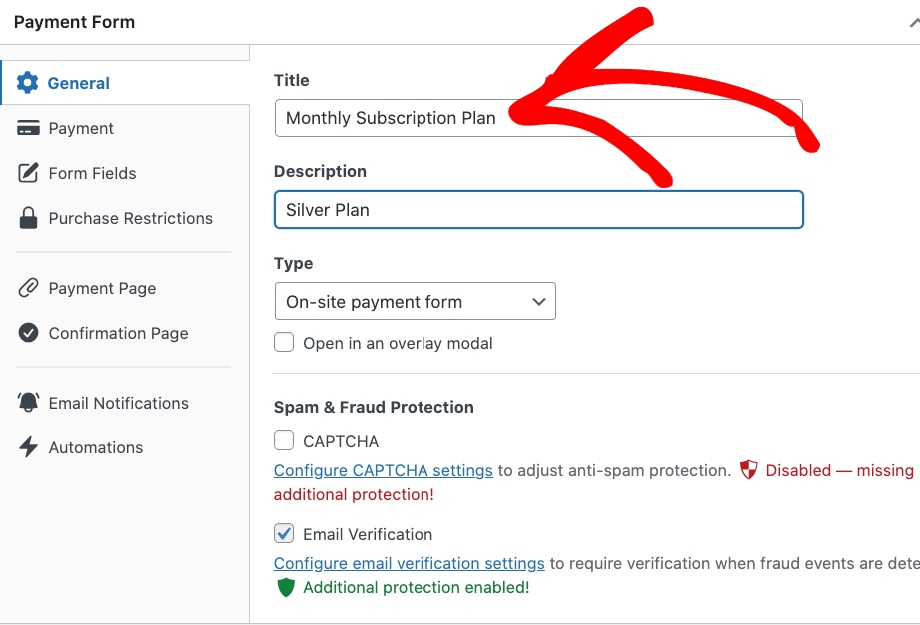
Once you’ve selected the Subscription Payment form, you’ll need to enter the title and description of your form in the General tab.
You should also keep On-site payment form selected as the Type to ensure that your form is embedded directly on your website.
Next, go to the Payment tab. Here is where you can set up your required pricing options.
Simply enter your amounts, and ensure that Required is checked. You’ll also need to ensure that the Allow purchasing multiple price options box is checked.
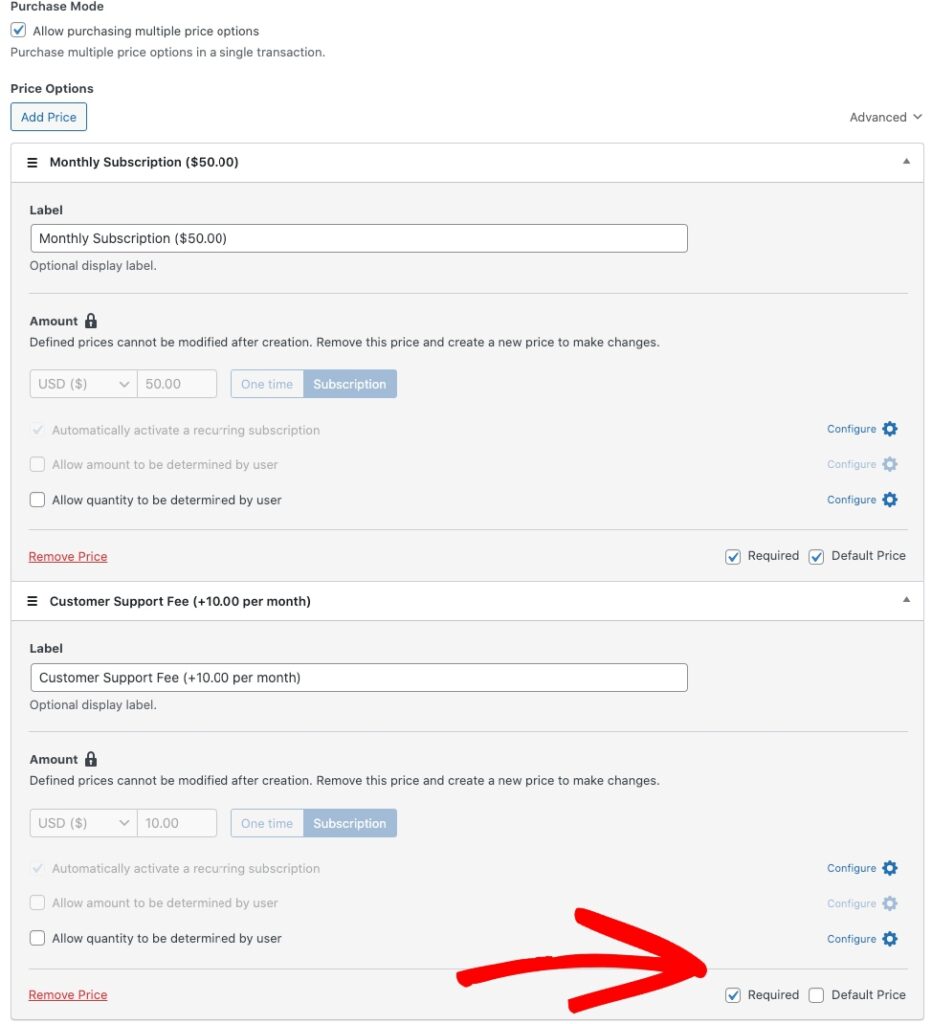
Once you’ve finished adding the monthly subscription amount and the customer support fee to the form, go ahead and click on the Preview button.
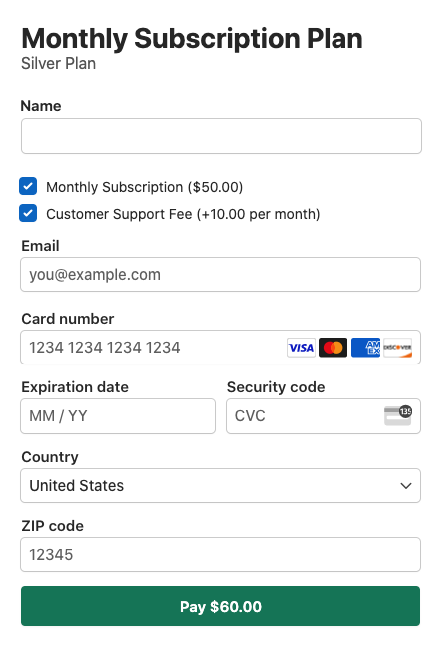
In preview mode, you’ll be able to see that your form has the monthly subscription amount labeled in addition to the monthly support fee.
Step 3: Publish Your Form
When you’ve finished creating your subscription payment form with an added customer support fee, all you need to do next is publish it on your website.
Simply click on the Publish button. Then, click on Copy Shortcode.
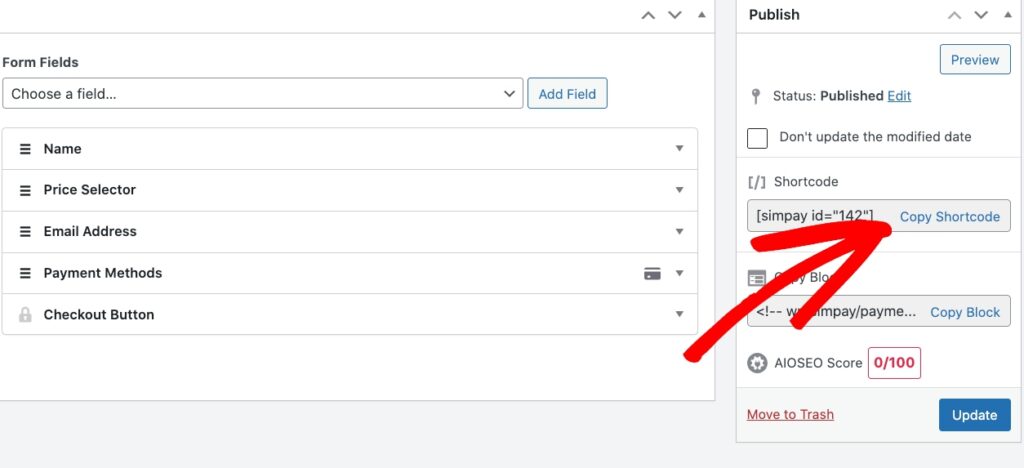
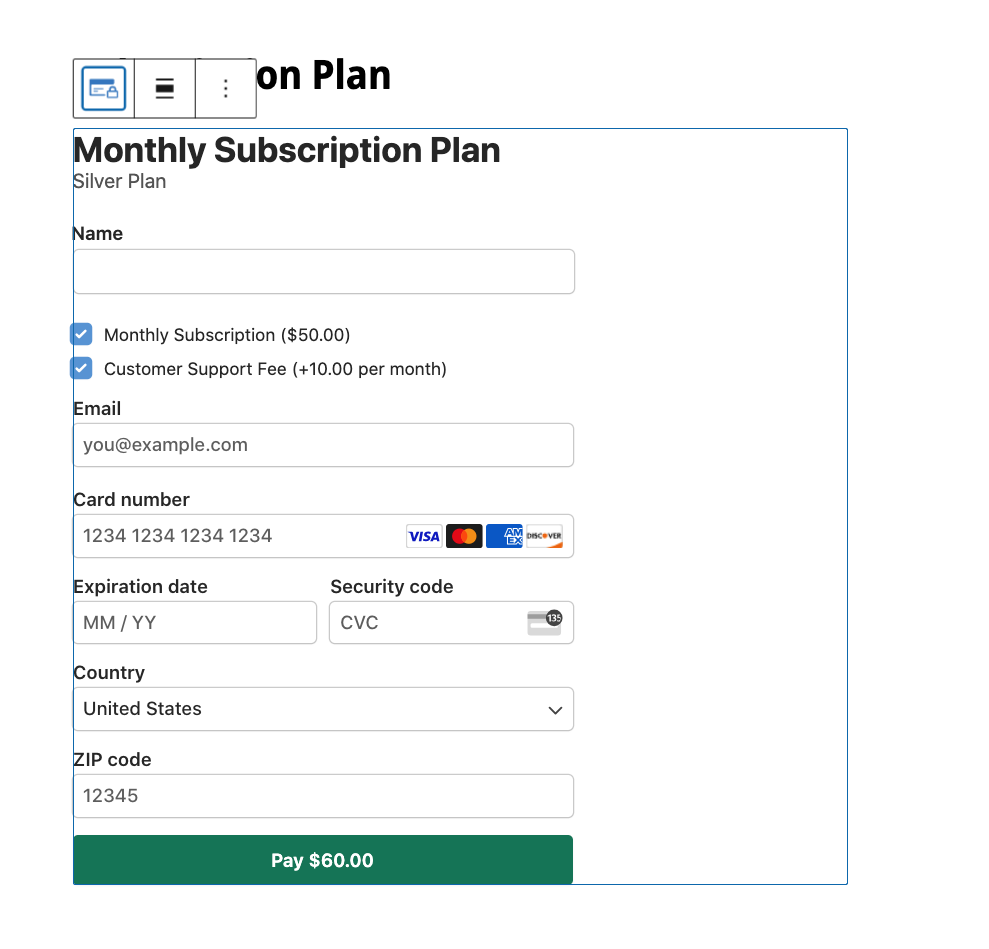
Next, go to the page or post you want your payment form on and paste the code directly into the Block Editor.
Now that we’ve created a subscription payment form with a required support fee, let’s answer some of the most common questions asked about required price options.
Required Pricing FAQs
Won’t adding required fees drive customers away?
Actually, transparent pricing often increases trust and conversions. When fees are clearly explained and provide obvious value (like included support or essential materials), customers appreciate knowing exactly what they’re paying for. Hidden fees or unexpected charges are far more likely to cause cart abandonment than upfront, well-structured required options.
Why not just include all costs in one single price?
While bundling everything into one price might seem simpler, itemizing required components offers several advantages. It helps customers understand the value they’re receiving, makes your base price more competitive, and allows for clearer accounting of different revenue streams.
How do I know what items should be required vs. optional?
Consider making an item required if it’s:
- Essential for customer success with your product or service
- Represents a cost you consistently incur serving customers
- Provides crucial value that customers shouldn’t skip. For example, implementation fees, support packages, or necessary materials are typically good candidates for required options
We hope this article has helped you learn how to boost revenue by adding required price options to your WordPress payment forms.
If you liked this article, you might also want to check out our guide on how to create a branded checkout page in WordPress.
What are you waiting for? Get started with WP Simple Pay today!
To read more articles like this, follow us on X.
Disclosure: Our content is reader-supported. This means if you click on some of our links, then we may earn a commission. We only recommend products that we believe will add value to our readers.


Leave a Reply