10 Components & Best Practices of a Perfect Email Receipt
Last updated on
The email receipt is one of the most important components of an online transaction. There’s no debate that if you want to process payments through your website, you must close each transaction with a record emailed to your customer.
But while most businesses use receipts, they often neglect important information. They also fail to use the email to create a great impression on their customer, smooth out the customer experience, and drive more revenue.
In this post, we’d like to talk about what goes into the perfect email receipt. But first, let’s dive into why we send receipts in the first place.
Why Do You Send an Email Receipt?
Email receipts are important because everyone reads them. They have the highest open rate of any type of email you’ll send your customers – nearly 71%!
The simplest purpose of an email receipt is to let the buyer know you’ve received their payment. It gives the buyer closure that they’ve completed their end of the transaction properly and you’ll move forward with your part.
A receipt also creates a record. It’s something your customer can use if they ever have to dispute the transaction with you or for a court (though hopefully it never comes to that).
Receipts are especially important when the customer is a business. They’ll want to use the receipt to process the transaction and write off the expense. If the purchase was made by an employee for a business, that employee will want to use it as proof for their expense report.
And if – for some reason – your buyer is worried that you wouldn’t fulfill your end of the bargain, an email receipt can make them feel safer about the transaction.
What happens if you don’t send email receipts?
Neglecting receipts probably won’t have much impact on your conversion rate, but it’s guaranteed to confuse your customers. They’ll submit more support tickets or send more emails inquiring about their purchase.
But email receipts aren’t just records of purchase. They’re also opportunities to build stronger connections with your customers and drive more sales.
Should You Customize an Email Receipt?
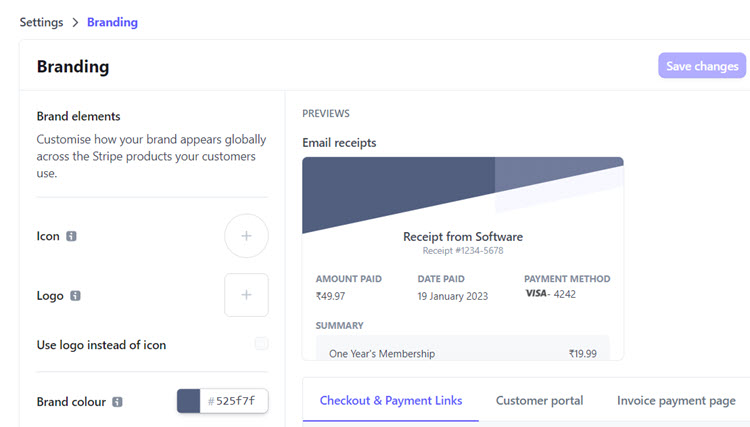
All popular payment processors like Stripe let you send an automated email receipt as soon as payment has been made.
The downside is that the customization option for the default payment receipt is limited. You could only customize a few receipt elements, like logo, brand color, language, and so on.
However, if you use the WP Simple Pay plugin to accept Stripe payments on your WordPress site, you can customize every single detail in your email receipt.
WP Simple Pay comes with a default email receipt that automatically sends emails upon successful payments. That means if you want to make some minor tweaks to the default receipt, all you have to do is to go to the email receipt page in WP Simple Pay and edit it the way you want. It only takes around a minute to tweak the receipt.
Here’s how to customize Stripe email receipts in WordPress.
Remove the additional 3% fee!
Most Stripe plugins charge an additional 3% fee for EVERY transaction
…not WP Simple Pay Pro!
What Goes Into an Email Receipt?
Transactional emails like receipts can actually be quite complex. There’s a lot of information to include, but you still want to keep things brief. Let’s walk through everything you should include in your email receipts.
1. A Clear and Straight-Forward Subject Line
When it comes to promotional emails, it pays to be clever and enticing with your subject lines. But that doesn’t apply to transactional emails. When you send an email receipt, the subject line should be clear, simple, and plain.
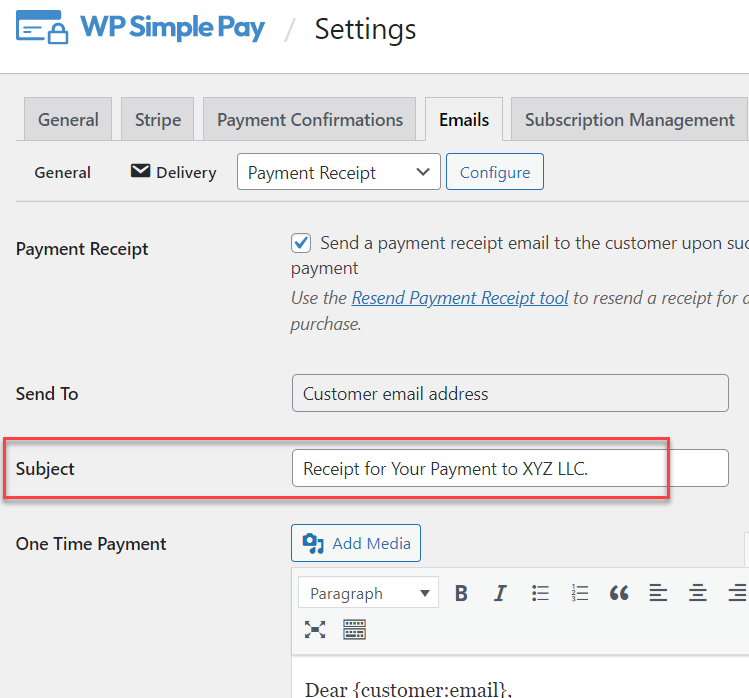
What should you include in an email receipt subject line? Some of these:
- The name of the product/service they purchased
- The cause they donated to
- How much they spent or donated
- The words “receipt” or “invoice” or similar
- The invoice or order number
Some businesses like to include their name in the subject line, but that’s redundant. The recipient will already have your name in the “from” slot.
2. A Genuine “Thank You”
This is an often overlooked component of an email receipt, but depending on your customer, it might be the most important.
In a face-to-face transaction, you would instinctively thank your customer. But you lack that opportunity when a customer pays through your website. Make sure to say “thank you” at some point on your receipt, ideally at the top.
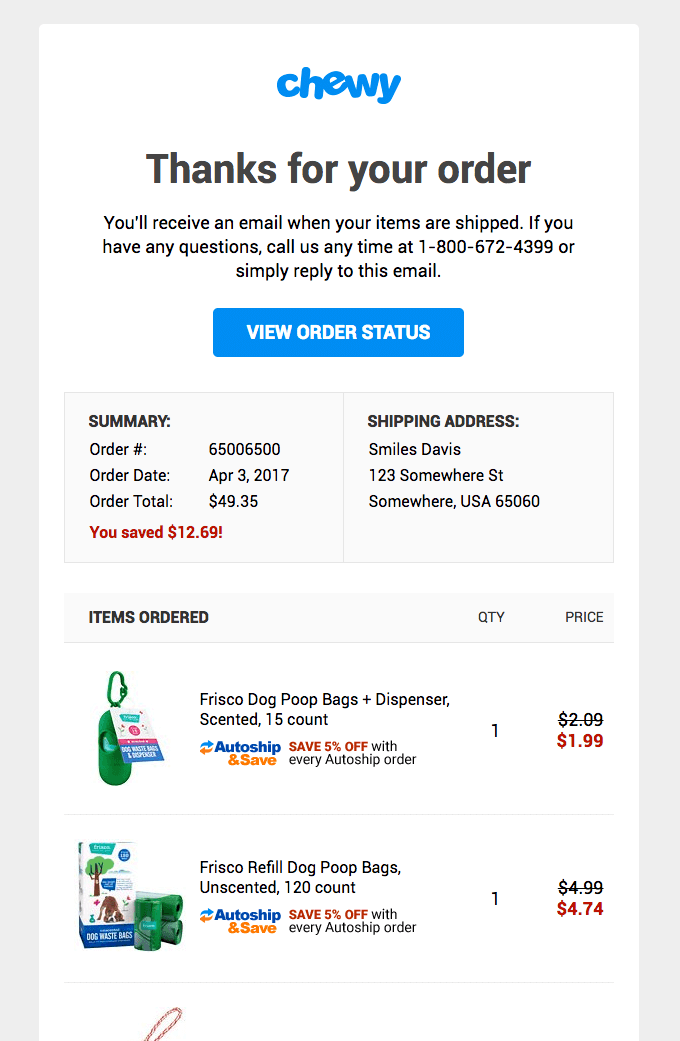
This Chewy receipt does a great job of putting their “thank you” front and center.
3. Billing Information
Include some information on the email receipt regarding how you billed the customer. This is a reminder for them. You should include the card you billed (“your Mastercard ending in 1234”), the date you billed the card, and the name on the card.
If your company name will look different on their credit card statement (perhaps you’re known by a DBA but your credit card processing uses your real company name, or you use a third-party billing system), mention that on the receipt. Say something simple like “You’ll see this charge under the name Acme LLC on your statement.”
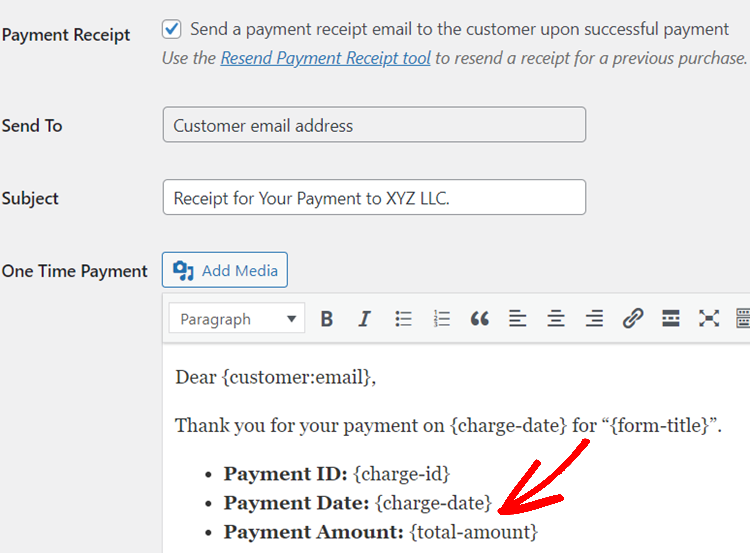
WP Simple Pay lets you dynamically display every detail in your receipt using smart tags. Here are all the default smart tags you can use to dynamically show billing information.
- {form-title} – The form’s title.
- {form-description} – The form’s description.
- {total-amount} – The total price of the payment.
- {customer-name} – The value of the Name form field.
- {charge-date} – The charge date returned from Stripe.
- {charge-id} – The unique charge ID returned from Stripe.
- {payment-type} – The type of payment (one-time or recurring).
- {card-brand} – The brand of the card used. Visa, Amex, etc.
- {card-last4} – The last four digits of the card used.
- {tax-amount} – The calculated tax amount based on the total and the tax percent setting.
- {recurring-amount} – The recurring amount to be charged each period of the subscription plan.
- {max-charges} – The total number of max charges set for an installment plan.
- {next-invoice-date} – The date the next invoice is due.
- {update-payment-method-url} – URL to update the subscription’s payment method.
For more details, check out this guide: Creating a custom payment receipt in WordPress for Stripe
4. Shipping Information
If you’re selling something that needs to be shipped, it’s important to put some shipping information in the receipt. Give them as much data as you have, such as…
- When you’ll ship the item.
- The shipping method you’ll use.
- When they can expect it.
- A link to track their package.
Most importantly, give the customer a clear way to contact you or the shipping service if they are concerned about the shipping time or method.
It’s okay if you don’t have all of that information. If you can’t provide it in the email receipt, you may want to send some separate shipping notification emails.
5. List of Items Purchased
A list of products or services the buyer purchased is a critical part of the email receipt. You’ll want to include the item/service name, cost, and any relevant details (like size, color, duration, recurring status, etc.). If you have a picture to represent the product/service, include that as well.
At the bottom of the list, display the total purchase price of the entire order, including taxes and fees. Make this number stand out because it’s a piece of information your customer may re-consult in the future.
Some businesses still required printed paperwork, so it’s also smart to include a link to a printer-friendly version of the receipt. If you don’t want to automate something so they can download a printer-friendly version, at least include instructions to request a PDF from you.
6. Invoice/Order Number
If your customers need to contact you (or your support team), you’ll need a way to identify their order. So it’s important to pair a number to each order. Place this number somewhere prominent on the email receipt so the customer can find it quickly when you ask for it.
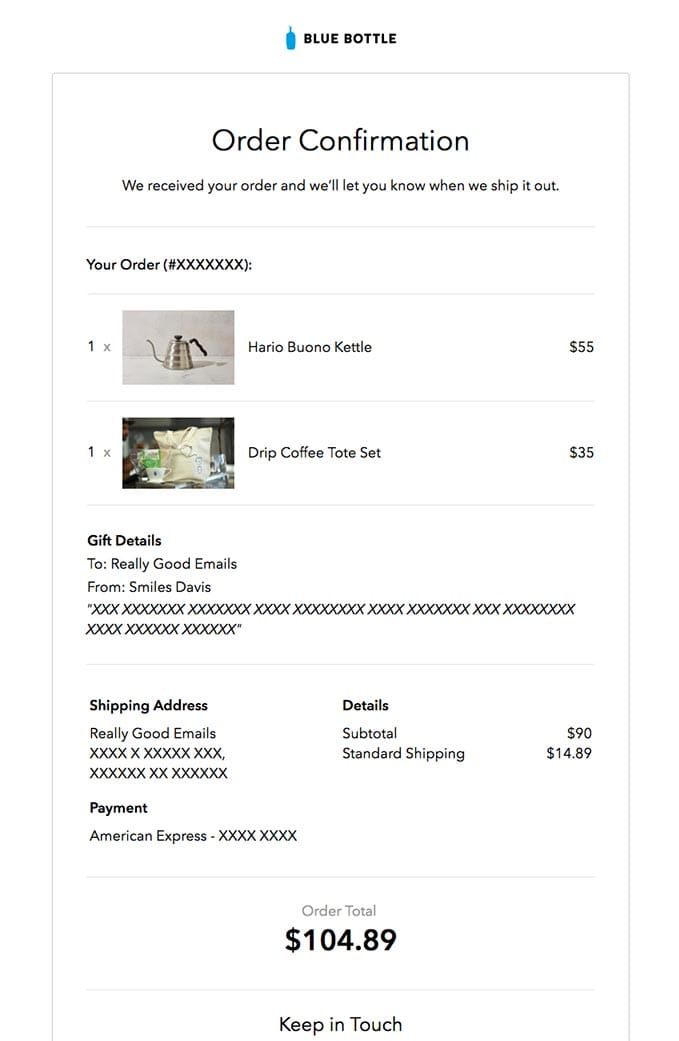
This Blue Bottle email receipt does a great job of laying out the customer’s order and presenting a clear total at the bottom.
7. Download or License Key Information
If the customer purchased a digital product, put the link to download it right in the email. That’s where they’ll expect it. If they don’t get a link immediately, they’ll end up submitting a support request. Include the link regardless of whether you create a dashboard of licenses.
If the download link will expire at any point, make that information clear so your customer downloads their product right away. Tell them how to request a new download link if theirs expires.
8. Any Other Relevant Actions
Email receipts are viewed more than any other type of email correspondence with your customer, so it’s a good place to include any information they need to have a smooth experience with your brand. Include links to any other actions that are relevant, such as:
- Add more users
- Edit account settings
- Print invoices/statements
- View/access licenses
- Change service/contract
- Update payment information
- Close account
- View help documents/knowledge base
9. Related Products or Information
Use your email receipt as an opportunity to help your customer beyond the purchase. Since you know the customer will read the receipt, it’s a great opportunity to deliver more value.
You might include links to resources or content to help them get the most out of their purchase. For instance, if the customer purchased your digital marketing package, you could link them to a blog post that explains what happens after the payment goes through. If the recipient donated to your charity, you could link them to a guide on how you’ll spend their donation.
Additionally, you could use the email receipt as an opportunity to upsell the customer on more products or services. You could link them to consumable products they might need to use their original purchase (like batteries, filters, or refills). You could also link them to related products that make sense with their order, like an add-on or warranty.
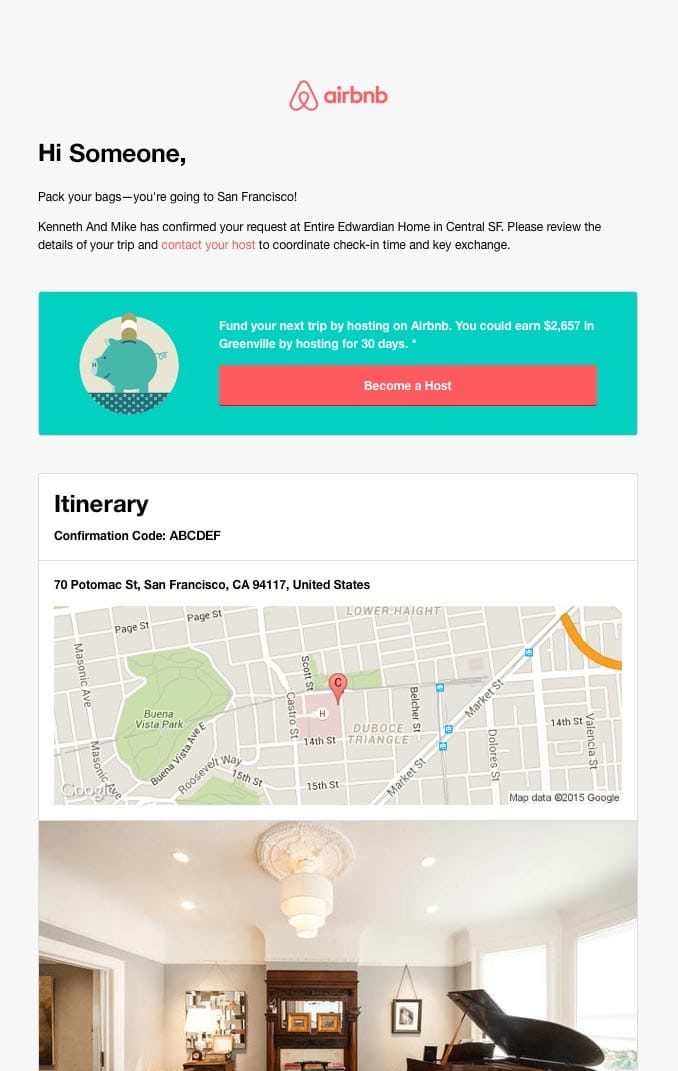
Notice how this AirBnB email includes a bunch of helpful information at the bottom to help the customer get more value from their purchase.
10. Contact Information
Every email you send to your customers should include clear and simple contact information. This rule applies to any type of email you send, but especially your email receipts. Give them your website, phone number, email address (even if it’s the same one you send from), and mailing address.
Creating Stripe Email Receipt in WordPress
If you want to send a highly customizable Stripe email receipt, then you’ll need WP Simple Pay. Aside from letting you send an email receipt, WP Simple Pay comes with several features as follows:
- Form builder + built-in templates: Easily choose from its built-in templates and create highly customizable payment forms.
- Stripe Tax: The plugin supports Stripe Tax, which enables you to collect tax based on where your customers are located at.
- Payment methods: You can enable multiple payment methods such as credit/debit cards, Google Pay / Apple Pay, ACH Direct Debit, and more.
That’s it!
We hope this article helped you learn about the anatomy of a perfect email receipt.
If you liked this article, you might also want to check out how to create a custom Stripe email receipt in WordPress.
What are you waiting for? Get started with WP Simple Pay and start customizing email receipts.
To read more articles like this, follow us on Facebook and Twitter.
Disclosure: Our content is reader-supported. This means if you click on some of our links, then we may earn a commission. We only recommend products that we believe will add value to our readers.
