
How to Collect Accepted Quote Amounts in WordPress
Last updated on
 Reviewed By:
 Spencer Finnell
Do you want to allow customers to pay an accepted quote amount on your WordPress site?
For businesses that offer specialized services or custom products, allowing customers to pay an accepted quote eliminates the need for offline interactions.
In this article, we’ll show you how to receive payments for accepted quotes directly on your WordPress website.
How to Collect Payments for Accepted Quotes
The best way to let your customers pay for accepted quotes on your site is to use a standalone Stripe payments plugin. It should let you use your existing invoice or proposal system and easily accept online payments without creating a shopping cart.
WP Simple Pay, the #1 Stripe payments plugin for WordPress, makes it easy to customize payment forms for accepted quotes without using code. It also lets you accept 10+ payment methods, create dedicated landing pages for your payment forms, send automated payment confirmation emails, and more.
For the purpose of this tutorial, we’ll create an accepted quote payment form that you can use to let customers complete their transactions directly on your site. One of the best parts about using WP Simple Pay is that you can add, edit, and remove custom form fields using the advanced drag-and-drop form builder.
Step 1: Install and Activate WP Simple Pay
To begin receiving accepted quote payments, the first thing you’ll need to do is install and activate WP Simple Pay on your WordPress site.
Simply visit the pricing page and choose the best plan for your needs. For more details, see this step-by-step guide on how to install WP Simple Pay.
Remove the additional 3% fee!
Most Stripe plugins charge an additional 3% fee for EVERY transaction
…not WP Simple Pay Pro!

If you didn’t see the setup wizard, simply head over to WP Simple Pay » Settings » Advanced tab and click the Launch Setup Wizard button.
2: Connect WordPress to Stripe
To connect your WordPress site to Stripe, click on Connect with Stripe.

Next up, enter the email address you use for your Stripe account and connect it to your site. If you don’t have a Stripe account, you can easily create one by entering your email address and completing the registration.
Upon completing this process, you’ll be shown a success page that says, “Setup Complete.” Next, click on Create a Payment Form.

Step 3: Create an Accepted Quote Payment Form
So far, you’ve installed and activated WP Simple Pay and connected your Stripe account to your WordPress site.
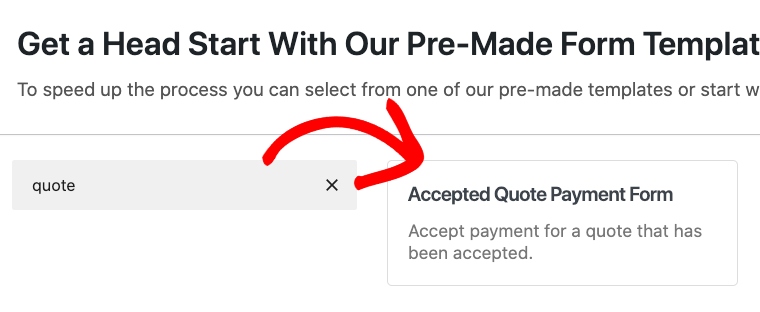
You should now be on the pre-built payment form templates library page. Go ahead and select the Accepted Quote Payment Form.
Next, in the General tab, enter the title and description of your form.
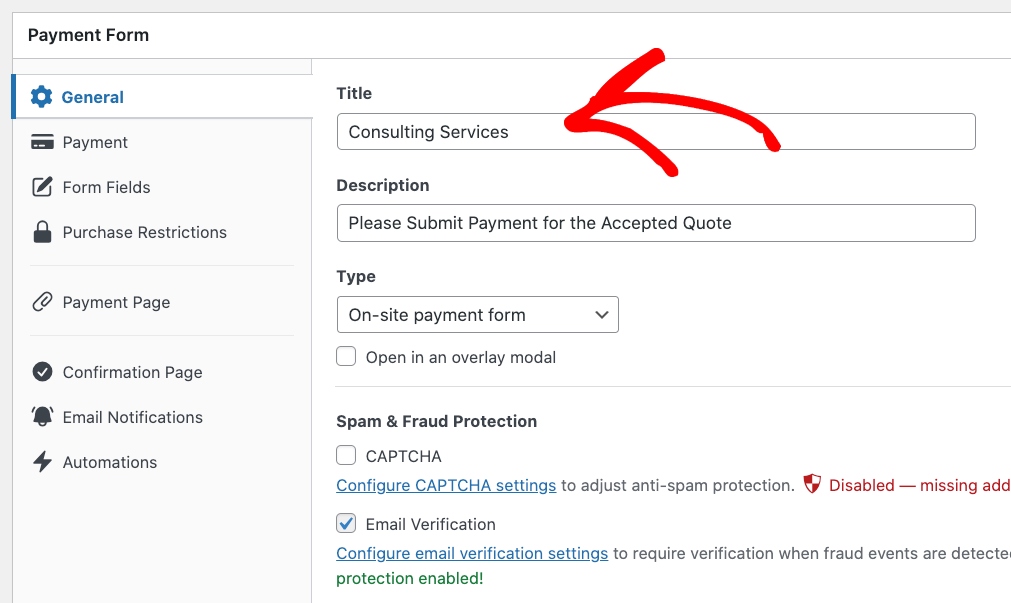
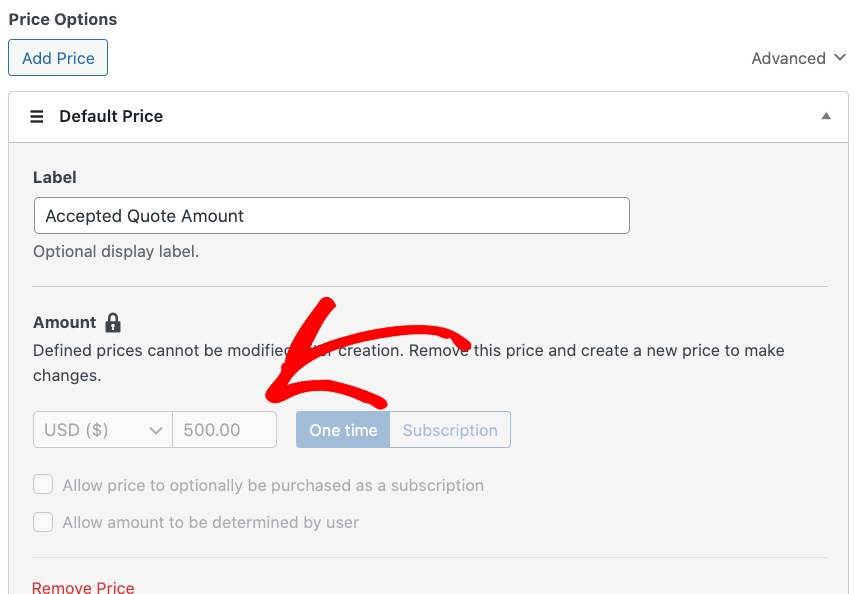
Be sure to leave On-site payment form selected for the form Type. Then, click on the Payment tab and enter the accepted price amount.
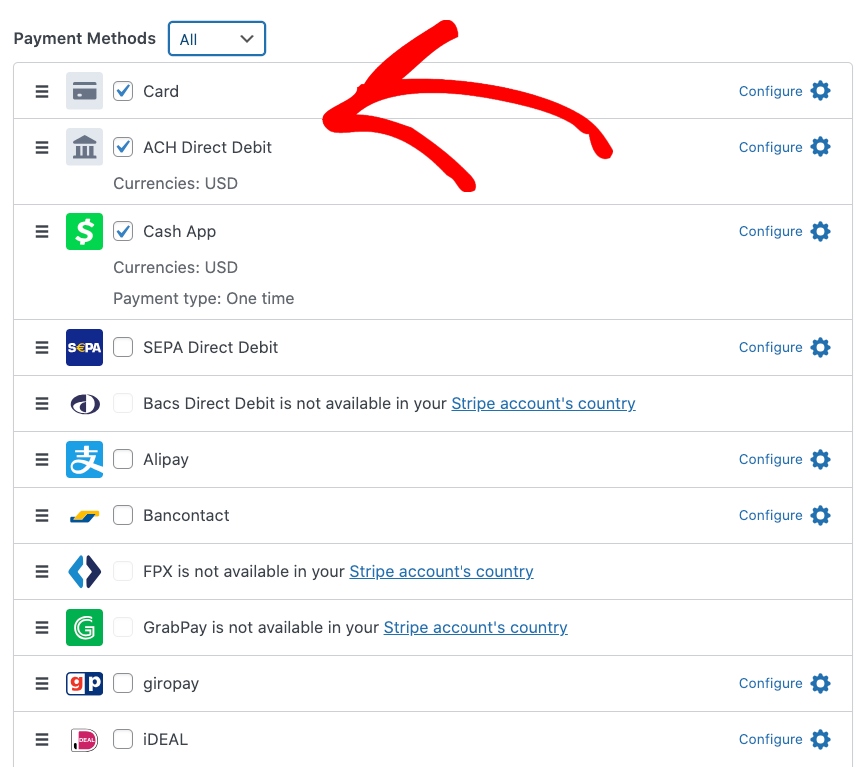
Next, select the payment method options you’d like to offer customers.
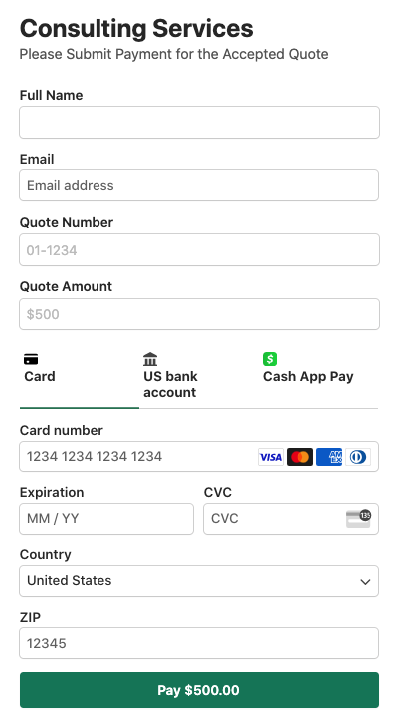
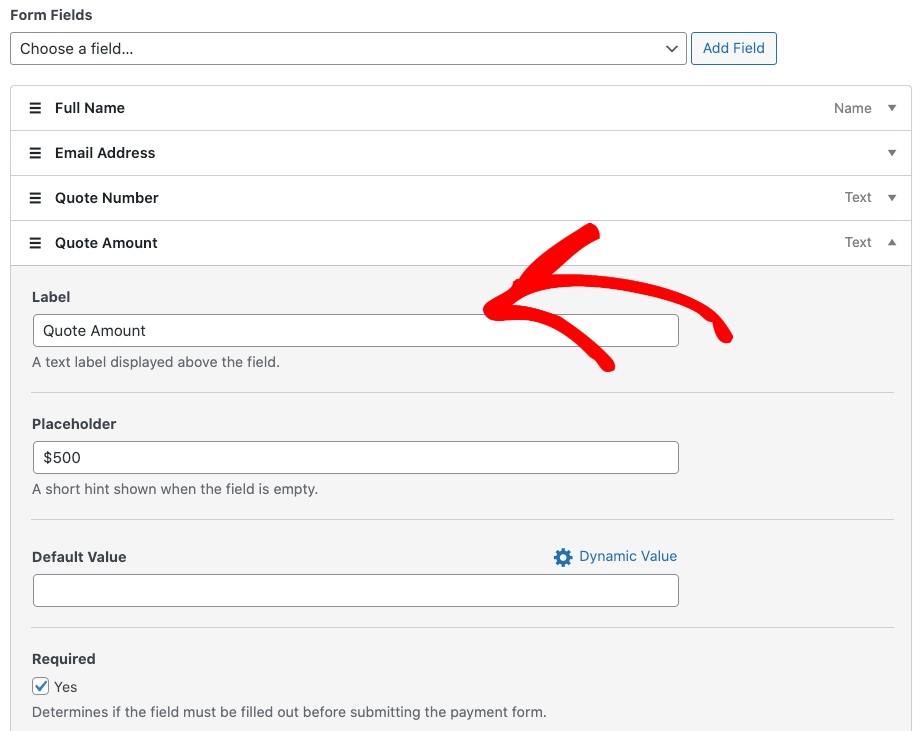
Be sure to click on Save Draft and move on to the Form Fields tab. Here, you can add, edit, and remove custom form fields. The template includes the following fields by default:
- Client Name
- Client Email Address
- Quote Number (text field)
- Quote Amount (custom amount field)
- Credit Card
Feel free to add a shipping address and an account number field to your form if needed. You can also edit the label for Quote Amount to reflect the accepted amount.
When you’re happy with your payment form, be sure to click on Publish.
Step 4: Publish Your Payment Form
Now that you’ve created an accepted quote payment form, you can add it to a page or post on your site.
First, go to the page or post you want the payment form on and click on the + icon to add the WP Simple Pay block. Then, choose the form you just created and click Publish or Update.

That’s it! We hope this article has helped you learn how to easily collect accepted quote amounts on your WordPress site.
If you liked this article, you might also want to check out our guide on how to accept deposit payments in WordPress.
What are you waiting for? Get started with WP Simple Pay today!
To read more articles like this, follow us on X.
Disclosure: Our content is reader-supported. This means if you click on some of our links, then we may earn a commission. We only recommend products that we believe will add value to our readers.


Leave a Reply