From Basic to Premium: How to Attach Add-Ons to WordPress Payment Forms
Last updated on
 Reviewed By:
 Spencer Finnell
Your WordPress payment forms might be costing you money right now; not because they’re broken, but because they’re missing critical premium add-ons that customers actually expect to pay for.
Here’s what most WordPress business owners get wrong: they worry that adding required fees will drive customers away. I’ve made this same mistake, watching potential profit slip away because I wasn’t charging for essential extras like shipping, handling, extended support, and warranties.
The reality? Customers understand and expect reasonable additional charges. In fact, strategic premium add-ons can actually enhance the perceived value of your core product while protecting your profit margins.
In This Article
What Are Premium Add-Ons?
Premium add-ons are additional products, services, or features that complement your core offering. Think of them as the extras that enhance the overall value proposition for your customers. These can range from physical additions to digital upgrades and service enhancements.
Common Types of Premium Add-Ons
- Extended Support Plans: Offering priority email or phone support
- Installation Services: Professional setup or configuration assistance
- Custom Development: Tailored modifications or features
- Rush Delivery: Expedited processing or delivery options
- Extended Warranties: Additional protection beyond standard coverage
- Premium Features: Advanced functionality or capabilities
- Training and Onboarding: Personalized guidance and setup assistance
- Priority Access: First-in-line benefits or exclusive features
The True Cost of Undercharging
Many businesses make a costly assumption that keeping pricing simple meant offering just the base product price. No extras, no add-ons, no required fees. They believe this would make purchasing decisions easier for their customers.
That decision can cost you thousands in potential revenue. Here’s what often goes overlooked:
Unrecognized Customer Expectations
Today’s buyers are sophisticated online shoppers. They’re used to seeing
(and choosing from) additional options, premium features, and service
add-ons. When these are missing, it can actually create doubt about your
offering’s completeness.
Hidden Operational Costs
Without structured add-ons or required fees, you’re essentially giving away
premium services for free. You find yourself absorbing the costs of urgent
support requests, rushing deliveries to demanding customers, and offering
extended features that should be premium upgrades.
Even worse, you’re probably handling countless custom requests that eat away at your profit
margins – all because you haven’t created a structured way to charge for
these additional services.
Missed Value Signaling
Premium options and add-ons serve another crucial purpose. They help
position your core offering. When customers see a “Professional” or
“Premium” tier, it makes your standard offering appear more attractive
and appropriately priced.
Strategic Add-On Implementation
The key to successful payment form add-ons isn’t just adding fees — it’s
structuring them in a way that creates genuine value for both you and your
customers.
The most successful WordPress businesses have mastered a specific
pattern: they position essential services as premium features that customers
actually want to pay for.
The Three-Tier Value Structure
Start by categorizing your add-ons into three distinct types:
Required Premium Features
These are non-negotiable elements that protect your business and ensure
quality service. For example, a basic support package or standard processing
fee. Present these as included professional services rather than extra
charges.
High-Value Optional Upgrades
These enhance the customer’s experience in meaningful ways — priority
support, expedited delivery, or extended access periods. Make these
available but optional, allowing customers to customize their purchase.
Premium Experience Add-ons
These are truly premium features that transform the basic purchase into a
VIP experience — things like direct Slack access, monthly strategy calls, or
exclusive resource libraries.
The Psychology of Premium Pricing
One of the biggest fears WordPress business owners have is that adding
required fees or premium options will drive customers away. But here’s what
years of data and testing have revealed: it’s not the presence of add-ons
that deters customers — it’s how they’re presented.
The Anchor Price Effect
When you properly structure your payment form options, something fascinating
happens: your base price actually becomes more attractive, not less. This
works because of a psychological principle called price anchoring.
For example, when you only offer your WordPress theme at $97, customers
focus solely on whether that price feels “too high.” But when you present:
- Standard Package: $97
- Professional Package: $147
- Agency Package: $297
Suddenly, $97 becomes an attractive entry point rather than a pricing
obstacle.
Making Add-Ons Work on WordPress
Now that you understand the strategy and psychology behind effective add-ons,
let’s talk about actually implementing them on your WordPress website.
Using the right tool can make the difference between add-ons that feel clunky and
those that feel premium.
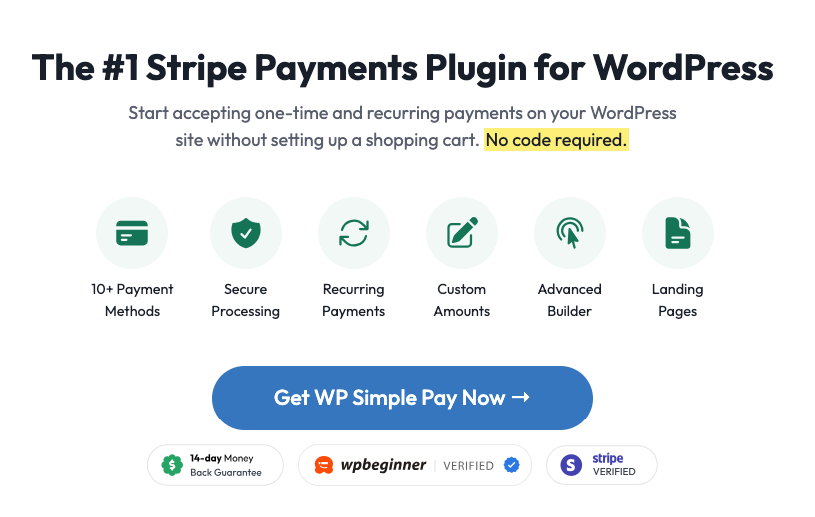
I use WP Simple Pay to create payment forms with add-ons because the plugin makes it super easy to customize my Stripe payment forms for several types of products and services without coding.
You can simply enter the price of the add-on, name it, and make it required or optional on your payment forms.
With that being said, follow the steps below to create a WordPress payment form with premium add-ons.
Step 1: Planning Your Add-On Strategy
Before diving into the technical implementation, carefully consider your add-on strategy:
- Identify valuable additions that align with customer needs
- Price add-ons appropriately — typically 10-30% of the base price
- Plan the presentation order — start with most popular options
- Consider bundle options for related add-ons
- Determine which add-ons should be one-time vs. recurring
Step 2: Install and Activate WP Simple Pay
To begin creating your payment forms with add-ons, go ahead and purchase your WP Simple Pay plan straight from the website. This will unlock all the payment form customization options, including add-ons and required pricing options.
If you need help with this step, see our guide on installing WP Simple Pay Pro.
✏️ Note:
While WP Simple Pay has a free version, I’ll be using WP Simple Pay Pro in this tutorial because it includes on-site payment forms and advanced features you’ll need to create add-ons and required pricing options for your payment forms.
Step 3: Create a Payment Form
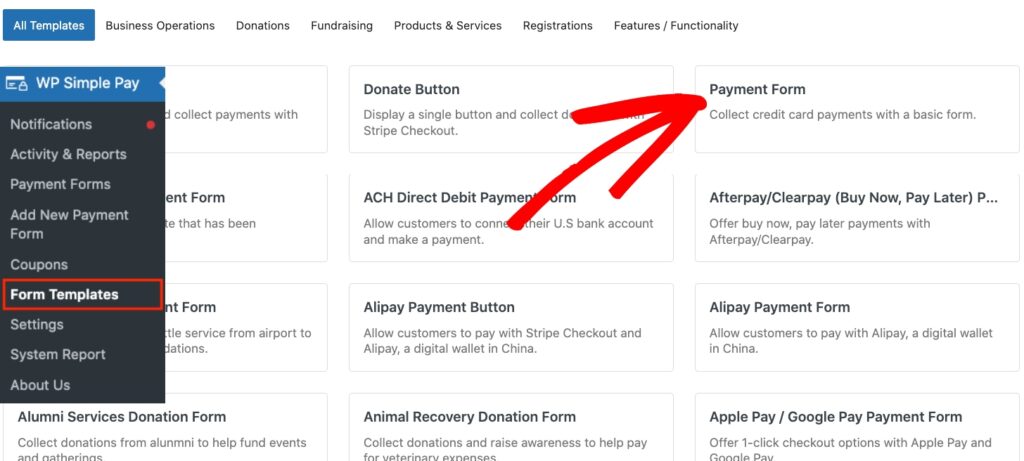
Now that you have WP Simple Pay installed and activated on your website, let’s select a pre-built payment form template.
To get started, go to WP Simple Pay » Form Templates in your WordPress dashboard and click on the Payment Form template.
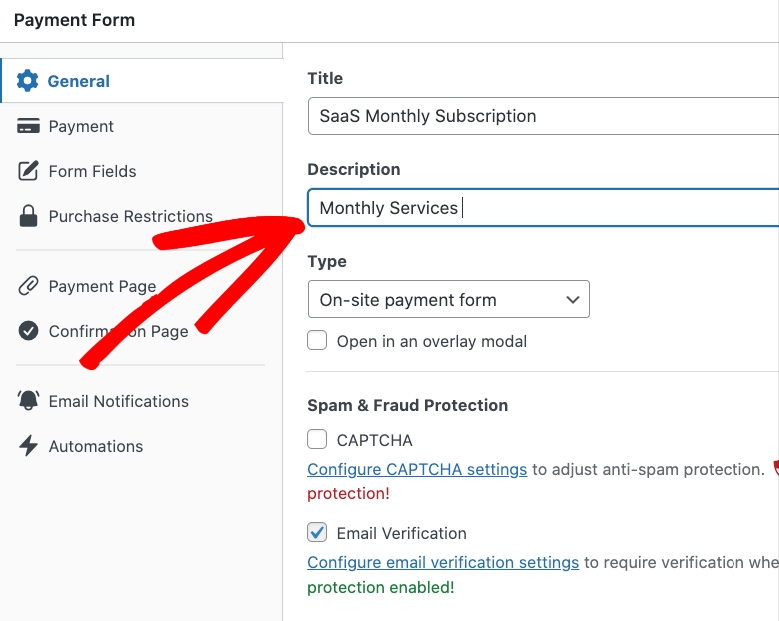
Next, you’ll see where you can add the title and description of your payment form. Be sure to keep the Type set to On-site payment form.
Step 4: Enter the Premium Add-Ons
Now that you’ve got your payment form set up, click on the Payment tab.
Be sure to check the box for Allow purchasing multiple price options.
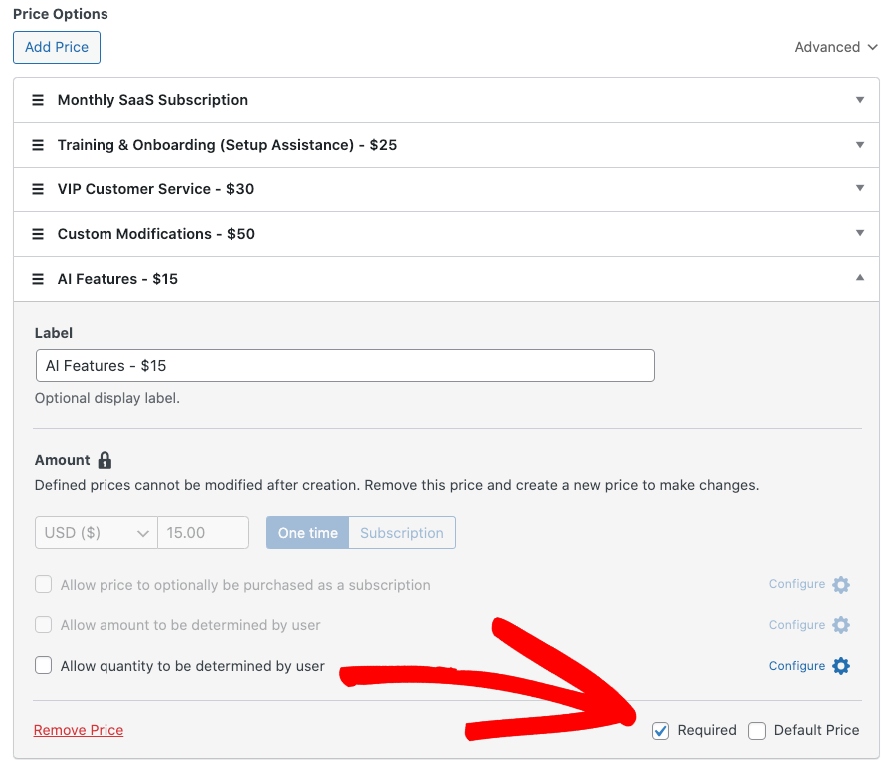
Then, click on the Add Price button and create your individual add-ons.
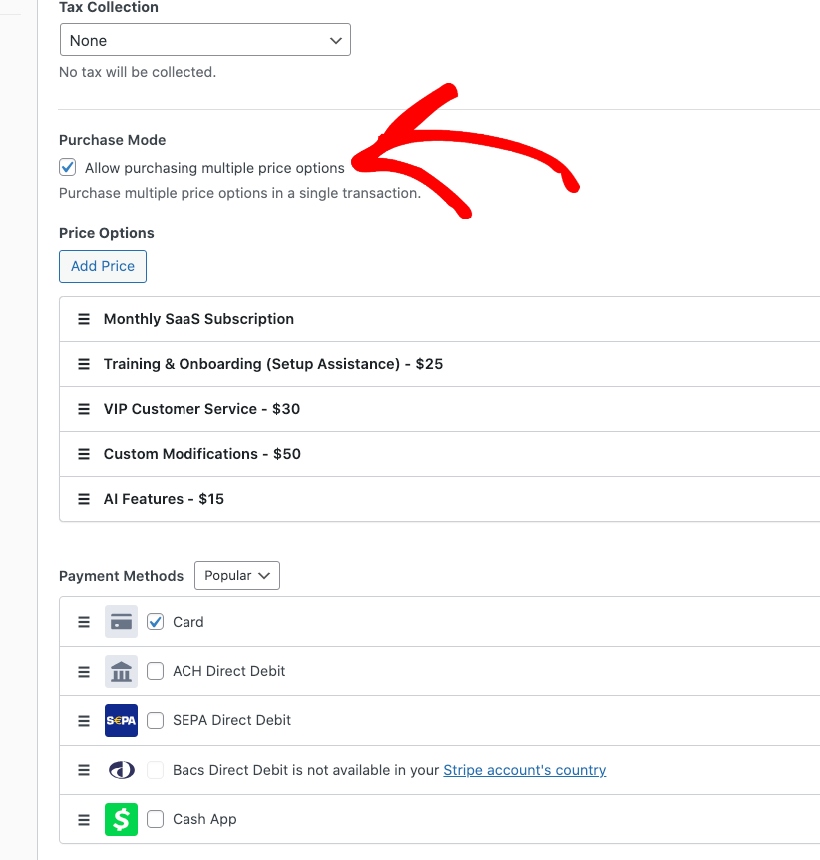
One of the best parts about the plugin is that you can make some add-ons optional, while marking others required.
Once you’ve finished creating your add-ons, select the payment method options you want to offer and click on Save Draft.
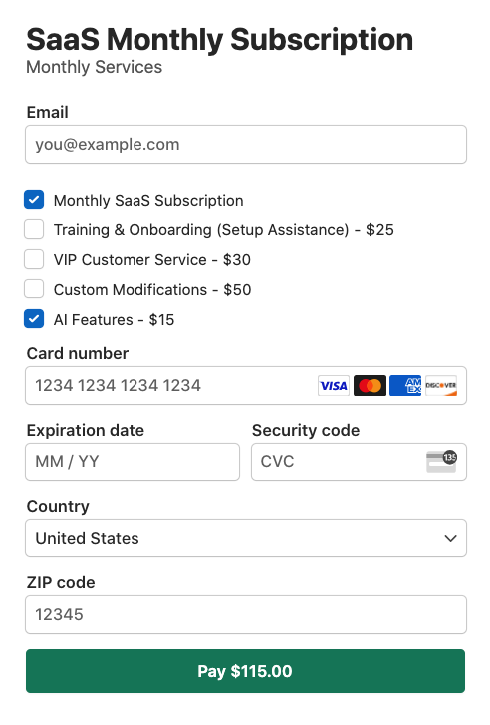
WP Simple Pay lets you preview your form to ensure that both your required and optional add-ons are displaying properly.
Step 5: Publish Your Payment Form
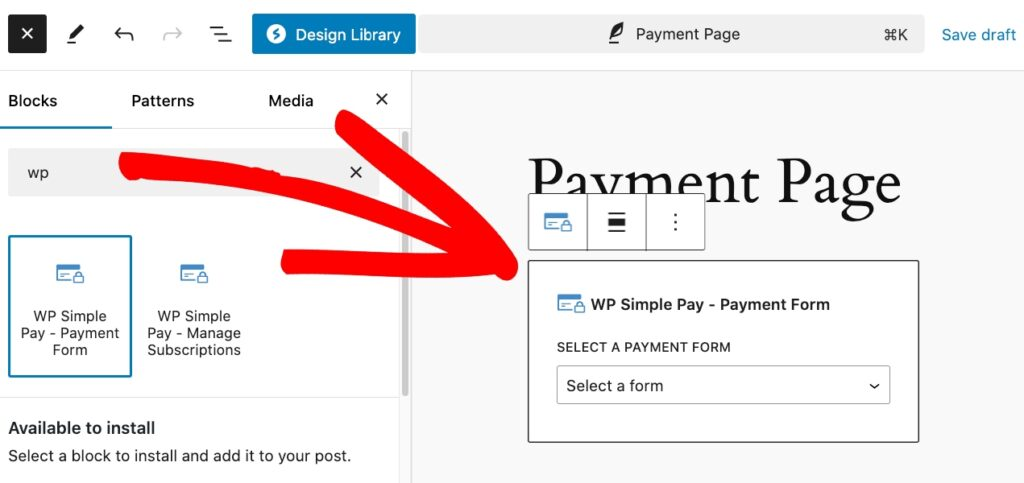
Now that your payment form is ready, it’s time to embed / publish it on your website.
To embed the form, navigate to the post or page where you want to publish it. Next, add the WP Simple Pay block by clicking on the + icon and selecting the WP Simple Pay block. Then choose the donation form you just created. And then, publish or update the form.
There you have it! I hope this article has helped you learn how to create Stripe payment forms with premium add-ons for your WordPress website.
If you liked this article, you might also want to check out guide on how to boost revenue with required price options in WordPress.
What are you waiting for? Get started with WP Simple Pay today!
To read more articles like this, follow us on X.
Disclosure: Our content is reader-supported. This means if you click on some of our links, then we may earn a commission. We only recommend products that we believe will add value to our readers.


Leave a Reply