How to Drive Traffic to Your Payment Forms Instantly in WordPress
Last updated on

 Spencer Finnell
Looking for an easy way to drive traffic instantly to your payment forms without having to leave your WordPress dashboard?
Like all eCommerce businesses, attracting visitors to your site is key to boosting sales and improving engagement.
In this article, we’ll show you how to drive more traffic to your payment forms using web push notifications straight from your WordPress admin dashboard.
What Are Web Push Notifications?
Push notifications have increasingly become a valuable tool for eCommerce sites looking to boost traffic and engagement. These short, timely messages or alerts are sent directly to a user’s browser, reaching subscribers even when the site is not actively in use.
This unique ability to connect with customers outside of the traditional browsing experience makes push notifications a powerful channel for driving traffic back to your site.
Typically, push notifications include a brief but compelling message and often an eye-catching image. This combination of elements is designed to quickly capture the user’s attention and prompt immediate action. When used correctly, push notifications can significantly impact your eCommerce site traffic and overall performance.
How to Send a Web Push Notification Instantly
To begin sending web push notifications from your WordPress site, you’ll need to install and activate a notifications plugin.
It’s important to choose one that enables you to send the notification without leaving your WordPress admin dashboard. To streamline the entire process and save time, you’ll need one that lets you set up customized notification messages directly from pages and posts on your site.
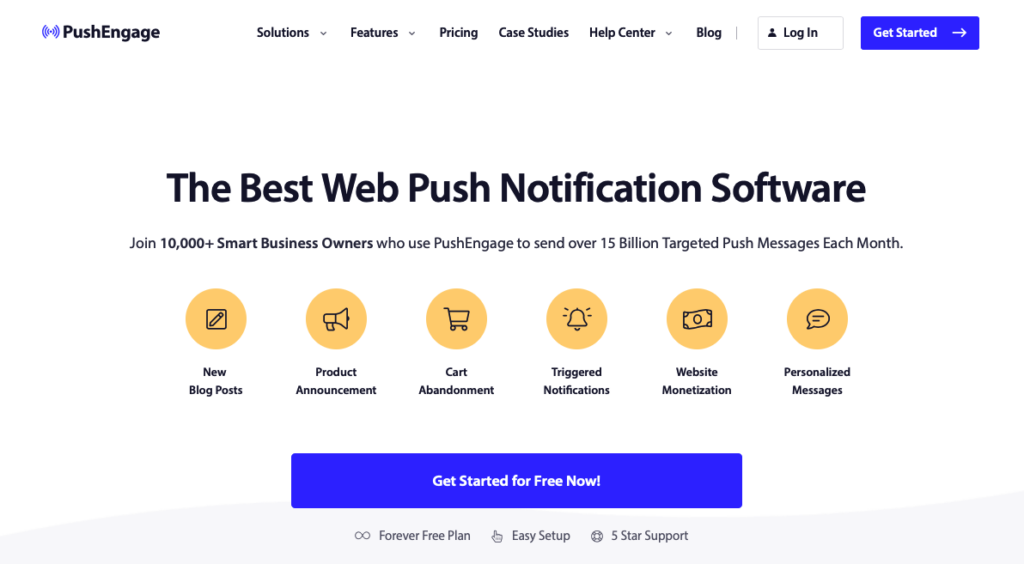
PushEngage, the best push notification plugin for WordPress, lets you manage your web notifications directly from pages and posts on your site. This enables you to send notifications instantly as soon as your payment pages go live.
One of the best parts about the plugin is that you don’t need to use any code to complete the installation and start collecting subscribers—the plugin takes care of everything!
Without further ado, let’s get started.
Step 1: Install and Activate PushEngage
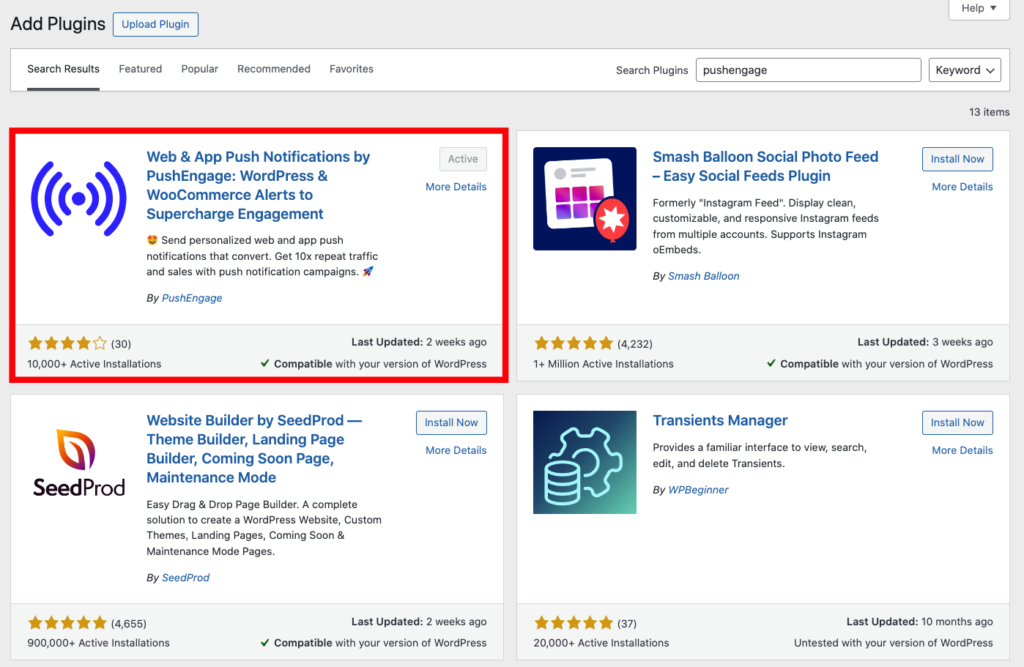
First, to install and activate the plugin on your site, log in to the admin dashboard. Then, navigate to Plugins » Add New» from the panel.
Next, search for “PushEngage” and select the Install Now button.
After you’ve installed the plugin, click on the Activate button.
You’ll now see a new PushEngage tab in your WordPress site’s left navigation panel. Go ahead and click on it.
You will either be asked to create a new account or connect an existing account to your site.
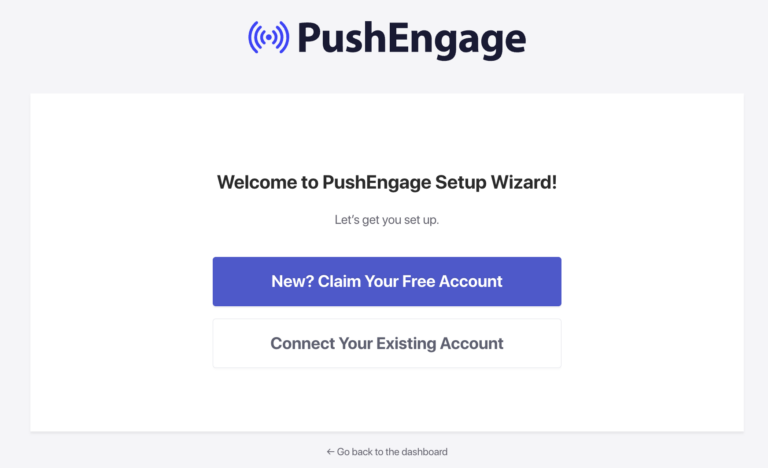
Once you’ve connected your existing account or created a new one, you can proceed with the setup.
That’s it! You will now see the Popup Modal/Subscription Opt-In on your website. Your visitors will see this Opt-In, and they can click on Allow to subscribe to your notifications.
You can also now go to a page or post on your site and scroll down to view your PushEngage Push Notification Settings.
Step 2: Create a Payment Form
Now that you’ve set up PushEngage on your site, you’ll need to create a payment form.
If you’re already using WP Simple Pay, the #1 Stripe payments plugin for WordPress, go to the navigation on the right side of your screen and click on WP Simple Pay.
Next, click on Add New. Alternatively, if you already have a payment form hosted on a payment page and would like to create a web push notification for it, simply go to that page.
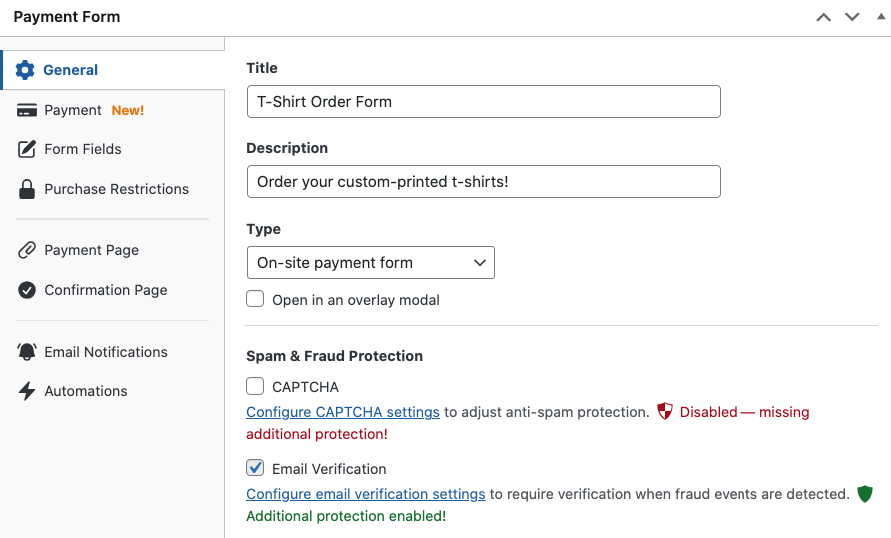
To create a new payment form using WP Simple Pay, go to the General tab and add the title and description. Also, be sure to leave On-site payment form selected for the Type.
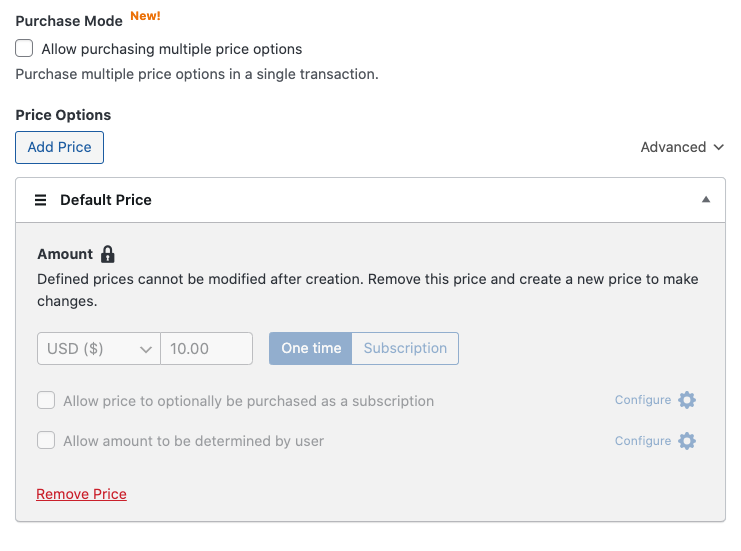
Next, go to the Payment tab and add your price options, amounts, and payment method options.
To sell multiple items in one transaction, be sure to check the box next to Allow purchasing multiple price options.
Once you’ve finished configuring your pricing options and payment methods, you can use the Confirmation Page and Email Notifications tabs to create customized confirmation messages to improve customer engagement.
Be sure to preview your form and then go ahead and click on the Publish button.
Step 3: Publish Your Payment Form
Now that you’ve created your payment form, it’s time to publish it on your site.
Simply go to the Publish module and click on “Copy Block.”
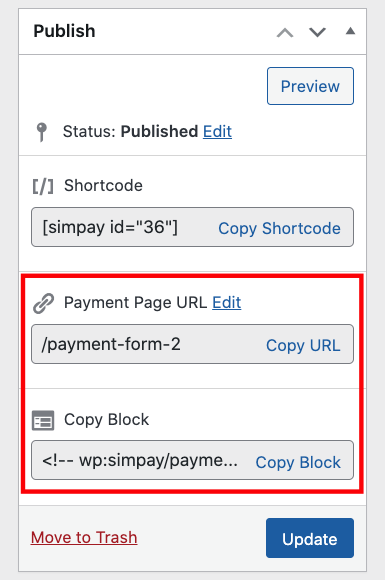
Then, go to the page you want your form on and paste it into the Block editor.
Your payment form will be displayed on the page.

Step 4: Send a Web Push Notification
So far, you’ve connected PushEngage to your WordPress site and added a payment form to a payment page.
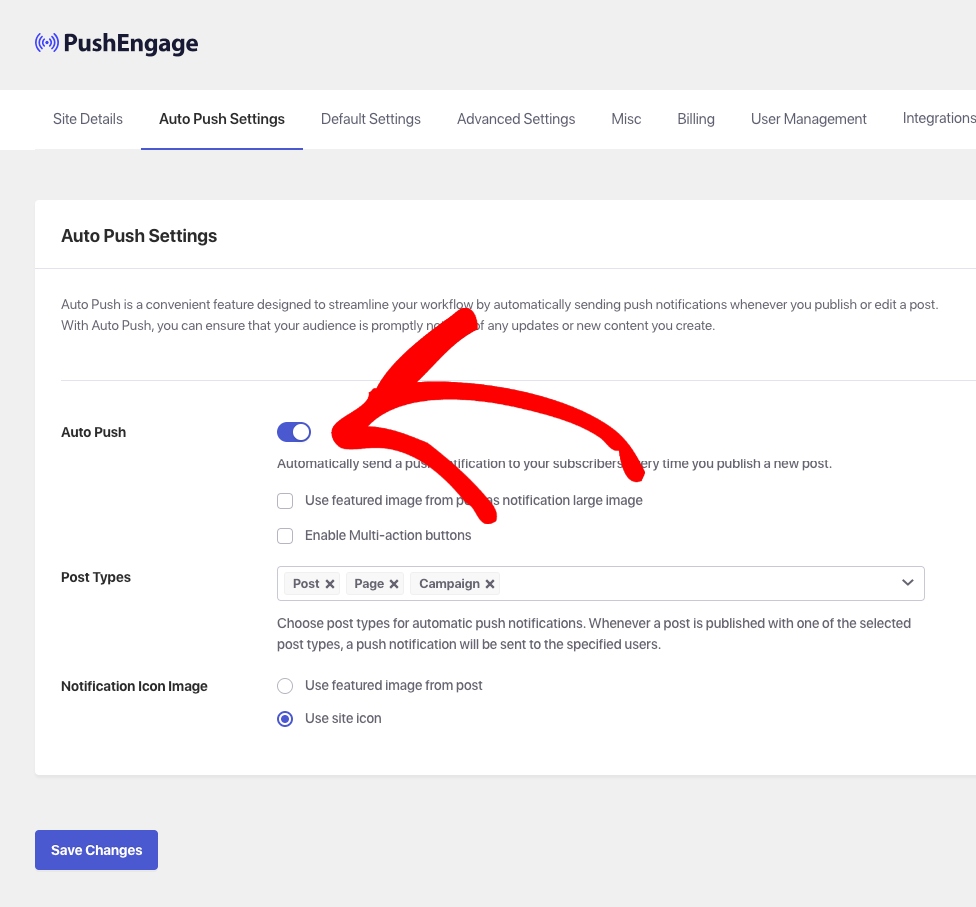
Next, to send a web push notification from your payment page, you’ll need to navigate to PushEngage Settings from the WordPress navigation panel. From here, toggle on the Auto Push switch to activate it.
Finally, choose Page for the Post Type. This will ensure that automatic push notifications are sent when a new payment page is created.
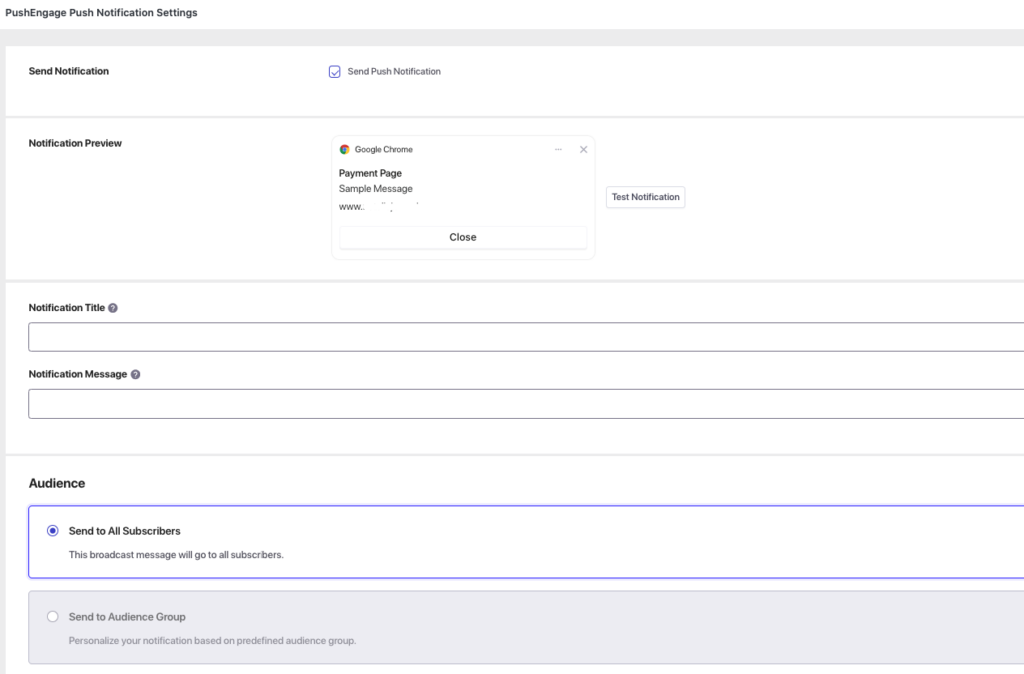
Now that you’ve set up your auto push settings, it’s time to customize your notification.
First, simply scroll down the payment page until you find the PushEngage Push Notification Settings.
Next, enter your custom Notification Title and Notification Message in the fields provided.
Remember, it’s best to keep your title and message concise and eye-catching to entice subscribers to click on the notification. You can also implement emojis to draw interest in what you have to share.
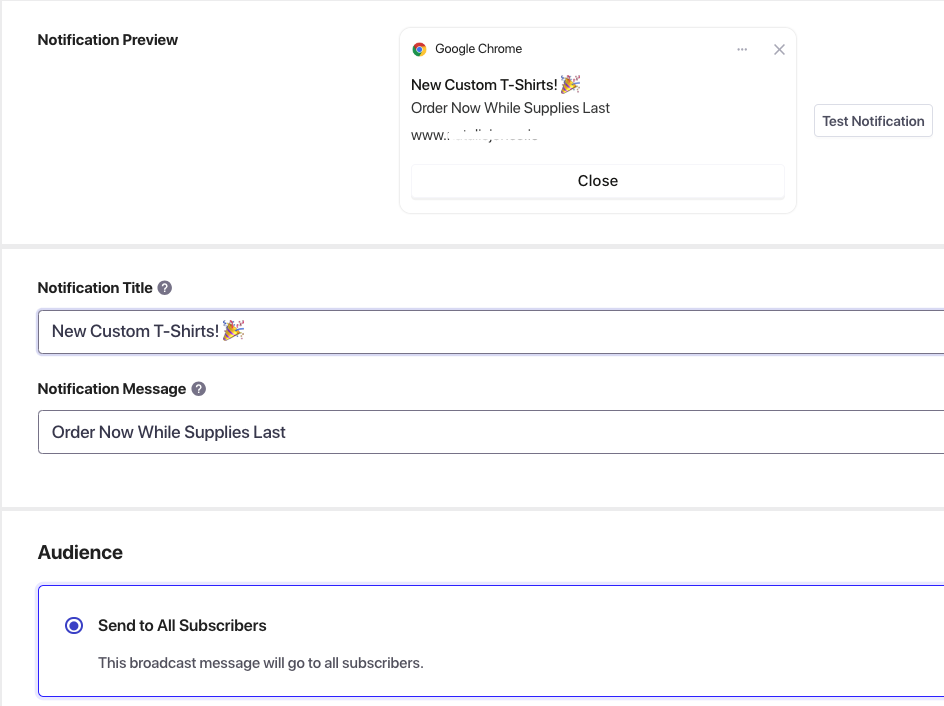
Finally, click on the Test Notification button to ensure that your push notification appears the way you wish. It will appear in the upper right-hand corner of your screen.
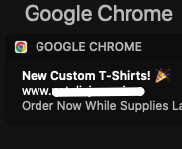
Testing Web Push Notifications
To test your notifications, you’ll need to add yourself as a subscriber to your site.
Simply create a new profile in your browser.
For Chrome, you’ll need to navigate to the Photo icon and click Add. Then, visit your site in the newly created profile. A Subscriber Opt-In window should be displayed. Go ahead and click on Allow.
Also, ensure that you have allowed push notifications in your browser settings.
That’s it! We hope this article has helped you learn how to drive traffic to your payment forms instantly in WordPress. You can now use these web push notifications for all of your payment pages.
If you liked this article, you might also want to check out our guide on how to send push notifications from your WordPress site. This guide shows you how to create web push notifications from your PushEngage dashboard.
What are you waiting for? Get started with WP Simple Pay today!
To read more articles like this, follow us on X.
Disclosure: Our content is reader-supported. This means if you click on some of our links, then we may earn a commission. We only recommend products that we believe will add value to our readers.


Leave a Reply