Custom Field Types Reference
In This Document
Reading time: 10 minutes | Difficulty: Beginner
Overview
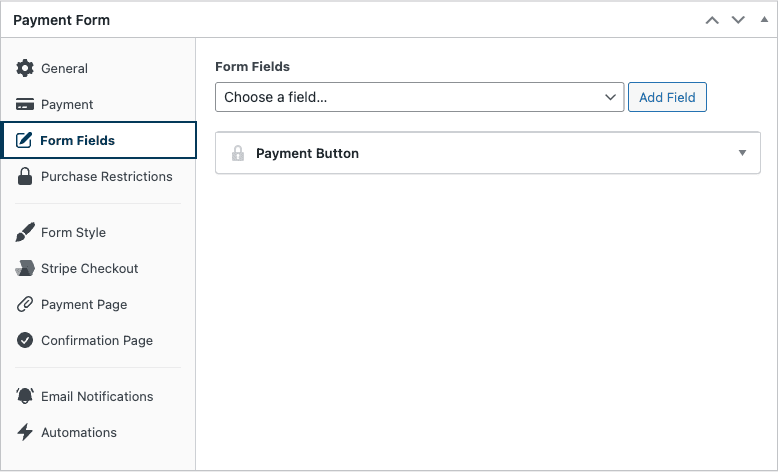
The Form Fields tab in the form builder is where you compose what a customer sees and fills in on a payment form. Click Choose a field… and you’ll see 19 field types covering customer information, presentational elements, payment selection, and the submit button itself.
This article is a complete reference for every field type. For a general walkthrough of how custom fields work — adding, ordering, removing, marking required — start with How to Configure a Payment Form’s Fields and Collect Custom Data.
Prerequisites
- WP Simple Pay Pro (custom fields beyond the basics require Pro)
- A payment form opened in the form editor
Field Categories
The 19 field types fall into four functional groups:
| Group | Fields |
|---|---|
| Customer information | Name, Email Address, Phone, Address, Tax ID, Date |
| Payment selection | Price Selector, Custom Amount Input, Coupon, Recurring Amount Toggle, Fee Recovery Toggle, Amount Breakdown, Payment Methods |
| Form structure / display | Heading, Text, Dropdown, Radio Select |
| Submit triggers | Checkout Button, Payment Button |
Customer Information Fields
Name
Collects the customer’s full name and stores it on the Stripe Customer record. Splits into first/last under the hood for Stripe compatibility.
- Required for: Card payments, most regulatory compliance, and useful smart-tag substitutions like
{customer-name}in emails. - Options: Label, placeholder, required toggle.
Email Address
Collects the email used as the customer’s contact address and Stripe Customer email. Always required when the form sends a Payment Receipt.
- Required for: Receipts, Manage Subscriptions links, abandoned-cart recovery, ACH/SEPA/Bacs (Stripe requires email for these methods).
- Options: Label, placeholder, required toggle.
Phone
Collects the customer’s phone number with international format support.
- Required for: SMS-based confirmations, fraud screening, B2B forms.
- Options: Label, placeholder, required toggle.
Address
Collects a billing or shipping address. Renders Stripe’s smart address element with country-aware fields and autocomplete.
- Required for: Tax calculation (Automatic Tax requires a billing address), shipping fulfillment, fraud checks.
- Options: Address type (Billing or Shipping), label, required toggle.
Tax ID
Collects a business tax identifier (VAT, GST, ABN, EIN, etc.) and attaches it to the Stripe Customer for invoicing.
- Required for: B2B EU invoicing, reverse-charge VAT, businesses that need a tax ID printed on receipts.
- Options: Label, placeholder, required toggle.
Date
Collects a date value with a date picker.
- Useful for: Event registrations, appointment booking, donations dedicated to a specific date, “preferred delivery” dates.
- Options: Label, placeholder, required toggle, minimum/maximum date constraints.
- Notes: The selected value is stored as form metadata — it doesn’t affect the charge amount or Stripe billing cycle.
Payment Selection Fields
Price Selector
The most important payment field on a multi-price form. Lets the customer choose between price options you’ve defined in the Payment tab.
- Display Style: Choose how prices appear:
- Basic — Plain radio list (default for forms with 1–3 price options).
- Dropdown — Compact
<select>element. Best when you have many prices and want to save vertical space. - List — Stacked cards with title, description, and price. Best for tiered pricing.
- Buttons — Side-by-side button group. Best for short, label-style options ($10, $25, $50).
- Options: Label, default price, required toggle.
Custom Amount Input
Lets the customer enter their own amount — the foundation of “pay what you want” and donation forms.
- Options: Label, placeholder, minimum amount, maximum amount, default amount.
- Tip: Combine with a Price Selector to offer suggested amounts plus a “custom” option.
Coupon
Lets the customer apply a coupon code at checkout. Coupons themselves are managed under WP Simple Pay > Coupons — see How to Add and Configure Coupons.
- Options: Label, placeholder.
- Notes: Distinct from the global Coupons admin page. The field is the customer-facing input; the admin page is where coupon codes are created.
Recurring Amount Toggle
A checkbox that, when enabled by the customer, converts a one-time payment into a recurring subscription on the same form. Powers “Donate monthly instead?” patterns without requiring two separate forms.
- Options: Label, billing interval (Daily/Weekly/Monthly/Yearly), invoice limit.
- Requires: Subscriptions enabled on the form.
Fee Recovery Toggle
A checkbox that lets the customer voluntarily cover the Stripe transaction fee, bumping the charge by a calculated amount so you receive the full intended total.
- Options: Label, fee percentage, fee fixed amount, default state (checked/unchecked).
- Useful for: Non-profits, donation forms, B2B invoices.
Amount Breakdown
A read-only display field that itemizes the payment total — line items, taxes, fees, coupons, and the final amount. Updates live as the customer interacts with other fields.
- Required for: Forms that collect tax via the Taxes feature — see How to Collect Taxes on Payments. Without this field, customers won’t see the tax line item before submitting.
- Options: Label, item display preferences.
Payment Methods
Renders the Stripe Payment Element where the customer enters card details, selects an alternative payment method (ACH, SEPA, Klarna, etc.), or chooses a saved method.
- Display Type: Tabs (horizontal) or Accordion (stacked) — see How to Choose a Payment Method Display Type.
- Visible Items: When using Accordion, controls how many methods show before a “More” button appears. Default: 5.
- Required for: Every on-site payment form. Off-site (Stripe Checkout) forms don’t use this field.
Form Structure / Display Fields
Heading
Inserts a styled heading between other fields. Useful for grouping related fields (“Billing Information”, “Event Details”, “Optional Add-Ons”).
- Options: Heading text, heading level (H2–H6).
- Notes: Purely visual — no value is collected or sent to Stripe.
Text
A multi-line block for free-form HTML/text. Use it for instructions, terms-of-service text, marketing copy, or thank-you content.
- Options: Body content (HTML allowed).
- Notes: Like Heading, this is presentational only.
Dropdown
A <select> element where you define the available options. Stores the chosen value as form metadata, viewable in the customer record and Stripe metadata.
- Options: Label, options list (label/value pairs), default selection, required toggle.
- Useful for: “How did you hear about us?”, T-shirt size, event session selection.
Radio Select
Same data shape as Dropdown, but rendered as radio buttons instead of a <select>. Better when you have 2–5 options and want them all visible at once.
- Options: Label, options list, default selection, required toggle.
Submit Triggers
Every form must have exactly one of these two button fields. They’re mutually exclusive: the form type (set in the General tab) decides which one appears in the picker.
Payment Button
The submit button for on-site payment forms (Embedded or Overlay). Charges the customer using the Stripe Payment Element on the same page.
- Options: Button text, processing text (shown while the request is in flight).
Checkout Button
The submit button for off-site Stripe Checkout forms. Redirects the customer to Stripe’s hosted checkout page.
- Options: Button text, processing text.
Frequently Asked Questions
Why do I see Payment Button on some forms and Checkout Button on others?
The button type is tied to the form’s Type in the General tab. On-site forms use Payment Button; off-site (Stripe Checkout) forms use Checkout Button. Switching the type in General automatically swaps the button field for you.
Can I add the same field type twice?
Some fields can be added multiple times (Heading, Text, Dropdown, Radio Select, Date). Others are single-use per form because they have a fixed role — you can only have one Email, one Price Selector, one Payment Methods field, one Coupon field, and one submit button. The picker greys out fields that are already in use.
Where does the data from custom fields go?
Custom field values are saved as metadata on the Stripe PaymentIntent or Subscription. You can view them in your Stripe Dashboard under the payment record’s Metadata section, and in the customer record inside WP Simple Pay. The data is also available to webhooks and to integrations like Uncanny Automator (see How to Use the Automations Tab).
Are field values included in receipt emails?
Yes — use smart tags to insert any custom field value into email subjects or bodies. See Using Smart Tags.
Why is the Amount Breakdown field empty?
The Amount Breakdown only shows line items that exist on the current form. If your form has no taxes, no fees, no coupon entered, and a single price option, the breakdown collapses to just the total. It “comes alive” when there’s something to itemize.
Can I customize field validation rules?
Built-in fields enforce sensible defaults (Email validates as an email, Tax ID accepts the formats Stripe accepts, etc.). For custom validation logic, use the simpay_form_validation filter — but most cases are covered by the built-in required toggle and field-specific options.
What’s Next?
- How to Configure a Payment Form’s Fields and Collect Custom Data – General walkthrough of adding and ordering fields
- How to Collect Taxes on Payments – Use the Address and Amount Breakdown fields together
- How to Choose a Payment Method Display Type – Configure the Payment Methods field
Still have questions? We're here to help!
Last Modified: