Connect WP Simple Pay to Facebook with Uncanny Automator
In This Document
What is Uncanny Automator?
Uncanny Automator is a powerful automation plugin for WordPress that simplifies and streamlines website workflows. With Uncanny Automator, you can easily create automated sequences called recipes by linking triggers, actions, and conditions. Uncanny Automator seamlessly integrates with other popular plugins and services, enabling you to automate tasks like form submissions, email marketing, user role updates, and more.
If you have the free version of Uncanny Automator, you’ll first need to connect your site with a free Uncanny Automator account, which will give you 250 free app credits to use with Instagram. If you have Uncanny Automator Pro, simply activate your Pro license key to get unlimited usage of the Mailchimp integration.
Create an Automation for Your Payment Form
Now that you’ve installed and activated Uncanny Automator in WordPress, it’s time to create a Facebook Pages automation for your payment form.
With WP Simple Pay, it’s easy to create tons of different automations for specific payment forms directly from the payment form builder.
First, head back over to the payment form you’ve created and click on the Automations tab.
You can find the form in the WordPress admin dashboard by going to WP Simple Pay » Payment Forms.
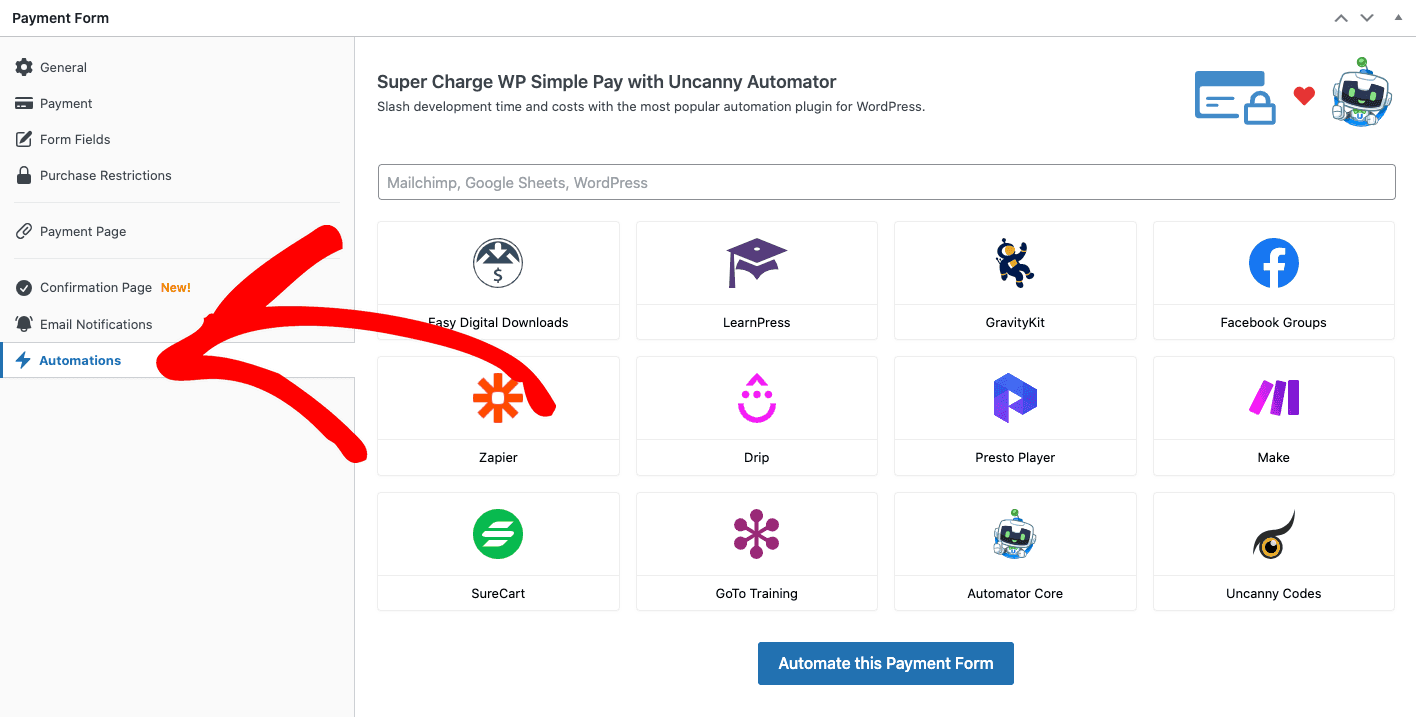
Next, enter Facebook Pages in the text field provided and click on the Automate this Payment Form button.
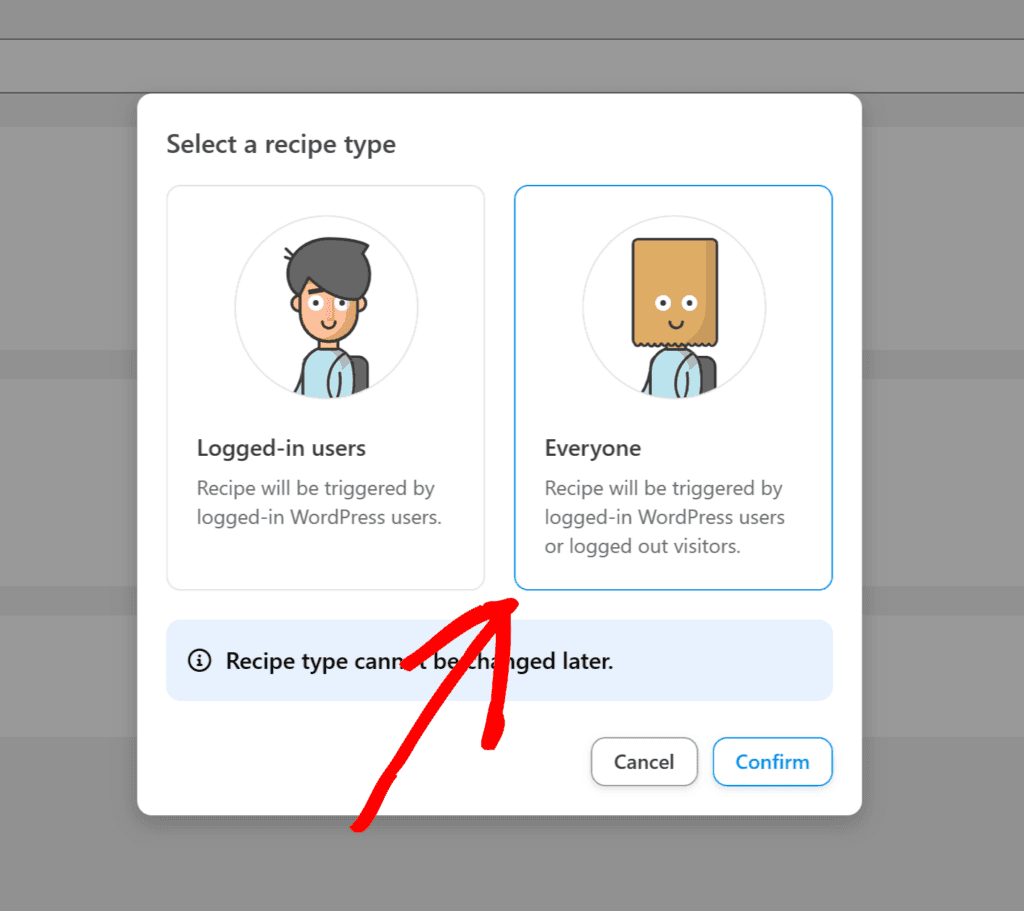
From here, you’ll be automatically redirected to the recipe builder page on Uncanny Automator.
Go ahead and select Everyone for the Recipe Type and click on the Confirm button.
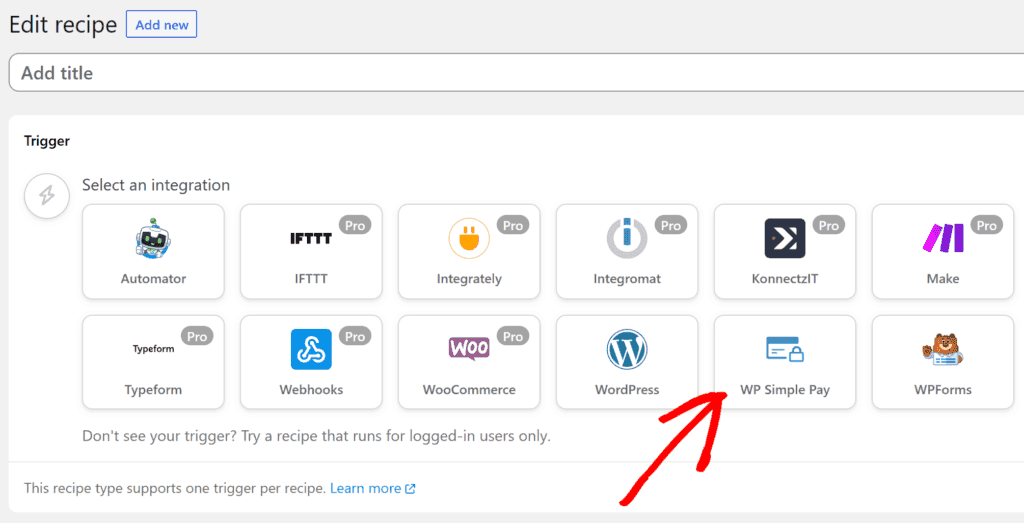
Next, click on the WP Simple Pay icon for your Integration.
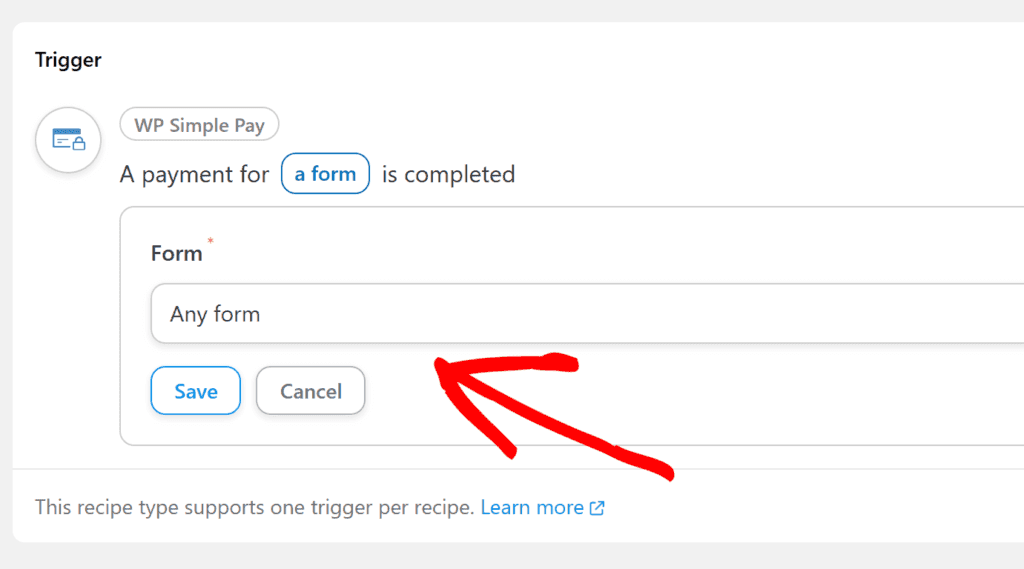
For the Trigger, choose Any Form and click Save. You can also select the payment form you just created from the dropdown menu to trigger your Facebook posts for this specific form only.
Now that you’ve set up your trigger, it’s time to configure your action. First, go ahead and click on Add Action.
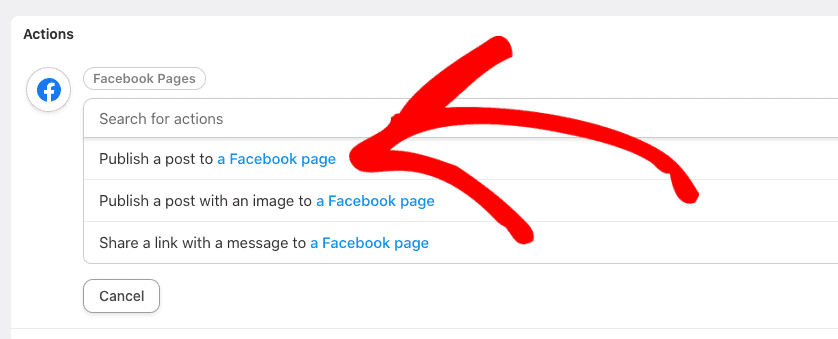
From the list of integration options, click on Facebook Pages. You’ll be prompted to connect your Facebook Page to Uncanny Automator if you haven’t already done so.
To create an automation for Facebook Pages, you’ll need to have a Facebook Business account set up first.
Once you’re finished connecting your Facebook Page to Uncanny Automator, go ahead and choose Publish a post to a Facebook page.
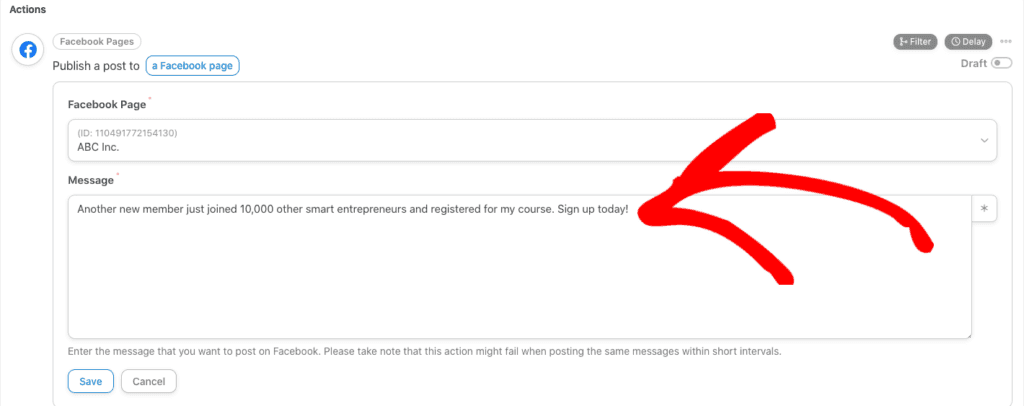
Next, click on your Facebook Page from the dropdown menu and add your custom message in the text field provided. Be sure to click on the Save button when you’re finished.
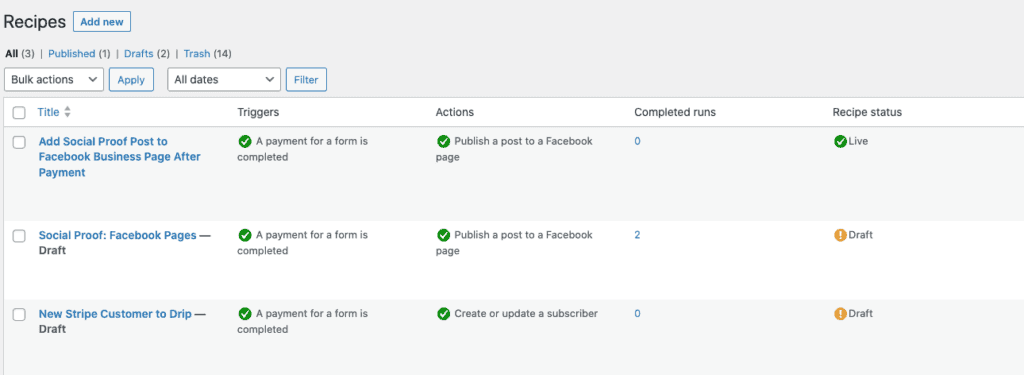
Now that you’ve created your automation recipe for your payment form, toggle the switch from Draft to Live in the upper right-hand part of the screen.
Next, to ensure that the automation is running, navigate to Automator » All Recipes.
Next Steps
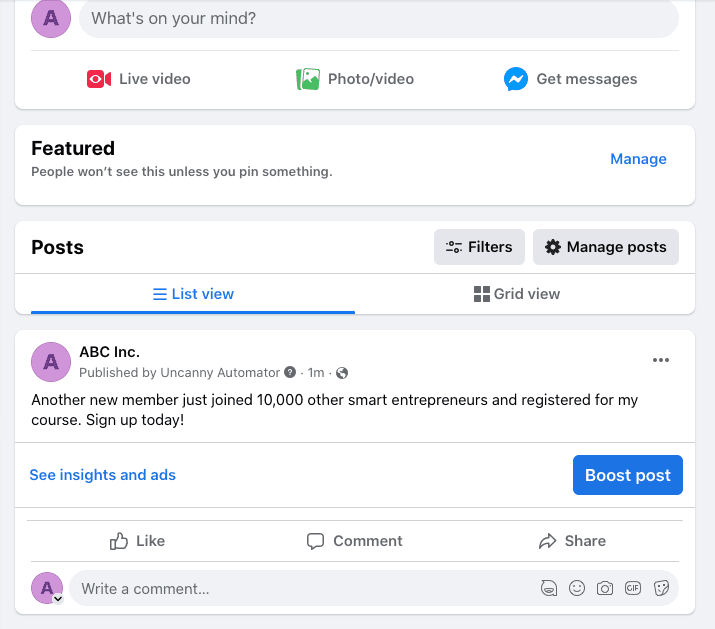
After you have created the Facebook Pages automation for your payment form, it’s highly recommended that you complete a test transaction to ensure the recipe is running smoothly.
You can visit your Facebook Page to see the posted message. It should look something like the one below.
That’s it! We hope this article has helped you learn how to automatically add a social proof post to your Facebook Page.
Still have questions? We're here to help!
Last Modified: