How to Set Up and Use the Stripe Customer Portal
In This Document
The Stripe customer portal is a Stripe-hosted page that lets your customers manage their subscriptions and billing details.
Stripe Settings
Not all settings are compatible with WP Simple Pay. The following settings can be used:
- Update subscriptions, including upgrading, downgrading and changing the quantities of their subscriptions
- Cancel subscriptions, immediately or at the end of a billing period
- Update payment methods like adding and removing cards
- View invoice history
- Update billing information, such as their email address, phone number, and shipping address
WP Simple Pay Settings
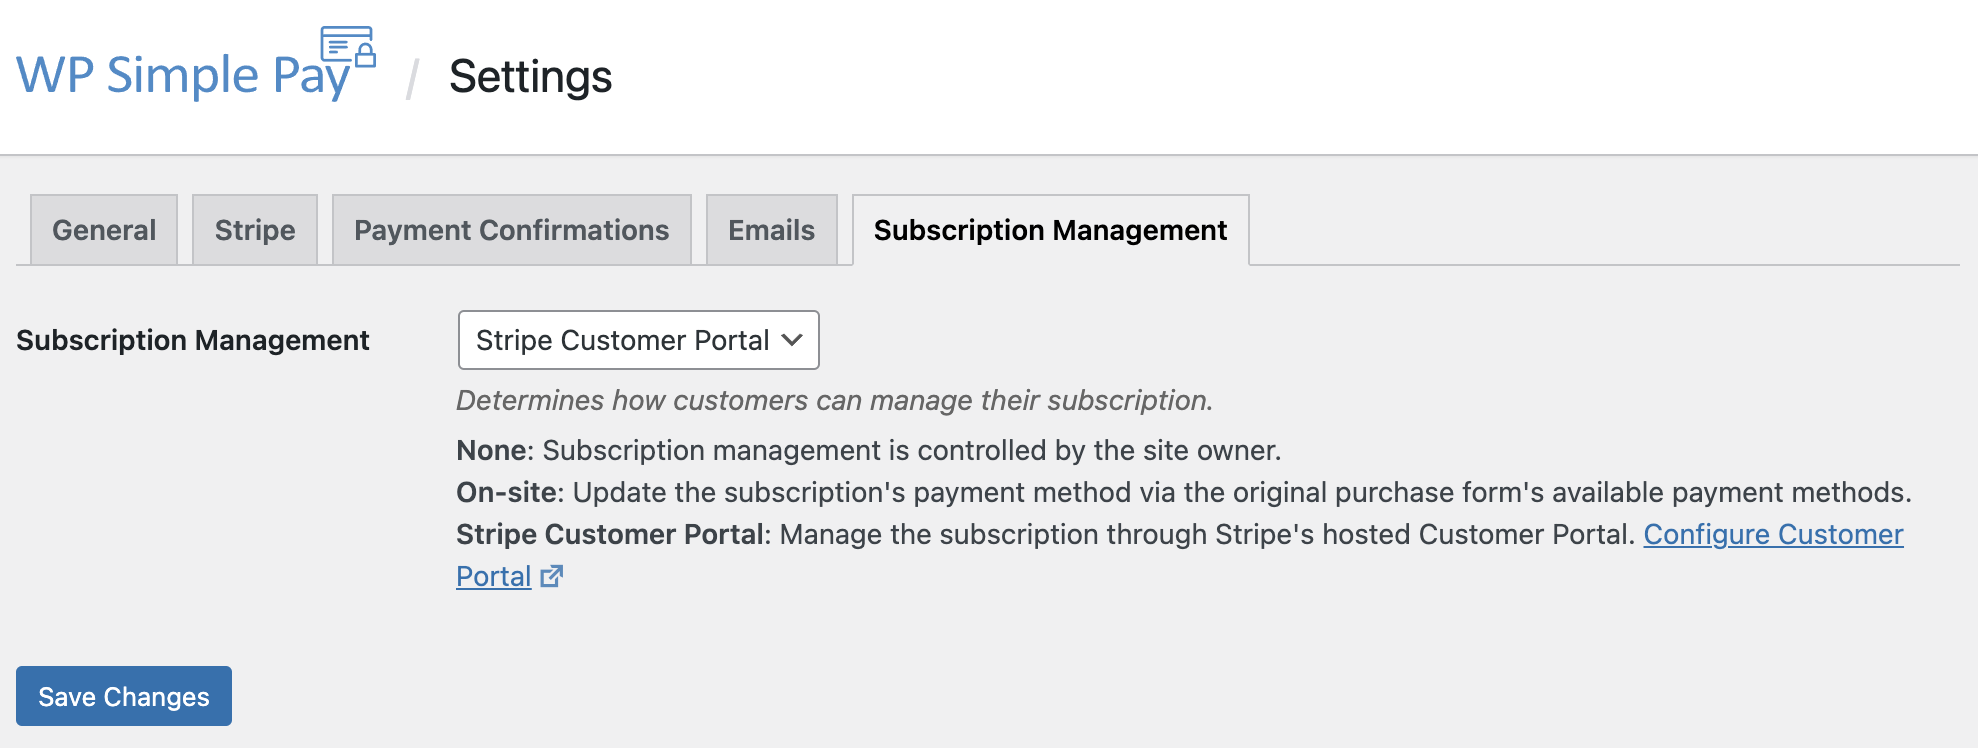
After setting up the portal in the Stripe Dashboard, you are ready to configure Simple Pay to use it. The step-by-step process is outlined below. In WP Simple Pay → Settings → Subscription Management choose Stripe Customer Portal from the dropdown and Save Changes.

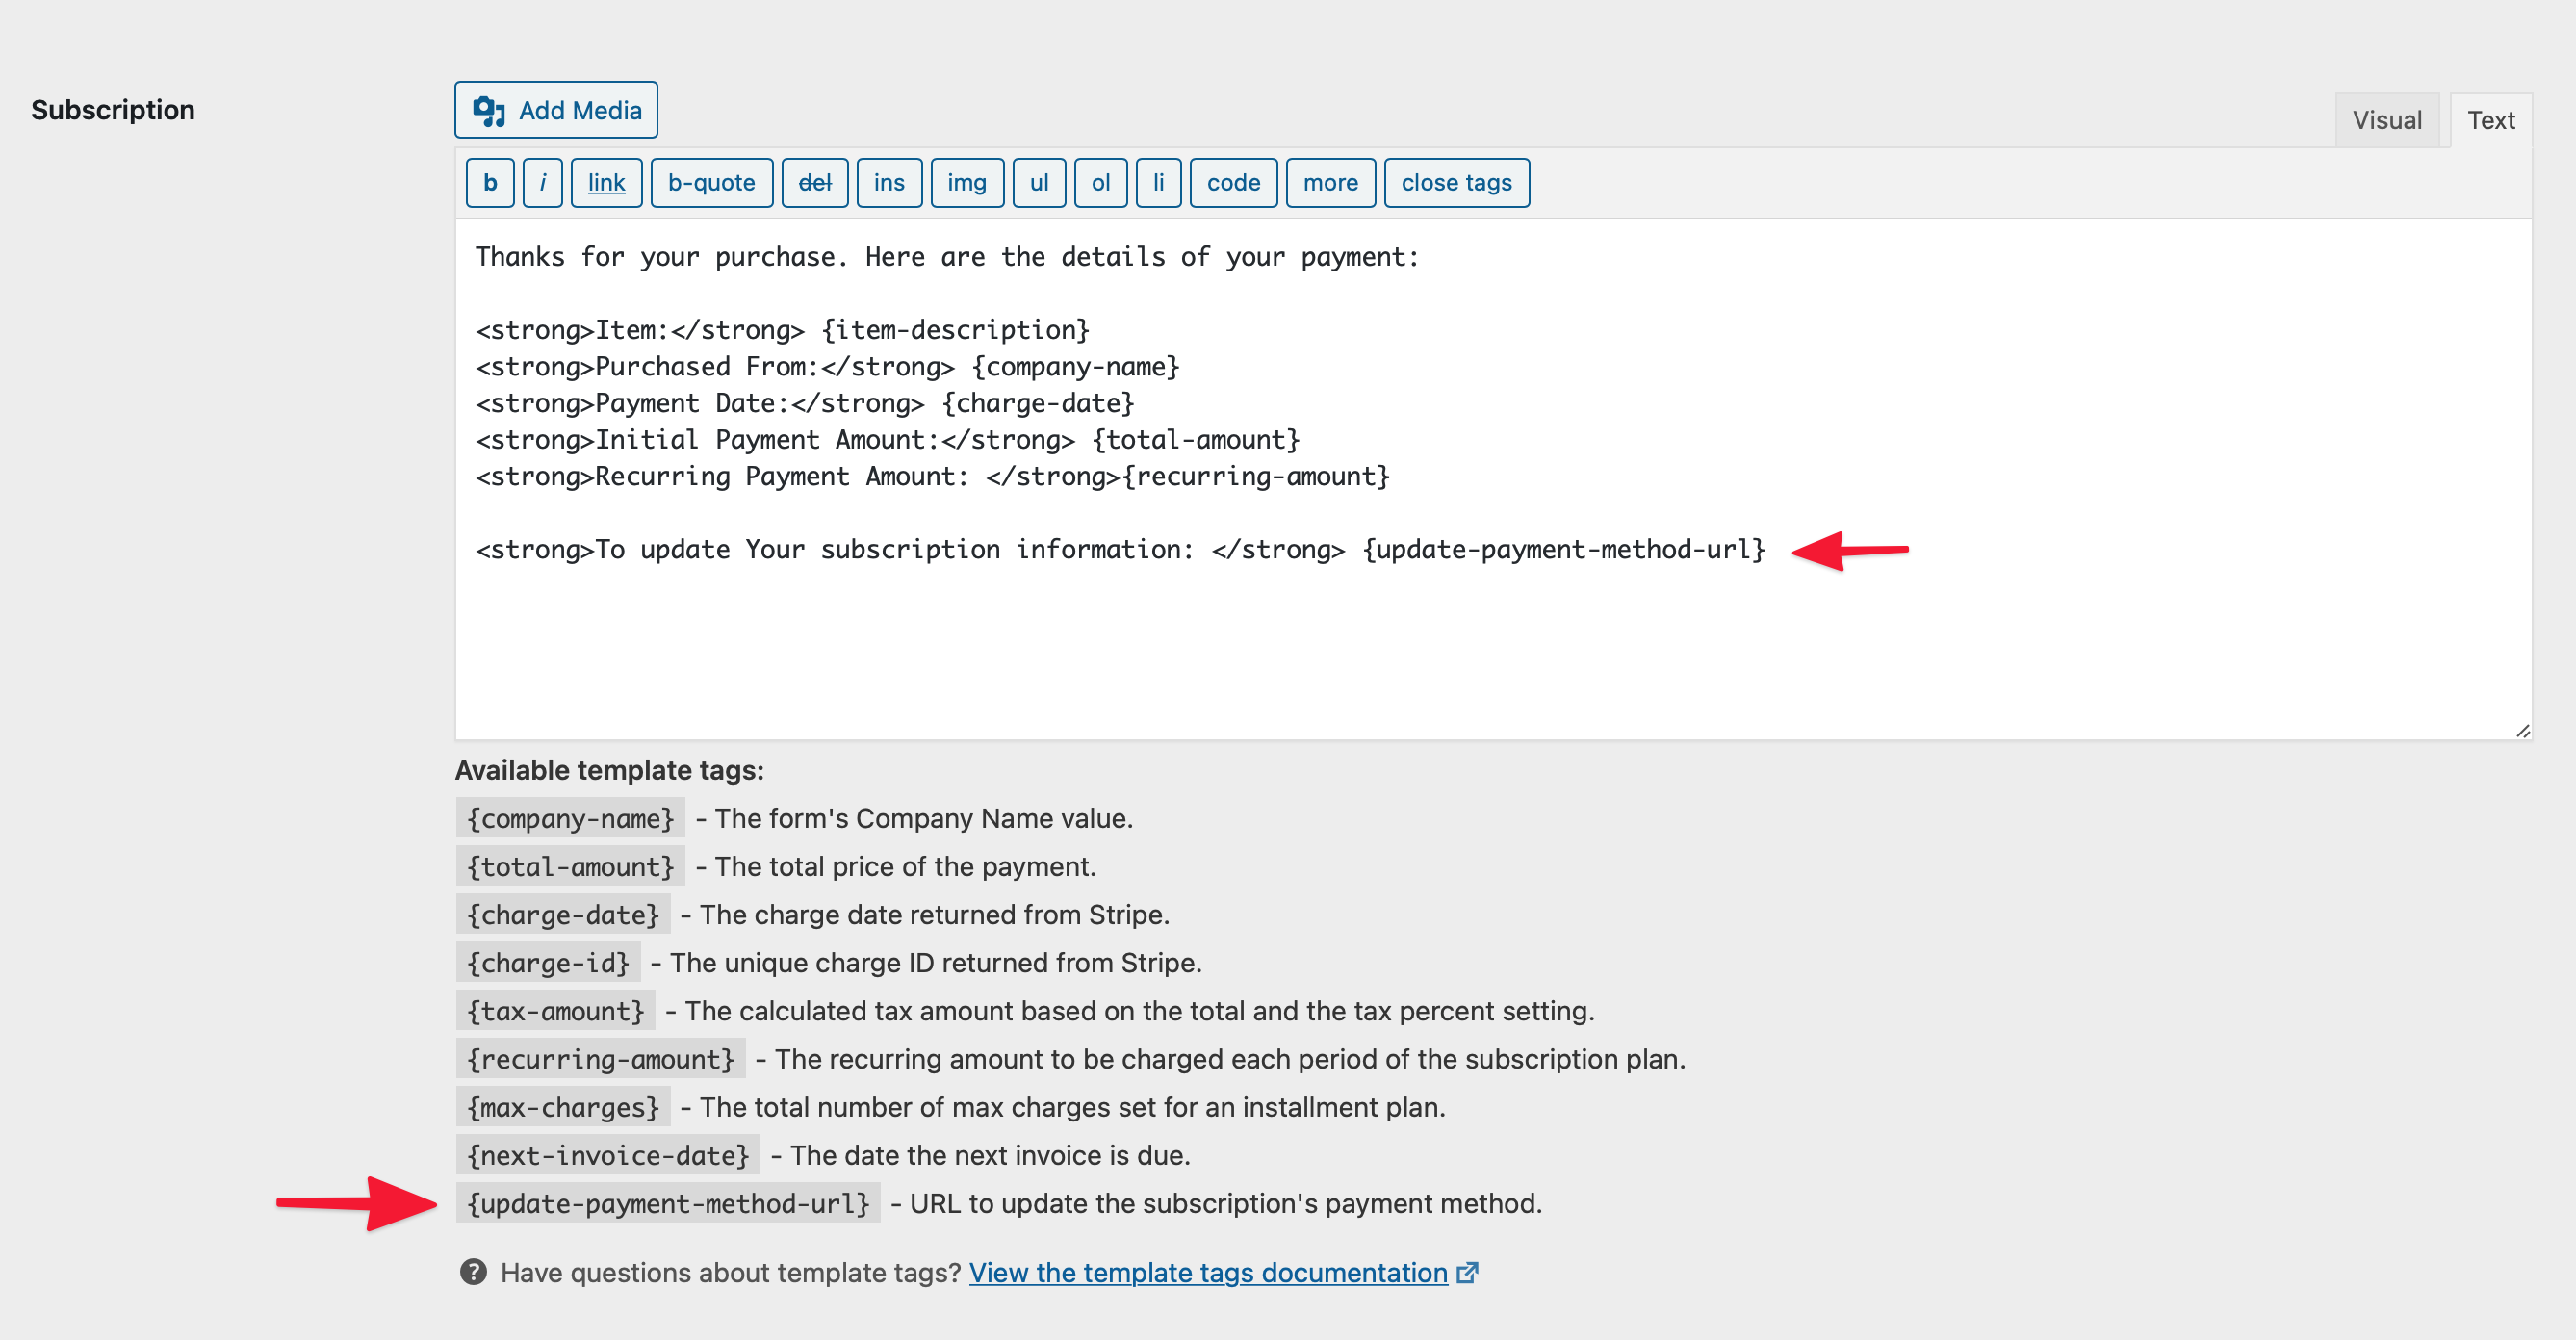
Then you’ll want to configure the payment receipt in WP Simple Pay → Settings → Emails → Payment Receipt (either the Subscription or Subscription with Trial emails) Be sure to add the {update-payment-method-url}template tag .

You may optionally decide to send the Upcoming Invoice email in WP Simple Pay → Settings → Emails → Upcoming Invoice to which you should also add the {update-payment-method-url} template tag. If you choose to do this, you need to disable the Stripe-generated email about upcoming renewals in the Stripe dashboard:

When enabled, the Upcoming Invoice email is sent to the email address originally used by the customer when completing the payment. This email is triggered based on the “upcoming renewal event” setting in the Stripe Dashboard.
Still have questions? We’re here to help!
Last Modified:
