How to Launch Overlay from Other Buttons or Links
In This Document
This article details adding custom code to your WordPress site and is intended for developers. Although we don’t provide custom development services ourselves, if you need help, we highly recommend Seahawk Media.
Custom code snippets are provided as-is and there is no guarantee they will continue to work across multiple versions of WP Simple Pay.
Step 1: Update the Button URL
To launch a Stripe Checkout or overlay payment form via a custom button link you need to change the button link URL. Adjusting the URL of the button link will depend on how you are editing your content. Update the URL to the following:
#form-176
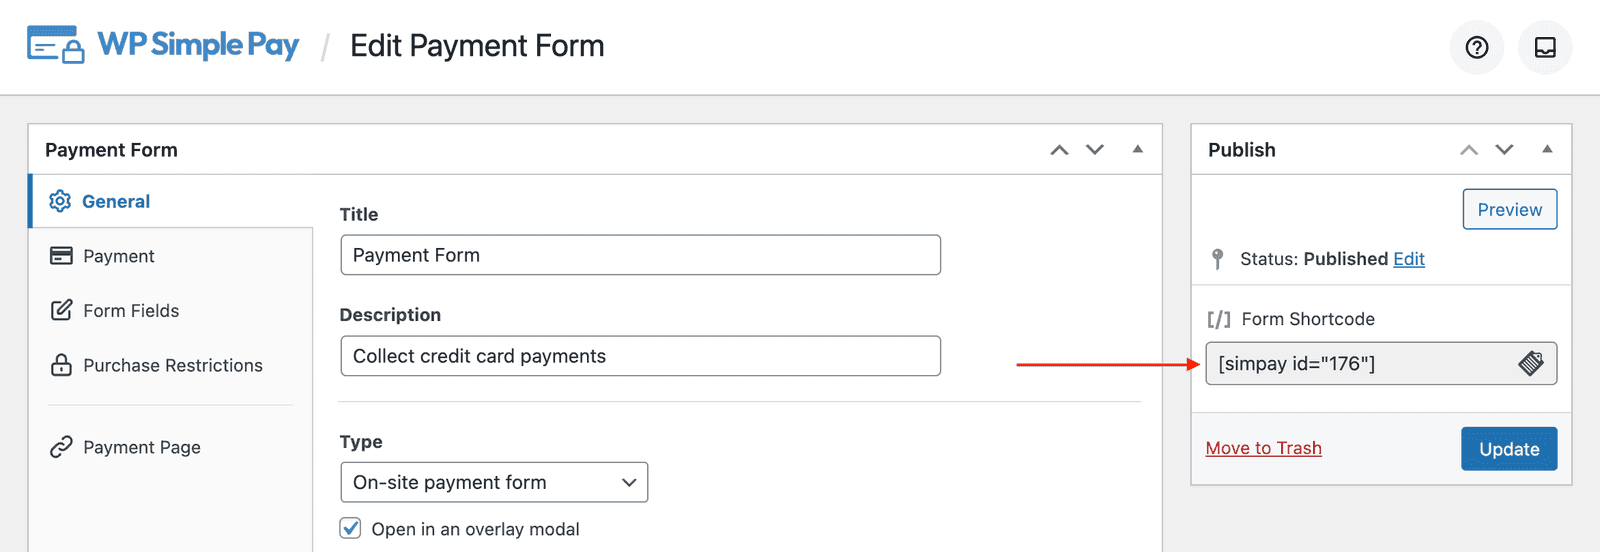
Replace 176 with the ID of the payment form you would like to launch. You can find the ID of your payment form in the form edit screen. The form ID is the number portion of the Simple Pay shortcode as shown below.
Next, embed the WP Simple Pay payment form shortcode in your page as you would normally: . This will cause the payment form to output on the page, but we will hide it in the next steps to ensure only the custom button link is visible.
Step 2: Add Custom JavaScript
There are many ways to add custom JavaScript code to your WordPress website. See our recommended guide for adding code snippets. We recommend that you add JavaScript to your theme’s footer using the free plugin WP Code. Go to Code Snippets → Header & Footer, then add the custom Javascript to the Footer section as shown below.
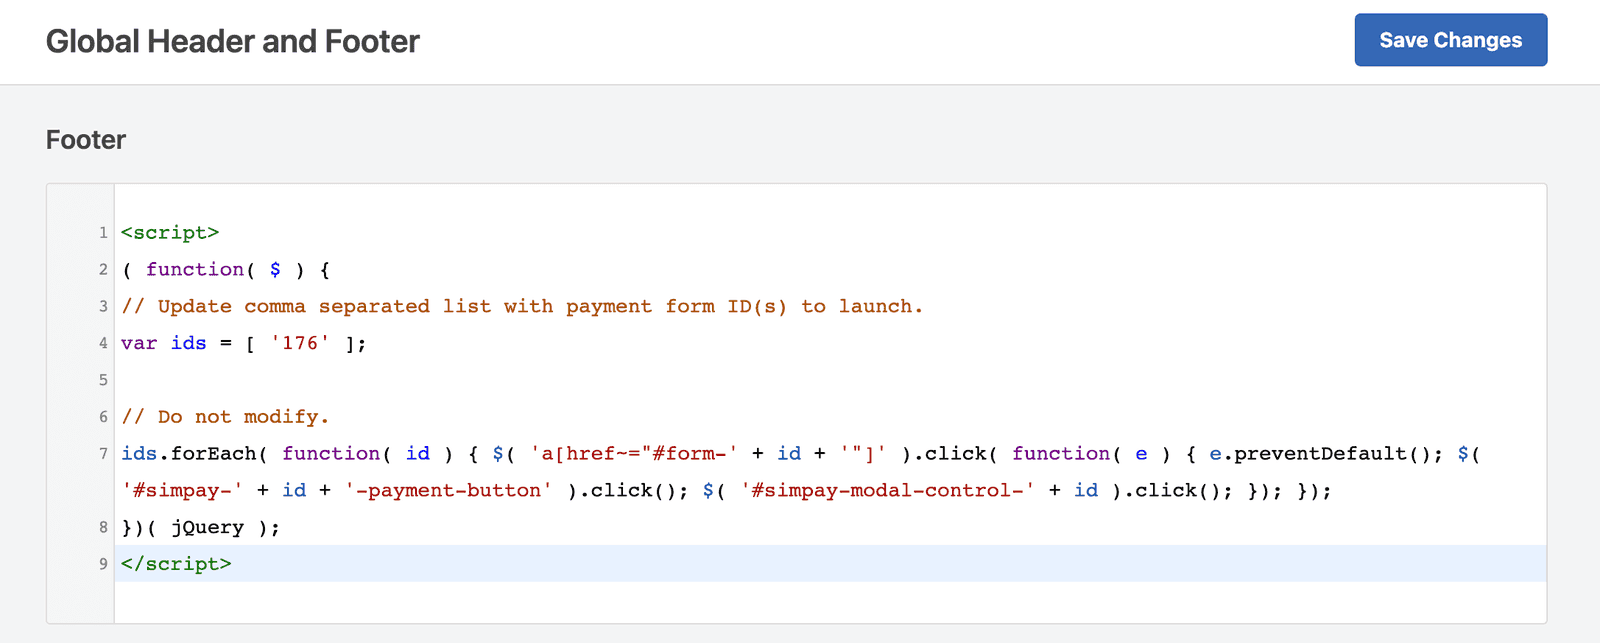
<script>
( function( $ ) {
	// Update comma separated list with payment form ID(s) to launch.
	var ids = [ '123' ];

	// Do not modify.
	ids.forEach( function( id ) {
		$( 'a[href~="#form-' + id + '"]' ).click( function( e ) {
			e.preventDefault();
			$( '.simpay-form-' + id + ' .simpay-payment-btn' ).click();
			$( '#simpay-modal-control-' + id ).click();
		});
	});
})( jQuery );
</script>
Replace the 123 in line 4 with the ID of your payment form. If you are creating multiple buttons on a page, you can add a comma-separated list of payment form IDs you want to be able to launch.
Step 3: Add Custom CSS
There are many ways to add custom CSS code to your WordPress website. We have outlined a few ways in our documentation. We recommend that you add CSS to your theme’s header using the free plugin WP Code. Go to Code Snippets → Header & Footer, then add your CSS to the Header section:
<style>
body:not(.simpay-form-preview) .simpay-form-wrap {
  display: none;
}
</style>
This will hide the default shortcode output, so only the custom button link is visible.
Still have questions? We're here to help!
Last Modified: