How to Configure a Payment Form’s General Settings
In This Document
In the form builder General tab, you can adjust general behavior of the Payment Form.
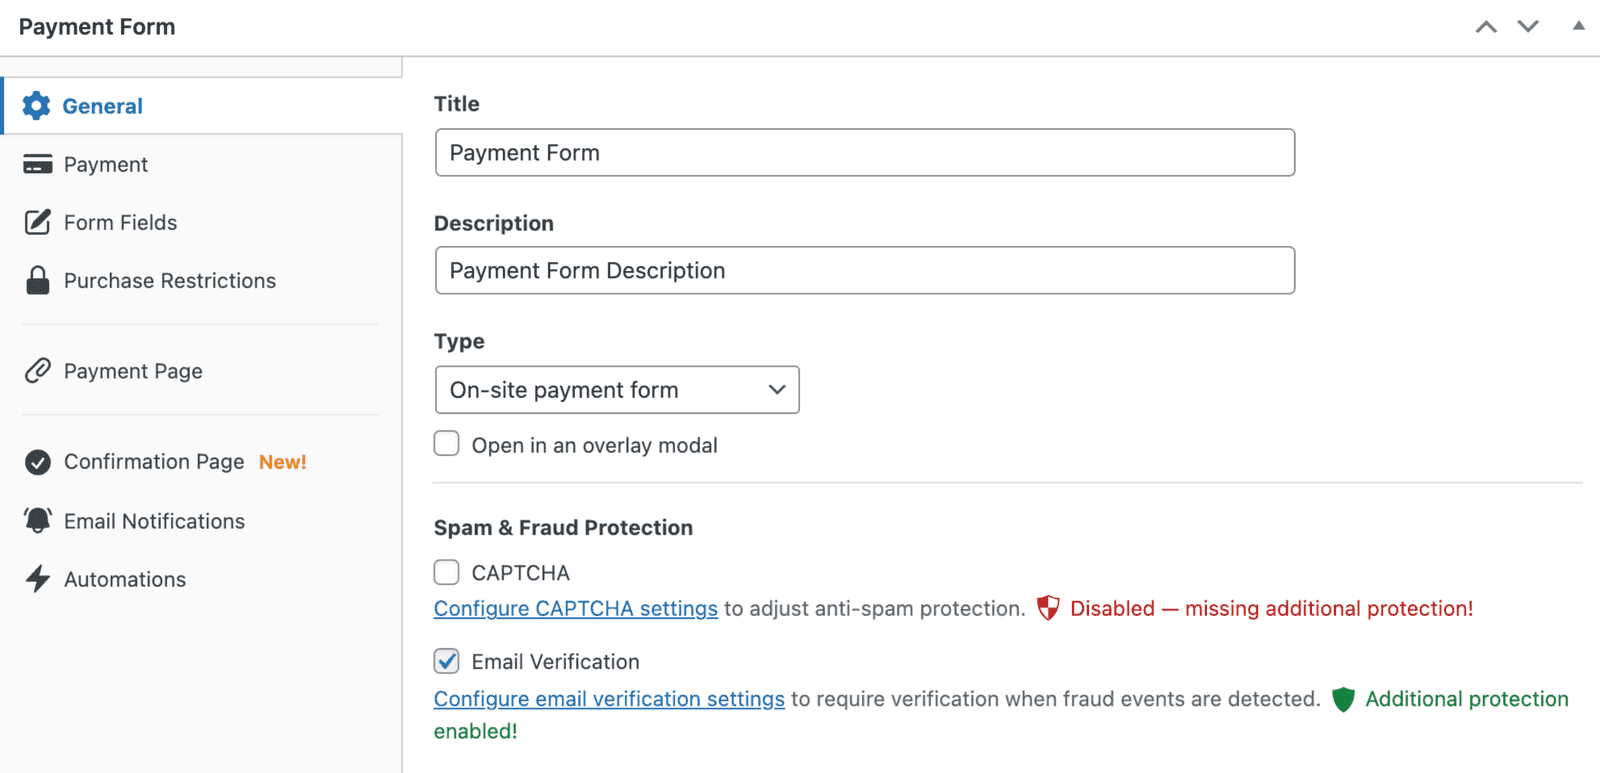
Title
A title to describe the payment form. The title is output above the payment form, or on Stripe Checkout
Description
Optional. Additional description of the payment form. Output above the Payment Form, or on Stripe Checkout.
Type
On-site payment form
Display all payment form fields on the page itself, and payment collection will occur on-site. All fields can be rearranged and styled as needed.
On-site payment forms utilize Stripe Elements to provide real-time validation and securely collect payment details.
Open in an overlay modal
Display all payment form fields in an overlay launched by a button on the page. Like the embedded option, all fields can be rearranged and styled as needed, and the payment is collected on-site.
Off-site Stripe Checkout form
Display some fields on the page and others in the Stripe Checkout form. Stripe Checkout is served by Stripe’s servers and allows partial field customization. Payment is collected off-site. See Stripe Checkout Display Options to customize this further.
Spam & Fraud Protection
Google reCAPTCHA v3
Add additional anti-spam protection by enabling Google reCAPTCHA v3. Read more about Google reCAPTCHA settings →
Email Verification
Add additional anti-fraud protection by requiring users to retrieve a one-time-use code from a valid email address before accepting a payment. Read more about Email verification settings →
Still have questions? We're here to help!
Last Modified: