Connect WP Simple Pay to Mailchimp with Uncanny Automator
In This Document
This tutorial assumes that you have already created an Audience in Mailchimp. In this tutorial, we are using the title Uncanny Automator for our Audience.
What is Uncanny Automator?
Uncanny Automator is a powerful automation plugin for WordPress that simplifies and streamlines website workflows. With Uncanny Automator, you can easily create automated sequences called recipes by linking triggers, actions, and conditions. Uncanny Automator seamlessly integrates with other popular plugins and services, enabling you to automate tasks like form submissions, email marketing, user role updates, and more.
If you have the free version of Uncanny Automator, you’ll first need to connect your site with a free Uncanny Automator account, which will give you 250 free app credits to use with Mailchimp. If you have Uncanny Automator Pro, simply activate your Pro license key to get unlimited usage of the Mailchimp integration.
Once you’ve connected your free account or activated your Pro license key, return to the recipe page and click on the Mailchimp icon.
You should see a dialog appear with a link to connect your Facebook account to Uncanny Automator.
Connect your WordPress site to Mailchimp
Click Connect account. You’ll see a screen asking you to authorize Uncanny Automator to access your account:
- Click Allow.
You are now ready to automate actions with Uncanny Automator and Mailchimp!
Create a new Uncanny Automator recipe
From the Automator menu, select Automator > Add new to create a new recipe. You’ll then create your Trigger and its associated Action(s).
Set Up Your Trigger
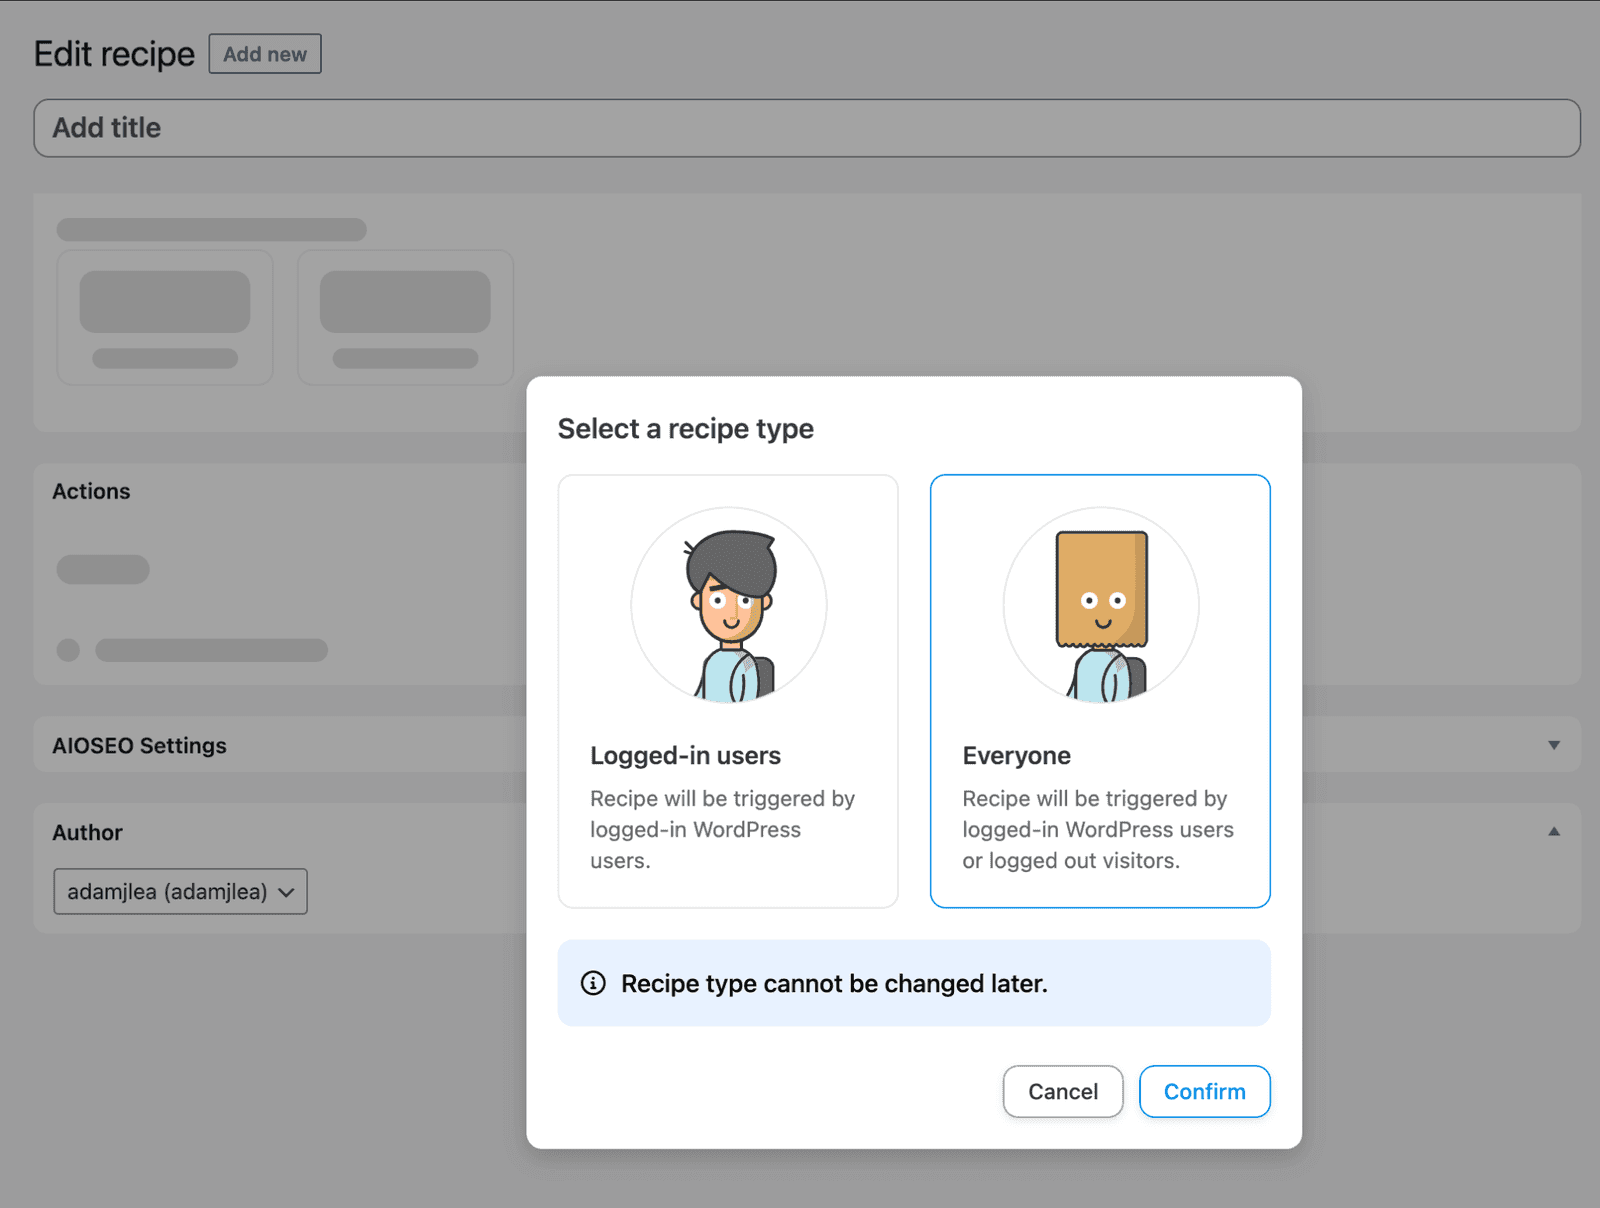
You’ll be asked whether your recipe is for Logged-in users or Everyone. For this example let’s choose Everyone and click confirm.
You’ll be presented with a list of connected integrations to choose your Triggers from. Choose WP Simple Pay from the available options.
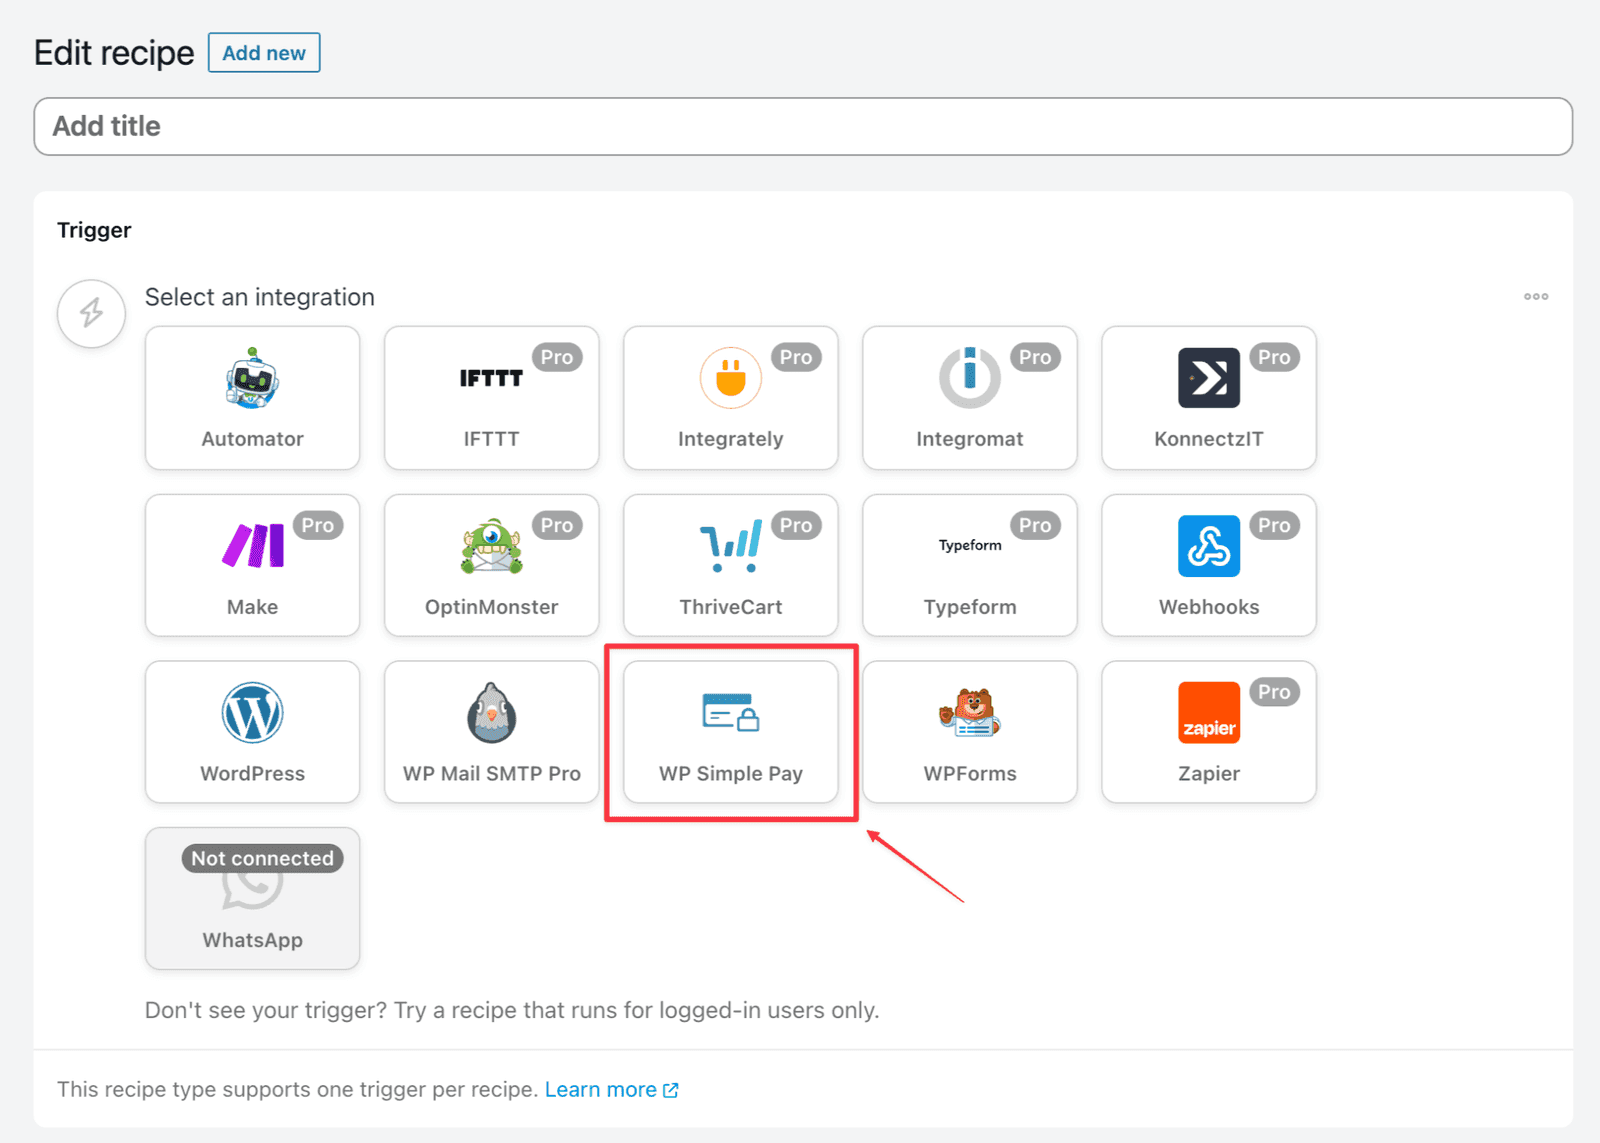
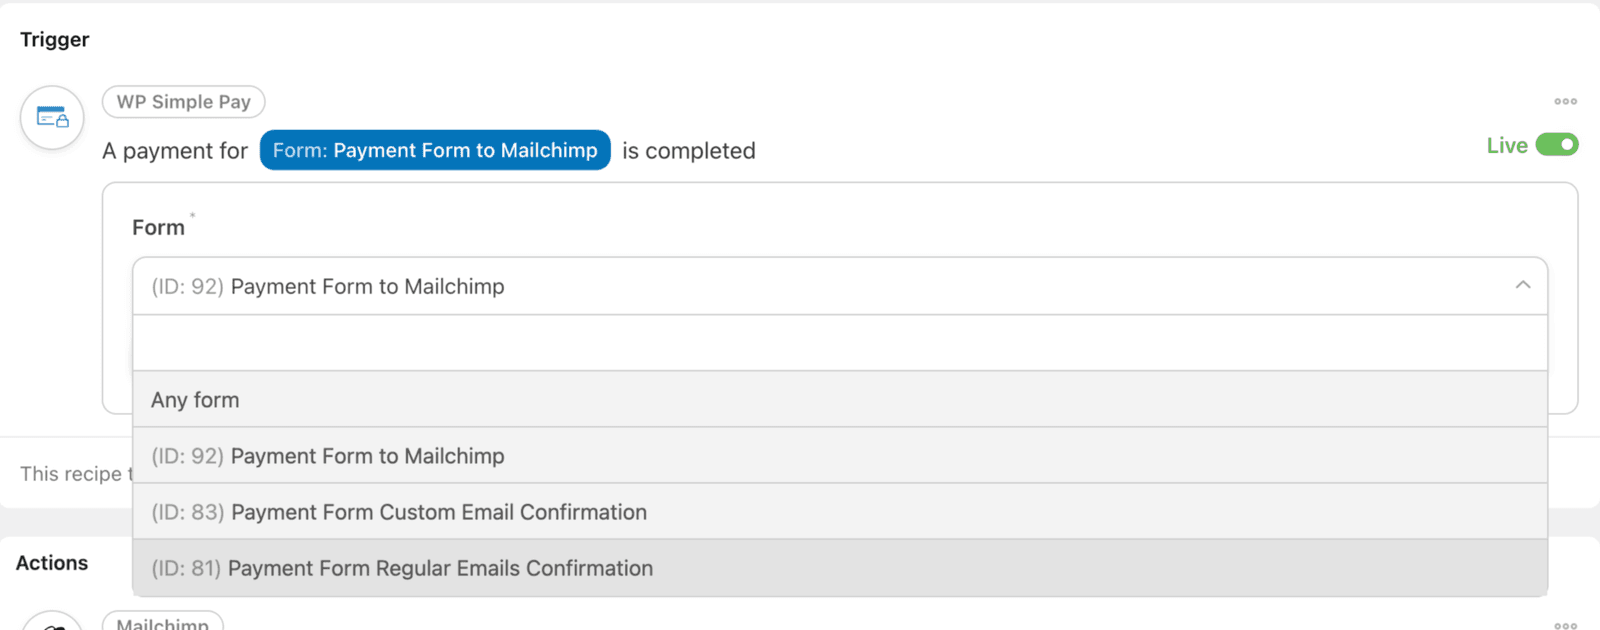
After selecting WP Simple Pay, you be presented with a list of Triggers. For this example choose A payment form is completed.
You will then be presented with a dropdown to select the form you wish this Trigger to apply to. Choose the appropriate form from the dropdown and then click the Save button.
Set Up Your Action
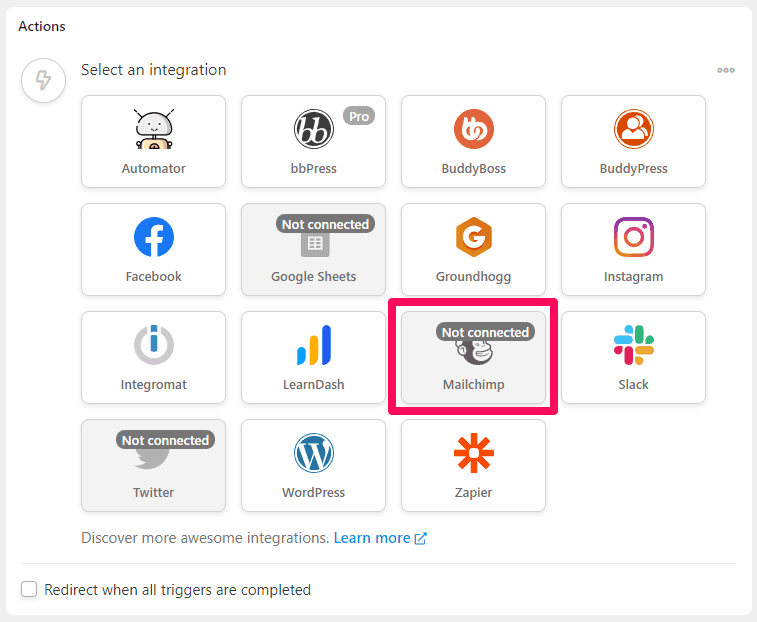
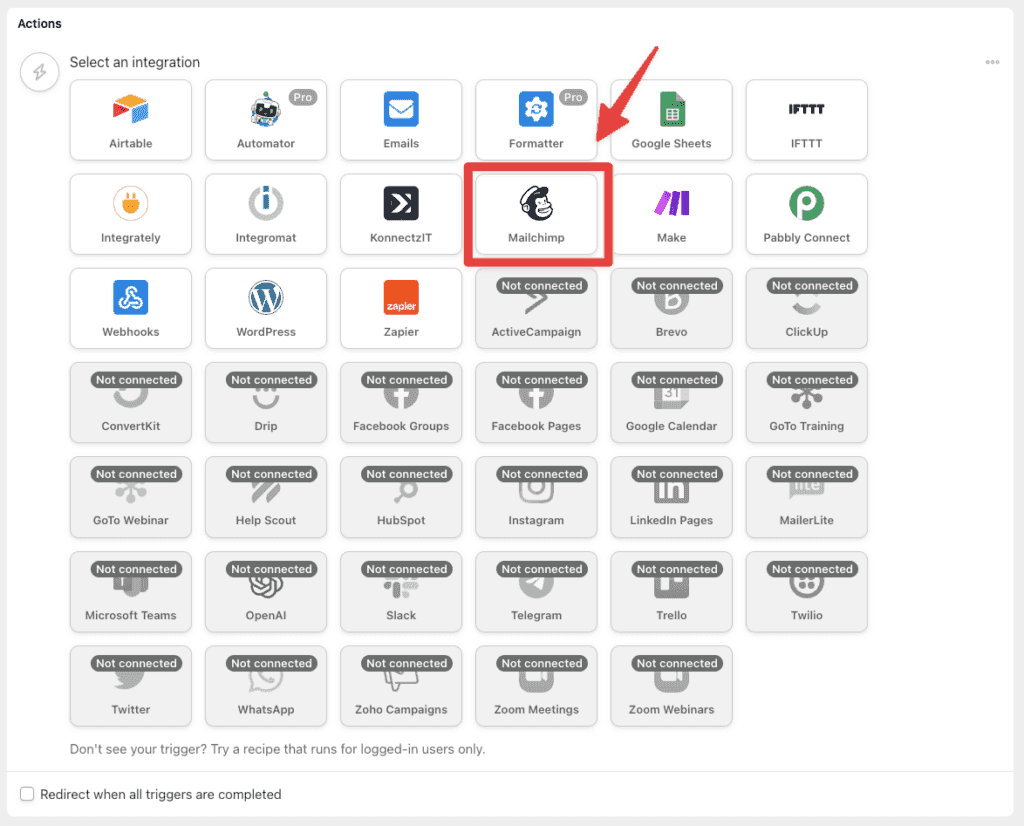
Below the Trigger section, you see the Action section. Click the Add action button and you will see a list of connected integrations from which to choose your Action. Choose Mailchimp from the available options.
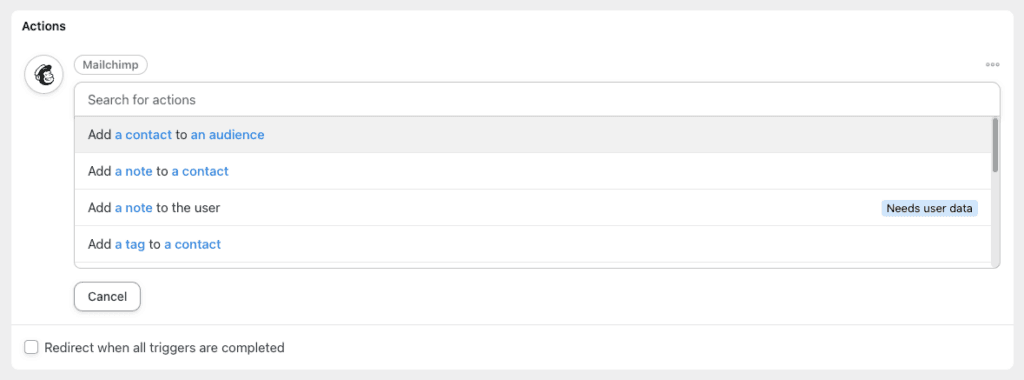
Scroll through the list of available actions until you see Add a contact to an audience, and then click it to select.
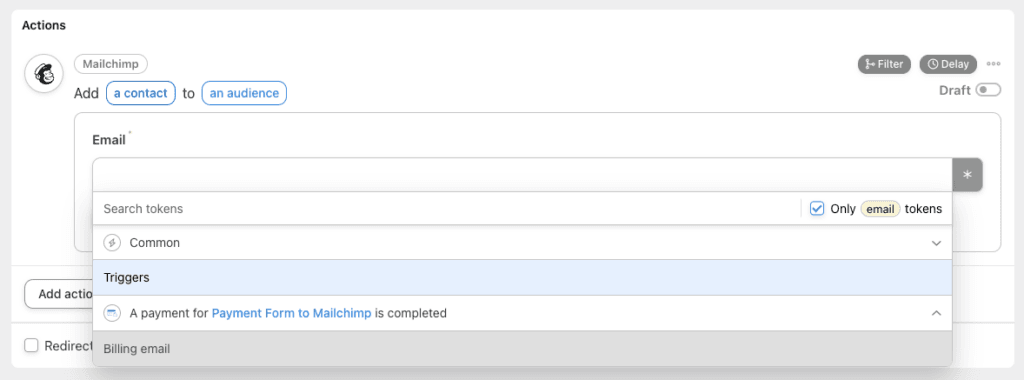
You will then be presented with a dropdown to select the field that you wish to populate the Mailchimp Email field from apply to. Choose the appropriate field from the dropdown and then click the Save button.
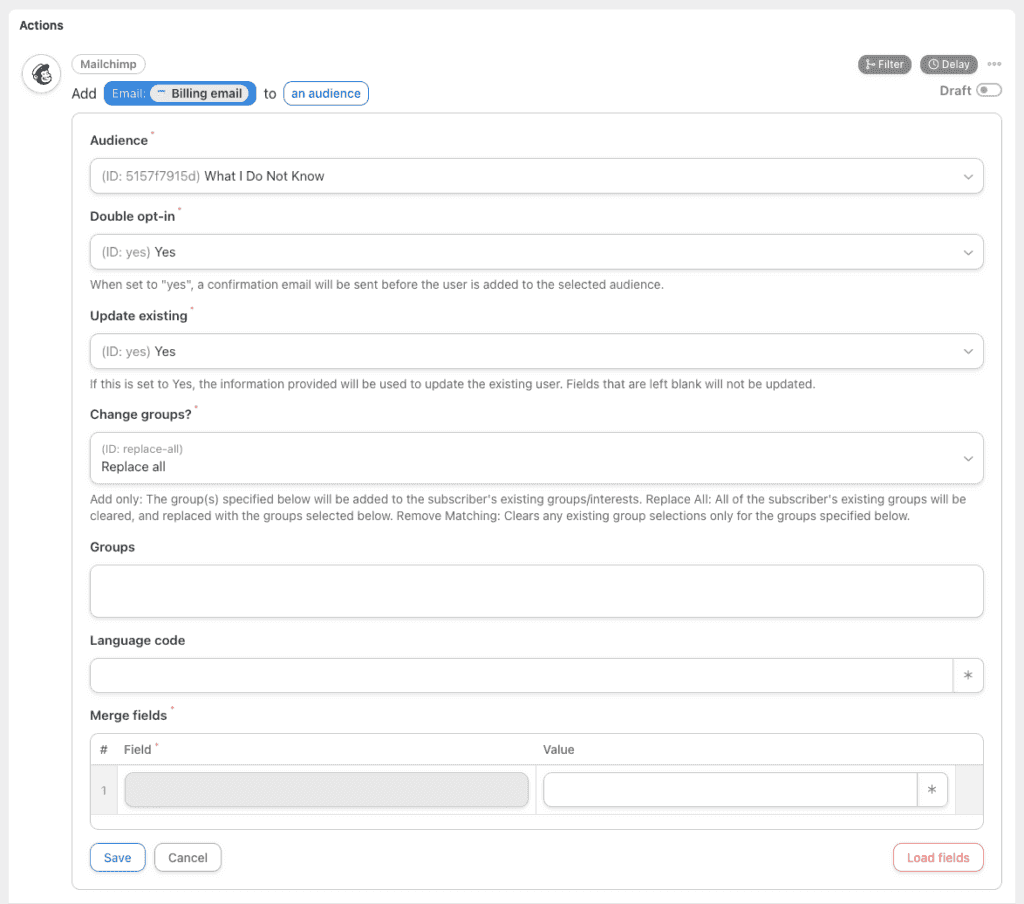
You will then be presented with a list of options to configure your settings. Complete the fields as desired and then click the Save button.
That’s it! Sit back and relax as your recipes run and update your Mailchimp users automatically as they complete your recipe’s triggers.
Notes
- In actions such as “Add the user to an audience”, MailChimp does not support the retrieval of non-text fields by third parties. If you have a checkbox or other non-text field types defined on an audience, you, unfortunately, will not be able to set values for these fields via Uncanny Automator.
Still have questions? We're here to help!
Last Modified: