How to Accept Apple Pay & Google Pay
In This Document
By enabling this option, site visitors are shown an Apple Pay or Google Pay option if their browser and device combination supports it. If none are available, the option is not displayed.
Currently, supported browsers include Chrome Desktop, Chrome Android, macOS Safari, iOS Safari, and Microsoft Edge for Windows.
A payment method must also be saved to the browser or device. For example, you can save a card in Chrome or add a card to your Wallet for Safari. See our Apple Pay & Google Pay demos in action.
Google Pay and Apple Pay are enabled by default when using Stripe Checkout. You can disable one or both by visiting the Stripe Payment Method settings in the Stripe Dashboard.
Registering Your Domain with Google Pay & Apple Pay
To use Apple Pay, you must be connected to your Stripe account in Live Mode.
To use Google Pay & Apple Pay, you need to register all of your web domains that will show one of these payment methods.
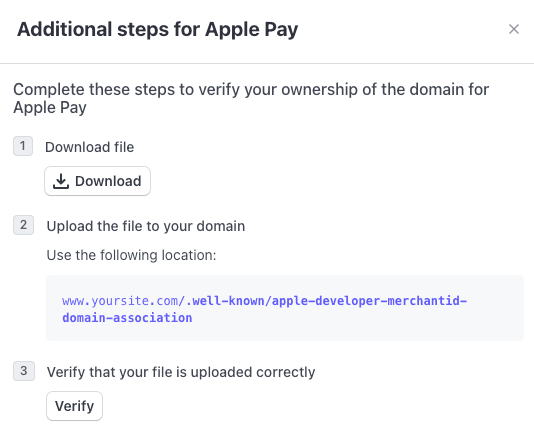
First, you must download a domain association file and upload it to your host. WP Simple Pay Pro will attempt to do this automatically the first time you save a payment form with a Google Pay or Apple Pay button in live mode, but if you need to do this manually for any reason, you can follow these steps from Stripe.
Next, you must tell Stripe to register your domain. You can do this by going to the Payment Method Domains page in the Account Settings of your Stripe Dashboard and clicking Add a new domain.
After adding your domain, one additional step is needed for Apple Pay. Follow the directions in the panel as seen below:
Once you’ve registered and verified your domains, you can make payments on your site using your live API keys.
Configure Apple Pay & Google Pay Option
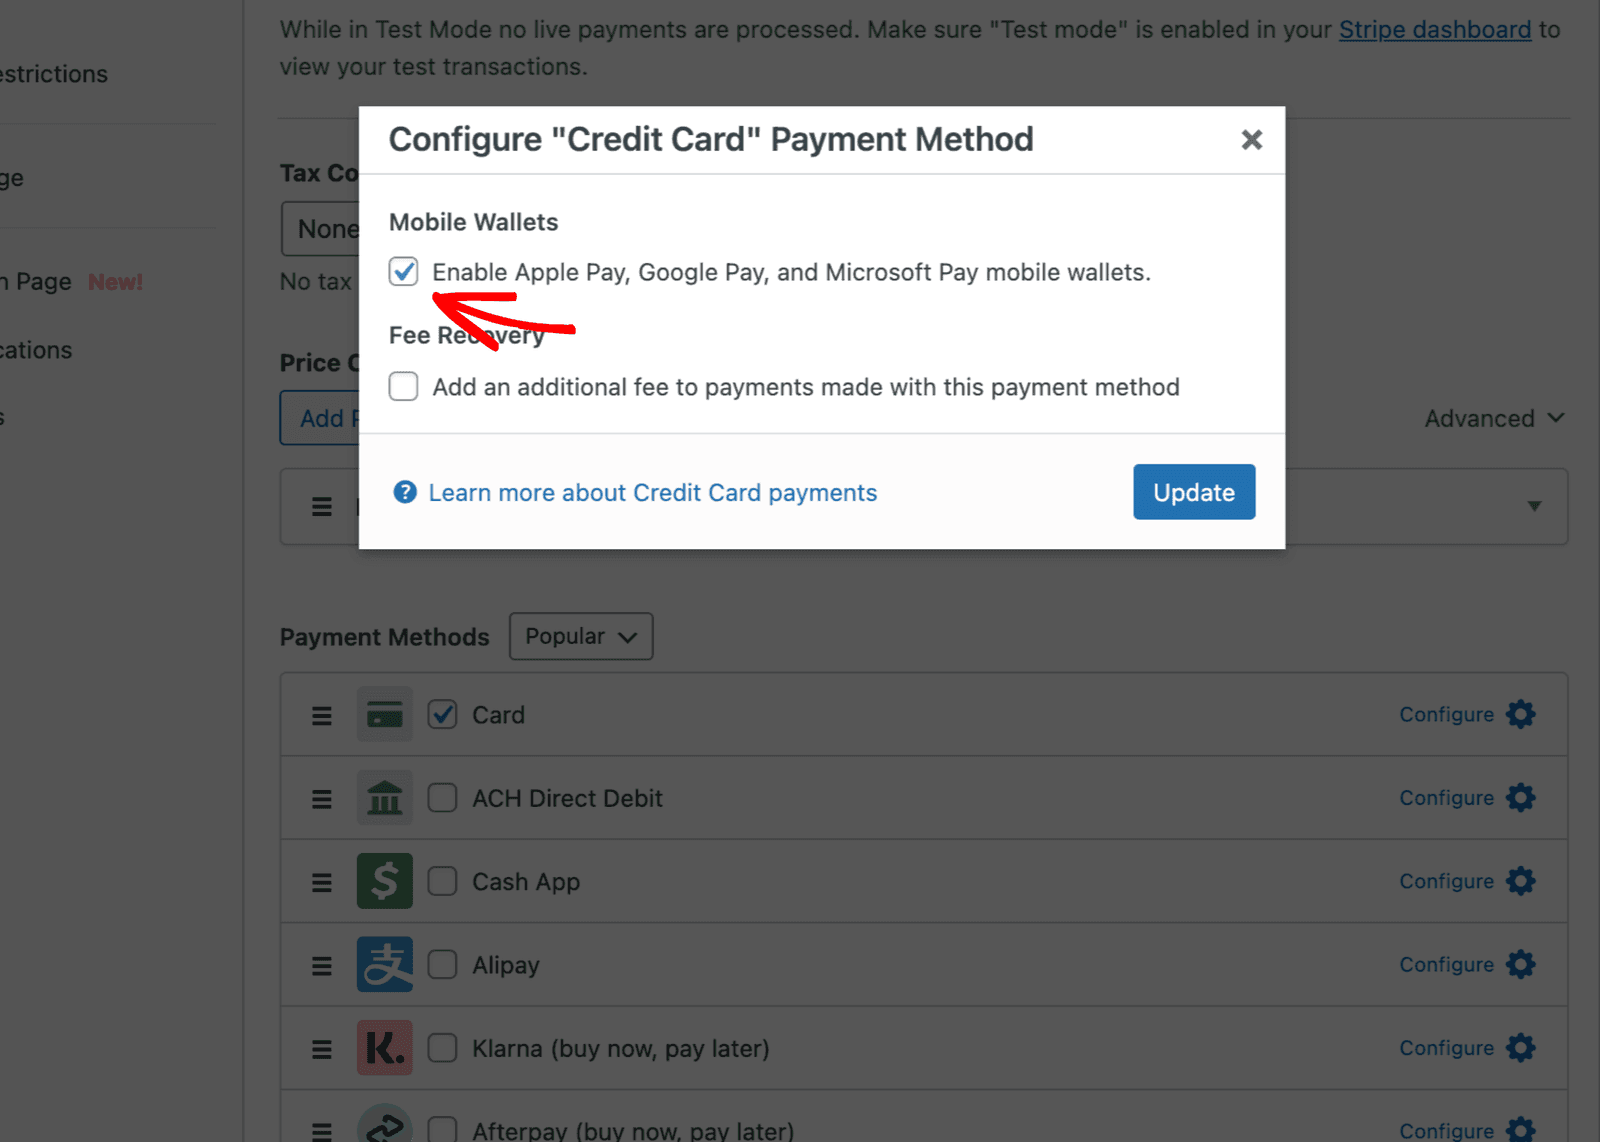
You can add Apple Pay/Google Pay to an embedded or overlay payment form by configuring the options of the Card Payment Method on the Payment tab.

When you click the Configure option, a modal window will open displaying the option to select “Enable Apple Pay, Google Pay…” mobile wallets. Enable the checkbox and click Update.
Remember to update your Payment Form after making these changes.
References
Please note that the use of Apple Pay on the Web is subject to the Apple Pay on the Web terms of service, and the use of Google Pay is subject to the Google Pay terms of service.
Supported Countries
Apple Pay, Google Pay, and Microsoft Pay are available to cardholders at participating banks in supported countries. The Account Country setting in WP Simple Pay > Settings > Stripe > Account determines which country Apple Pay, Google Pay, and Microsoft Pay will use to determine seller eligibility. Both parties (buyer and seller) need to originate from an eligible country for the Apple Pay/Google Pay buttons to appear on the purchase form. The lists of supported countries are linked below.
Troubleshooting Apple Pay
Apple Pay – Button only shows in private/incognito Safari window
Try removing the domain from the Stripe dashboard and re-adding it:
- Go to Apple Pay management in Stripe dashboard.
- Remove the existing Apple Pay domain.
- Add it again inside the dashboard.
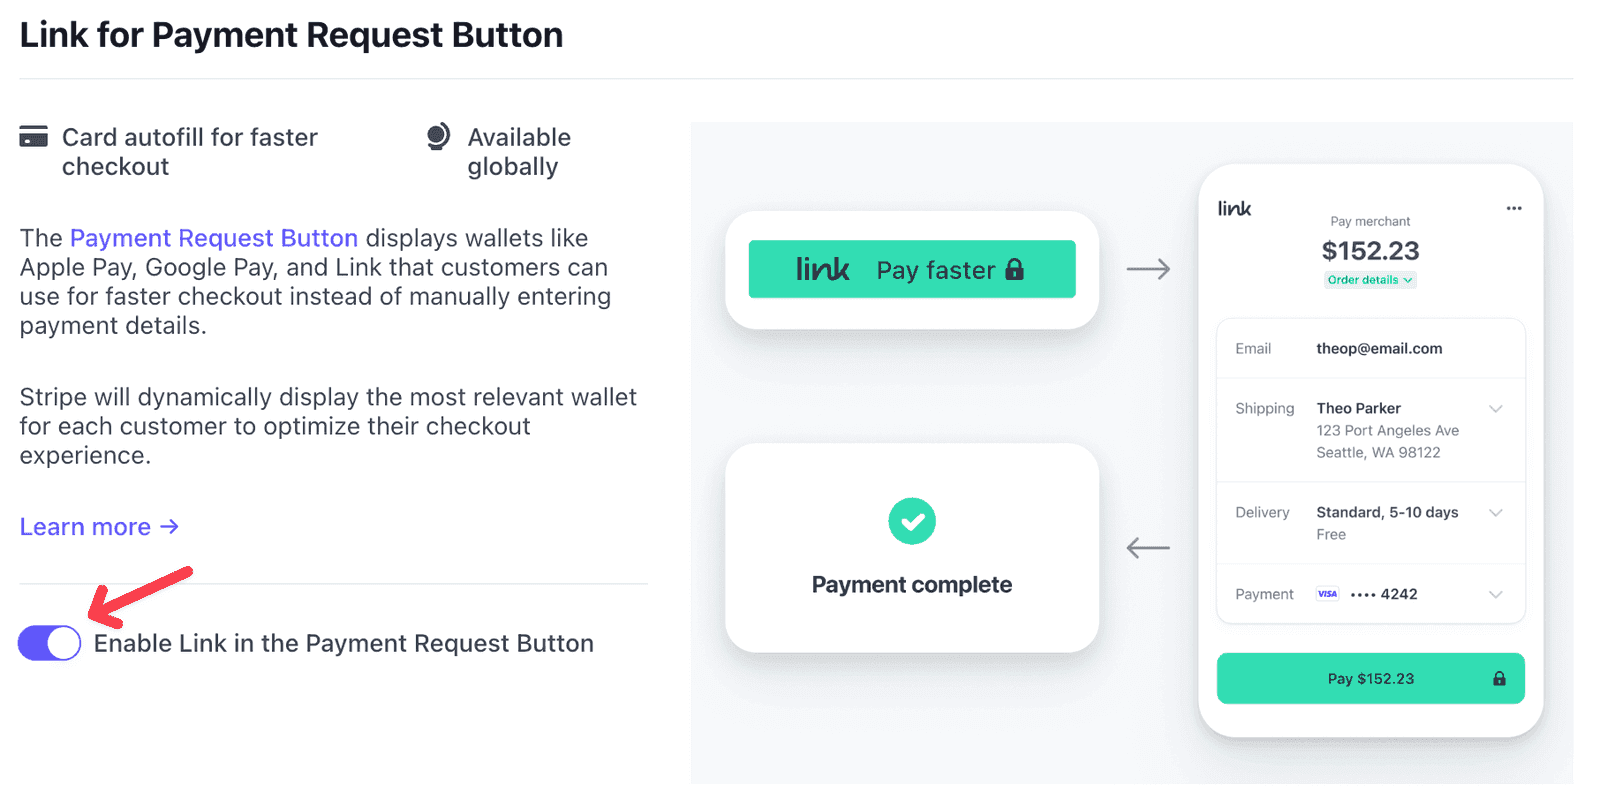
Link in the Payment Request Button
Link is Stripe’s one-click checkout experience that lets your customers store their payment details so they can pay in one click across hundreds of thousands of websites.
Disabling/Enabling the Link Feature
The Link feature is enabled by default by Stripe. You can disable the Link feature from within the Stripe Dashboard.
How and When is Link Used?
The Payment Request Button dynamically displays wallet options to optimize the checkout experience for your customers. Customers see Apple Pay or Google Pay if they’ve enabled them on their device, and depending on what browser they are using.
If a customer doesn’t have Apple Pay or Google Pay enabled on their device, they see Link. Additionally, customers using Chrome with active, authenticated Link sessions see Link.
| Browser + Wallet | Payment Button |
|---|---|
| Safari + Apple Pay enabled | Apple Pay |
| Chrome + Link authenticated | Link |
| Chrome + Google Pay enabled and Link not authenticated | Google Pay |
| Chrome on iOS 16 + Apple Pay and Google Pay enabled | Apple Pay |
| Any browser + No active Apple Pay or Google Pay | Link |
Still have questions? We're here to help!
Last Modified: