How to Configure an Advanced Stripe Webhook Setup
In This Document
This document contains advanced setup options that are not needed for most sites.
See our standard webhook documentation for basic setup.
Webhooks allow Stripe to send messages back to your WordPress site. Setting up webhooks is required for some functionality of WP Simple Pay such as sending emails, creating installment plans, allowing customers to update their subscription payment details, and using its integration with AffiliateWP.
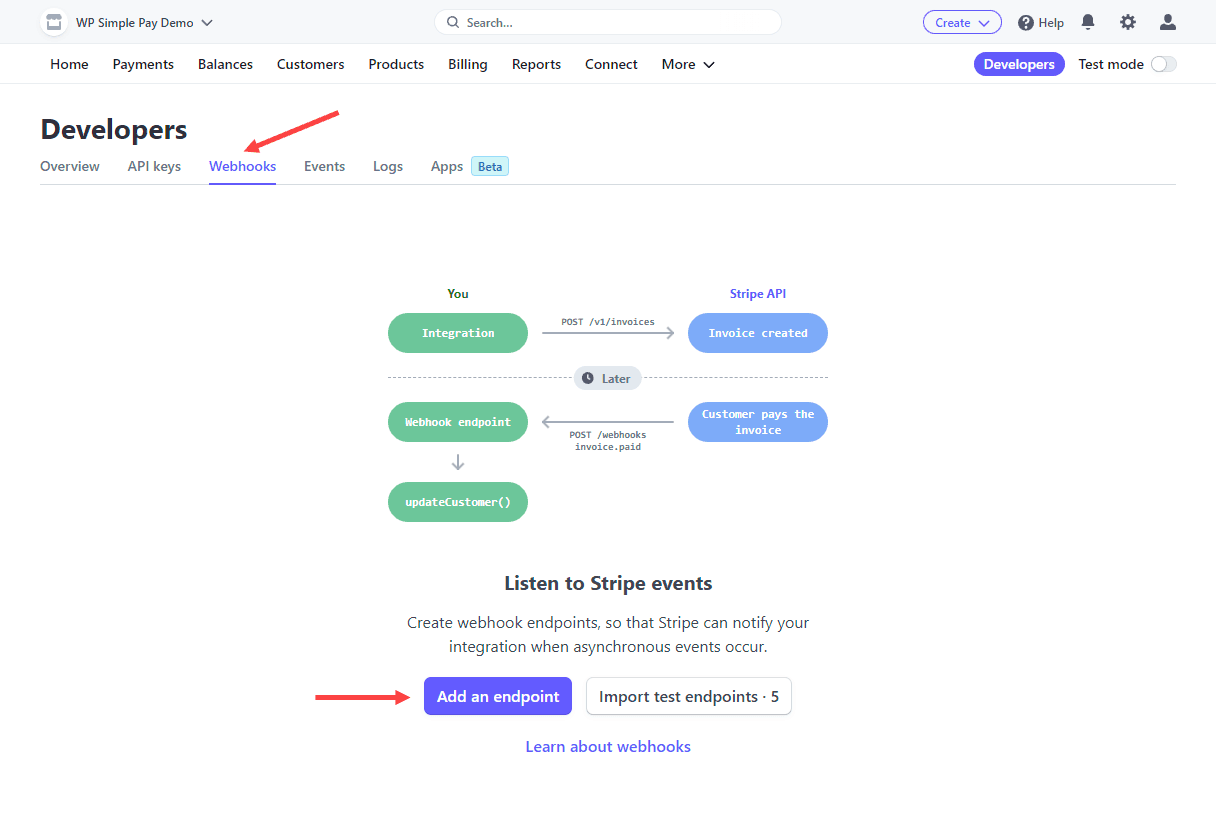
Adding the Webhook Endpoint
To add the appropriate webhook endpoints, in your Stripe Dashboard, go to Developers → Webhooks.
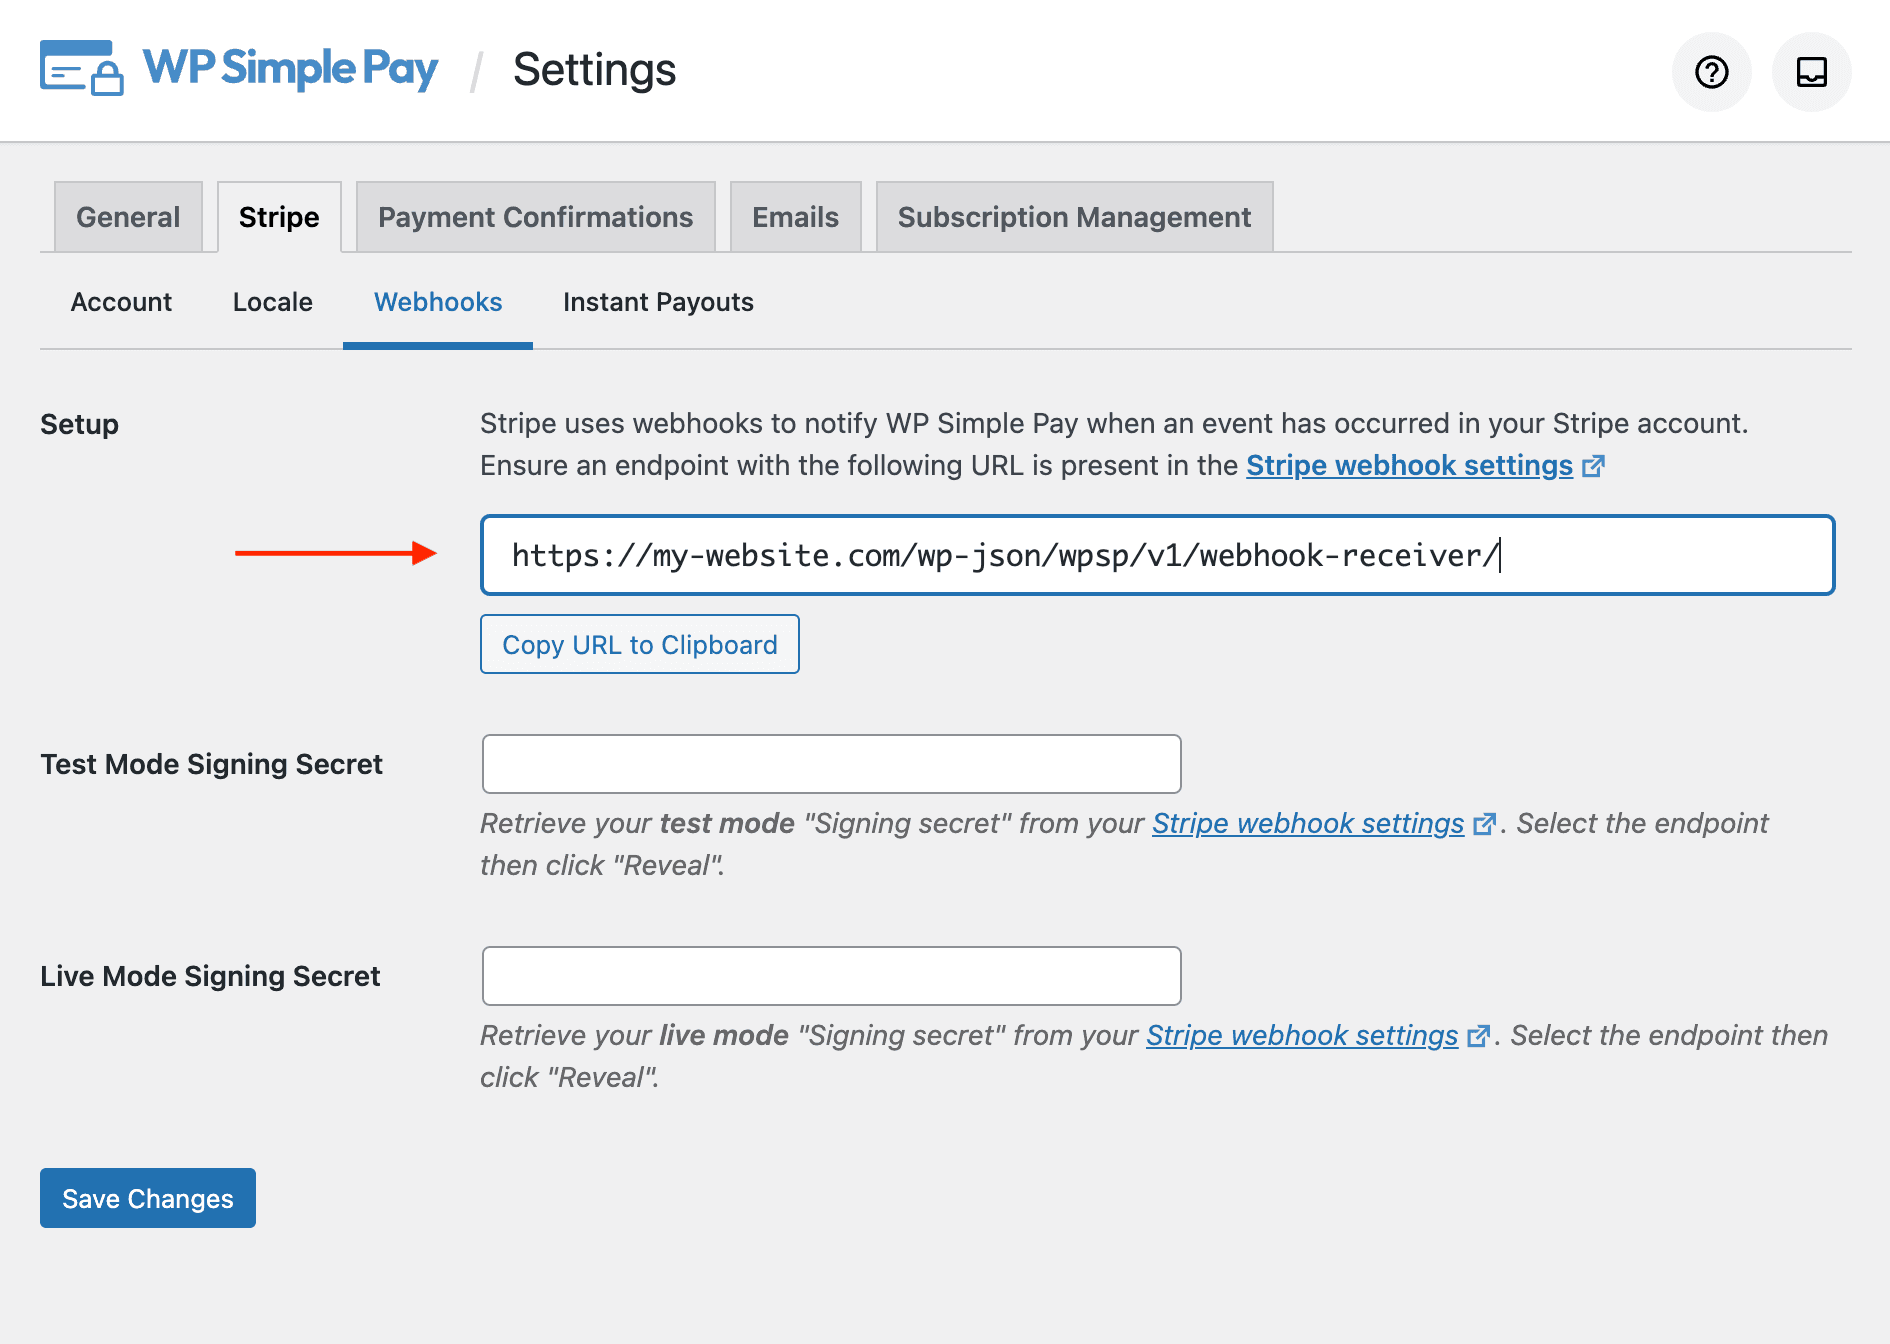
Click Add Endpoint, then add the URL found in WP Simple Pay → Settings → Stripe → Webhooks.
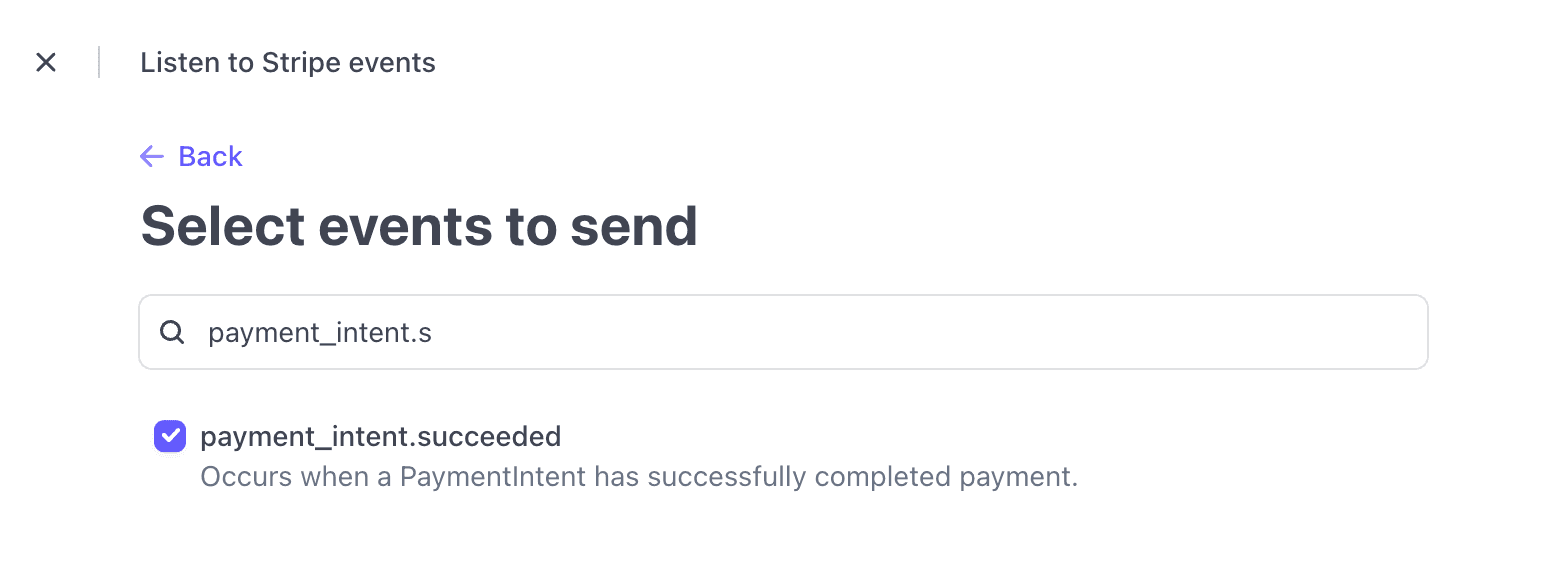
You now will need to add the specific events to listen to by clicking the button labeled +Select events. After doing that, you can copy and paste each event listed below into the Select events to send → Search events search box.
After searching each term, click the checkbox to add it, and the search additional terms. Do not click Add events until you’ve checked all events listed below:
**charge.failed**charge.refundedcharge.succeededcheckout.session.completedinvoice.payment_succeededinvoice.upcomingpayment_intent.processingpayment_intent.succeededcustomer.subscription.deletedcustomer.subscription.updated
Details about the functionality of each of these events is shown at the bottom of this document.
When you’re done adding events, click Add endpoint to complete the process. After you add the endpoint, you should see the new URL listed in the webhooks settings.
Configuring the Webhook Signing Secret
Stripe can sign the webhook events it sends to your endpoints for added security, and we strongly recommend that you set this up.
To do so, retrieve your endpoint’s secret from your Dashboard’s webhooks settings. Select an endpoint for which you want to obtain the secret, then click the Reveal button.
Then copy the signing secret from the Stripe Dashboard, head back to the Stripe Setup tab in your WP admin, then paste it into the Endpoint Secret text box for the current payment mode.
Your webhooks are now set up and secure.
Currently, WP Simple Pay utilizes the following events:
Event Type Descriptions
invoice.payment_succeeded
- Used to increment installment plans and send “Payment Confirmation” and “Payment Notification” emails for Subscriptions.
- Exposes the
simpay_webhook_subscription_createdaction for further processing after a successful Subscription.
**payment_intent.succeeded
**
- Sends the “Payment Confirmation” and “Payment Notification” emails for one-time payments.
- Exposes the
simpay_webhook_payment_intent_succeededaction for further processing after successful payment
**charge.succeeded
**
- Sends the “Payment Confirmation” and “Payment Notification” emails for one-time payments using ACH Debit.
- Exposes the
simpay_webhook_charge_succeededaction for further processing after successful payment
invoice.upcoming
- Sends the “Upcoming Invoice” email reminder for updating a Payment Method. Learn more
checkout.session.completed
- Used to remove generated abandoned Stripe Checkout records.
- Exposes the
simpay_webhook_checkout_session_completedaction for further processing if needed.
plan.updated
- Used to ensure the list of Subscription Plans is up-to-date when configuration Subscription Options.
**charge.failed**
- Exposes the
simpay_webhook_charge_failedaction for further processing after a Charge fails.
Still have questions? We're here to help!
Last Modified: