
[Nytt] Introduktion av installationsguiden och betalformulärblocket
Senast uppdaterad

På WP Simple Pay förbättrar vi ständigt våra plugins för att ge dig en bättre användarupplevelse.
Om du precis har börjat med WP Simple Pay eller lägger till ytterligare betalningsformulär är det nu ännu enklare och snabbare att slutföra installationen och börja ta emot betalningar på din WordPress-webbplats.
Vi är glada att kunna meddela att från och med nu, efter att ha aktiverat WP Simple Pay-pluginet för första gången, kommer en ny guide att starta som guidar dig genom den initiala installationsprocessen steg för steg.
Dessutom kan du nu lägga till betalningsformulär på sidor genom att helt enkelt lägga till ett block för betalningsformulär istället för att kopiera och klistra in kortkoder.
Både installationsguiden och blocket för betalningsformulär är avsedda att förenkla installationsprocessen, så de är ganska självförklarande. Men vi kommer att gå igenom dem steg för steg så att du vet vad du kan förvänta dig.
Genomgång av installationsguiden
Efter att du har installerat och aktiverat WP Simple Pay-pluginet för första gången på din WordPress-webbplats bör den nya installationsguiden visas automatiskt.
Om du redan har installerat och aktiverat WP Simple Pay eller om pluginet tidigare installerades och togs bort från din webbplats, kommer installationsguiden inte att visas automatiskt. Du kan dock fortfarande starta installationsguiden i din WordPress-instrumentpanel genom att besöka WP Simple Pay » Inställningar » Allmänt » Avancerat och klicka på Starta installationsguiden. Även om du kan komma åt alla WP Simple Pay-inställningar utan installationsguiden, låter detta dig gå igenom den och dubbelkolla dina inställningar med dess steg-för-steg-stil.
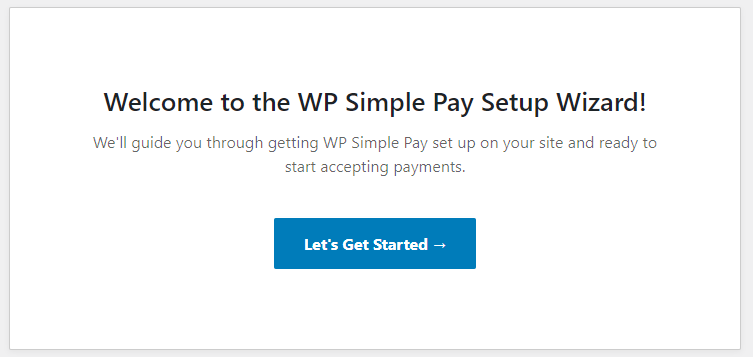
Klicka på Låt oss komma igång och låt oss dyka in...
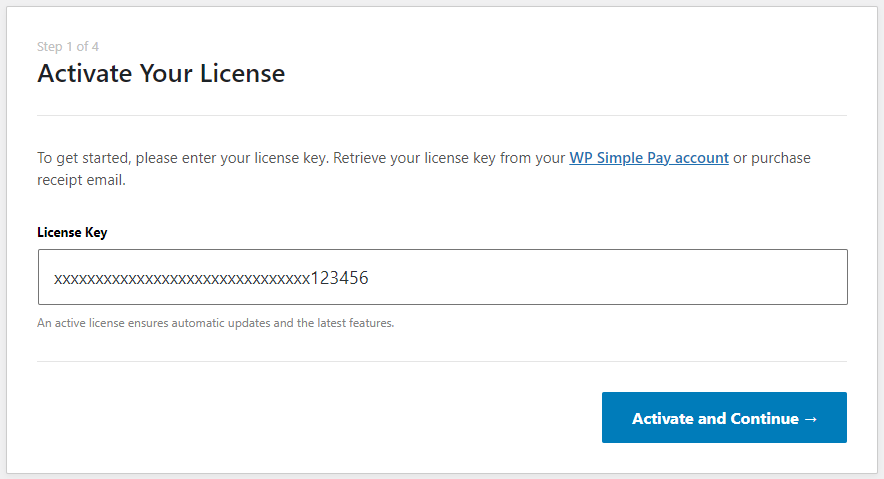
För steg 1 kommer du att uppmanas att ange din licensnyckel, som kan hämtas från ditt WP Simple Pay-konto eller ditt köpkvitto-e-postmeddelande. Kopiera och klistra helt enkelt in den i fältet för licensnyckel och klicka sedan på Aktivera och fortsätt. Om du använder Lite-versionen av WP Simple Pay hoppar du över steg 1 eftersom en licensnyckel inte krävs för att köra den.
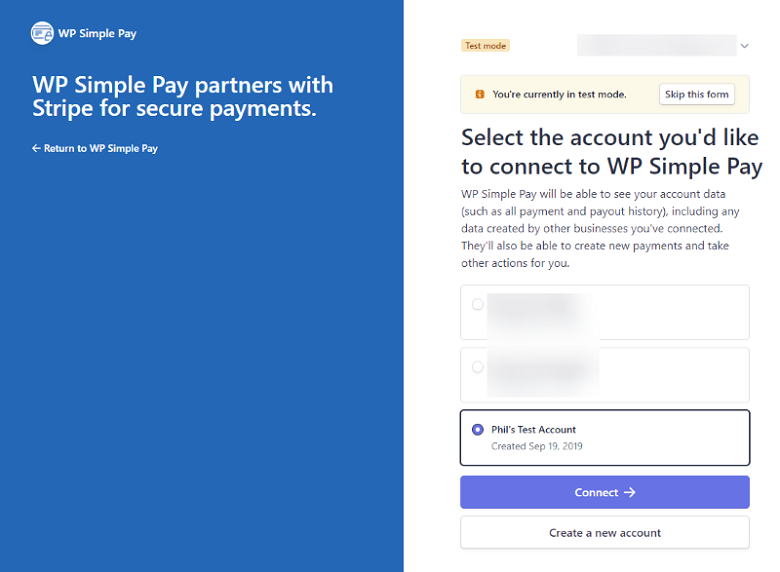
Steg 2 är där du behöver ansluta WP Simple Pay till ditt Stripe-konto, oavsett om det är ett nytt eller befintligt. Om du ännu inte har ett Stripe-konto kommer du att uppmanas att skapa ett under detta steg.
För de som är nya inom Stripe har de några utmärkta komma igång-guider för att få mer detaljer och se en skärminspelning.
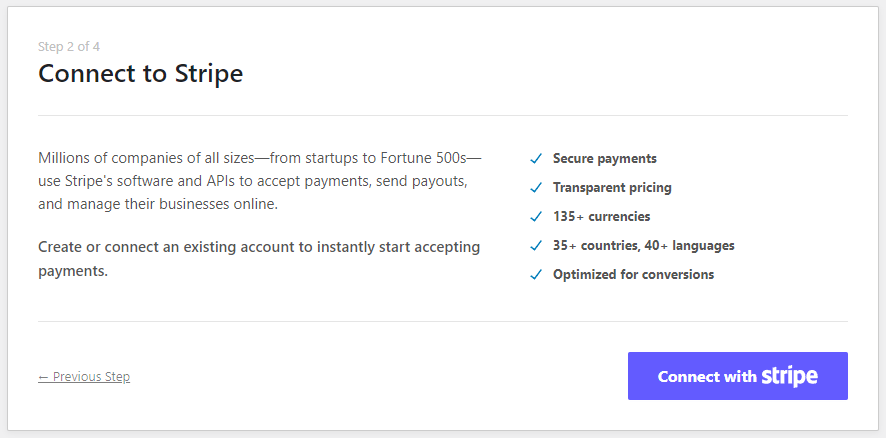
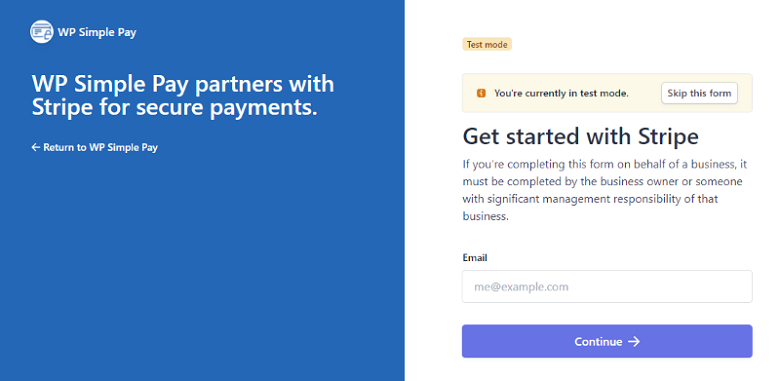
Efter att ha klickat på Anslut med Stripe kommer du att tas till en av följande auktorisationssidor på stripe.com beroende på om du är inloggad på ett befintligt Stripe-konto eller inte. Fortsätt helt enkelt med att ansluta ditt Stripe-konto tills du tas tillbaka till installationsguiden.
I steg 3 har du möjlighet att aktivera eller inaktivera olika e-postrelaterade funktioner i WP Simple Pay. Dessa e-postfunktioner ingår inte i Lite-versionen av WP Simple Pay, men du kan uppgradera till Pro för att börja använda dem när som helst.

Från den sista skärmen i installationsguiden är allt som återstår att skapa ditt första betalningsformulär! Härifrån kan du också se de olika guider och genomgångar som finns tillgängliga i vår dokumentation.

Introduktion av blocket för betalningsformulär
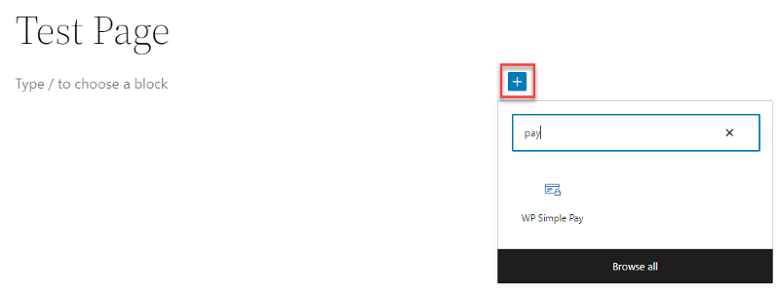
Du kan nu snabbt lägga till ett WP Simple Pay-betalningsformulär på en sida genom att lägga till ett block för betalningsformulär istället för att kopiera och klistra in en kortkod i ett kortkodsblock.
När du redigerar en sida, klicka bara på den nya blockknappen (+) i det övre vänstra hörnet av redigeraren eller på höger sida av ett block, skriv sedan "pay" i sökfältet. Du bör se blocket "WP Simple Pay" för betalningsformulär, som du kan klicka på för att lägga till på sidan.
Alternativt kan du skriva "/" för att söka, sedan skriva "pay" för att söka och lägga till blocket.
Efter att blocket har valts måste du välja vilket betalningsformulär du vill lägga till på sidan från en rullgardinsmeny.

När du väljer ett betalningsformulär visas en visuell representation av formuläret.
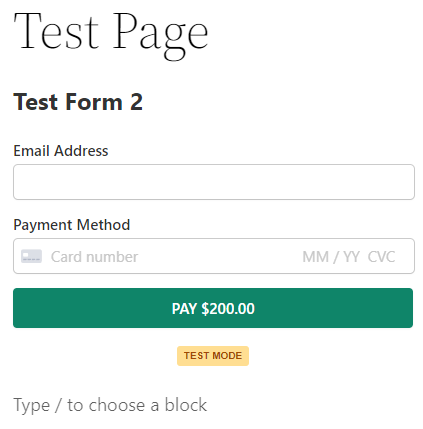
Det var allt! Nu kan du fortsätta att redigera sidan efter behov.
Prova den nya uppdateringen idag
Har du några frågor? Du kan kontakta vårt kundsupportteam här så hjälper de dig gärna.
Vi hoppas att du tycker att de nya funktionerna för installationsguiden och blocket för betalningsformulär är enklare och snabbare att konfigurera och lägga till betalningsformulär på din WordPress-webbplats, särskilt om du är nybörjare på WP Simple Pay.
Om du inte redan använder WP Simple Pay Pro, klicka bara här för att komma igång idag! Det är det bästa Stripe-betalningspluginet som finns och vi gör det ännu bättre med varje uppdatering. Som alltid, ett stort tack för ditt fortsatta stöd.
Disclosure: Vårt innehåll stöds av läsare. Det betyder att om du klickar på några av våra länkar kan vi tjäna en provision. Vi rekommenderar bara produkter som vi tror kommer att tillföra värde för våra läsare.


Lämna ett svar